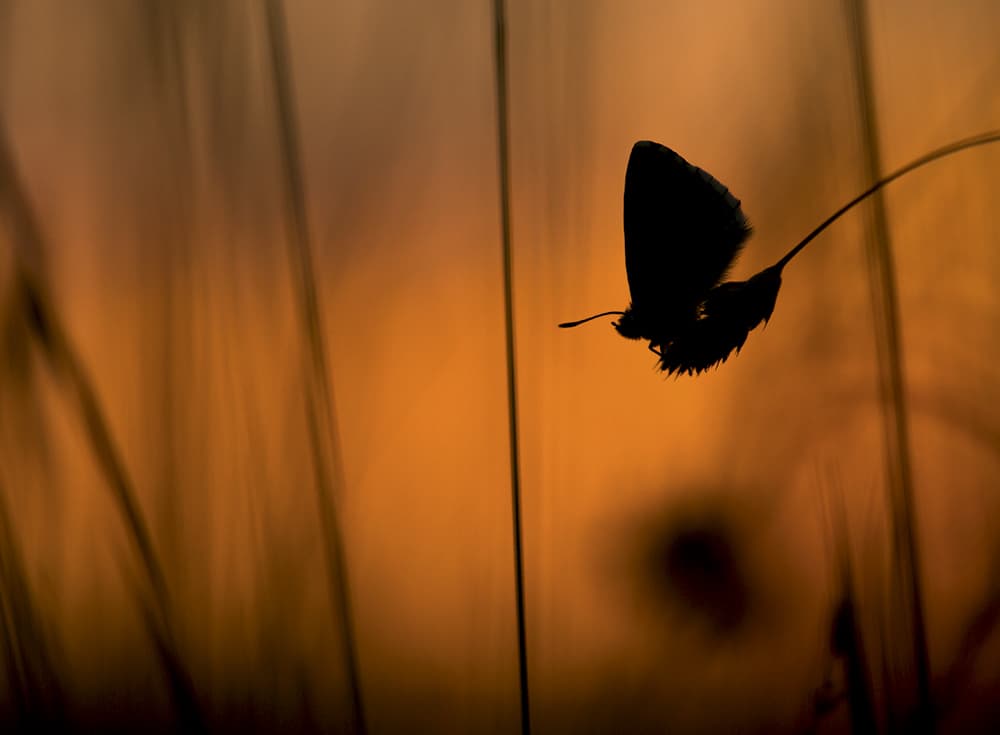
Dusk is often the best time for shots of insects. All photos by Paul Hobson
Wildlife photography in the UK has never been easier. With only limited wildlife knowledge or field skills, you can amass an incredibly impressive portfolio of some of Britain’s most iconic animals. In our time-constrained modern world, workshops and pay-as-you-go hide set-ups provide a great way to get face to face with some stunning creatures like pine martens, ospreys and red squirrels. However, for many photographers, while these can produce incredible images, something is missing – originality and the challenge!
Know your subject
Wildlife photography is unlike any other photographic genre. The best wildlife photographers are excellent naturalists with a great set of field skills first, and photographers second. Many believe you can only be a good wildlife photographer by having a deep love and respect for all wildlife. That means you should want to learn about, get to know and watch your chosen subjects as much as possible, which helps build up your own set of field skills. The best way to learn and acquire skills is by getting out there with an experienced wildlife photographer. If this isn’t possible, you’ll have to gain the skills by research and trial and error.
‘Fieldcraft’ is a simple term to describe the ability to approach, get close to and photograph an animal without causing it stress. It may be that the animal has no idea you’re even there. In other cases it’s fully aware of your presence but, because you have approached it in a sensible way, it’s comfortable with you in sight and will behave naturally as you take images. There’s no one-size-fits-all formula for all species, but there are many common ideas that generally work in most situations and with most animals.
Research
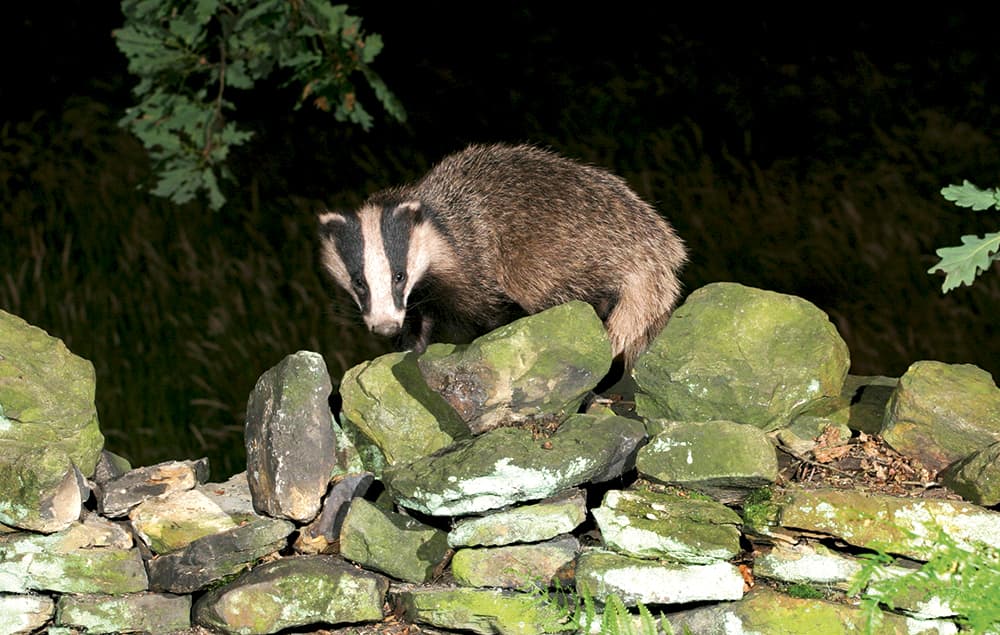
Badgers’ poor eyesight and nocturnal habits mean you won’t need to use a hide and can often use flash
The first thing you need to do before starting is to research your chosen subjects. Let’s say you’ve chosen foxes and badgers. At first glance, both would seem to be similar animals with the same sensory awareness of their world, which in part dictates how you approach them as a photographer. Both have an amazing sense of smell and hearing, but while foxes have excellent eyesight, badgers are positively myopic. This fact is important when you work with either species. Rural foxes are incredibly wary and you’ll almost certainly need a hide or full camo clothing so there’s no chance of them spotting you.
Badgers, on the other hand, cannot really see you if you stay still, are downwind and wear sensible dull-coloured clothing. The key issue is not to cut a skyline where your silhouette/shape and movement could be easily detected. This means that a hide isn’t really necessary. Another difference is their activity cycle. Foxes will often be active during the night and into dawn, so daylight shots are achievable. Badgers, on the other hand, tend to be far more nocturnal, so you may have to use flash to get your images.
Knowing how an animal reacts to the weather is another factor that’s worth researching. Both foxes and badgers, as is the case with many mammals, don’t like windy weather, since they can’t rely on their hearing, and they often emerge later and are far more wary.
Approach or wait?
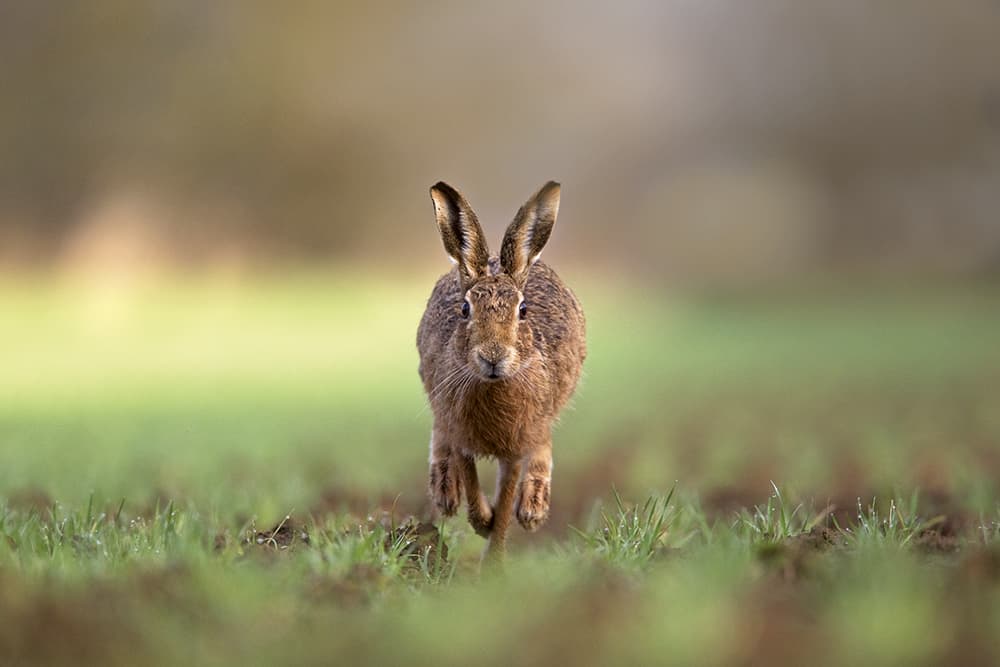
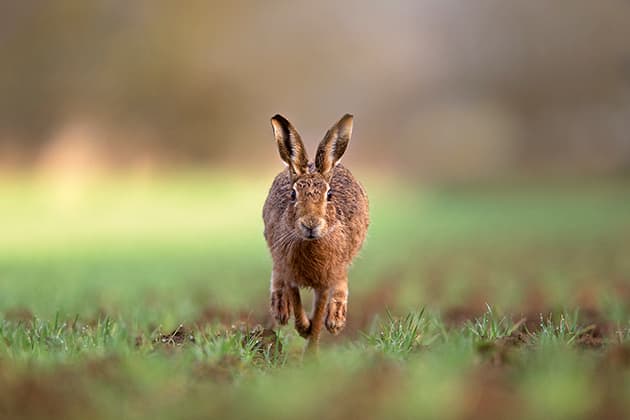
You can either stalk or lie in wait for brown hares, but do your field work first to identity their favourite runs
One thing you’ll have to consider is whether you approach the animal or let it come to you. If you intend to approach, you’ll have to master the art of stalking. There are many aspects to consider here, such as what you wear, how long you have to get close, whether you carry your camera or take it in a bag, how close you’ll need to get, whether you intend the animal to see you the whole time or if you want to approach and work completely unseen, and how the animal displays anxiety and stress if you make a false move or get too close.
The starting point is to spend time watching your chosen animal at a distance and learn about when, where and how it operates in its habitat. The alternative to stalking is to lie in wait, either hidden in vegetation or in a hide.
One mammal with which you can adopt either method is the brown hare. Hares love feeding and running around their favourite fields at dawn and for the first few hours of daylight. They then tend to move to their form, where they hunker down and snooze for the rest of the day. If you’ve done your field work, you’ll realise they have favourite runs, often along the sides of hedges or through tracks in crops. By moving in before dawn, you can lie down with your camera on a beanbag (or small sledge with a tripod head) at the end of a hedgerow. You don’t need camo clothing, although it won’t do any harm. Then you wait. If you’re lucky (and you will be eventually), a hare will run along the hedge towards you. The alternative is to stalk the hare in its form. By belly crawling at an angle (not straight at it), you can get fairly close and take images as it lies there. Be careful that you don’t cause it to get nervous and bolt across the field, though.
As a rule, most animals are more relaxed if they approach you, whether you’re in a hide or in view. The art and joy of field work is to work out where to wait, then, with a great feeling of anticipation, hold your breath as the animal works its way towards you.
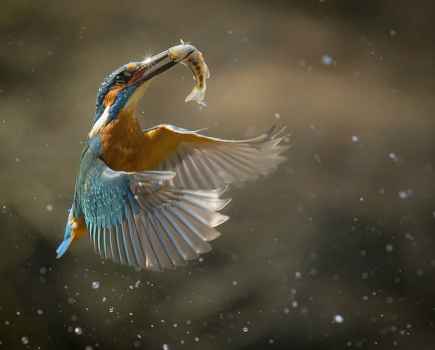
Otters
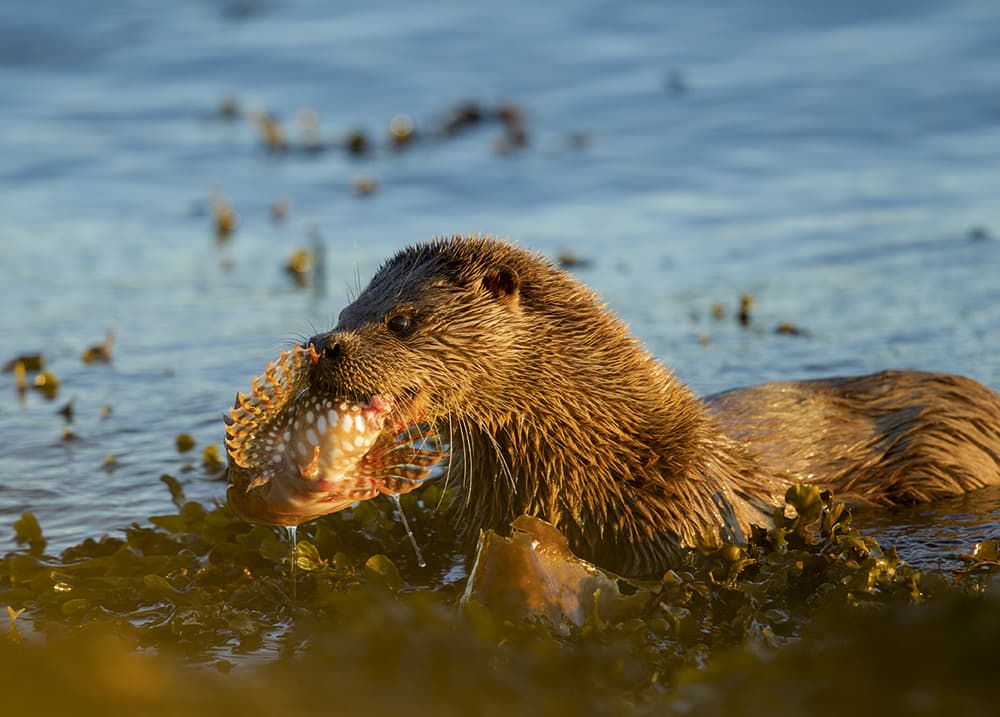
Knowing where and when an otter will approach the shore is an essential field skill
Otters offer a great photographic challenge as good field skills and natural history knowledge are essential. Watching otters fishing at sea isn’t hard, but how do you know where and when they will head for the shore? The key point is the size of the fish or crab an otter catches. If it’s small, the otter will merrily chomp away while still at sea. However, if it’s a big fish or crab, the otter will swim with it to shore, so the idea is to get into a position on the shoreline back from the sea’s edge but within your camera’s range. You can move quickly if the otter dives, but if it swims on the surface you’ll have to stalk it, paying attention to the wind direction, and making full use of any cover such as boulders and seaweed humps.
Top tip
The first shot you take as you get close to your subject is often the most important. It’s easy to get excited and blast away at your highest frame rate, hoping to get an image before the animal flees to safety. However, with a bit of care and by using the silent mode (many modern DSLRs now have this option), you should be able to judge exactly when to take this shot. The key is to watch the animal carefully and choose a moment when it’s distracted, such as when it’s feeding. Hopefully, it then won’t notice the shutter noise and you can build up images over the ensuing hour or so, eventually being able to switch to the highest frame rate (which is the loudest).
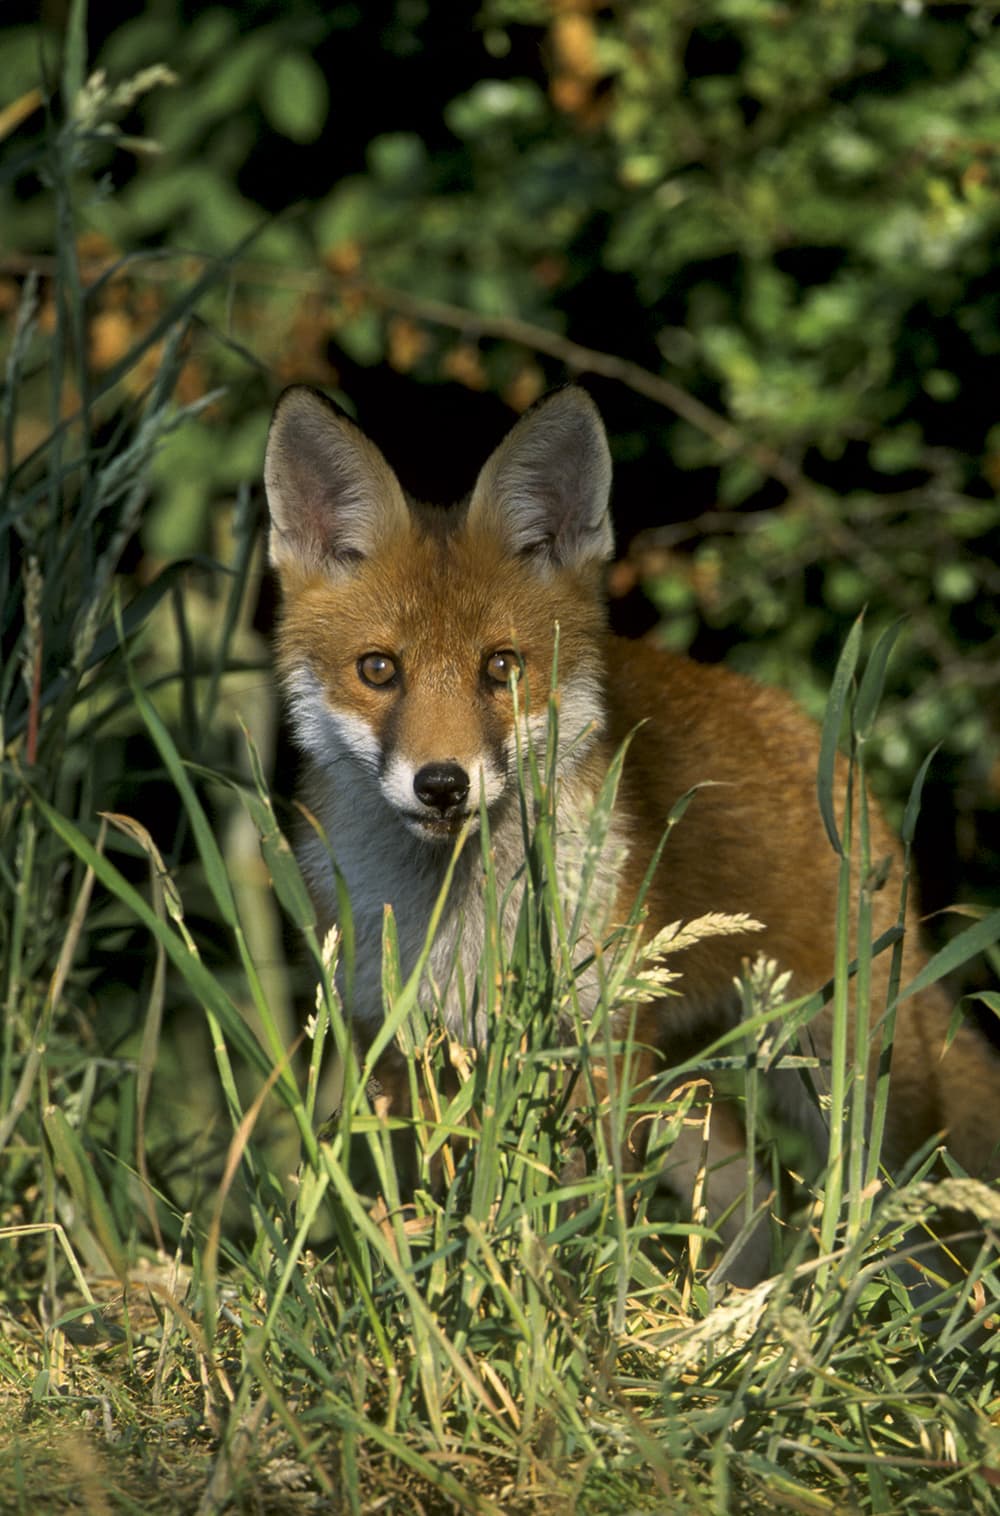
Foxes are active around dawn, so daylight shots of them are possible
Kit list
Long telephoto
For most birds and larger mammals, I choose a 500mm so I can get the maximum working distance, which keeps the animal relaxed.
Macro
For invertebrates, reptiles and amphibians, I usually use my 180mm macro lens, as I will with many plants.
Hides
I use a chair hide if I’m only putting it up and down on the day, and have a selection of box and dome hides if I need something a little more durable and permanent. I always have an old blanket with a plastic backing for situations where I may have to lie in wait for hours.
After more than 20 years as an environmental science lecturer, Paul Hobson packed it all in to move into wildlife photography full time. He loves travelling around the world, but definitely prefers working in the UK – the demands on the photographer are harder, but the rewards greater. www.paulhobson.co.uk