Your guide: Ben Hall
Ben Hall is one of the UK’s leading wildlife photographers, with many international awards to his name. His images are widely published throughout the world, he has co-authored two books and runs photography workshops in the UK and overseas. Visit his website for more
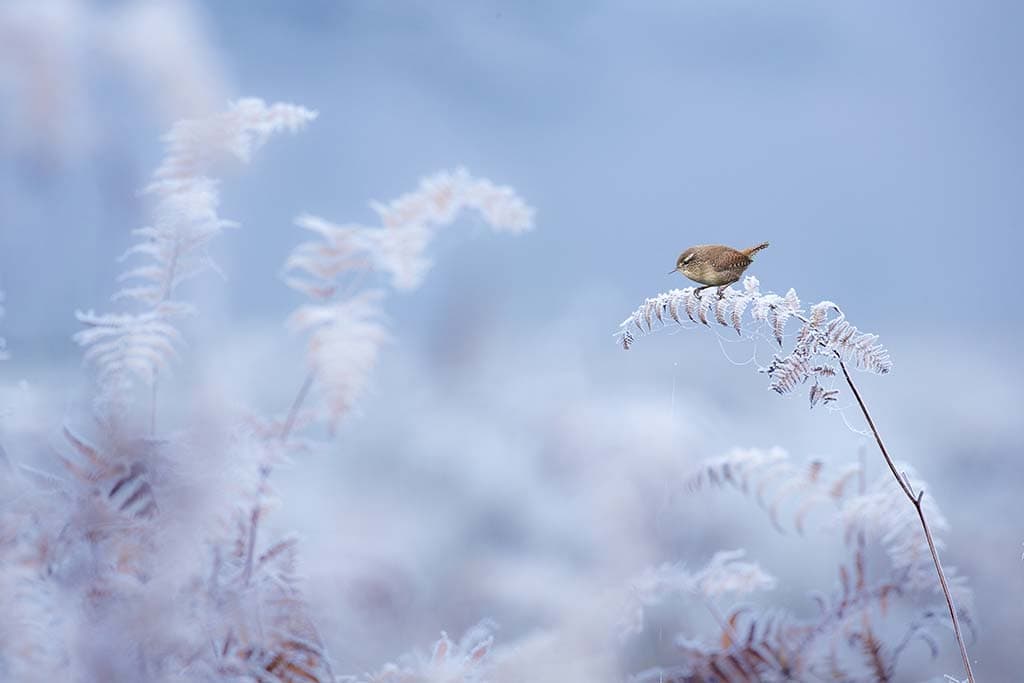
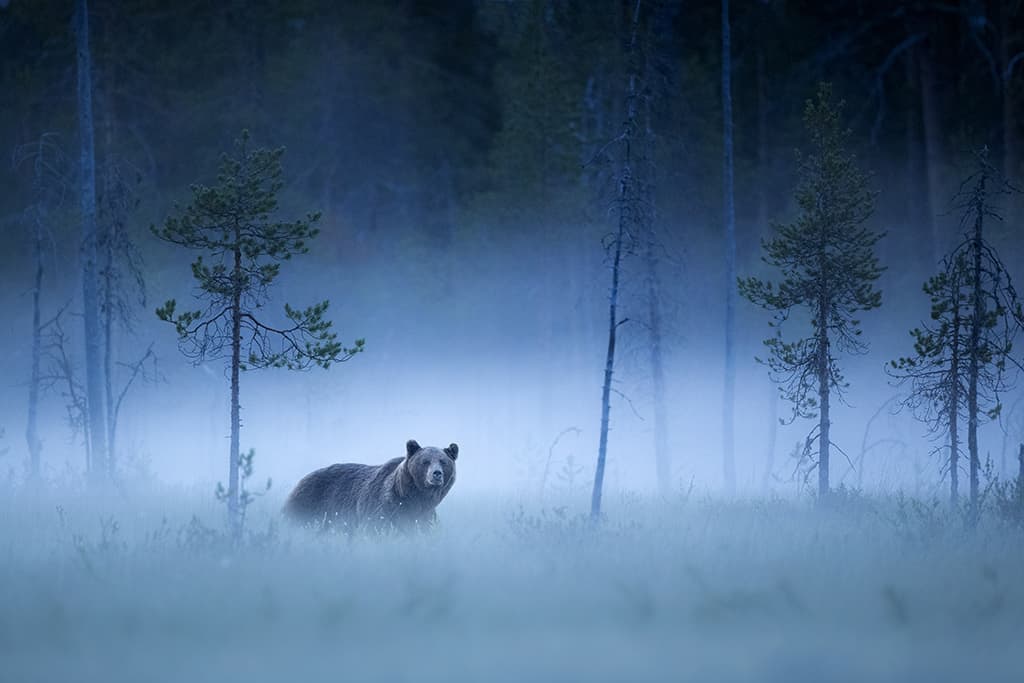
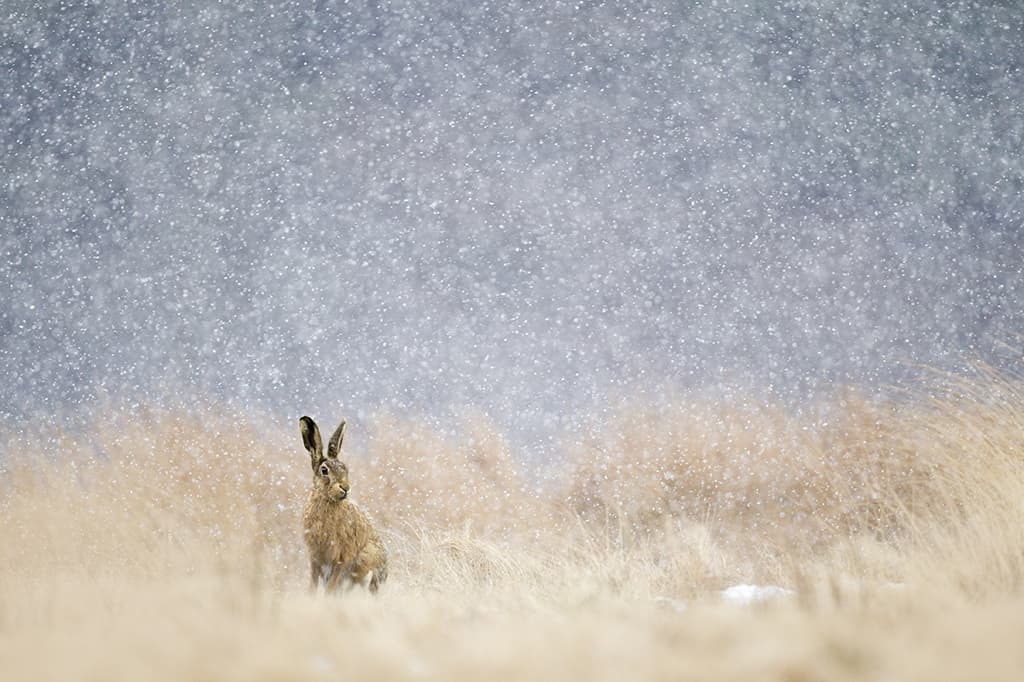
The mist has reduced contrast, helping to eliminate distractions. Canon EOS-1D X, 500mm, 1/250sec at f/7.1, ISO 1000
There is something magical about winter wildlife photography. It is the perfect season for exploring the beauty of natural light. As the days shorten, the low winter sun illuminates intricate frost patterns, and highlights the shape and form of a fresh blanket of snow. Although by now our summer migrants are far from our shores, the United Kingdom sees an influx of fascinating winter visitors such as waxwings, geese and swans.
As temperatures plunge, food becomes scarce and animals and birds, emboldened by the need to feed, become easier to approach. There is a certain special quality to winter light that is absent at any other time of year. Now is the time to brave the cold and explore the beauty of low-light photography. Time of day Although the days are shorter, the sun remains low enough in the sky to shoot all day.
For the most atmospheric results, however, concentrate your efforts during the golden hour. Warm, winter light and fresh snow or frost can be a magical combination. It pays to head out early and scout your location. Look for the best angle to shoot from and pay careful attention to the direction of light.
Front lighting will illuminate the subject evenly, but backlighting will often result in a far more evocative image and is a wonderful way of enhancing atmosphere. The light is much less intense during winter, and the reduced contrast levels should make the correct exposure easier to determine, but it is important to check your histogram regularly.
One of the by-products of contre-jour photography is the halo of light that appears around the subject. This is known as rim-lighting, and it’s a great way of highlighting shape and form. Mammals with fur coats work particularly well in this respect, but birds in flight can also look spectacular with golden light burning through the wings, giving them a translucent appearance. Experimenting with exposure can yield spectacular results.
When backlighting your subject, look for areas of dark shadow to place your subject against and underexpose by up to three stops. The shadows will be drastically underexposed and should appear black, with only the rim-lighting visible.
A layer of cloud diffused the sun, allowing me to include it in the frame. Canon EOS-1D X, 500mm, 1/8000sec at f/5, ISO 1000
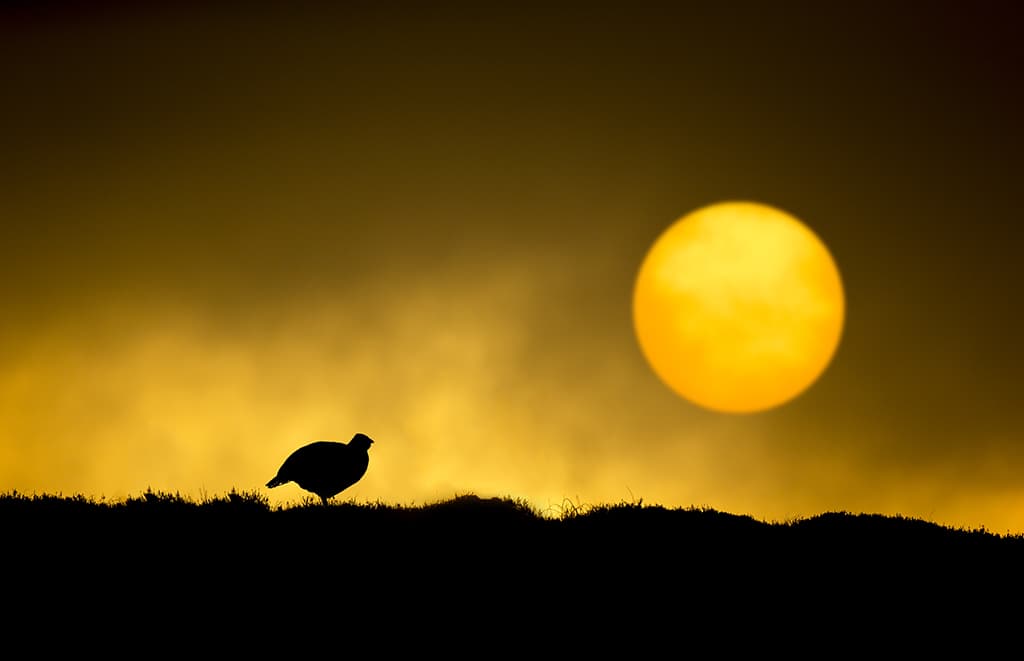
Silhouettes
Winter is the perfect season to capture silhouettes, as the skies can be mesmerising at dawn and dusk.
A well-executed silhouette should be simple yet graphic, and the subject should be instantly recognisable. Wintering geese and swans are great subjects, especially in flight against a vivid, winter sky. When tackling birds in flight, focus settings become crucial. Expanding your focus area will make it easier to track the birds, but if the background is clean and unobtrusive, you may find the active point easier.
This will also allow you to compose your images in-camera, without having to change focus points. To capture not only single birds but also larger flocks, a zoom lens will offer more versatility. Rather than framing tightly, always keep an eye out for opportunities to include the environment, since images such as these tell the viewer a more complete story and so are often more interesting than a simple portrait.
One of the trickiest aspects of shooting silhouettes is calculating the correct exposure. Switch to spot metering and take a reading from the brightest area of the sky. This will give you a good base exposure from which to work. Then, depending on the brightness, you should increase this exposure by up to one full stop.
The brighter the sky, the more extra exposure you should add. If there is a dense covering of cloud and the sunrise appears muted it may, however, not be necessary to add any compensation. If you are planning to include the sun in the frame, wait until it is very close to the horizon or when it is covered by
a thin layer of haze, mist or cloud.
Capturing motion
Unfortunately, winter isn’t always full of clear, high pressure days with golden light and a sprinkling of frost! All too often, the light is dull and flat. Don’t despair, however, as dull overcast conditions offer a great opportunity to experiment with motion blur. Several factors are involved when it comes to successfully capturing the motion of a moving subject. Using a suitable shutter speed is paramount.
There is no such thing as the correct shutter speed, as this will depend on the speed and distance of your subject – and the degree of blur that you would like to reveal. Switching to shutter-priority mode will allow you to experiment with a variety of shutter speeds and find which gives the optimum results. Between 1/15sec and 1/60sec is a good place to start, but experimenting is key, so take plenty of images until you achieve the desired effect. Set your camera to its fastest frame rate and fire a burst of images, as each shot will vary dramatically.
Don’t be afraid to let your creativity run wild. Shutter speeds of over one second and some intentional camera movement during the exposure can produce wonderfully abstract images, or even an impression of your subject. Large flocks of birds can work particularly well with very slow shutter speeds, the motion of the birds and their wing beats appearing like brush strokes on canvas. Recommended locations When it comes to choosing locations and planning your shoots, working locally is a great way of optimising opportunities.
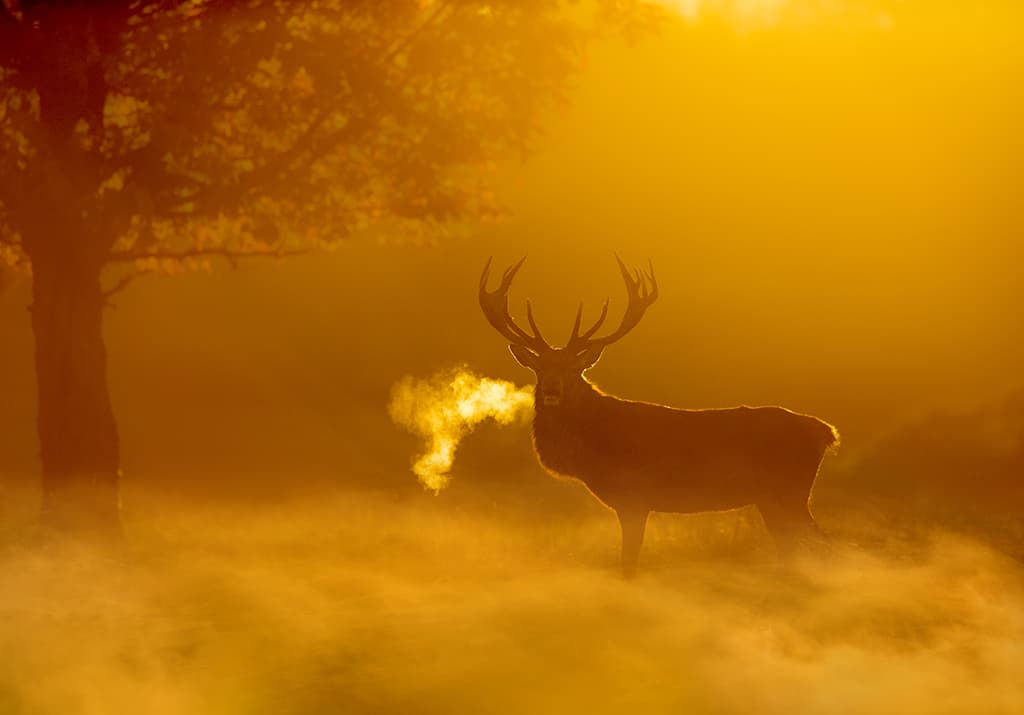
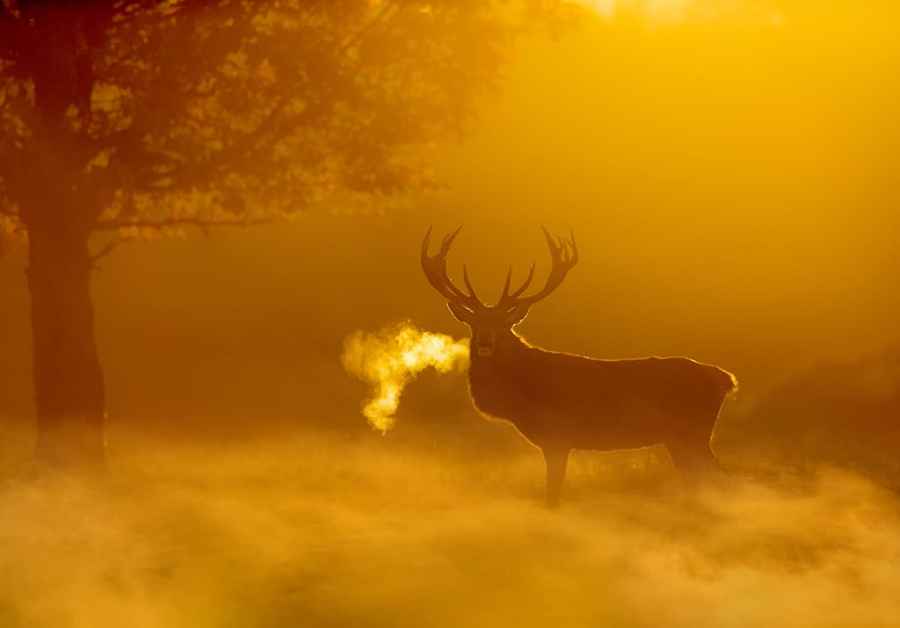
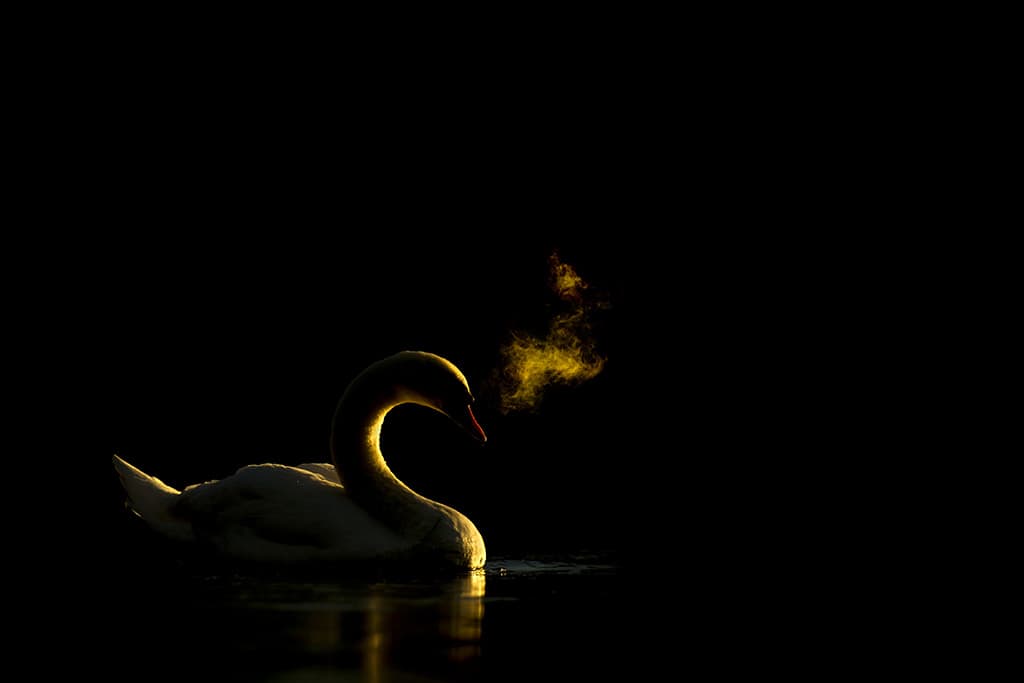
I shot towards an area of shadow to highlight the breath against the light. Canon EOS-1D X Mark II, 500mm, 1/1250sec, at f/5.6, ISO 800
Location, location, location
Getting to know your location intimately will help you to make the best of any given opportunities. Return to the same site multiple times and you will soon learn where your potential subjects are likely to be found, and how the light changes throughout the day. Study the backgrounds closely, as well as the direction of light, and you should soon begin to visualise the type of images that may be possible.
Then, it’s simply a case of waiting for the best weather conditions to ensure you capture the best results. Local parks with open lakes can be productive and the resident wildlife is likely to be accustomed to people. Often, following a cold but clear night, a misty dawn will follow, offering spectacular opportunities for moody and evocative images. On such a morning, park lakes will often be covered in a veil of mist, adding atmosphere to images of birds on the water.
Wetland reserves are great places to explore in winter. Not only are they accessible, with most having purpose-built hides, but many are also home to winter migrants such as whooper and Bewick’s swans, and pink-footed geese. One location which should never be overlooked, especially in winter, is your own back garden. Setting up a feeding station with a selection of natural perches is a great way of attracting and photographing garden birds. In spells of harsh, winter weather you should see plenty of activity at the feeders, making it possible to capture interaction between your subjects.
Equipment
As well as warm winter clothes and useful (and unobtrusive) accessories such as bean bags, your choice of lenses is crucial. To tackle subjects such as garden birds and other winter wildlife, a long focal length is a must. At least 400mm will be required for most subjects in the UK. If you have a shorter lens, a teleconverter can be used to increase focal length, but you will lose at least one stop of light.
I recommend a wideangle lens This might seem a strange choice for wildlife photography, but provided that you have close access to your subject, a wideangle can be used to show the animal in context and will offer a fresh and interesting perspective.
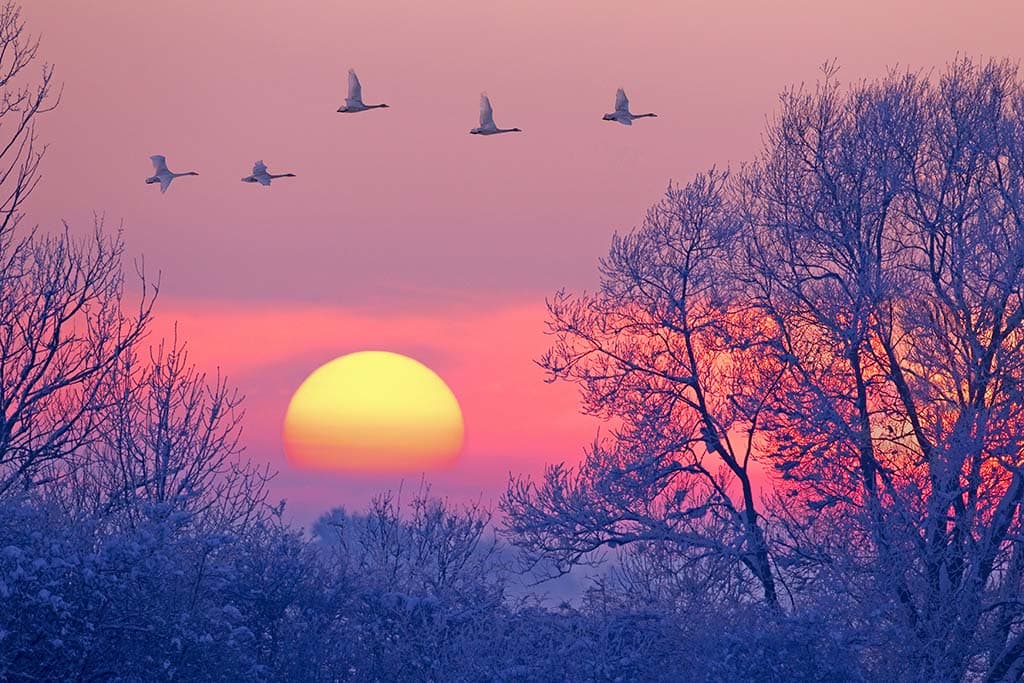
Why this image works
I captured these whooper swans (above) just as the sun was sinking. The light levels were low, but the vivid winter sky and the visible sun meant that shutter speeds were fast enough to freeze the birds. The intensity of the sun was muted by a layer of hazy cloud near the horizon, which meant I could capture the colour of the sun without underexposing the rest of the image.
I used a tele-zoom lens and zoomed out to show the birds in the environment. Luckily, there is good separation between each of the swans. The trees frame the birds and draw the viewer’s eye into the image, and there is an interesting contrast between the warm winter sky and the cool blue hues of the snow-covered trees.
Ben’s tips for great winter wildlife images
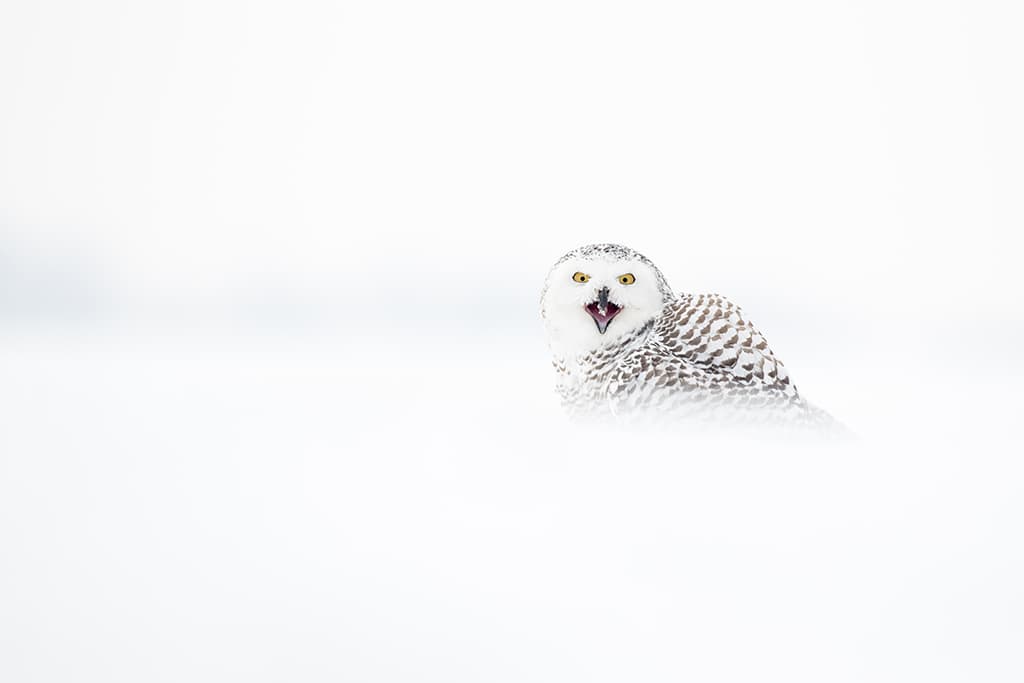
High key
Flat light and winter weather can offer the perfect opportunity to experiment with a high-key effect. The key is to keep things simple. During periods of snow and frost, seek out a pale subject and expose to the right to keep the whites clean and prevent underexposure.
Blue hour
During the brief periods before sunrise and following sunset, the light temperature cools down and blue hues become more apparent. This is known as the ‘blue hour’. Pictures taken at this stage of the day take on a serene and ethereal quality. Keep your ISO setting high as light levels will be low.
Low key
Low-key images can work especially well when combined with backlighting. Firstly, look for an area of shadow that’s suitable for use as your background, then try underexposing by up to three stops. This will drastically underexpose the image so that only the rim-lighting is visible.
Keep it simple
Simplicity is often the key to a successful image. Try to eliminate anything distracting from the frame and concentrate on blurring the foreground and background as much as possible. This will separate your subject from its surroundings, creating a sense of depth.
Environment
Capturing your subject in a winter environment tells a story. The harsh weather will not only add atmosphere but also a feeling of isolation and extremity. When photographing in snowfall, experiment with shutter speeds as this will drastically alter the appearance of the snow.
How to get great images of birds in flight
1) Use shutter priority to select a speed of at least 1/1000sec in order to freeze the motion of a bird in flight.
2) Adjust your ISO setting according to the amount of available light. Don’t be afraid of increasing the ISO if light levels are low, as noise can always be reduced at the post-processing stage.
3) Expand the focus area to give you more margin for error when tracking a moving subject. When shooting against the sky, the active point may prove more effective.
4) Switch to high-speed drive continuous shooting. This will allow you to fire off a burst of frames at one time, giving you a greater chance of success.
5) Take a test shot and check the histogram. Look carefully at the right-hand side of the graph. If there is a gap, you will need to increase your exposure.
6) When shooting birds against the sky, it’s likely you will need to add some positive exposure compensation. Increase exposure until the histogram
is nudging the right-hand side.
7) When tracking your subject, try to pan as smoothly as possible and match the speed of the bird.
8) Always be ready to fire and try to anticipate the movements of the birds. The more time you spend observing your subjects the easier this will become.
9) Try backlighting your subject to create a bold silhouette. Colourful, winter skies offer the perfect background.
10) Experiment with motion. Switch to a slow shutter speed and pan with the birds to create a feeling of movement and energy.
Experiment with shutter speeds
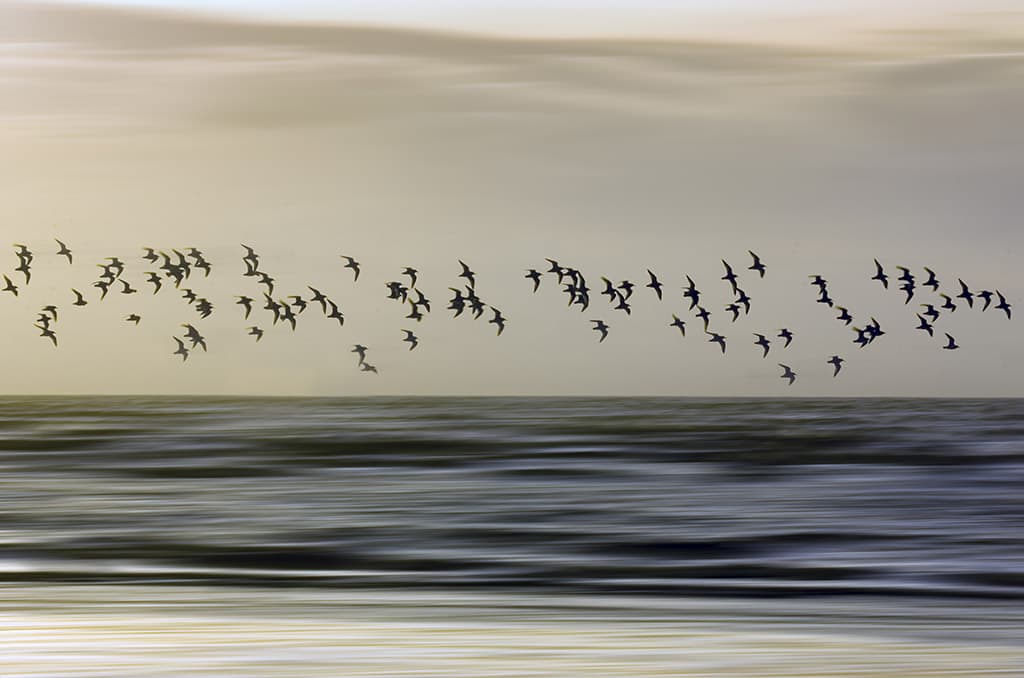
These two images of black-tailed godwits in flight show how dramatic the difference between a fast and slow shutter speed can be. The first was taken with a speed of 1/250sec, which has created a fairly sharp and distinct image of the birds.

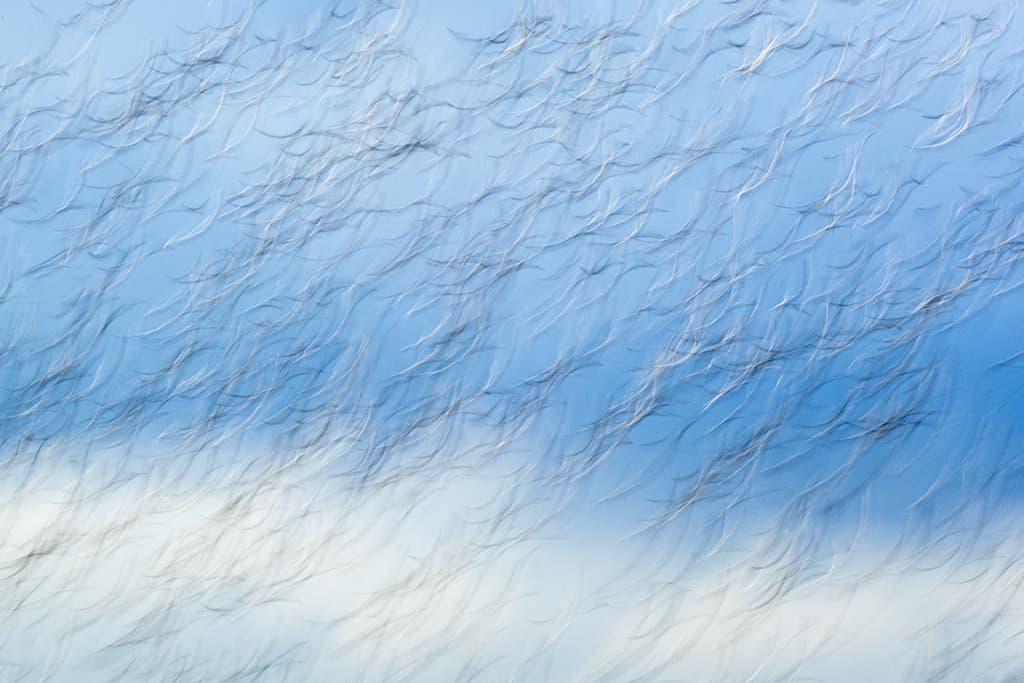
The second shot was taken at a much slower 1/10sec to create an abstract image that reveals the motion and energy of the flock.
Further reading
Get great shots of winter birds