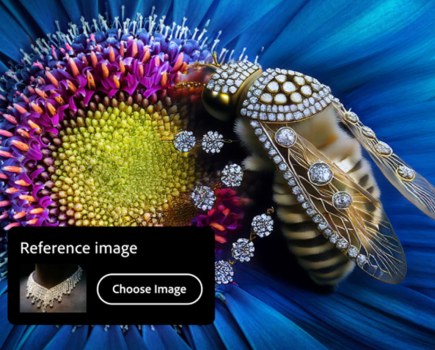
Creative and selective blur can easily be added to photos in post-production. Credit: Martin Evening
Selective focusing, or the ability to restrict the lens focus, doesn’t always have to be done in camera. There are Photoshop techniques you can use that can be particularly useful when working with images shot using small-size sensors, or lenses that don’t have ultra-wide apertures, where the objective is to achieve, for instance, a shallow focus. Various Photoshop filters allow you to do this at the post-processing stage, though how well you can match a true de-focused lens look still depends on which method you use to apply a blur effect.
For example, there are 16 different kinds of blur filters available in Photoshop. However, if you want to make a photograph appear realistically out of focus, it is not just a matter of simply blurring the detail. For instance, while the Gaussian Blur filter is useful for many things, such as softening masks or smoothing detail, it is unable to mimic making an image appear to be out of focus. Consider for a moment how a camera lens focuses a viewed object to form an image that is made up of circular points on the film/sensor surface. When the radius of these points is very small, the image is considered sharp and when the radius is large, the image appears to be out of focus. What is also particularly noticeable is the way in which bright highlights tend to blow out as they go out of focus and how you can see the shape of the camera lens iris in the blurred highlight points.
Lens Blur filter
The Lens Blur filter offers the best potential to simulate the way a camera lens forms an optical image and then throws this out of focus. The way this filter works is to temporarily convert the image to a 32-bit, pseudo-HDR editing space, before it applies the blur effect in which the highlight areas can be made to flare out first, and the shape of the iris blur is governed by how you adjust the settings in the Iris section. Working with the Lens Blur filter you can create fairly realistic-looking lens blur effects, but the filter suffers from certain limitations. First, it can be quite slow to work with, and therefore, it can be a painstaking experience to tweak the sliders in search of an optimum blur setting. Plus, the sheer number of sliders can also be considered quite intimidating at first glance.
More recently, Adobe added the Blur Gallery effects to Photoshop. With this suite of filter effects and additional control panels, it is possible to simulate lens blur effects, but with much simpler sliders to control the blur amount and bokeh (the lens flaring effect). Some of the Blur Gallery filters go beyond what can be achieved using the original Lens Blur filter. Better still, all the Blur Gallery filters can make use of the computer’s Graphics Processor Unit (GPU) to significantly speed up the calculations (assuming the video card in your computer is compatible, of course) so much so that you’ll often find there is very little, if any, delay as you adjust the sliders. The image examples I have included here show the range of photographic blurring effects that can be achieved working either directly on the image background layer, or by isolating the background contents and blurring these separately, such as in
the Path Blur example.
The Lens Blur filter
With such an overwhelming interface, the main controls to concentrate on in the Lens Blur filter dialog are the Radius slider, which controls the amount of blur applied to the image, and the Specular Highlights slider, which controls how much the highlights blow out. You can also use a mask channel to define the areas where you wish to selectively apply the Lens Blur. This can be used to create shallow depth-of-field effects. Basically, you can use, say, a simple gradient to define the areas that you wish to remain sharp and those that you want to have appear out of focus. You can then load the channel mask as a Depth Map via the Lens Blur dialog and use the Blur Focal Distance slider to determine which areas should remain sharpest.
Credit: Martin Evening
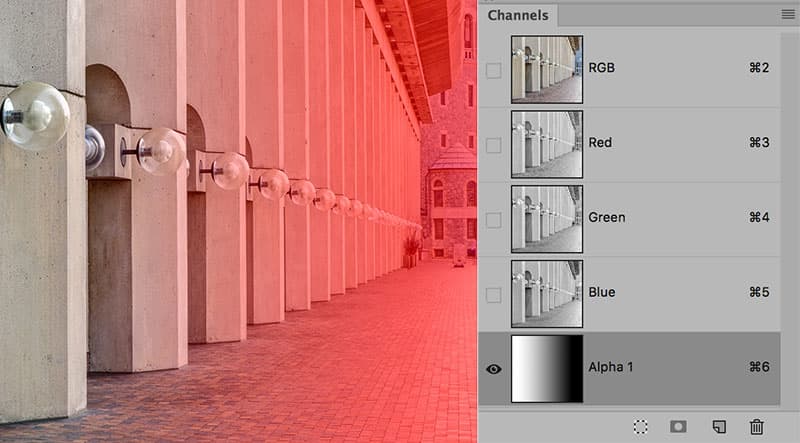
1. Quick Mask overlay
First, I created a new mask channel called Alpha 1 and added a gradient that went from white to black, which is made visible here as a Quick Mask overlay.
Credit: Martin Evening
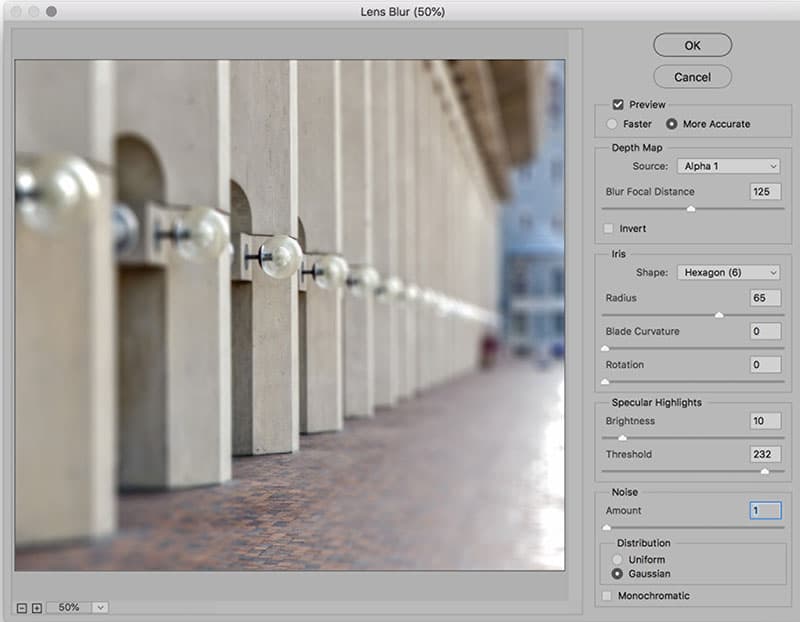
2. Apply the lens Blur filter
I then loaded the Alpha 1 channel in the Lens Blur filter dialog to use as a depth map. I adjusted the Blur Focal Distance slider to determine where I wanted the image to remain sharp. This setting specified the mask channel grey value that I wished to appear sharpest.
Blur Gallery filters
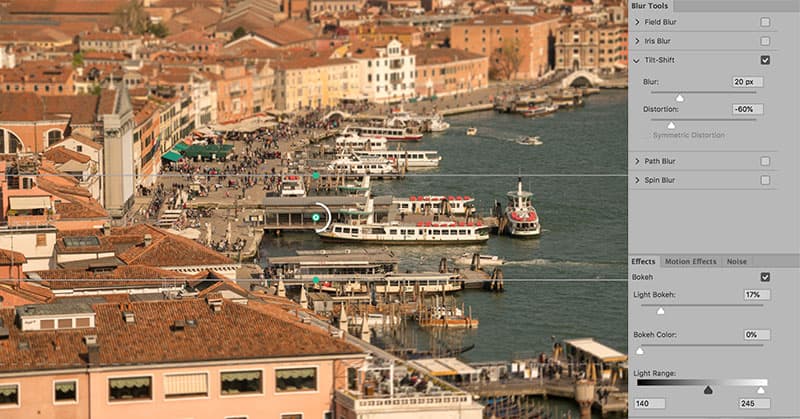
The Blur Gallery filters offer a more simplified interface for applying Lens Blur effects. Overall these are a lot quicker to work with than the Lens Blur filter, have fewer controls to bother with, and the blur effects can easily be edited. The Blur slider controls the strength of the blur effect and allows you to apply much stronger blurs than you can with the Lens Blur filter. The Effects panel contains the Blur Effects controls. For example, the Tilt-Shift blur filter can mimic both the blur and distortion effect you would get when shooting with a view camera, where you can tilt the film plane and also the effect you can get when shooting with a Lens Baby lens.
Credit: Martin Evening
Whenever you apply a Tilt-Shift blur, you’ll see a pin in the centre with two solid focus lines on either side of the pin. These indicate the no-blur zone in which the image will remain in focus. Beyond are the dotted feather lines. Between the focus and feather lines are the transition zone where the image fades from being in focus to out of focus, as set by the Blur slider in the Blur Tools panel.
Credit: Martin Evening
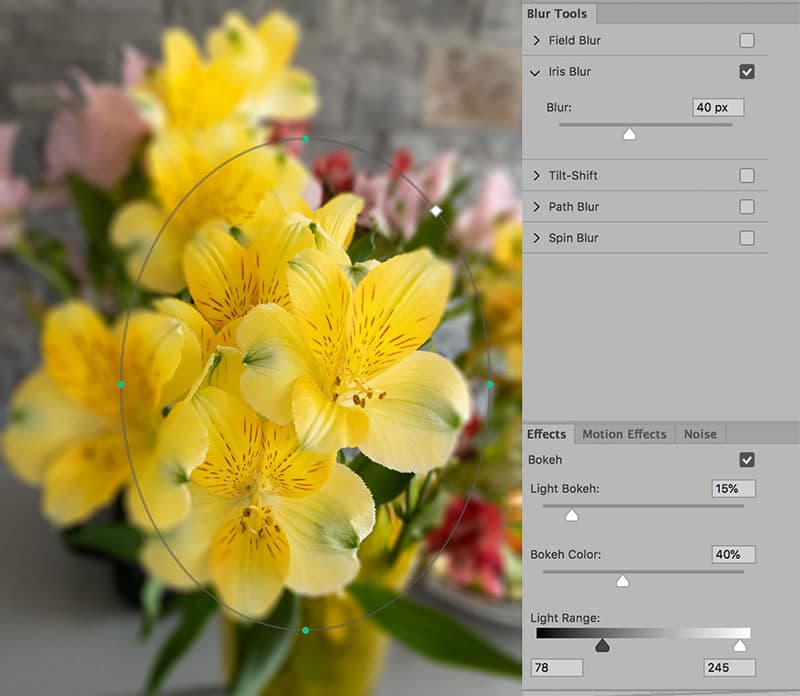
Iris Blur
By default, the Iris Blur filter ellipse-field controls appear centred in the image. You can click on the centre pin to reposition and drag any of the four outer-ellipse handles to adjust the shape and angle of the radius field. This blur effect is great for simulating lens sharpness fall-off, especially on an iPhone capture like this photo.
Credit: Martin Evening
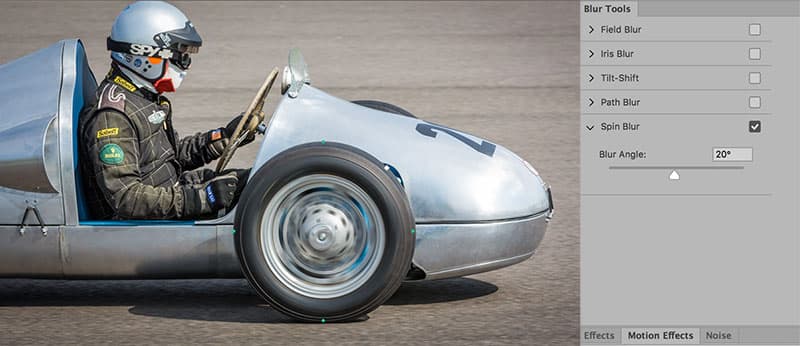
Spin Blur
Using the Spin Blur effect you can apply a spin blur of varying intensity. The effect is similar to the Radial Blur filter in Spin mode, but as a Blur Gallery filter you have a lot more interactive control over the effect. For example, you can apply an elliptical-shaped blur, re-centre the blur effect and adjust the Blur while seeing a live preview.

Credit: Martin Evening
Motion Blur Effects panel
The Motion Blur Effects panel sliders can be used to create multiple strobe/flash effects. You can adjust how many times the image will be repeated and how much blur there will be between each flash exposure. The Strobe Flashes slider can be used to set the number of strobe flash exposures (from 1 up to 100).
Credit: Martin Evening
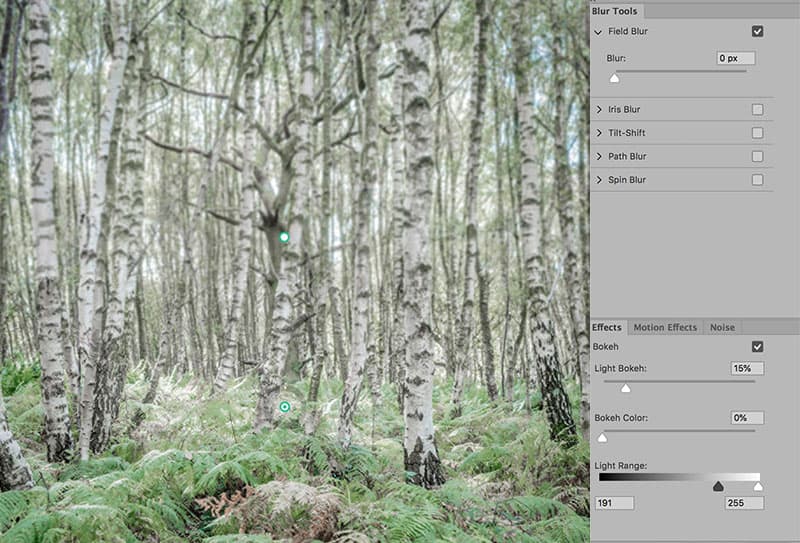
Field Blur
The Field Blur effect applies a global blur effect. However, by adding further pins you are able to create custom gradient blur effects. In this example, the central pin applied a 20% Blur, while the pin at the bottom applied a zero amount and thereby created a smooth gradient between the two.

Credit: Martin Evening
Path Blur
The Path Blur filter creates a motion blur effect along a user- drawn path. By clicking on the path to add more control points and dragging, you can manipulate the shape and direction of the motion blur to create an effect similar to camera shake. Here, I manipulated the path shape to control the curvature of the Path Blur applied to the Background layer, from which I had isolated the car.
Credit: Martin Evening
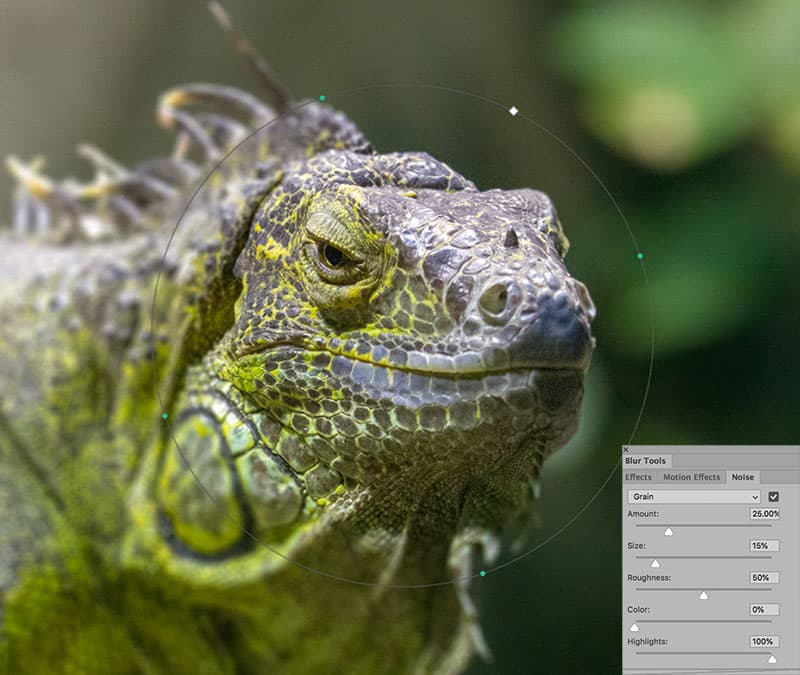
Noise panel
One of the problems you get when adding Blur Gallery effects is that the blur effect also blurs the underlying noise structure of the image. Now, this is not such a problem if the image you are working on has no visible noise. But when editing a high-ISO capture you can simulate the original image’s noise in the blurred areas.