BEFORE: A key feature of Affinity is Personas; each persona has a different workspace with an array of tools. Credit: James Paterson
Photoshop has been the undisputed king of image editors for the best part of 25 years, but since the introduction of the subscription-based model in 2013, many photographers – put o by the thought of perpetual monthly payments for the rest of their image-editing lives – have been looking elsewhere. One popular option that offers a great deal of bang for the buck is Serif’s Affinity Photo. Costing the equivalent of just five months of Adobe’s Photography Plan subscription, Affinity Photo has been making headway with photographers for a few years now, and its development has progressed rapidly.
But cost counts for nothing unless it delivers. Affinity Photo gives you an impressive range of image-editing controls. It can’t compare with Photoshop in terms of its feature set, but there’s an argument that many photographers – particularly casual users – don’t necessarily need the depth of tools on o er in Photoshop, which encompass all kinds of workflows, from 3D rendering to video editing. So if you’re looking for a powerful photo editor that is also kind on the wallet, Affinity Photo might be the right choice for you. Over these pages we’ll take time to explore many of its key features and benefits.
AFTER: The Photo Persona is where you’ll spend most of your time editing photos. Credit: James Paterson
Getting started with Affinity Photo
Upon first opening an image into Affinity Photo the range of tools might seem daunting. So it helps to spend a little time finding your way around. One of the key features of the interface is Personas. Accessed via five buttons at the top left of the interface, Personas are Affinity Photo’s approach to different workspaces, each with their own array of tools and commands. The tools usually appear in a toolbar on the left, with additional controls in the panels on the right. First is the Photo Persona (pictured), which is where you’ll spend most of your time editing photos. Next is the Liquify Persona. Here you can push, pull, twirl, bloat and reshape your images. Following Liquify is the Develop Persona, which is Affinity Photo’s answer to raw editing. After this comes the Tone Mapping Persona. This can be used to tone HDR images, although you can also use it to give normal images the HDR look. Finally there’s the Export Persona, which offers a range of export options that will be especially useful to designers and web developers.
If you’re a Photoshop user, it won’t take long to adjust to Affinity Photo’s interface. Credit: James Paterson
Making the switch
If you’re familiar with Photoshop then you can be up and running with Affinity Photo in very little time. It’s an image editor very much cut from the same cloth. There are Layers, Blend Modes, Adjustment Layers, Masks and many other powerful features pioneered by Adobe and cannily incorporated into Affinity Photo. The interface is easily navigable with the familiar array of moveable panels, which include a History Panel, Channels, Styles and Brushes. And of course there’s a Tools Panel which houses important tools like the Healing brush, Clone tool, Crop tool and Pen tool. As such, it’s a slick package designed to allay the sense of disorientation that inevitably accompanies any foray into a new program, and one that makes the switch from Photoshop easier than you think.
A raw file will automatically open and appear in the Develop Persona. Credit: James Paterson
Raw editing
When you open a raw file into Affinity Photo it will automatically appear in the Develop Persona. This is the app’s raw processor and, unlike a separate plug-in such as Photoshop’s Camera Raw, it’s included in the main interface. You’ll find useful tonal sliders to the right of the screen, plus a selective brush and gradient tool that can be set to create linear, radial or elliptical adjustments. In the toolbar on the left there are essential tools for setting the white balance (use it to click on a neutral point in the image) plus cropping and blemish removal tools. Once you’re finished editing your raw file you need to click the Develop button to commit the changes and access the other Personas. It’s worth noting that after this you can still go back to the Develop Persona at any point in your workflow to use its tools on your image.
There are several tools for creating HDRs. Credit: James Paterson
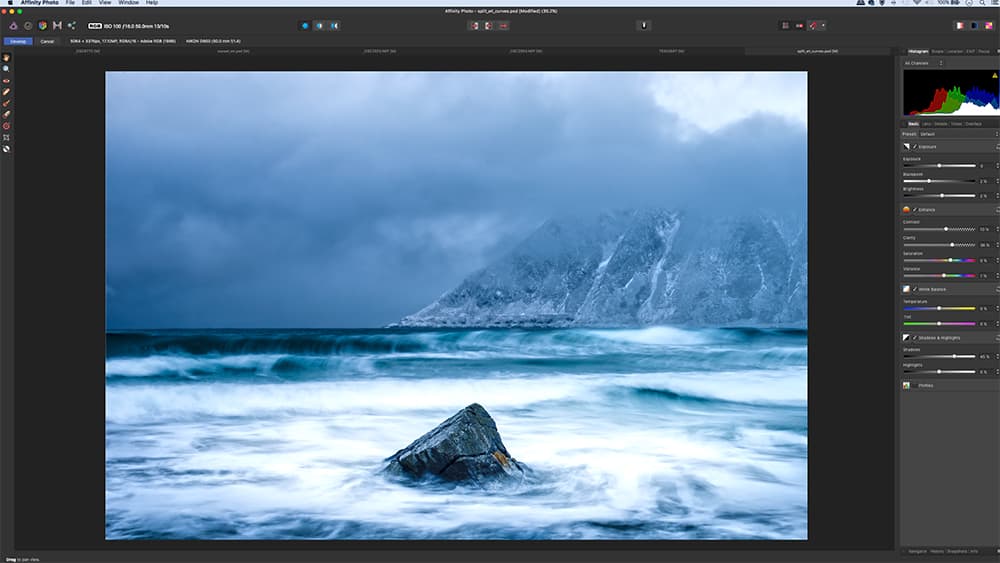
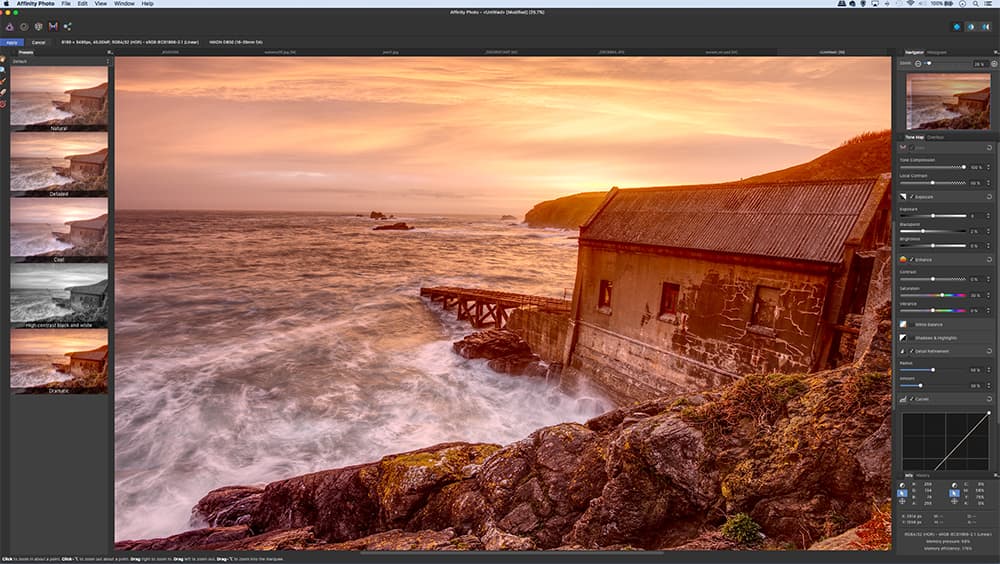
Creating HDRs
If you enjoy HDR photography, Affinity Photo offers several useful exposure-merging and tone-mapping features. You’ll need two or more bracketed exposures for this, shot using a tripod to keep them in alignment. First we merge the exposures together using the ‘New HDR Merge’ command found under the File menu. Once done, we can take the resulting 32-bit HDR image into the Tone Mapping Persona (accessed via the top left icon) to enhance the tones and detail, giving it the ‘HDR look’ if we choose to. The Tone Mapping Persona offers a range of presets on the left side that can be used to give your HDR instant looks like ‘Dramatic’ and ‘Cool’. On the right you’ll find useful tonal controls such as Tone Compression, that’s used to control the extent of dynamic range, and Local Contrast, which enhances details for the crunchy look associated with HDRs. Once done, we can go to Document>Color Format to convert the bit-depth to 8-bit before exporting in our chosen image format.

Layers are also available for more powerful editing. Credit: James Paterson
Layer tools
Layers have long been the cornerstone of editing in Photoshop, and they’re also at the heart of many of Affinity Photo’s best features. For the uninitiated, Layers can be hard to grasp. It’s helpful to think of them as layers or acetate placed on top of one another. The control centre for Layers is the Layers Panel, which offers access to all the most important features.
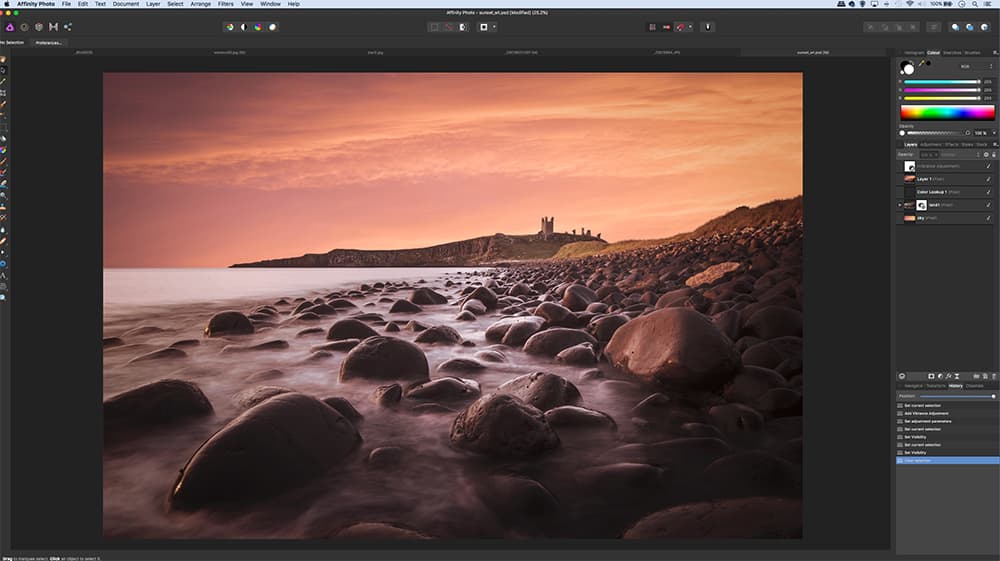
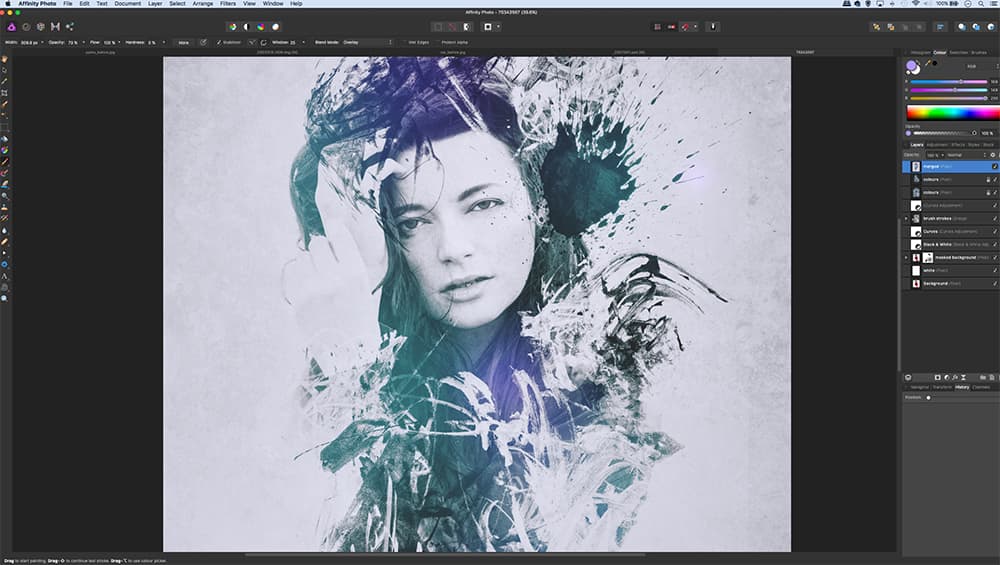
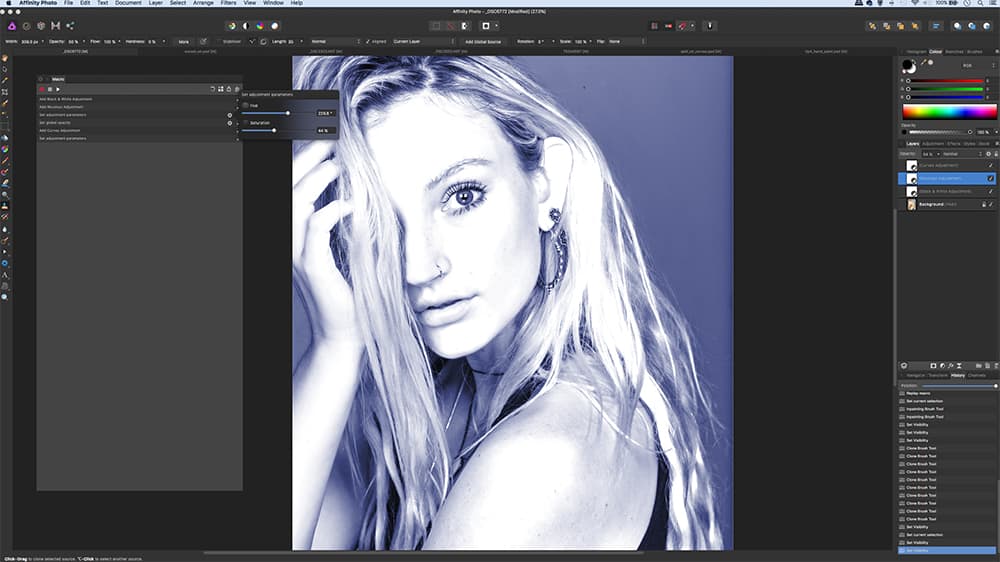
In Affinity Photo, Layers can be used for all kinds of powerful edits. First and foremost, we can use them to combine images, or add graphics and text to photos – with each element confined to its own layer and therefore endlessly editable. As well as pixel-based layers that contain images or parts of images, we can also make use of Adjustment Layers. These act as standalone adjustments and affect all the layers below them in the layer stack. We can also employ a range of layer blending tools, from simple opacity settings to layer masks and Blend Modes – we’ve used the Screen Blend Mode here to create a simple double exposure effect.
6 Photoshop-beating features in Affinity Photo
Credit: James Paterson
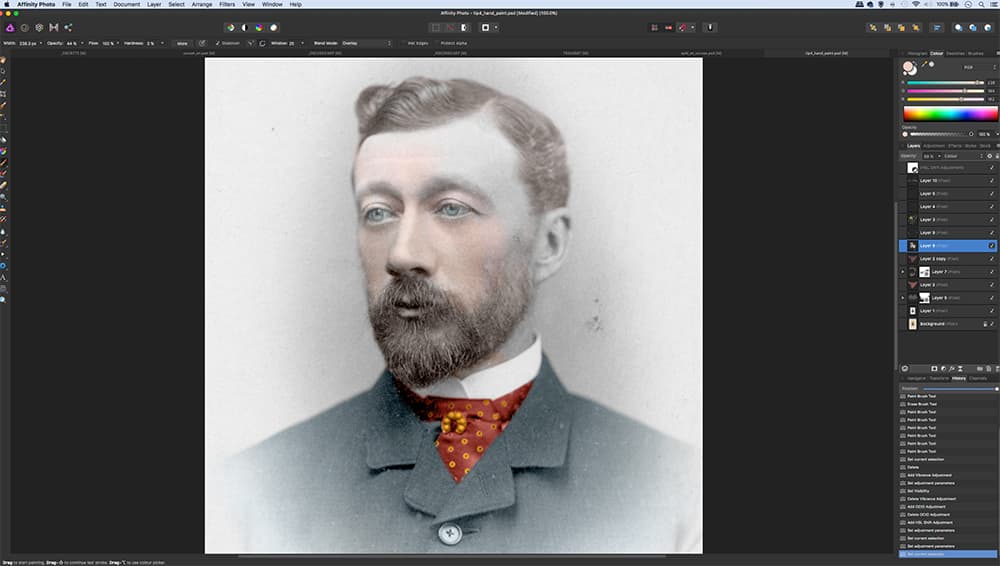
1. Live Brush Previews
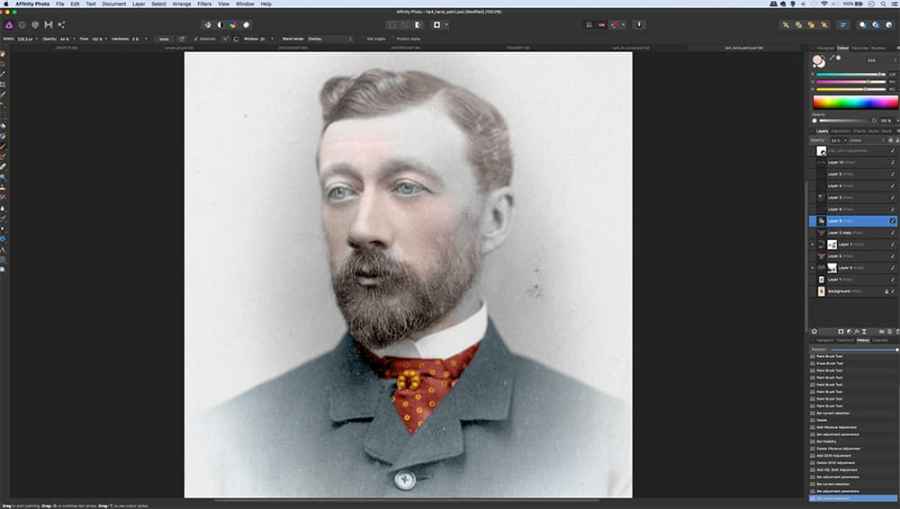
This feature will impress those of us used to using Photoshop brushes. The Affinity Brush tool cursor has a live preview that shows how it will work before we start painting – including any blend modes or opacity settings (handy for hand-colouring old photos by painting a layer set to the Colour Blend Mode here). It works brilliantly when painting layer masks too.
Credit: James Paterson
2. Macros
Macros are recordable operations similar to Photoshop Actions. We open the Macro Panel (View>Studio>Macros) and hit record, then any edits we make are recorded. Unlike Photoshop, we can tweak the settings within the macro steps. The saved macro appears in the Library Panel, ready to be applied to other photos or used for batch-processing.
Credit: James Paterson
3. Non-destructive resizing
If you resize a layer to make it smaller then choose to make it larger again, there will be no loss in quality – its highest resolution is always available regardless of its size on- screen. This is akin to converting a layer to a Smart Object in Photoshop, but with Affinity Photo non-destructive resizing is the default.
Credit: James Paterson
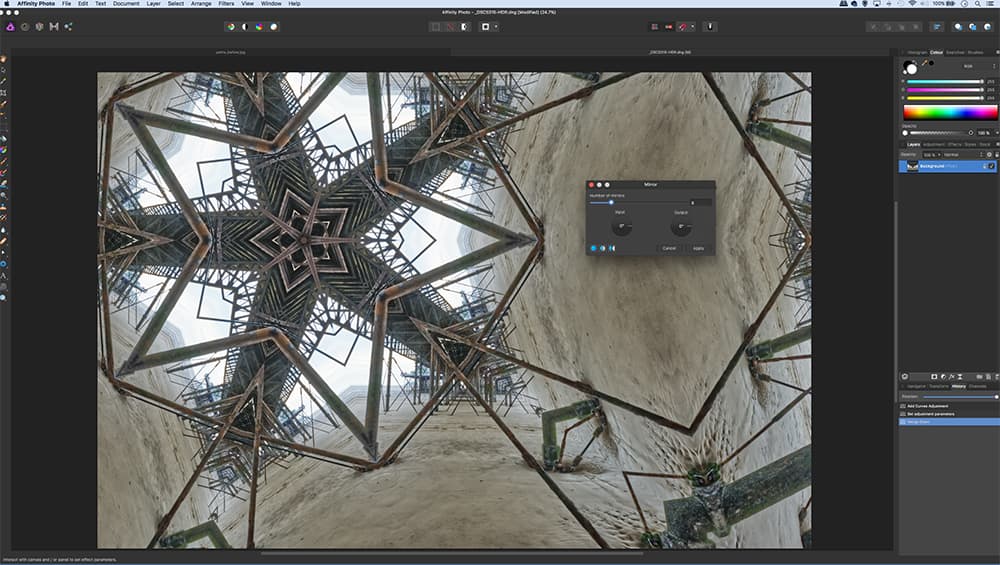
4. Mirror Filter
Accessed under Filter>Distort>Mirror, this unique filter is unashamedly great fun. It can result in wonderful symmetrical patterns, allowing you to transform photos into geometric designs in interesting and frequently unexpected ways. We simply set a number of mirrors, tweak the angle and drag the centre point to create the effect.
Credit: James Paterson
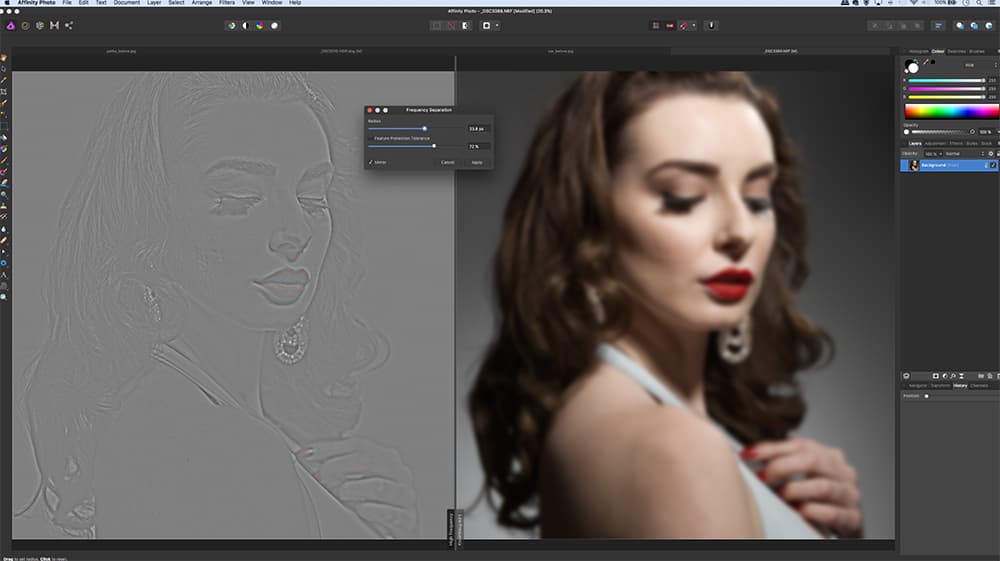
5. Frequency separation
Frequency separation is essential for high-end retouching, but in Photoshop it takes several steps to set up. By contrast, Affinity Photo offers a dedicated command under the filter menu. It creates a high frequency and low frequency layers, with a handy split-screen view to fine-tune the level of detail. Once applied, we can retouch each layer individually.
Credit: James Paterson
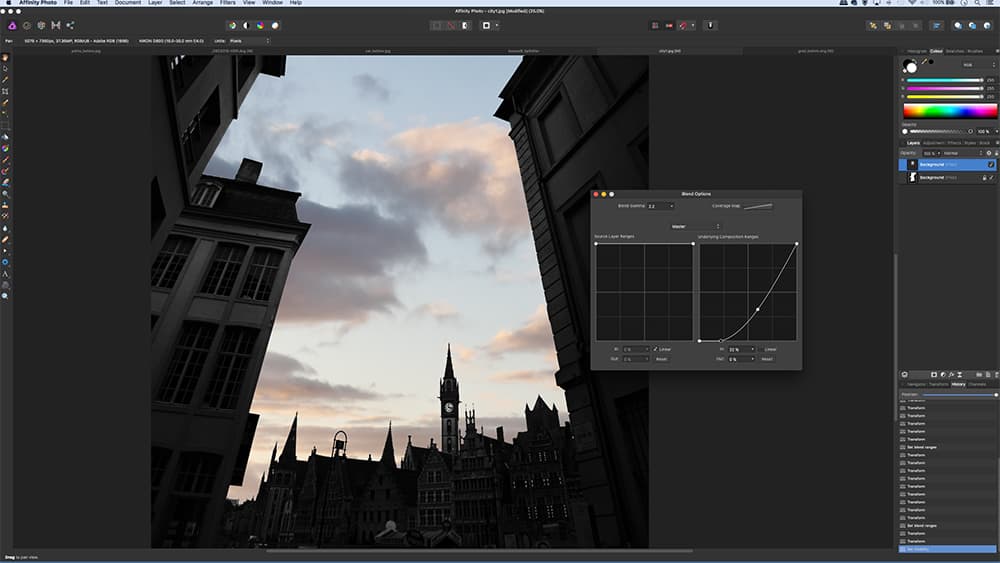
6. Blend Ranges
This command is found by clicking the cog icon in the layers panel. It allows us to blend layers based on the luminosity or colour values, letting us merge two photos in seconds. It’s much like Photoshop’s Blend If command, but it goes one further by offering an intuitive set of curve controls that allow for a finer degree of control. It lets us replace the sky in seconds.