
So you want to take great studio portraits but feel that you need the latest and most expensive lighting kit to achieve this? Well, you don’t. Photography in its most basic form is about ‘painting with light’, and that means any available light not just the artificially generated type.
And the beauty of using such a source is that it’s free, gives you natural-looking images, and can be manipulated in the way you want, and with the minimum of equipment. And to guide you we’ve enlisted the help of professional photographer and author, John Freeman.
As John will tell you, one of the great benefits of shooting portraits in this way is that you don’t need to find exotic locations, or spend money on hiring a studio, everything can be done from your own home, where you can utilise the available light, find brilliant backgrounds, be it a wall, curtains or window. Use a mere handful of props to create stunning images.
As with anything to do with photography, there are no boundaries, the only thing standing in the way of the creativity is yourself.
So what are you waiting for? Grab a camera, a piece of white card, get yourself a subject, and away you go!
What you will need for great studio portraits…
 ‘Before you can begin’ says John‚ ‘you’ll first need the right equipment.’
But fear not, there isn’t a great deal of it.
‘Which camera body to use isn’t a major concern, but the type of lens you use is. For this shoot I opted for a fast (f/2.8) 70-200mm lens. Its speed is beneficial because, even though you are using an area that has sufficient light, you’ll need a lens that can transfer as much light to the sensor as possible. The short telephoto option I went for will enable me to crop in and come out as much as I feel is needed.
‘Because you won’t be using any flash to light the scene, there is every likelihood that you will need to shoot at a slow shutter speed in order to capture enough of the available light, so a tripod is advised. Some of you may feel confident that you have enough of a steady hand to shoot at such a setting, but I’d certainly recommend the use of a tripod, and one where the camera can be moved from landscape to portrait format with the minimum of fuss. My tripod of choice is a Manfrotto, but any decent quality one will do.’
Studio portraits: Reflectors

‘The next vital piece of kit is a reflector. There is a huge range of these available on the market, Lastolite being a well-used brand, but you can, if budget is a problem, simply use a large piece of white card, or even a towel. The reason for using a reflector is that because your light source will be coming in from one location, it means that one side of whatever you are photographing will be in shadow.
‘By using the reflector you will be able to position it on the other side of your subject, have it facing the light, and bounce the available light coming through the window into the shadows, giving a more balanced and natural look, and not a shot heavy in contrast. In this shoot we went for two reflectors, a circular Lastolite reflector and a large piece of white card.
‘If you are lucky enough to have an assistant you’ll be able to ask them to hold the reflectors for you, but if this is not the case, you may require a stand that you can use as a prop. Failing that, you can always ask the subject to try and hold the reflector, but that might produce an awkward-looking shoot. This is where it is handy to possess some light stands and clamps, and then position the reflector accordingly.’
‘A common photography tool, and one that will ensure your exposure is correct, is a grey card. This is a popular piece of a photographe’s kit bag, and placed next to the subject’s face will allow the camera to determine what the correct settings need to be.
Studio portraits: Find a Suitable Model
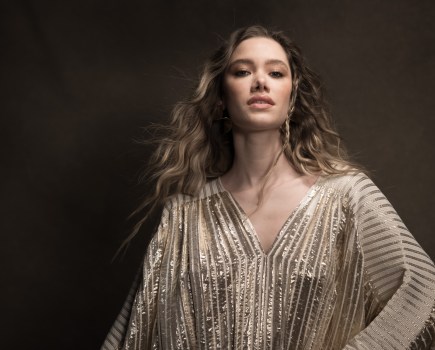
‘Last, but by no means least, is the model themselves. It’s always a good idea to use someone you know if you’re just starting out, as they’ll feel relaxed and the shots will look more natural. For this shoot, we used Jenna. Jenna’s a professional model and made things very easy as she’s done such shoots before. Great subjects need little prompting, and whenever they hear the shutter go, they will immediately alter their pose so that the photographer captures a variety of different shots to choose from.
‘It’s also worthwhile allowing yourself the opportunity to experiment. Don’t feel you have to organise everything the way a book or person may tell you.’
Studio portraits: Setting up the Scene
 ‘Once you have your location sorted you will need to do a bit of reconnaissance work to find the most suitable parts of the house to shoot in,’ John says. ‘We were rather spoilt in our location, with no less than three areas ideal for such a shoot, and once the first port of call was finalised we were then able to set everything up, including working out what camera settings to use. This is where the grey card came into play.
‘Grey cards help the photographer get exposure and colour balance right, and the way to use them is to first set your camera to manual so that you have total control over it, and then, using spot metering, take a reading from the grey card to see what the ideal exposure would be given the available light. The grey card should be placed as close to the subject you are photographing as possible, if not in its place. There are no rules to say that the readings you get are the only ones you can use, but it will give you a benchmark from which to work. And by using spot metering you are isolating the area you want to get exposure for. If, for example, you used matrix metering you will be taking a wider reading around the subject and come up with settings that won’t expose your subject correctly.
‘Taking some test shots is an ideal way of determining what settings you will need the camera to be set at, so before firing off the shutter for real,’ I had a few test-runs first.
‘As with any portrait shot, and because we weren’t lighting the scene artificially, I wanted to use a wide aperture so that the eyes and a large part of the face were in sharp focus, pick up all of the available light, and at the same time, blur out the background. When I took my grey card reading, with an ISO of 200, this was giving me a shutter speed of 1/15th sec. To calculate such a setting, I set the camera to manual so that I had full control over it. At this stage camera shake isn’t a huge issue, but for the later shots, using a remote shutter release counters this problem and allows me to get sharp images even though I’m using a slow shutter speed.
‘And then, we begin…’
Studio portraits: Shooting
Studio portraits shoot one

‘For the first shoot we went up a floor to one of the bedrooms. With ample light and the minimum amount of furniture in the room, positioning Jenna, myself, and Erin was very easy. However, the light was a little cold, so I decided to try and warm Jenna up a bit with the careful placement of our reflectors.
‘Having seen the room already in the initial recce, I felt it was best to have Jenna sitting on the bed, facing its bottom end. At first we tried the idea of having Jenna sitting on the edge of the bed with her arms resting on the end bedposts. This worked well as I was able to position myself in such a way that one side of my subject’s face was lit up by natural light.
‘I’m not a massive fan of having hands in portrait shots, but by using the bed Jenna was able to do something with them. It can often be the case that an inexperienced model will have difficulty in knowing what to do with their hands in a shoot, but by using a prop and offering some guidance this can easily be resolved.’
Studio portraits shoot one: Set Up

In this shoot, John decided to use two reflectors at the same time, one to bounce light into the shadows and one to direct some light upwards and into Jenna’s face. Although in this particular example Erin was able to do a fantastic job in holding both the reflector and white card together, such a set-up can be made easier with the use of a stand and some clamps. Not only would this free up the hands of an assistant, it would provide a chance for you to involve more reflectors into your shoot, if needed.
Studio portraits shoot two
‘The second shoot of the day took place on the landing upstairs. I’d noticed a generous amount of light was making its way into this area and there was an armchair placed ideally with its back towards the source. Because of this, Jenna is completely backlit, and as such, her face is in a lot of shadow. But by calculated placement of the reflectors, we will be able to bounce light back towards her.
‘However, as soon as the shoot started, and this was something that had been noticed on first inspection of the location we could see that a rather unsightly looking rooftop was visible outside the window behind Jenna. In order to eliminate this I overexposed the background to blow it out, and the settings of 1/25th sec at f/2.8 and an ISO of 400 made this possible.’
Studio portraits shoot two: Set Up

By bringing two reflectors into play we were able to light up Jenna’s face without losing the backlight. Again, Jenna held the white card in front of her to uplight her face, and Erin stood to the side in order to throw some warm light towards the side of Jenna’s face. The chair was in the ideal position already so it was really just a case of popping Jenna in place and firing away, with John actually positioning himself more head-on to the light.
Studio portraits shoot shoot three
 ‘For the last shoot we used the lounge. The room is large and there was a huge bay window located behind and to the side of the subject, who had been positioned on a chaise longue. There was plenty of available light shining through the window but straightaway we were met with a problem.
‘Outside the window, and just over the head of the model, there was a skip. To eliminate this problem we simply taped a sheet of tracing paper on the outside of the window. Not only did this block out the sight of the skip, but it still allowed the ambient light to shine through.
‘I often find that hands can get in the way of a good shot, and so move them out of shot, leaving the portrait clear of any clutter.
‘Moving away from the model I positioned myself low down and at a 90° angle to the direction in which the light was hitting my subject.
‘Using the settings I’ve already highlighted to add sharpness to the salient features of Jenna, her eyes and face. I dialed in an aperture of f/2.8 and a shutter speed of 1/50th sec. I was still using an ISO setting of 400. These settings allowed me to use the available light, and with the introduction of a reflector, kindly held in place by Erin, I could then bounce light on to the side of the face that was in shadow.
‘There is always the possibility that the light will change so alterations will often have to occur on the move. As the light got stronger, I asked Erin to move further away but on the same line as the direction of light. This meant that a less harsh light was being bounced into the shadows, which in turn helped towards the natural look I was after in the portrait. Always be aware of changes in light and adjust accordingly.’
Studio portraits shoot three: set up

The white card faced the light source, bouncing it into the shadows on Jenna’s face. John then selected a spot that was at about 90° to the direction of the light, and that allowed him to alter to high, middle and low shooting angles with ease.