Family portraiture can be as creative and unique as the family unit you’re photographing. We speak a diverse range of portrait pros about their different styles and techniques for capturing beautiful family pictures,
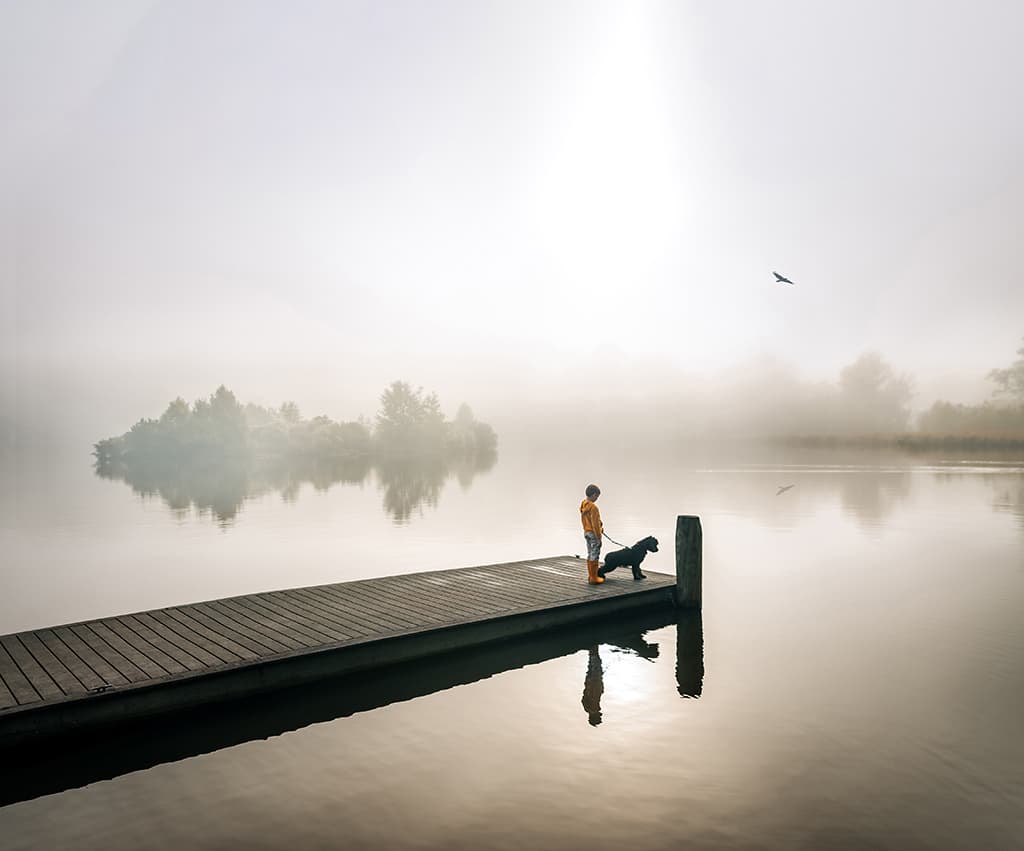
Romantic Lifestyle

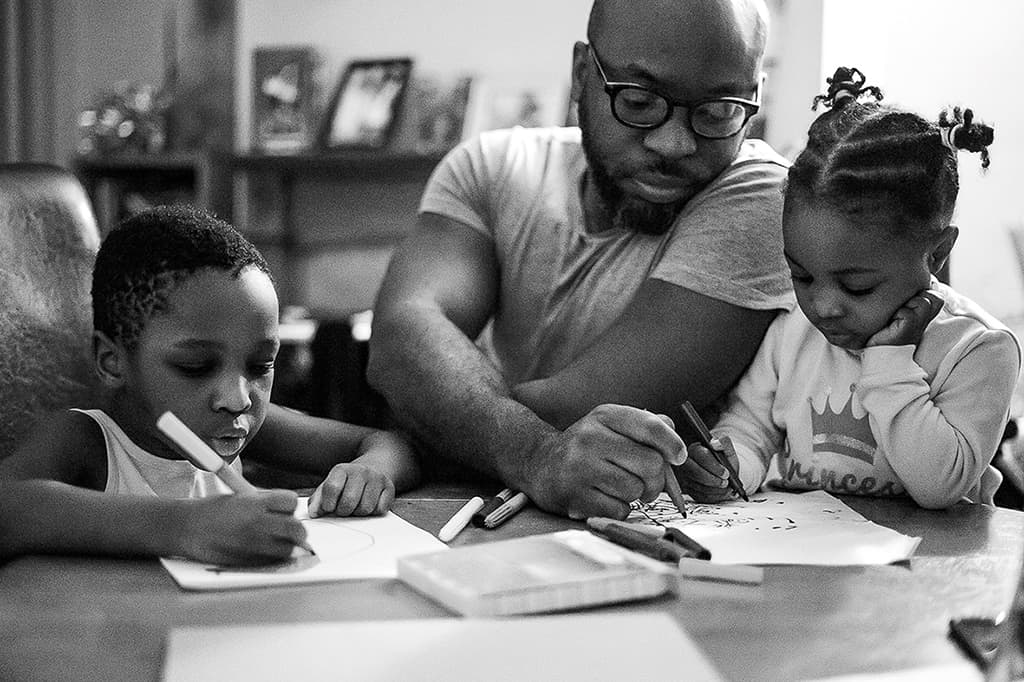
Your guide: Susan Grimes
Based in North Carolina, Susan has been capturing family adventures since her three-year stay in the UK. An expert in composition and lifestyle photography, she is a primary instructor for the Click Photo School. Find out more on www.instagram.com/susan.grimes, or her site
Use all your tools
Make it simple but make it powerful. All the elements included in the frame contribute to the story your image is telling. If they’re visible, then you’re saying these elements are important; include only elements that help tell a meaningful and visually interesting story. To do this, you need to use all the tools at your disposal: light, perspective, focal length and aperture choice.
Leave only the most impactful details and make sure your subject stands out within the scene. Concentrate on avoiding distracting items that pull the viewer’s eye away from the subject, especially along the edges of the frame, and use compositional elements to control their attention. Tools such as colours, lines, framing, shadows, shapes and negative space should be utilised, because with just a few of those elements in place your image can become more striking and compelling.
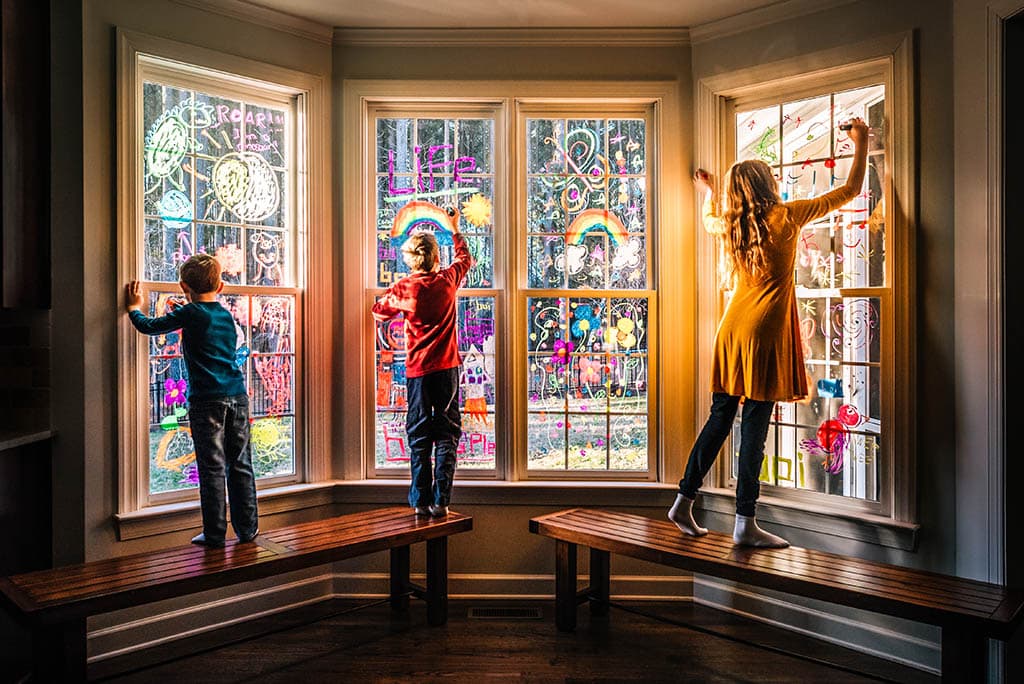
Prepare to succeed
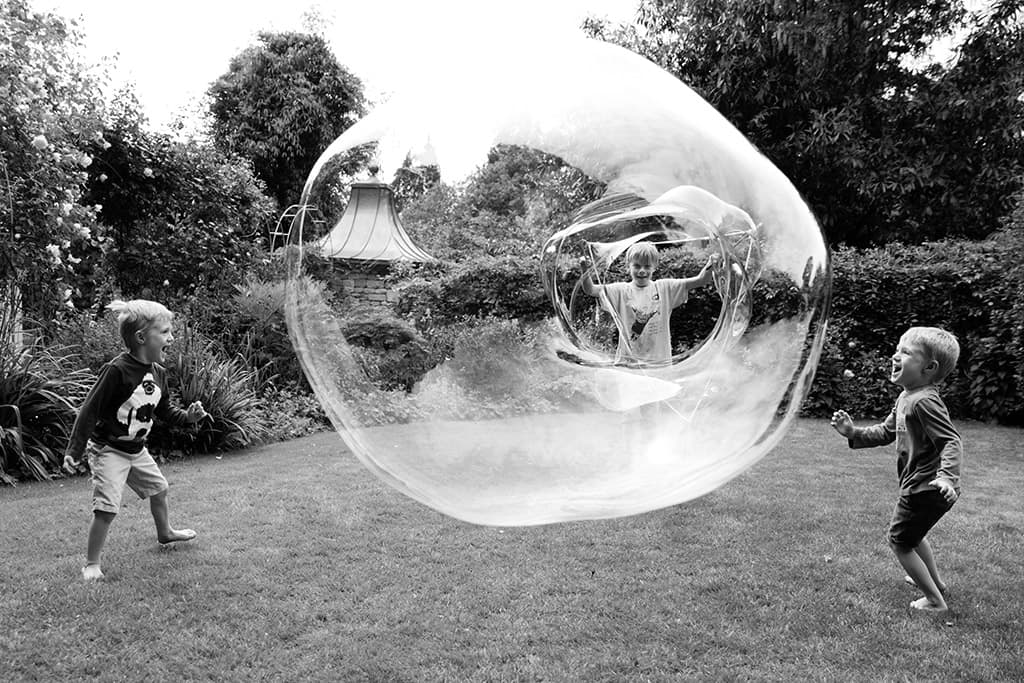
Catching the most natural moments involves preparation. Whether indoors or outside, the location needs to appeal to the subjects, to have beautiful light and be free from distractions. As I want subjects to be happy, comfortable and interacting, I often begin with activities that excite or suit my subjects’ personalities and to engage children in one place for a few minutes. In doing so, I can observe clues that help to predict behaviour and gather ideas for how to shoot the scene.
Once subjects are engaged, I don’t wait until something is happening to take a shot, especially with energetic children. I’ll be photographing before and after ‘the moment’, then I’ll be watching closely to see where the momentum of the moment will take them. Will they hold up their art work when they finish? Are they going to run after a sibling?
It’s important to pay attention and be poised to capture the spontaneous interactions but also keep one eye on scanning the environment thinking about your next shot.
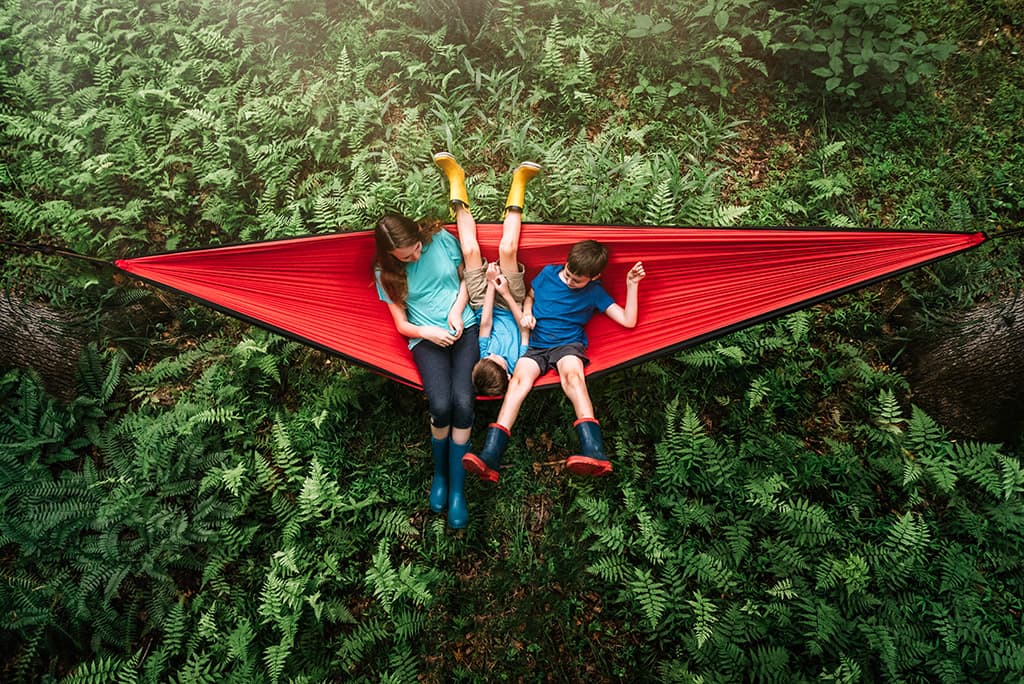
Change the perspective
Perspective is one of a photographer’s most powerful tools. Rarely do I ever photograph at eye-level. I approach every scene as if it were a puzzle to solve by exploring the environment from different angles, continually trying to improve the composition with every click.
Changing my viewpoint, if only slightly, can dramatically alter the impact of an image. It can change how the story is told, how the viewer is drawn in and how long they stay.
If I have enough time, I’ll try multiple perspectives including getting low to the ground, shooting overhead, getting close up and moving away.Each new angle uses the light and compositional elements differently. Ultimately, I want the simplest, strongest and most engaging image and I know that type of portrait takes creativity and effort.
Susan’s best kit
Nikon D750
A reliable, robust and hardworking camera, the D750 has survived daily use in all sorts of weather for years. I don’t have to handle it delicately, which is great because I change viewpoint quickly and frequently. It handles noise well, exposure is solid and the autofocus tracks energetic kids well.
Sigma 20mm f/1.4 Art
Wideangle lenses enable me to capture my subjects within dramatic landscapes and to exaggerate lines.
I also use a Sigma 35mm f/1.4 Art and Nikon AF-S 85mm f/1.4.
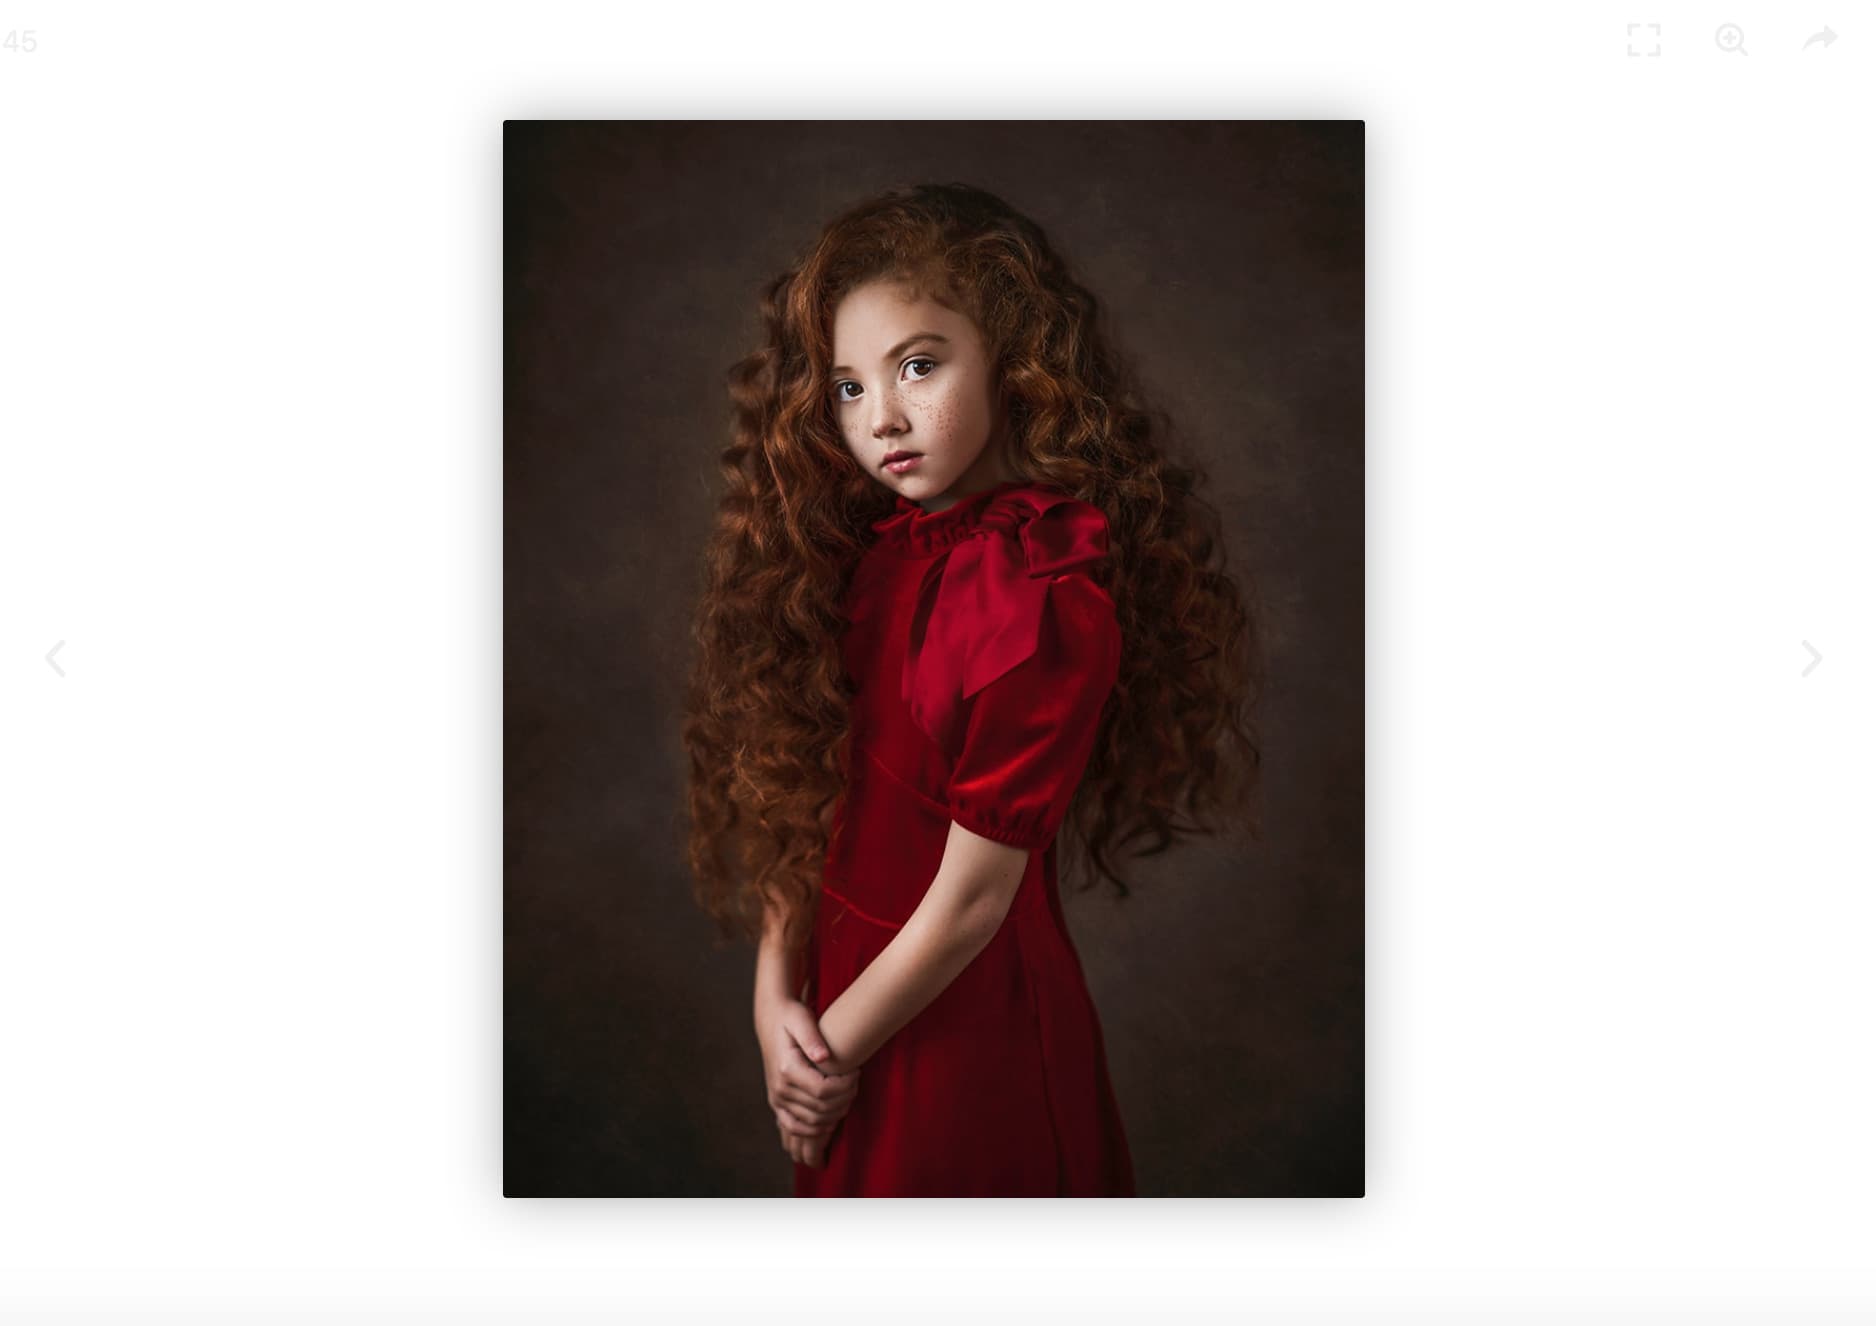
Black and White Documentary
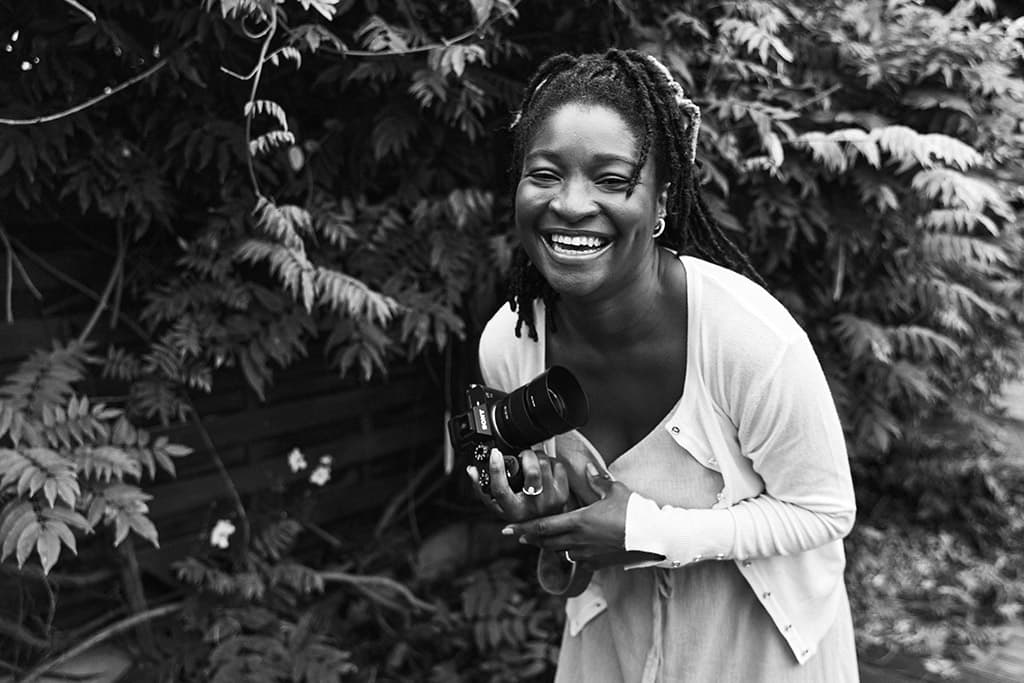
Your guide: Mercy Haruna
Mercy Haruna Iko-Ojo Mercy Haruna, aka Mercy, is a Kent-based portrait and documentary photographer dedicated to capturing the fleeting moments of everyday family life as well as those that dive into deeper conversations about the realities of motherhood. See @immeiko and her website.

Beauty of black & white
Black & white film is where I began and it continues to define how I see the world. Monochrome appeals to the minimalist in me and stripping away colour distils the scene and focuses on the story I’m telling, the composition, lighting, shapes and interactions. It’s simple, raw and nostalgic, which works for my style.
With black & white, you don’t have to think about how colours complement each other or if the background is messy. Using a camera’s B&W profile to preview your images at capture can help to train your eye but when converting in post-production never just slap on a generic preset.
Taking steps to achieve accurate skin tone and contrast with the right balance of highlights and shadows requires careful refinement of setting. Always shoot in raw to retain the colour information for maximum tonal detail; it will give you the greatest latitude for editing whilst preserving the original file.
Become a storyteller
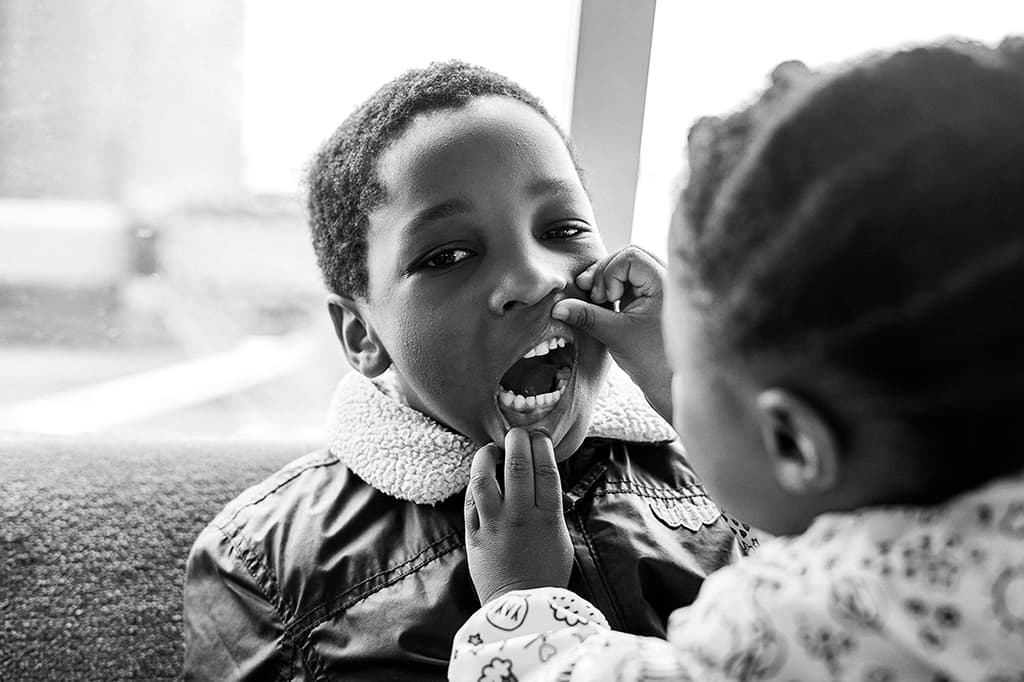
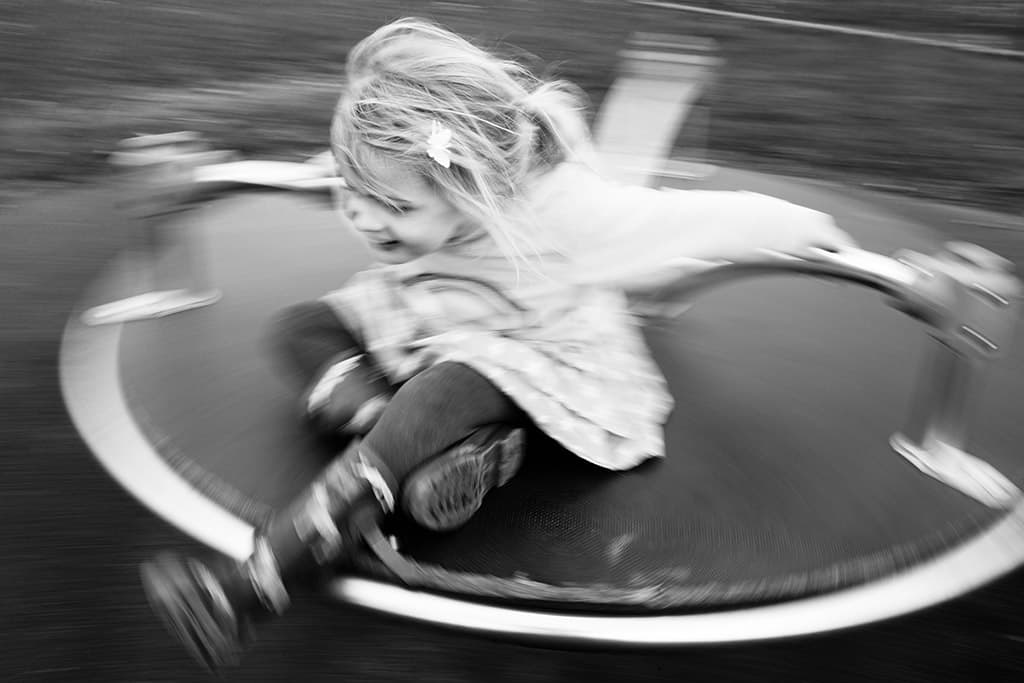
It’s the everyday moments that form a family’s story and whilst some may call them ‘mundane’ compared to the major milestones we’re accustomed to capturing, it’s these ‘ordinary’ moments that are most often forgotten. As a family documentary photographer, you shoot what you observe – subjects are unposed, undisturbed and undirected.
If I intercede, then I’m changing their very personal story. However, encouraging them to engage in an activity they all enjoy, such as cooking or playing games, can help you capture those moments. If you need a new angle or better light, you move instead of the subjects. It helps to get to know the family that you’re working with and let them know you because you will be spending a lot of time together – the longer you spend with a family, the more likely it is that you’ll capture great, natural-looking portraits.
Sometimes the best, spontaneous images don’t happen until late in the session when everyone’s warmed up. Let children be children, tantrums are all part of their story.
Master your equipment
Effective documentary photography requires quick responses and a close eye on what’s unfolding in the scene – if you’re fumbling with your camera you’ll miss opportunities. Instinctively knowing the settings you’ll need will increase your success rate.
I often shoot wide open with ISOs as high as 5000; I don’t mind a little grain. You also need to understand how your camera behaves, especially in changeable lighting, and how to compensate for it. How does it handle dynamic range or backlit scenes?
Will it struggle to focus in low light or on low-contrast areas? If you know this, you can recompose or override your camera accordingly. Practise a lot but try not to overshoot either; it’s tempting to shoot in bursts but be more mindful – being limited to 36 exposures on a roll of film has taught me that and it is good practice.
Mercy’s best kit
Sony Alpha 7 II and FE 50mm f/1.8
Using minimal gear allows me to focus more on subjects and their stories. The mirrorless Sony A7 II is portable, versatile and performs well in low light, which is important as I mostly photograph indoors and in tight spaces.
Extra batteries
Running out of power is inexcusable during a family session – it just isn’t an option. I always have extra fully-charged batteries close to hand and plenty of empty SanDisk Ultra memory cards.
Your guide: Helen Bartlett
A Canon ambassador and London-based family documentary photographer for 18 years. Her black & white, timeless portraits are created with longevity in mind. See her website and @helenbartlettphotography.
Light and shadow
In monochrome, you’ll spend a lot of time looking at highlights and shadows. If I’m taking a portrait indoors, I’ll often direct an activity to an area where there’s a drop-off in window light as it can lead to many different images by simply moving around the subject. You could shoot with your back to the window and your subject looking towards the light to softly illuminate their face, allowing the rest of the room to fall to darkness.
You could move to the side so you also get a soft modelling light on their cheeks, use a back light or prioritise shadows for a striking rim light. Learn how to ‘see’ the light and know how to use your camera to emphasise the best of it.
See in monochrome
More consideration to light, depth and tone is essential with black & white. A child in a red jumper running through a green forest will always stand out in colour but, in black & white, you need some light to create separation as both jumper and forest will be grey.
Not having colour lets you concentrate more on emotions, reactions and relationships, and the complexities of composition like finding balance and shapes. Black & white is totally timeless, freed from neon fashion crimes and will remain beautiful for decades to come. Always shoot in raw so you have the dynamic range and data to be flexible during processing, but consider setting your camera to shoot monochrome so you learn to ‘see’ in black & white for a more streamlined process.
Maintain control
I always use manual mode so that all the creative decisions are made by me and not the camera. My cameras handle ISO 8000 without a problem, even if I’m printing at 50 inches across, so I often crank up the ISO setting when shutter speed is a priority.
For focusing, I always rely on Al Servo mode to track subjects, and back-button focus so I can retain ultimate control and keep the focusing separate from the shutter. The combination works really well given that I often work wide open and with fast children.
Helen’s best kit
Canon EOS-1D X Mark II and EOS R5
The Mark II is built well and has phenomenal autofocus. The R5 is invaluable for its face and eye-tracking and the electronic viewfinder lets me ‘see’ in mono, giving me a much better idea of how the light is behaving.
Canon 50mm f/1.2
The quality, speed and accuracy of this prime means it rarely leaves my camera.
Waterproofs
I’ll often be lying in mud to find different viewpoints so I live in waterproofs most of the year. It means I can stay clean enough to continue shooting in a client’s home.
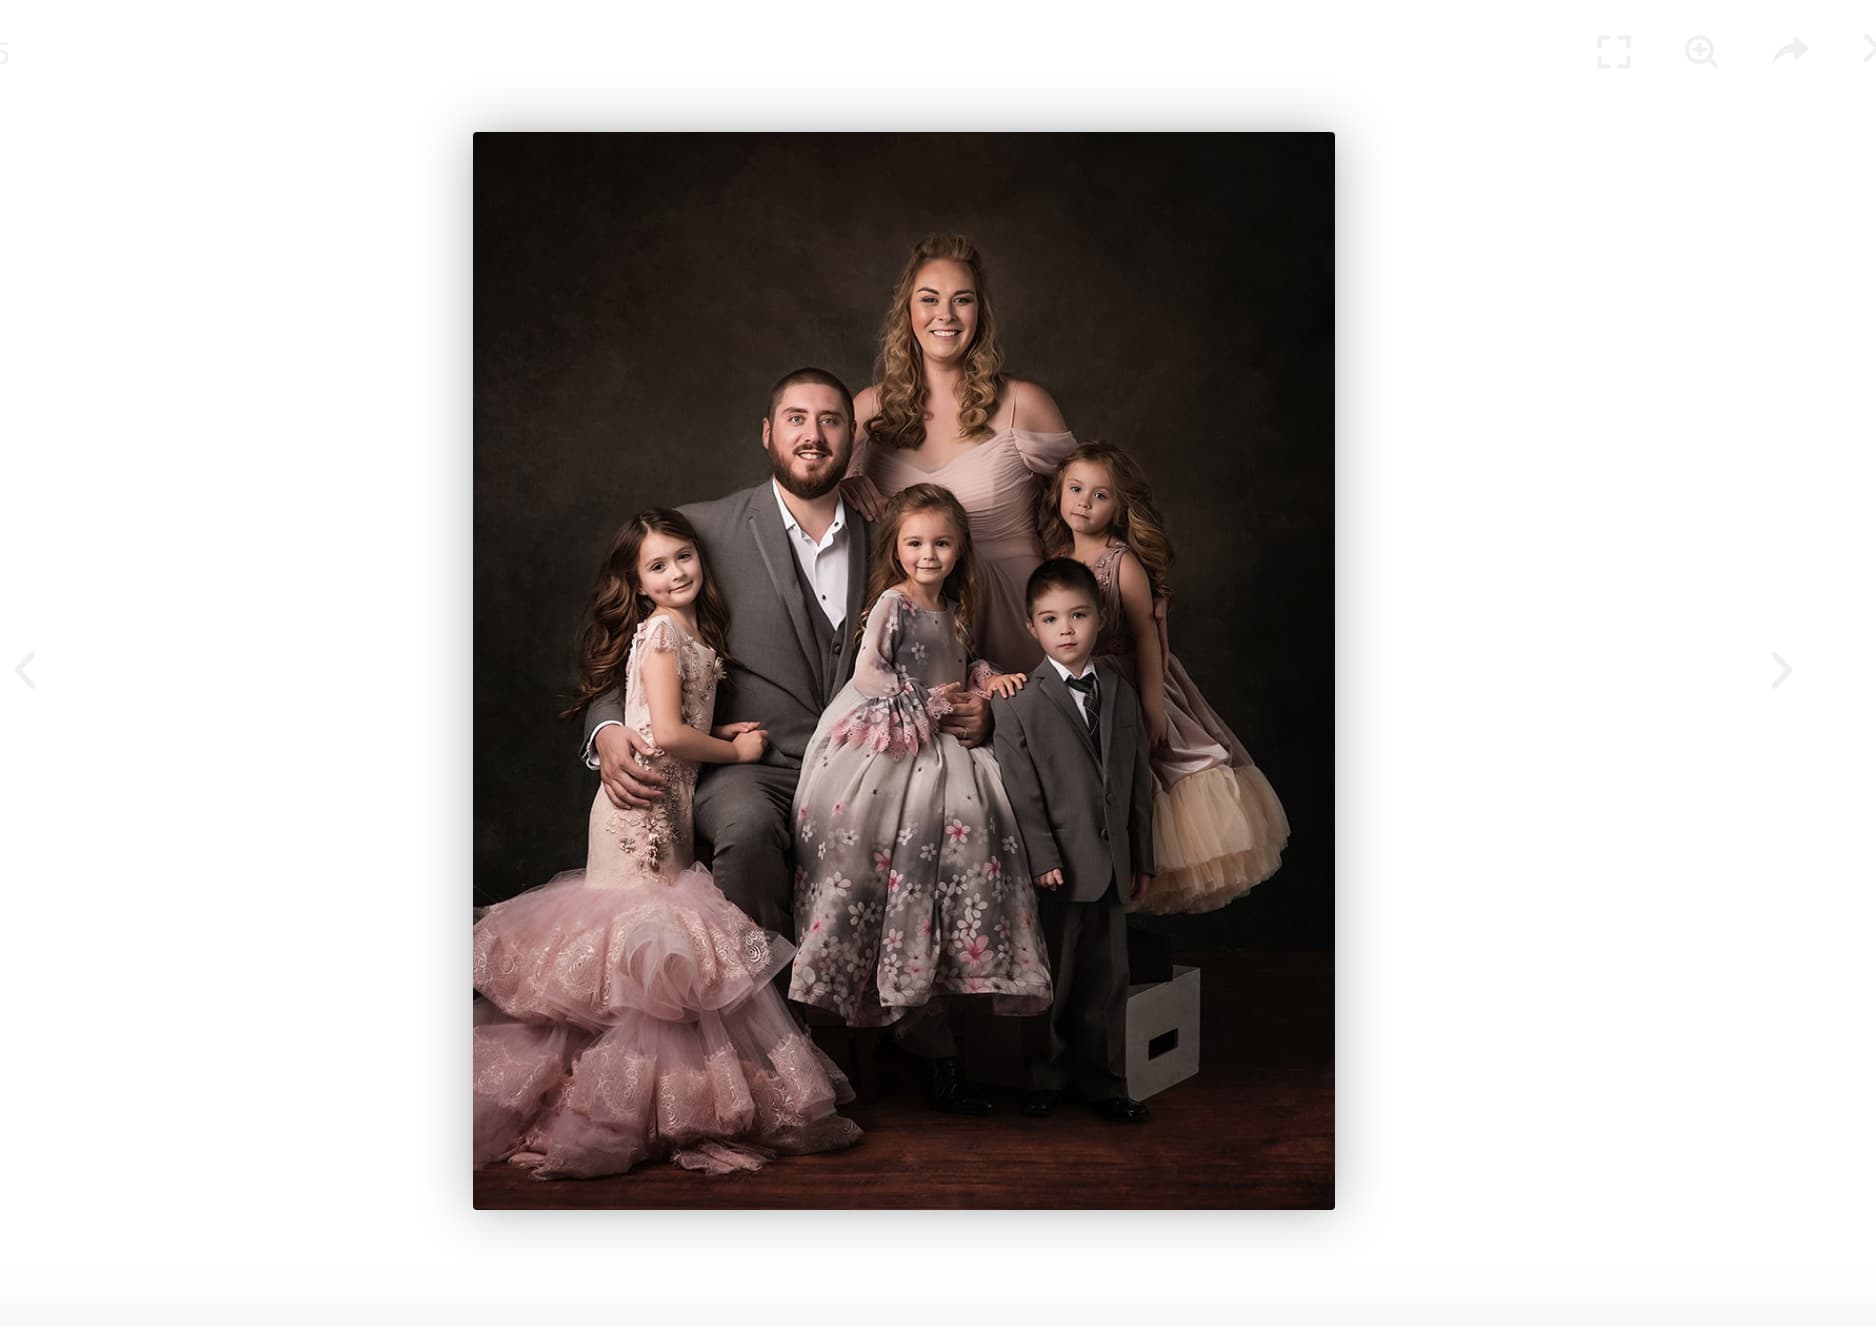
Fine Art
Your guide: Paulina Duczman
An internationally renowned and multi-award-winning family portrait photographer and tutor, Polish-born Paulina established her UK studio in 2014.
She often travels the world teaching her lighting and posing techniques for classical portraits to high acclaim. www.paulinaduczman.com, www.facebook.com/paulinaduczmanphotography.
Identify your idea
The primary goal for fine-art photography is to express a vision, to form an idea, to deliver a message or evoke emotions. Once you’ve found your ‘goal’, you can begin creating portraits and find your signature style.
Start by deciding on a consistent colour palette for your portfolio. Do you prefer pastels or rich earth tones, for instance, as this influences the fabrics and clothing choices you include in your sessions, as well as the furniture, accessories and backdrop – consistency is crucial and all have an impact on a portrait’s mood. In fact, accessories on a portrait cannot be undervalued – they have the power to make or break an image.
They should complement and not overpower a subject: ensure that they’re the right size, add to your message and complement other textures and colours in the image. Then use elements such the lighting, pose and composition to connect with the viewer – do not underestimate the arduous planning and control involved in fine-art portraiture.
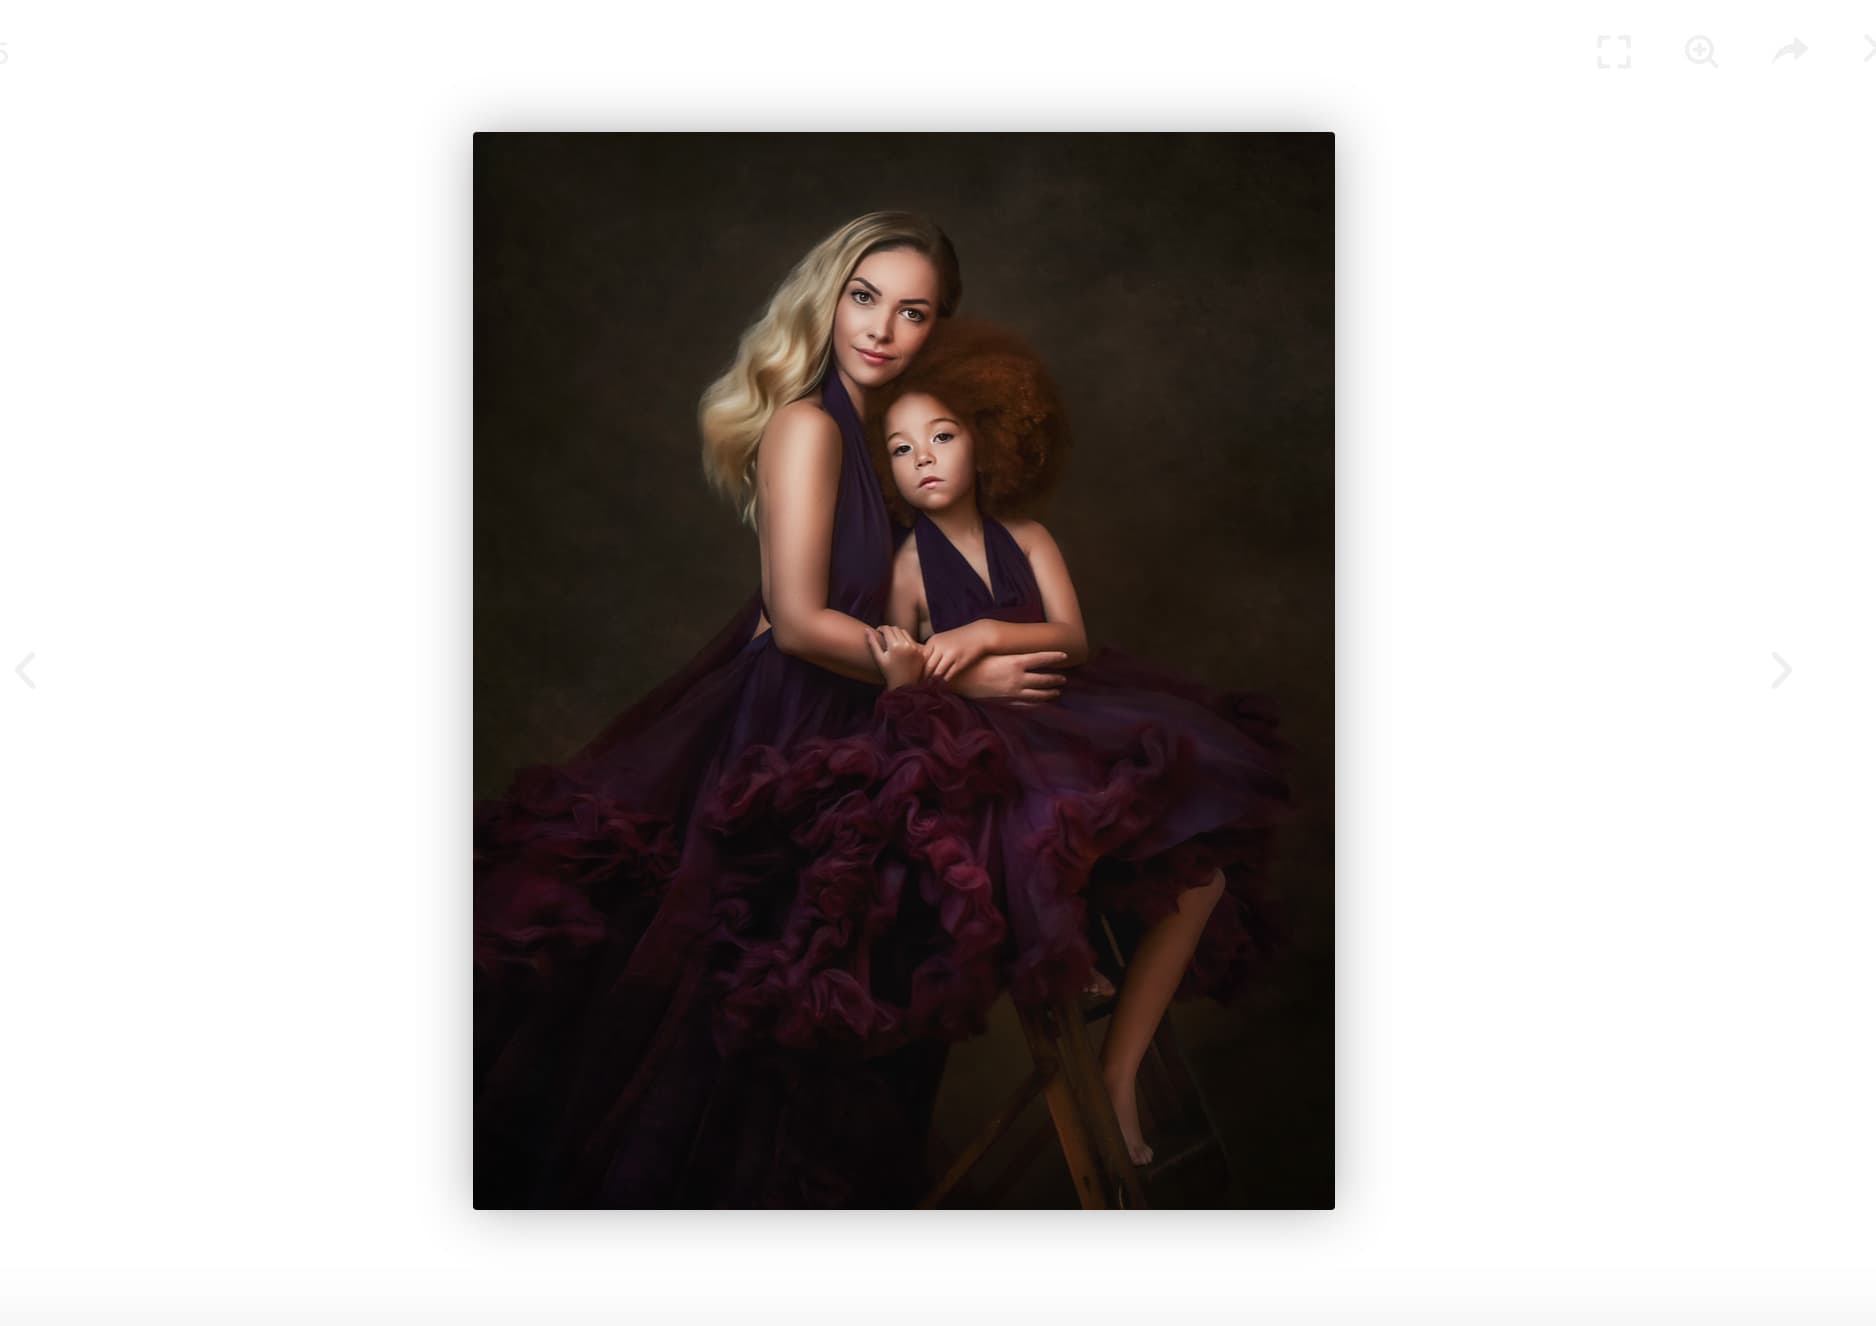
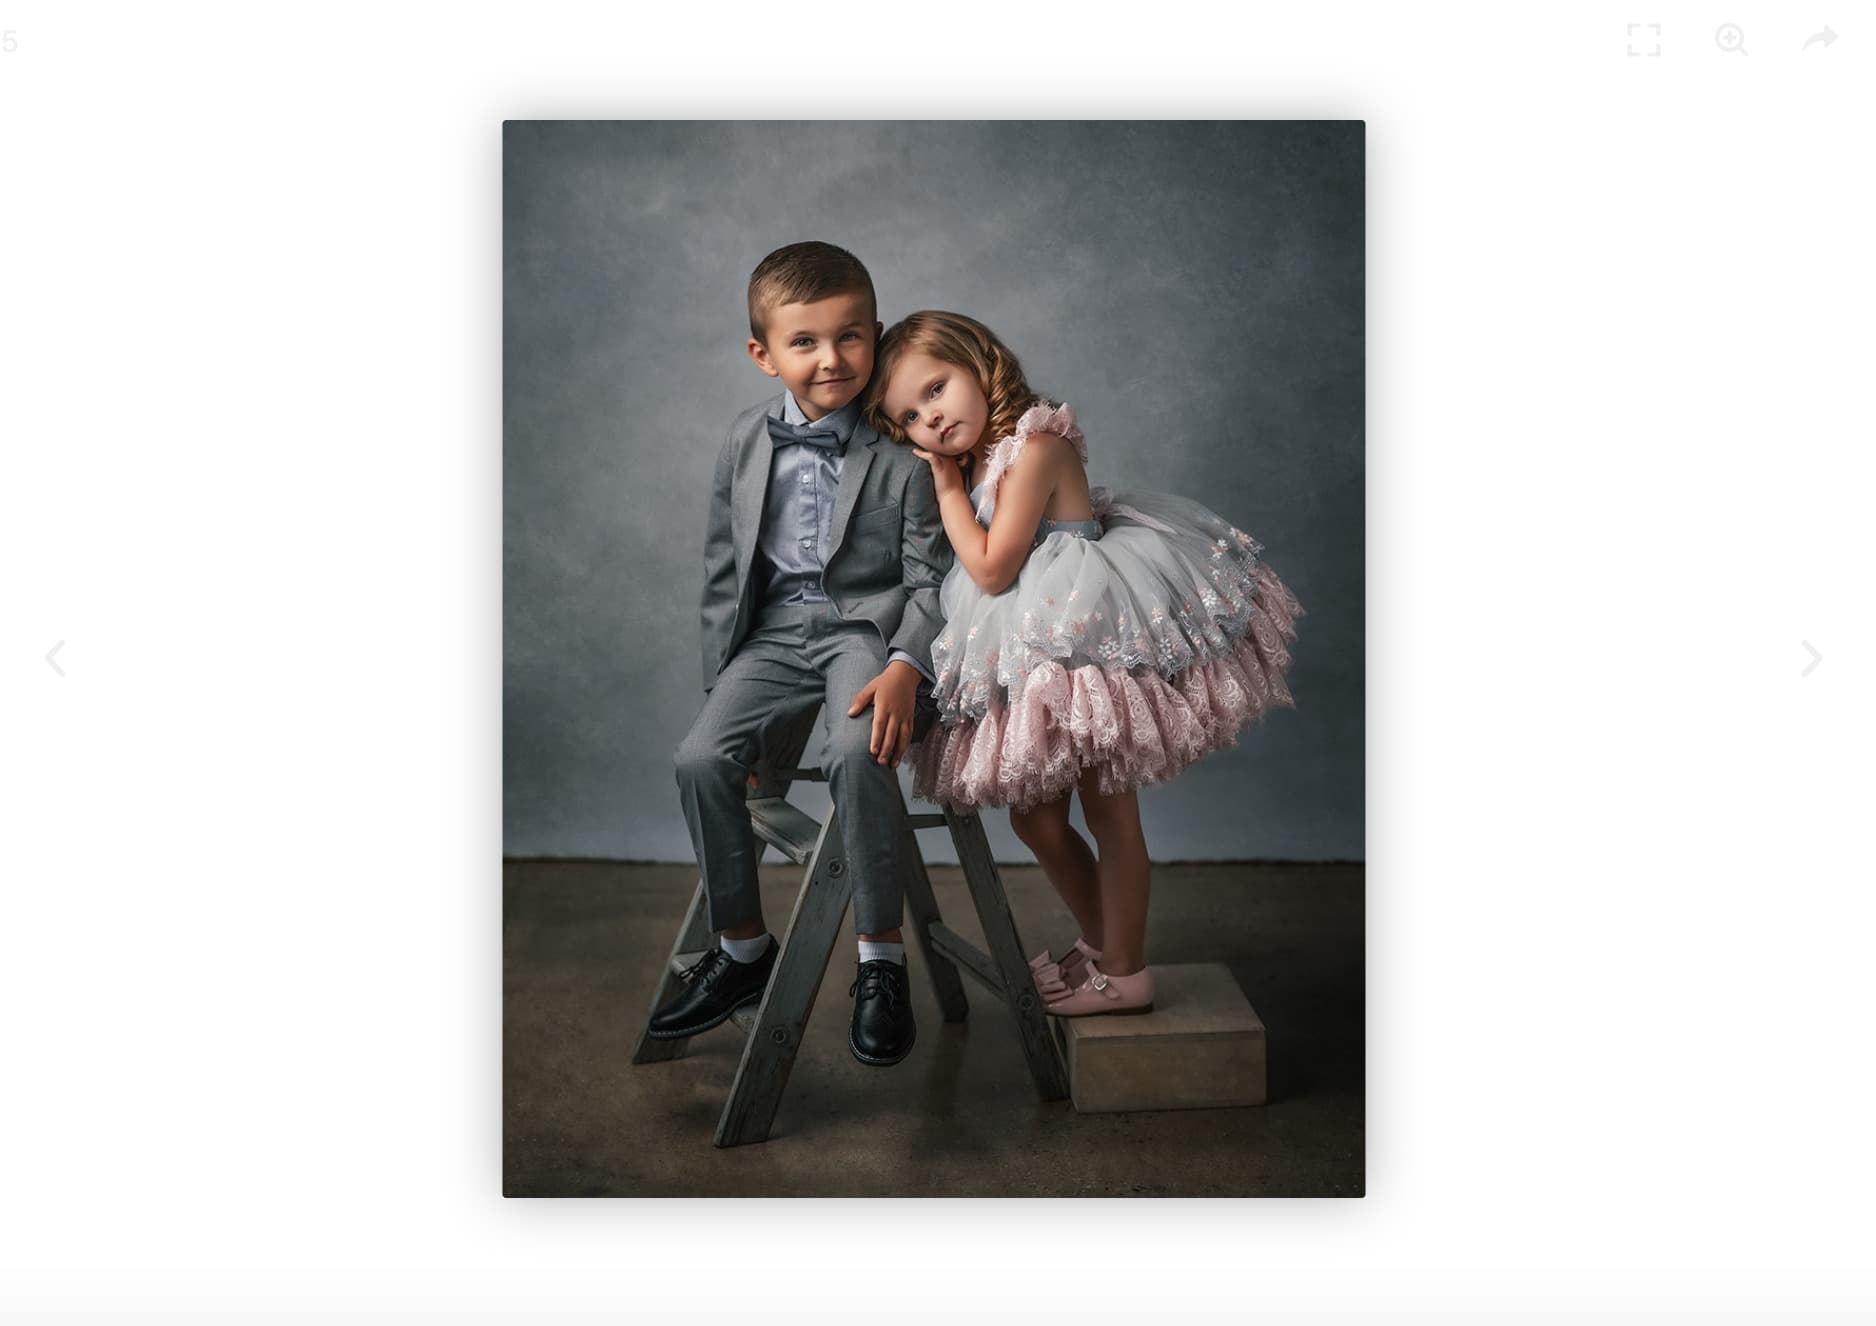
Create connections
Families want to appear their best in the moments that you’re preserving so it’s your responsibility to pose each person with the aim to flatter, as well as to connect each person so that the family looks like a cohesive unit. Personally, I don’t try to draw out reactions from my subjects – if smiles happen, they happen naturally; I prefer focused faces, images that show the family’s connection and of them being together in the moment.
Learning poses and how to adapt them to different subjects takes time and practice. I visit museums and galleries, read magazines and scroll Pinterest for ideas. Never force a pose by reading a subject’s body language; gently shape and instruct with a calm voice.
When posing siblings, you need to consider the relationship, too. The eldest can appear gentle, warm and protective over younger siblings but brothers or sisters together can look strong and confident. For fathers and young children, the bond is often shown through closeness and firm hugs; with teenagers, poses need to be more relaxed and show friendship. For mothers, it’s usually all about tenderness, the similarities to their daughters and the protectiveness older boys feel towards their mothers.
Light the way
Whilst I use a one-light studio set-up, you can create fine-art portraits using natural light just as well. I find it’s best to keep set-ups simple so as to concentrate on the subjects, which is why I tend to use only one key light with a 150cm octabox, even for family groups, owing to its large, soft pools of light, and I alternate between four main techniques: butterfly lighting, split lighting, loop lighting and Rembrandt lighting – using a reflector when necessary.
Loop lighting is one of my most favoured because it creates a loop-shaped shadow leading down from the nose towards the cheek by placing the light above eye-level and approximately 30° to the subject. The loop should never touch the shadow under the cheek as that would create Rembrandt lighting, which makes it easy to transition from one to the other. For Rembrandt lighting, the triangular shadow from the 45° light should not be wider than the eye or extend below the model’s nose.
Paulina’s best kit
Nikon 105mm f/1.4E ED A remarkable lens with a bright f/1.4 aperture that creates distinctive, exquisitely soft bokeh and eliminates all distortions – subjects are as sharp along the edges as they are central in the frame, even at its widest aperture. Godox AD300Pro TTL studio flash and 150cm Octabox Although the AD300Pro is promoted as a location flash, it’s perfect for my studio because it is battery powered –so there are no cables to create hazards for clients to navigate. The light is so soft that it allows me to shoot with apertures as wide as f/2.