We show you how to use the High Pass filter for advanced sharpening in Photoshop, as a better alternative to the unsharp mask filter…
Together with the options found in raw conversion software packages, the most common type of sharpening filter is the Unsharp Mask. Sometimes a gentle pass of this is all that’s required to give the impression of extra detail in images, but it’s not best suited to all kinds of images.
The High Pass filter is just one alternative. It’s particularly useful when dealing with images containing many edges, as it aims to define these while having little effect on low-frequency areas.
 Advanced image sharpening step 1 – Create a new layer
Open up your image in Photoshop’s main working space.
Duplicate the background by either dragging the Background in the Layer’s palette onto the
Create a New Layer button below, or using the Command J shortcut (Ctrl+J for PC users).
 Advanced image sharpening step 2 – Apply the filter
Select the High Pass filter from Filter>Other>High Pass, and adjust the radius to between 5 and 10.
The exact value will depend on your image, although you should be able to see what stands to be affected as you increase this.
Once you’re happy with the amount click OK.
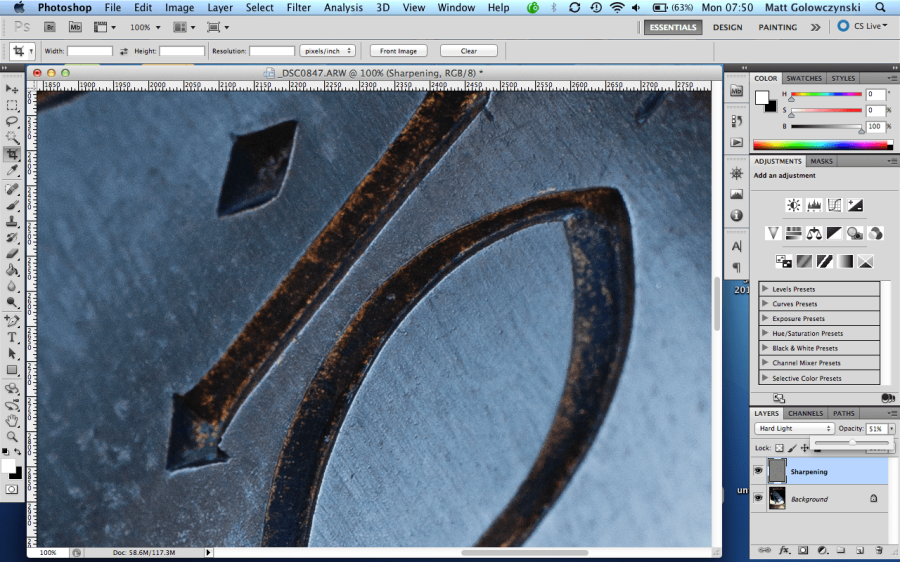
 Advanced image sharpening step 3 – Adjust the filter
Zoom in to the image until you reach 100% (View>Actual Pixels).
In the Layers palette change the filter’s blending type to either Overlay or Hard Light – you can change this later on so don’t worry too much about choosing one or the other.
Then move to the Opacity control next to this and adjust it until you’re happy with the sharpness.


