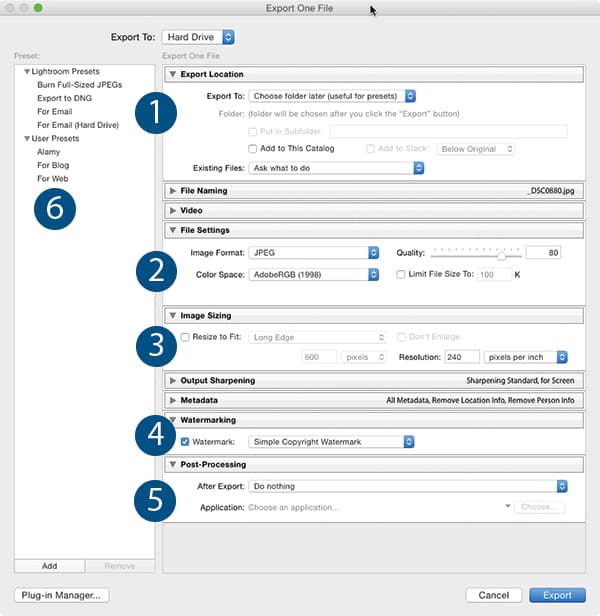
1. Export To…
The first decision to make is where you’re going to save your exported image.
Images can be exported to a specific folder, to the same folder as the original raw file or you can choose the export location later, as the final stage in the process. The ‘Choose folder later…’ option is probably the best to use in most instances, as it allows you to decide where to save images on a case-by-case basis. This is especially true if you plan to use a lot of Preset export options. For example, you may require the same file-size settings for numerous projects you’re working on, but want the images to be saved to different locations. You can apply your Preset export settings to a batch of images at once, but rather than the images being saved to a default location you can choose a different location every time.
If you’re working on a final set of images, or perhaps web versions of images, then another useful option is to ‘Put in Subfolder’. This option can work very well when combined with the ‘Export To: Same As Original Photo’ option. So, for example, if I have all my raw files from my trip to Malta in a folder called ‘Malta’, I can have a Preset that creates a sub-folder in the Malta folder called ‘Web Images’. It will then save lower-resolution JPEG files in this folder. It’s especially clever, as this Preset will also work with all my Lake District images: in each case all the Preset is doing is creating a new folder called ‘Web Images’ in a parent folder.
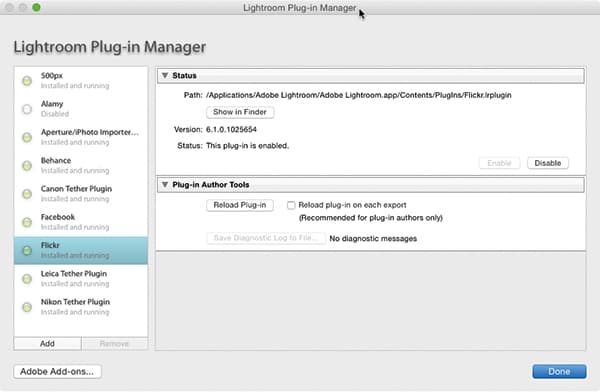
Plug-in Manager allows you to add export options.
2. File Settings
The options that are available to you in the File Settings window depend entirely on the format that you wish to save the image as. Images can be exported as JPEG, TIFF, PSD, DNG or as the same as the original file type. Most of the time, files will be exported as JPEGs and you’ll have the option to choose the colour space, the quality and whether to limit the final file size. As with all the various export options, the choices you make will depend entirely on what you plan to do with the exported image. Obviously, if you’re saving the image for website use it may be worth limiting the file size. However, if the image is going to be printed, the JPEG quality setting should be set to 100, or the file should be exported as an uncompressed TIFF file.
3. Image Sizing
One of the most useful tools within the Export setting is the ability to alter the size of the image. This can be useful if you have to submit a file for a competition, or to a stock library that requires images of a specific size.
It also allows you to create smaller versions of your images for internet use. There are numerous options under the ‘Resize to Fit’ drop-down menu, including the ability to save an image at a set number of megapixels, or to apply a specific dimension to the longest or shortest edge of an image – which is particularly useful if your images are a mix of portrait and landscape format. It’s also worth noting that there is a ‘Don’t Enlarge’ option. With this option selected images will not be made any larger than their original dimensions.
4. Watermarking
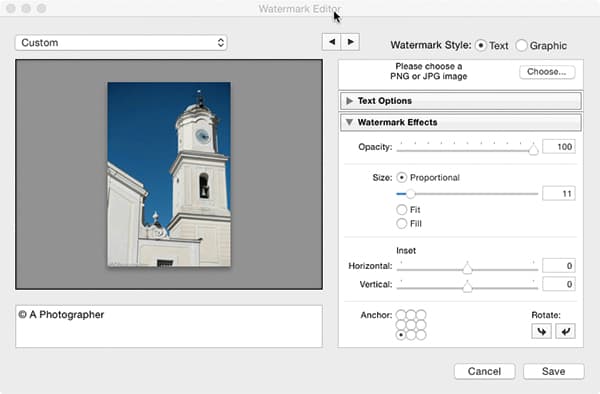
Creating a text or graphic watermark is simple.
Although having a large watermark on your images can be distracting, a small copyright notice with your name and perhaps a website link can be very useful if you’re putting your images online. Within the Export panel of Adobe Lightroom there’s the option to add a watermark, and you can create your own using the built-in watermark editor. This is extremely simple and basic to use, and allows you to add a watermark in the form of text or a graphic. Usefully, there’s the option to add the watermark at a size proportional to the exported image, so you don’t need to have different watermarks depending on the size of the image you’re exporting.
5. Post-Processing
If you plan to carry on working on your image once you’ve exported it, you’ll find options in the Post-Processing tab for what to do after exporting. If you plan to edit in Adobe Photoshop, then there’s already an option in the menu for this, although you can also choose any other installed application in which to open the image.
6. Presets
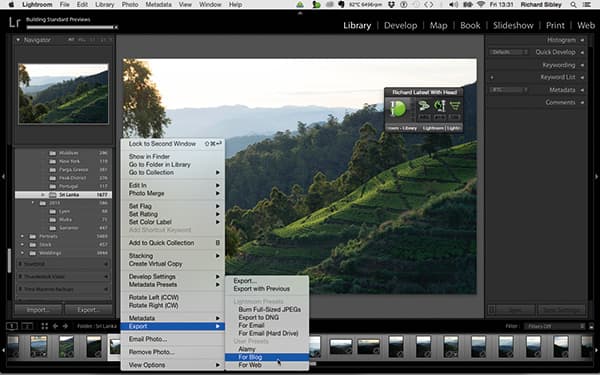
Most photographers will have particular ways of working with their images that they will use time and time again. This is why once you’ve worked out how you’re going to export your images it’s worth saving it as a Preset. For example, you may wish to have an option that lets you export an image at a specific size for your blog, or one that will allow you to export an image that is perfect for a glossy A3 print. Once you have created the Preset, you’ll find that it’s available in the right-click menu in Lightroom. All you have to do is right-click on the image, select your chosen Preset export and Lightroom will start rendering it.
Martin Evening’s expert tip

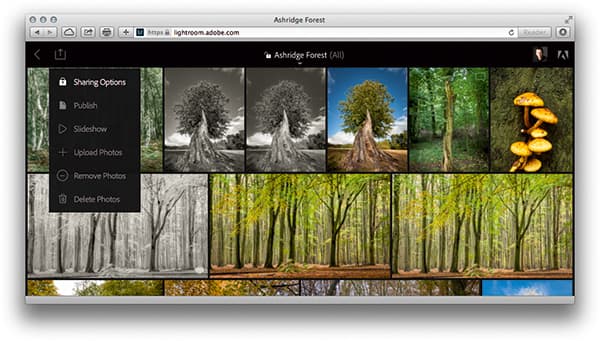
When you sync a collection with Lightroom Mobile you can share it with friends and colleagues via a web link.
Those who subscribe to the Adobe Creative Cloud will be able to create collections that synchronise with Lightroom Mobile. When you do this, there is a Make Public button in the Toolbar. Clicking on this generates a web link that can be shared with clients, friends or family, that will allow them to be view your images as a web gallery. Anyone who has an Adobe ID (they don’t have to be a subscriber to the Cloud) can also interact with a Lightroom web view gallery to add likes and comments. The Lightroom web view photographs are also dynamically updated as you make any edit changes to the master images in Lightroom. Working photographers can invite clients to monitor the progress of a shoot edit as they process the master images in Lightroom.


