The art of processing and manipulating images is nothing new. In the days before home computers, photographers would spend hours under their darkroom safelights, dodging and burning their prints. Then, in 1990, Adobe released its first edition of Photoshop, ushering in the transition towards digital processing. While early versions were fairly limited, yearly updates brought increasing functionality to the software and by the time the 1990s drew to a close, Photoshop had established itself as the industry standard image-editing application. Despite this, it remained prohibitively expensive. To address this, Adobe launched Photoshop Elements in 2001 as a kind of slimmed-down and cheaper version of the full-fat version. While Elements made image editing more affordable, it was never intended as a complete solution.
By the mid-noughties, when most photographers had embraced digital camera technology, there was increased demand for an application more specifically tailored to their workflow needs. To this end, Adobe released Lightroom in 2007. With a launch price of £200, Lightroom v.1 offered what was, for the time, a comprehensive toolset that included Raw conversion, non-destructive image editing and basic cataloguing. Since then, Lightroom has undergone numerous updates to become much more powerful, adding things like localised adjustments and automated lens-specific corrections to the mix. In fact, many photographers – amateur and professional alike – now routinely use it as their primary image-editing application.
Unlike Photoshop, which is only available through Adobe’s Creative Cloud subscription plan, you can still buy a boxed copy of Lightroom 6 (the current version) for around £110. You will need to pay for any future upgrades, however, which generally arrive around every 12-18 months. For this reason, you might want to consider subscribing to Adobe’s Photography package, which bundles Lightroom and Photoshop together for £8.57 a month (£102.84 a year). While you’ll never actually own a physical copy of either application, you will receive all the major software updates as soon as Adobe rolls them out. In addition, you’ll also gain access to a supporting cast of apps designed specifically for mobile devices. If you’re still not convinced, Adobe offers a free one-month Lightroom trial. If you’ve not tried it yet, then you really should give it a go.
Lightroom frees you up to shoot in Raw and obtain the very best from your images, so let’s check it out. Of course, we can’t cover absolutely everything, but we hope to leave you with a good overview of what it’s capable of.
Lightroom basics
The first thing to understand about Lightroom is that it’s very distinct from Photoshop. While Photoshop is incredibly useful, it is a much broader application that is designed to be used by all kinds of creative digital media professionals. Lightroom, on the other hand, is specifically for digital photographers.
In the broadest terms, Lightroom aims to provide you with all the tools you need to import, organise, edit, export and share your images. To facilitate this, Lightroom is broken down into seven different modules that are displayed along the top right-hand side of the main window: Library, Develop, Map, Book, Slideshow, Print and Web. Clicking on any of these will open the user interface that’s specific to that particular module. Library deals with importing, exporting and organisation of your images. Develop is the main image-processing and Raw-conversion module. Map allows you to group images together by location. Book allows you to create storybook layouts for online self-publishing service Blurb. Slideshow allows you to build slideshows and export them as movie files. Print contains everything you need to print your images. And, lastly, Web allows your to build customised image galleries and upload them directly to your website. Let’s now take a closer look at each of these in turn.
Library module
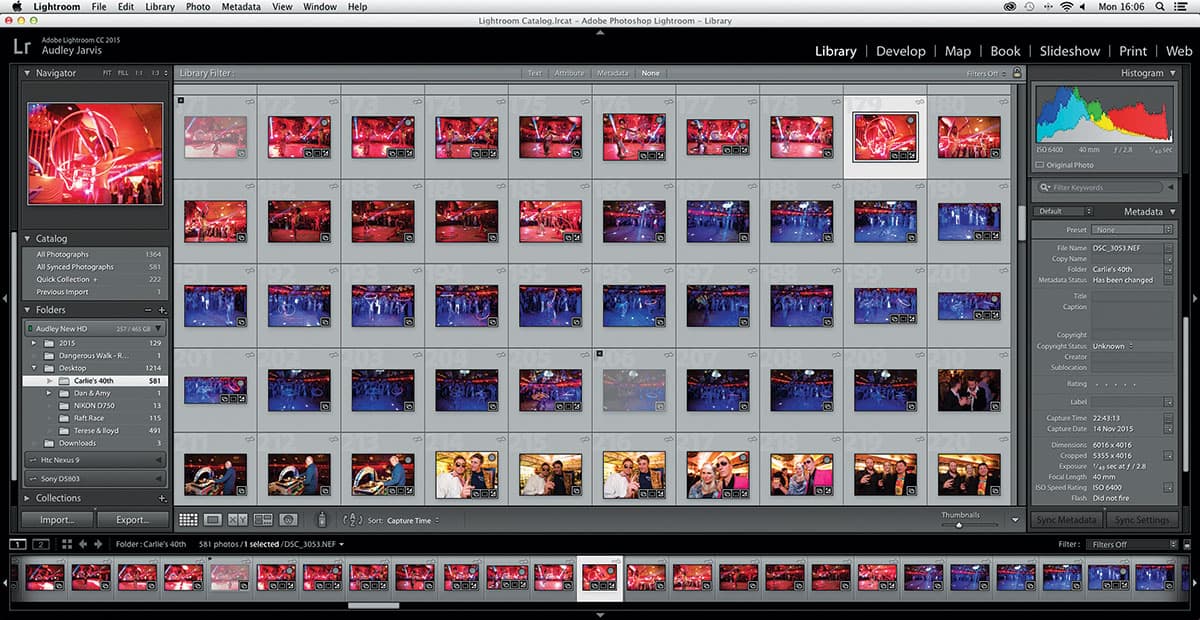
The Library module can be used to search through all of the images inside a Catalog, and also displays a histogram plus metadata information for each image
This is where you import new images to Lightroom as well as export those that you have finished processing. In addition, it can also be used to browse images that have already been imported, or to add tags, captions and other metadata to them. Lightroom supports all of the most common image file types including RAW, JPEG, DNG, TIFF, PSD, CMYK and PNG files, alongside a number of video files.
New images can be imported to Lightroom in a variety of ways. One important thing to grasp first, however, is that Lightroom is non-destructive. This basically means that your original images will not be altered in any way, regardless of how much processing you apply to them inside Lightroom. The way it works is that Lightroom creates a ‘Catalog’, which is essentially a database that contains all the data for each image, along with its location. You can fill these Catalogs with images, process them as you see fit and then export your processed images to a new location. Exported images are created as unique new files distinct from the originals. You can create as many individual Catalogs as you want and Lightroom will automatically remember which images belong in each, along with any previous edits.
How you organise your images and how many individual Catalogs you create is entirely up to you. Some users choose to create a new Catalog for every major processing project they embark on, while others lump everything together in a single Catalog. You can quickly and easily switch between catalogs by clicking on the ‘Open Catalog’ command in the ‘File’ tab at the top of your computer screen. In addition, it’s also possible to view only the images that belong to a particular image folder within any Catalog. You’ll find these folders listed on the left-hand pane of the Library module under the Folder menu; click on one and Lightroom will only display the images that belong to that particular folder. Lightroom will regularly prompt you to back up your Catalogs and this is something you should definitely do – especially if they contain hundreds of images that you’ve invested a lot of time processing.
Once you’ve decided which Catalog you want to import a fresh set of images into, you need to decide how Lightroom imports them. You have a number of choices: Copy as DNG entails converting your image files to the .DNG (universal Raw) format, moving them to a new location on your hard drive and then importing them; Copy entails copying your files to a new location and then importing them; Move entails moving the original files to a new location and then importing them; and lastly, Add imports your original files directly from their current location. Each of these options has its own benefits, but if you are just starting out then you may find it easiest to put the folder containing your new images in a specific place on your hard drive before you’ve even opened Lightroom – for example within a sub-folder of a more general ‘photography’ folder on your desktop – and then select the Add option. This way, you can keep all of your original image files in one place.
In addition to using the Library module to import photos, it’s also where you export processed images from. While in the Library module the main window in the centre of the interface displays thumbnails of all the images inside the current Catalog, simply highlight the ones you want to export and press the Export button. You can export single images or batches of images, and there’s a huge array of options when it comes to quality and sizing. Adobe supplies a number of one-click Export presets to help speed things up, and naturally you can add your own custom presets to these. In addition to exporting your images as JPEGs, you can also choose to export them as .PSD, .TIFF, or .DNG files. One other important function of the Library module that’s worth remembering is the ability to write additional data to your images, such your own tags and captions. The tools for this can be found on the right-hand side of the Library module.
Before we move on to look more closely at the Develop module, one final tool that’s available within the Library module is the Quick Develop tool. This is found on the right-hand side of the window, just above the Keyword and Metadata tools. This time-saving feature can be used to process single or multiple images using stored presets. Adobe provides a number of ready-made presets for you to use, but you can create your own or install third-party presets, too. Any adjustments made via the Quick Develop tool will automatically show up in the Develop module for each image the preset has been applied to (i.e. the sliders will all automatically move to the right place). While it’s obviously not a great idea to make sweeping changes to the exposure settings for all of your images in one go, the Quick Develop function can be useful if you want to apply a uniform white balance or tone curve to a batch of images, and could save you quite a lot of time compared to applying the settings to each individual image inside the Develop module.
Develop module
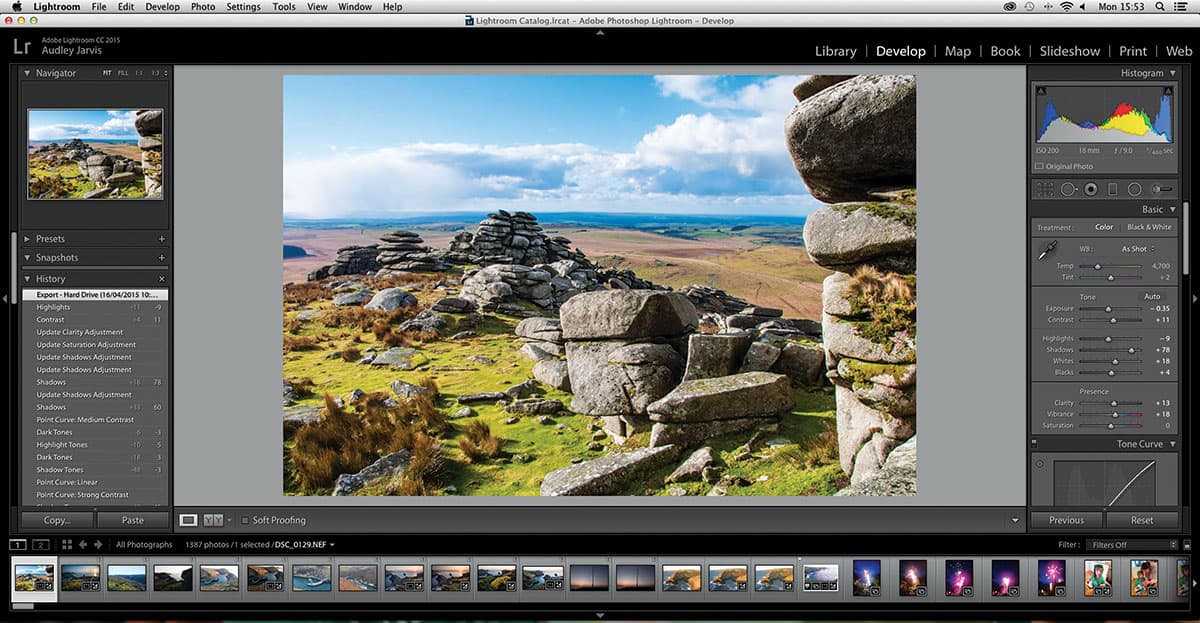
The Develop module is where you make adjustments to each image. Unlike the Develop module you can only view one image at a time. The filmstrip at the bottom of the window can be used to skip quickly between different images
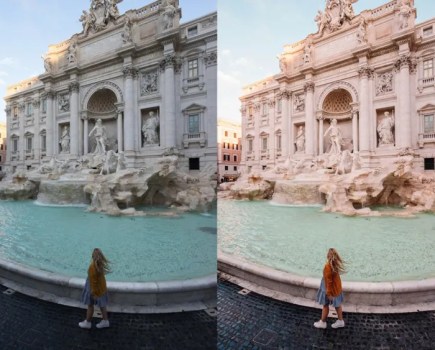
The Develop module is where you’ll find all the tools needed to process your images and bring the best out of them. Consequently, it’s where you’ll likely spend the majority of your time. While Lightroom can be used to enhance JPEGs, you will enjoy a far greater amount of flexibility if you work with lossless Raw files instead. This is because Raw files retain all of the data captured by the camera’s sensor, which in turn gives Lightroom much more to work with.
The Develop interface is actually pretty straightforward, even if it might appear daunting at first. Unlike the Library module, where you can view thumbnails of all the images inside a Catalog, in Develop you can only view one image at a time. The Filmstrip on the bottom panel of the Develop module is used to scroll through – and open – other images inside the Catalog. The Navigator panel in the top left-hand corner can be used to select how big you want to view the image. By default, it’s set to Fit, which allows you to view all of your image in the main image window. If you choose to work at 1:1 (100%) or above then your image almost certainly won’t fit on to the screen. In this case you can use the small square inset within the Navigator box to quickly move around the image.
Directly below the Navigator panel you’ll find a list of Presets, which are exactly the same as those found within the Quick Develop panel in the Library module. If you’ve forgotten to use a preset on an image, then you can do so from here, too. Below this is a Snapshots option, which allows you to take a snapshot of the image you are currently processing so that you can make quick comparisons at various stages of its processing history.
Below this is the History panel, which lists in chronological order every individual edit you’ve already made to an image. Clicking on any edit in the list will take you to how the image looked at that point of the editing process. Right clicking your mouse button allows you to take a quick snapshot for easier comparisons as outlined above.
Over on the right-hand side of the Develop module is where you’ll find Lightroom’s extensive list of processing tools. At the very top is a histogram that also supplies basic camera data including shutter speed, aperture and ISO settings. You can actually use the histogram to adjust the Blacks, Shadows, Exposure, Highlights and Whites of your image; simply hover your cursor over the histogram until it highlights the setting you want to change, then left-click and move your mouse left or right to adjust it. Alternatively, you can also use the individual sliders in the Basic panel just below the histogram to make these adjustments.
Adobe has added lots of useful features to Lightroom’s image processing toolset over the years and while the application still doesn’t allow you to work in layers, you can use brushes to make a good selection of localised alterations including exposure, clarity, saturation and sharpness. Alongside the brush tool, you will also find a graduated neutral-density filter tool, a red-eye reduction tool, a spot cloning tool, and the crop and straighten tool. If you do need to work in layers and you already own a copy of Photoshop (or if you subscribe to Adobe’s Creative Cloud Photography plan) then the process of taking an image from Lightroom and opening it in Photoshop is as easy as pressing the ‘Edit in Photoshop CC’ option, which you’ll find under the ‘Image’ tab on the top of your computer screen.
Below the Basic adjustments panel, you’ll find separate Tone Curve, Colour adjustment (including B&W conversion tools), Split Toning, Detail (sharpening and noise), Lens Correction, Effects (vignetting) and Camera Calibration panels. Combined, they give you a huge degree of control. While we don’t have the space to go into detail about the specific effects each of these tools have, most should be fairly recognisable to anyone who’s ever used an image-editing application before. If you’re using an interchangeable-lens camera, then one thing we do recommend doing as a matter of course is checking the ‘Enable Profile Corrections’ box in the Lens Corrections panel. This basically uses stored lens data to automatically correct any distortion issues and also minimises unsightly chromatic aberrations. The results are instantly noticeable, especially if you’re using a wideangle lens that’s prone to barrel distortion.
Map, Book, Slideshow, Print & Web modules

The Map module works with Google Maps and allows you to add location information to your images by placing them on a map
Beyond Library and Develop, the five remaining Lightroom modules are primarily tools of convenience, which is to say they aim to make lighter work of doing specific things with your photos once you’ve finished processing them. While most photographers are unlikely to spend a great deal of time in any of them, they are nevertheless still worth exploring.
The main function of the Map module is that it enables you to geotag your images with the help of Google Maps. You can, of course, do this in real time with the aid of a smartphone while you are out shooting, or you can do it in the Map module afterwards. While using the Map module is slightly less accurate than using an app on your smartphone to create a ‘tracklog’ that plots your precise route and then sync it with Lightroom, it’s also less time consuming, less fiddly and still remains accurate to within a few metres.
To use the Map module simply zoom in on the map and then drag and drop the image(s) on the precise location where they were taken. Lightroom will then import longitudinal and latitudinal data from Google Maps, which will be added to the image’s metadata file when you export it.
The Book module allows you to create storybook layouts that are compatible with online self-publishing service Blurb. You’ll find all the same tools provided by the company’s bespoke application. If you don’t want to order through Blurb, you can also use the Book module to produce PDF or JPEG book layouts that you can export to your own computer and print yourself.
The Slideshow module is, as the name suggests, used to create slideshows. Lightroom gives you a range of tools, including intro and ending screen, drop shadows, background images, watermarks and suchlike. You can also add your own music tracks to accompany them. They can be exported as MP4 movie files in a range of quality options including 720p HD and 1080p Full HD. Alternatively, you can export them as PDFs.
Also fairly self-explanatory is the Print module, which allows you to print images directly from Lightroom rather than having to open up a separate application. Naturally, it offers all the regular quality and sizing options you’d expect, along with paper type selection and colour management options. If you have a wireless printer, then you can set it up from inside Lightroom.
Finally, the Web module is dedicated to the creation of image galleries for the internet. In addition to a wide range of layout, template, captioning and watermarking tools, you can also choose whether the finished page is displayed via HTML or Flash. Once your page is ready, it can be uploaded via FTP to your own website.
Lightroom Plug-ins
Plug-ins are third-party add-ons that are used to enhance the functionality of Lightroom. As such, they are designed to operate within Lightroom rather than as standalone applications. That said, some do open a new window within the application. While professionally made plug-ins generally cost money (and can be quite expensive), there are many thousands that can be downloaded and used completely for free. In terms of functionality, plug-ins can do all kinds of things and while image processing presets for Lightroom’s Develop module are by far the most common type, you will also find plug-ins that are designed to make lighter work of exporting your Lightroom images to blogs, social media websites and cloud storage services. In addition, there are are also plug-ins that allow you to temporarily export and process your Lightroom images in other processing applications, for example DxO Labs and Photomatix Pro.
Add-On Portal
Because there are so many plug-ins and presets available for Lightroom, finding one that’s right for you can be quite time-consuming and frustrating. Typing something like ‘Best free Lightroom presets’ into Google, for example, returns hundreds of results, many of which will take you to websites that appear to be more interested in obtaining your email address than actually providing you with any free presets. One way round this is to use Adobe’s official Add-on portal by typing in the address above (exactly as written, no need to add ‘www’). Once you’ve opened the portal, click on Lightroom and then specify whether you’re looking for a paid or a free plug-in. There are literally thousands to choose from, plus a useful search tool that can help to narrow down the results.
ON1 Presets
In addition to offering an excellent range of paid-for processing and effects applications, including On1 Photo 10 and On1 Effects 10, American software company On1 also offers a generous range of free Lightroom preset plug-ins. This includes two ‘Signature’ collections, along with a range of other, more specialised preset packages that cover everything from vintage looks to B&W treatments. The presets are free to download direct from the website, although you will need to supply an email address. Simply follow the installation instructions and you’ll be able to access them directly from the Presets panel in Lightroom.
VSCO Films
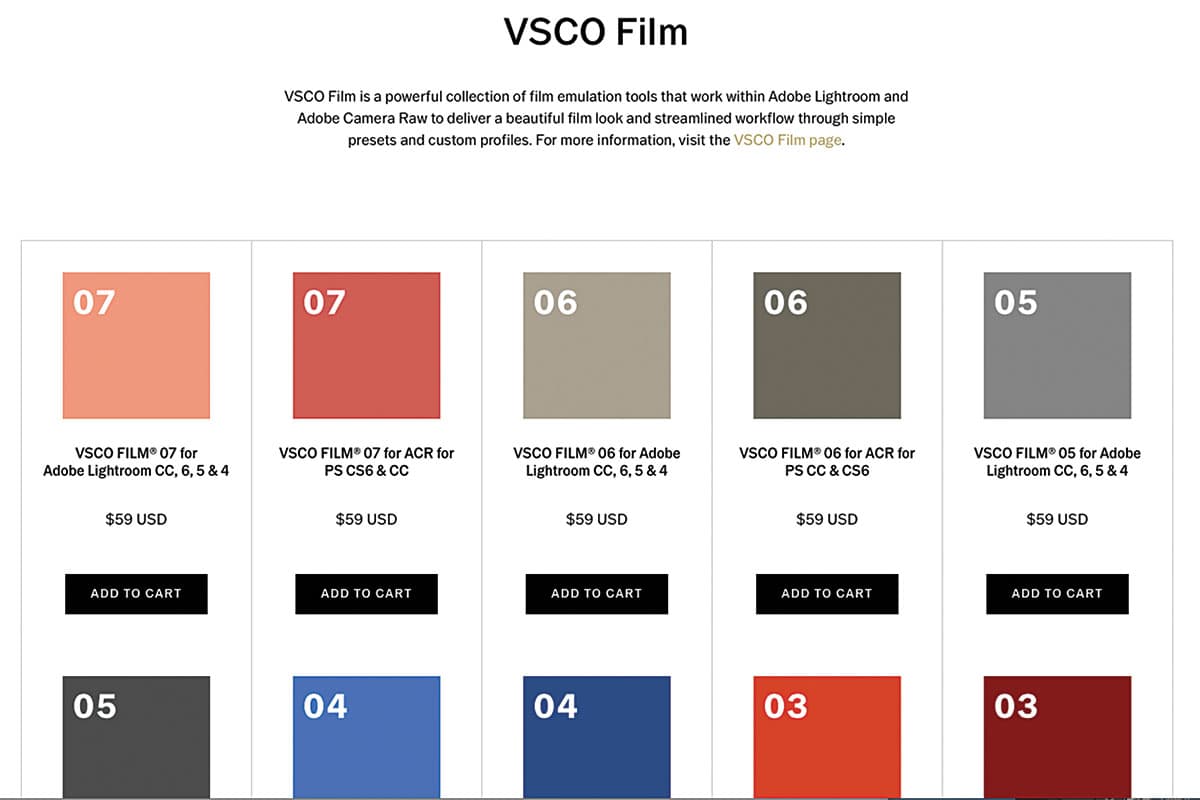
VSCO offers a range of professionally crafted Lightroom preset plug-ins that aim to reproduce the look of classic film. There are seven individual collections, each of which costs around £40 and concentrates on a particular genre of film. These include: 01 Modern Films, 02 Classic Films, 03 Instant Films, 04 Slide Films, 05 Archetype Films, 06 Alternative Process Films, and 07 Eclectic Films. In addition to the actual presets themselves, VSCO also provides custom camera profiles for each collection, in order to increase the accuracy of each film type even further. A full list of compatible cameras is available on their website.
Google Nik Software
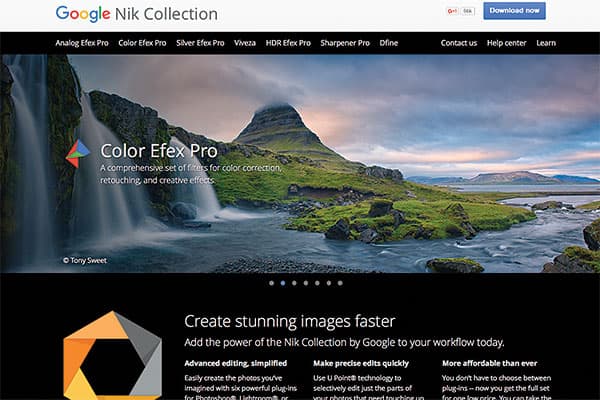
Nik Software has been making plug-ins for Photoshop since 1995. These days the company is owned by Google, which recently made the Nik range free. There are seven plug-ins, each of which is concerned with a specific task: Analog Efex Pro 2 offers a range of classic film and camera presets; Colour Efex Pro offers colour correction and creative effects; Silver Efex Pro enables professional-looking B&W conversion; Viveza offers precise toning and colour control; HDR Efex Pro enables stunning HDR effects; Sharpener Pro enables professional-grade image sharpening; and Dfine offers precise noise control. Additional content updates have now been discontinued, but the collection is still available for the moment.
Capture Monkey: The Fader
This useful bit of freeware allows you to control the opacity of your processing presets. Whereas most presets can only be turned on or off, with The Fader installed, you are able to select a specific percentage of that particular preset. According to its makers, The Fader will automatically re-compute the values for each setting and move the various sliders accordingly. From here you can, of course, make your own adjustments. And since The Fader ranges from 1% to 150% you can even choose to over-process your presets if that’s the kind of look you’re after.