Ever since Photoshop was first released, people have questioned the faithfulness of images. There’s no better example of this than the front covers of glossy glamour magazines where it’s become common practice to enhance a portrait shot in Photoshop for maximum impact and effect.
The great news for those who’d like to attempt portrait retouching is that it’s not out of reach. Whether you’d like to remove a few skin blemishes or attempt more advanced skin softening, you don’t have to be a professional retoucher or a Photoshop whizz kid to finish portraits to an exceptional standard.
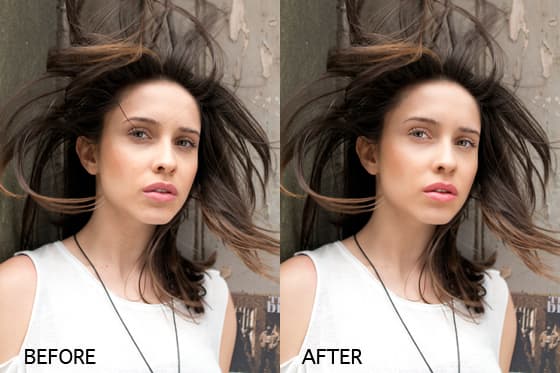
This step-by-step will reveal how portrait imperfections are eliminated to produce flawless-looking results. And if that’s not enough the technique will also run through how skin is softened effectively using layer masks to retain detail and texture.
If you fancy creating a professional looking portrait in less than 15 minutes make sure you follow these four steps to success. You can download the image we’ve used for this step-by-step here: Download image
Enjoy the technique!

 Portrait Retouching in Photoshop: Step 1 – Create a duplicate layer
Before starting any serious cloning and healing work in a portrait image it’s vital you identify the imperfections you’d like to remove. With the image open in Photoshop you’ll first want to hit the shotcut Ctrl+J to create a duplicate layer in the layers palette. Hit the letter B to select the brush tool. At the bottom of the toolbox you’ll find two coloured boxes. Double click inside the foreground colour box.
 Portrait Retouching in Photoshop: Step 2 – Identify the imperfections
With the colour picker now loaded move the vertical slider over on the right up and down until it’s set to a pink shade, then hit OK. Next circle any skin blemishes, hair strands or imperfections that you think require removal. Now select the background layer in the layers palette and go to Layer > Duplicate layer. Rename this layer Retouch in the dialog box and hit OK. In the layers palette drag the Retouch layer to the top of the stack.
 Portrait Retouching in Photoshop: Step 3 – Clone away the imperfections
To refer to the previously identified imperfections simply click on the eye icon beside the Retouch layer to temporarily turn it off. Hit the letter S to select the Clone Stamp tool and setup a brush size that’s slightly larger than the distraction you’d like to remove. By holding Alt you can sample the pixels you’d like to use for replacement and then it’s just a case of brushing over any distractions to remove them.
Expert tip – If you accidentally make a mistake when you’re cloning head to Window > History to retrace your steps before giving it another attempt.
 Portrait Retouching in Photoshop: Step 4 – Select the Spot Healing Brush
Any skin blemishes in portraits are very quick to remove with Photoshop’s Healing Brush tools. Select the Spot Healing Brush from the toolbox. The Sport Healing brush should be fractionally larger than the blemish you wish to remove as it works on a principle whereby it studies the area around the cursor before deciding on the best pixels to use to create a seamless blend. Brush over any blemishes to remove them.
Portrait Retouching in Photoshop: Step 5 – Soften the skin
To soften the skin you’ll want to create another duplicate layer to work on (Ctrl+J). Now head to Filter>Blur>Gaussian Blur and set the Radius to 20 pixels before hitting OK. Reduce the Opacity of the layer to 50%. Click on the Add Layer Mask icon at the bottom of the layers palette, which can be found to the left of the Create New Fill or Adjustment layer icon.
Portrait Retouching in Photoshop: Step 6 – Control the softening of the skin
Go to Edit > Fill. Set the Contents to Black and hit OK. Hit the letter D to reset the foreground/ background colours to their default setting and with the foreground colour set to white select the Brush tool. Setup a soft-edged 150px brush with an Opacity of 80%. Brush over the skin to soften it being careful not to brush over any areas that you want to remain sharp such as the eyes, eyebrows, eyelashes and lips.
Enhance Eyes with Curves

It’s not uncommon when shooting portraits for the eyes to appear slightly dark if you haven’t used a reflector at the point of capture. This is a relatively quick fix in Photoshop using selections and curves. First of all you’ll want to select the Lasso tool and check the Add to Selection icon is selected from the options bar. Select both eyes before feathering the selection using Refine Edge (Select>Refine Edge). Set the feather to about 60 or 70% and hit OK. Go to Layer > New Adjustment Layer > Curves. Plot a point on the horizontal line before pulling it up slightly to brighten the area around the eyes and the eyes themselves. To finish off close the Adjustments panel and you can turn the Curves adjustment layer on and off in the layers palette using the eye visibility icon to view the improvement from before to after.


