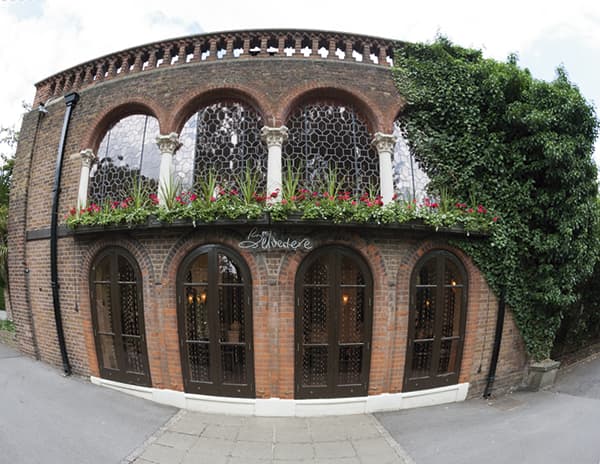
While there are problems with lens chromatic aberration and focus in the original image from Adrian Maltby, the biggest issue is the extreme lens barrel distortion. Rather than using a Photoshop lens profile, I used Camera Raw to apply a first-pass correction and then took the image into Photoshop, where I applied a further adjustment using the Lens Correction filter.
Before
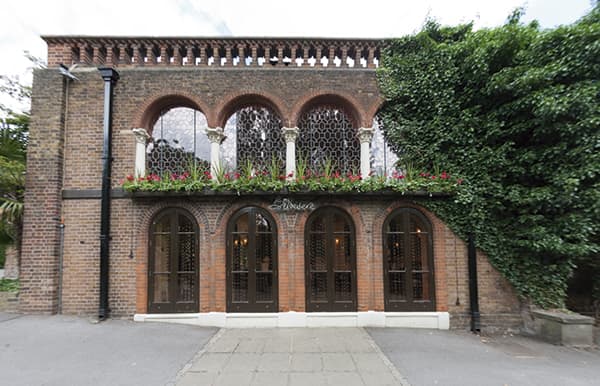
The result wasn’t perfect, but you will notice how many of the lines that were curved are now straighter and the globe in the top-left corner now appears less elliptical in shape.
After
1. Apply Camera Raw lens corrections
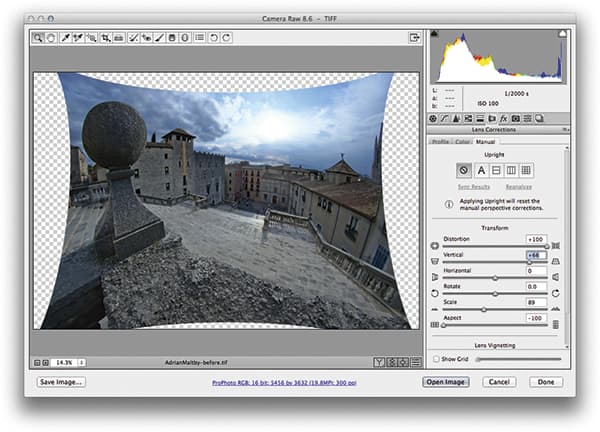 To correct the extreme lens barrel distortion, in Camera Raw I went to the Lens Corrections panel and applied the maximum +100 Distortion, +66 Vertical and -100 Aspect slider adjustments to compensate for the vertical stretching.
2. Add Basic panel adjustments
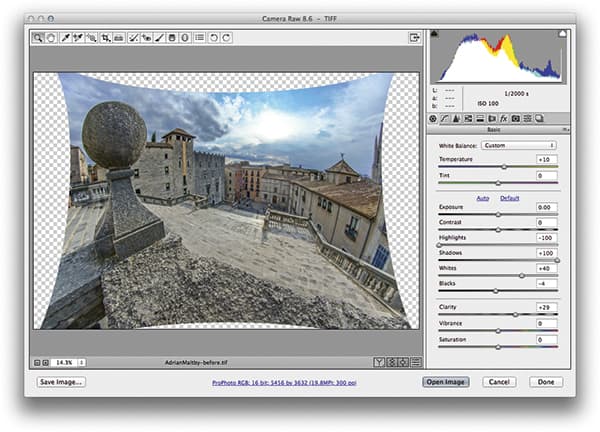 In the Basic panel, I applied a -100 Highlights adjustment to reveal detail in the clouds and sky, and a +100 Shadows adjustment to show detail in the shadow areas. I also warmed the image slightly and added some Clarity to boost the midtone contrast.
3. Apply the Lens Correction filter
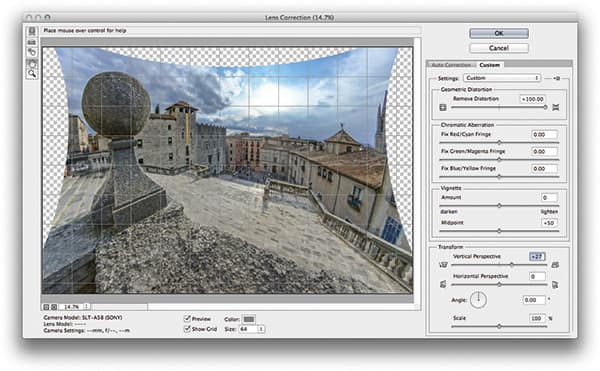 The geometric distortion was not fully corrected so I opened the adjusted image in Photoshop. In the Filter menu I selected the Lens Correction filter and applied a maximum Distortion correction along with a +27 Vertical Perspective correction.
Lens corrections
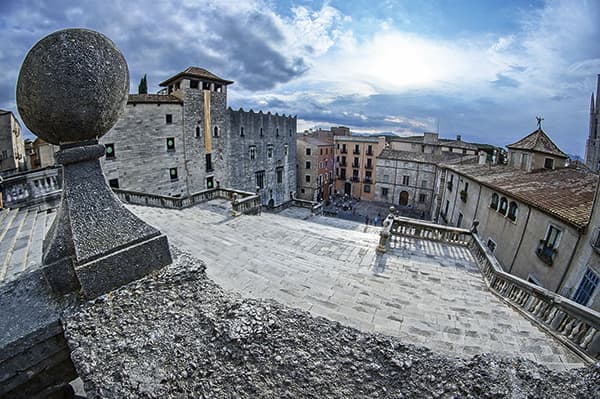
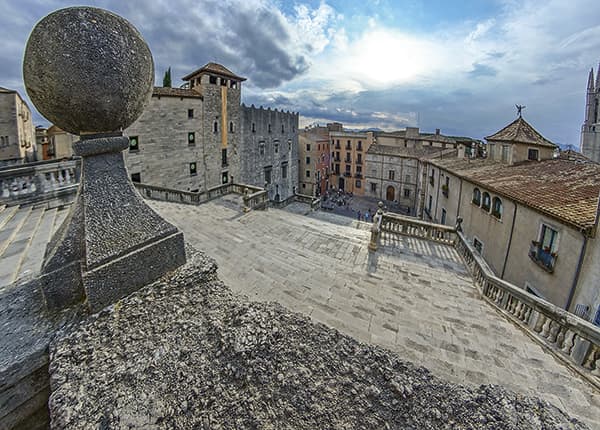
Lens corrections in Photoshop or Camera Raw are possible due to Adobe having a database of lens profiles for many different camera lenses. This includes most of the popular brands and models. Basically, the software is able to reference the camera’s Exif lens data, and using that information it knows exactly how to correct known lens anomalies such as geometric distortion and vignetting. It’s not just the lens corrections in Camera Raw and Photoshop, but also other tools such as the Adaptive Wide Angle filter and Photomerge that benefit from this feature. Shown here is a before and after example of a photograph shot with a fisheye lens automatically corrected using a lens profile.