
This photograph, by Anthony Jackson, was taken using a Ricoh Caplio GX100 at 15secs, f/2.7 and 100 ISO.
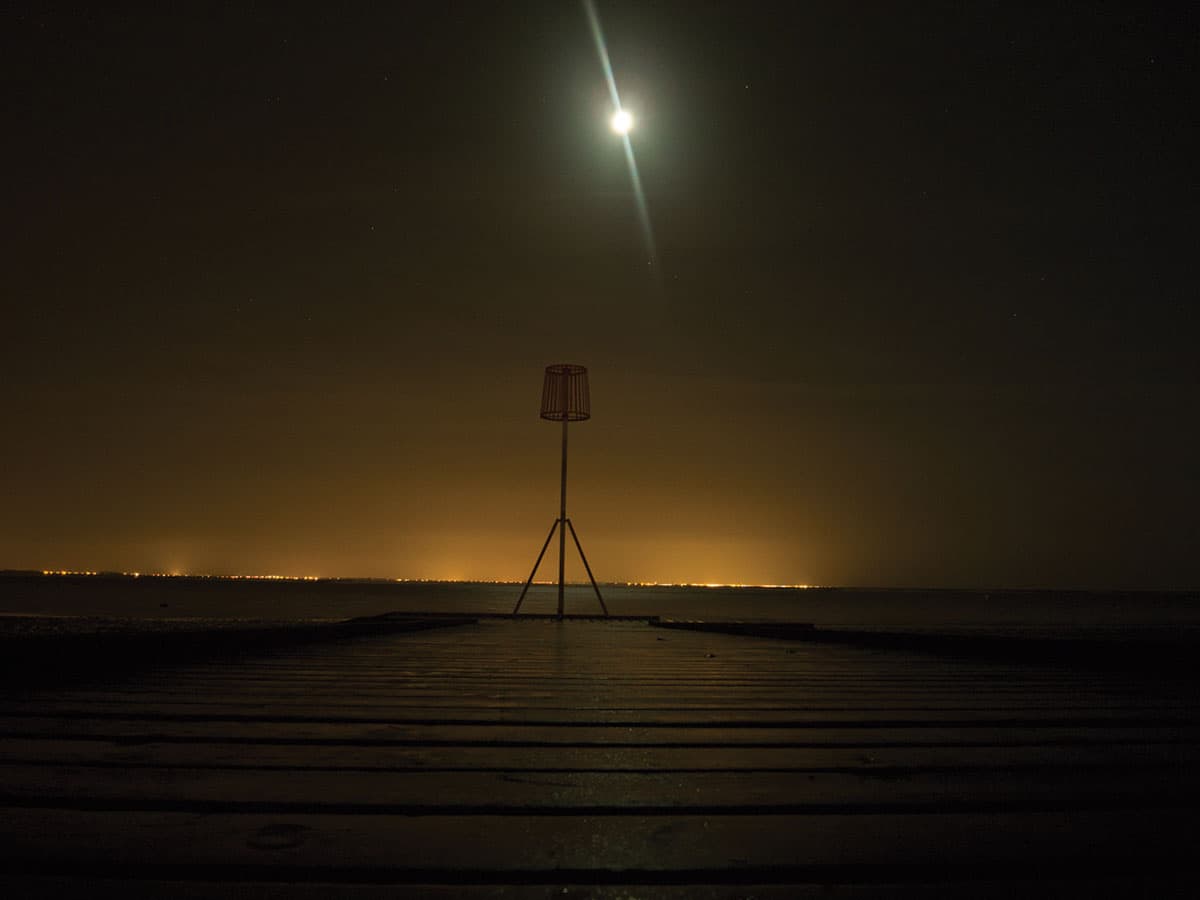
Before
Because the photograph was underexposed by 2 stops, it required a lot of lightening in post-production, which exaggerated the native noise signature. Under the circumstances, it might have been better to set the ISO setting to 400 and shoot using the same exposure.
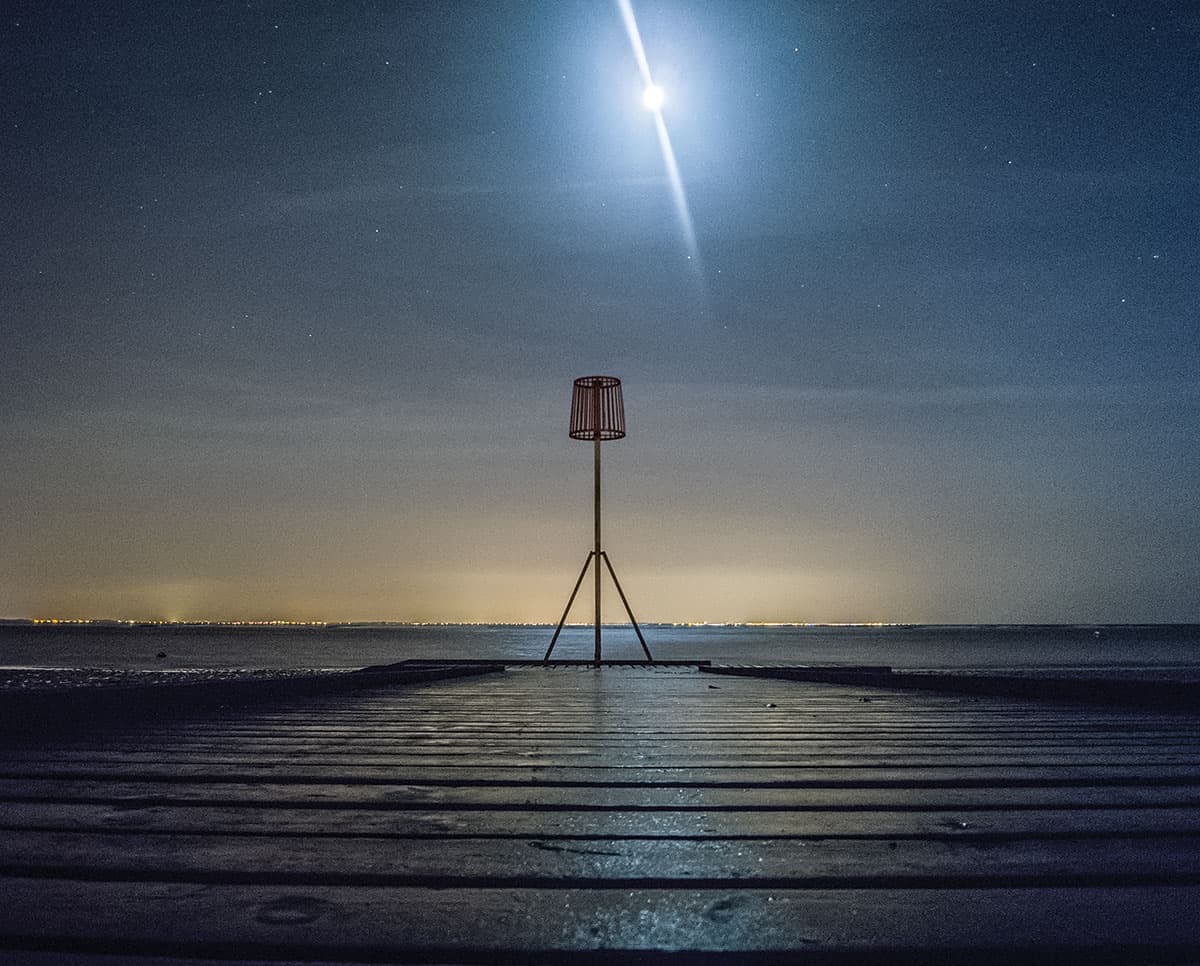
After
The main thing I wanted to show here was how changing white balance settings for a raw image can dramatically affect the appearance of the photograph.
1. Apply Basic panel tone corrections
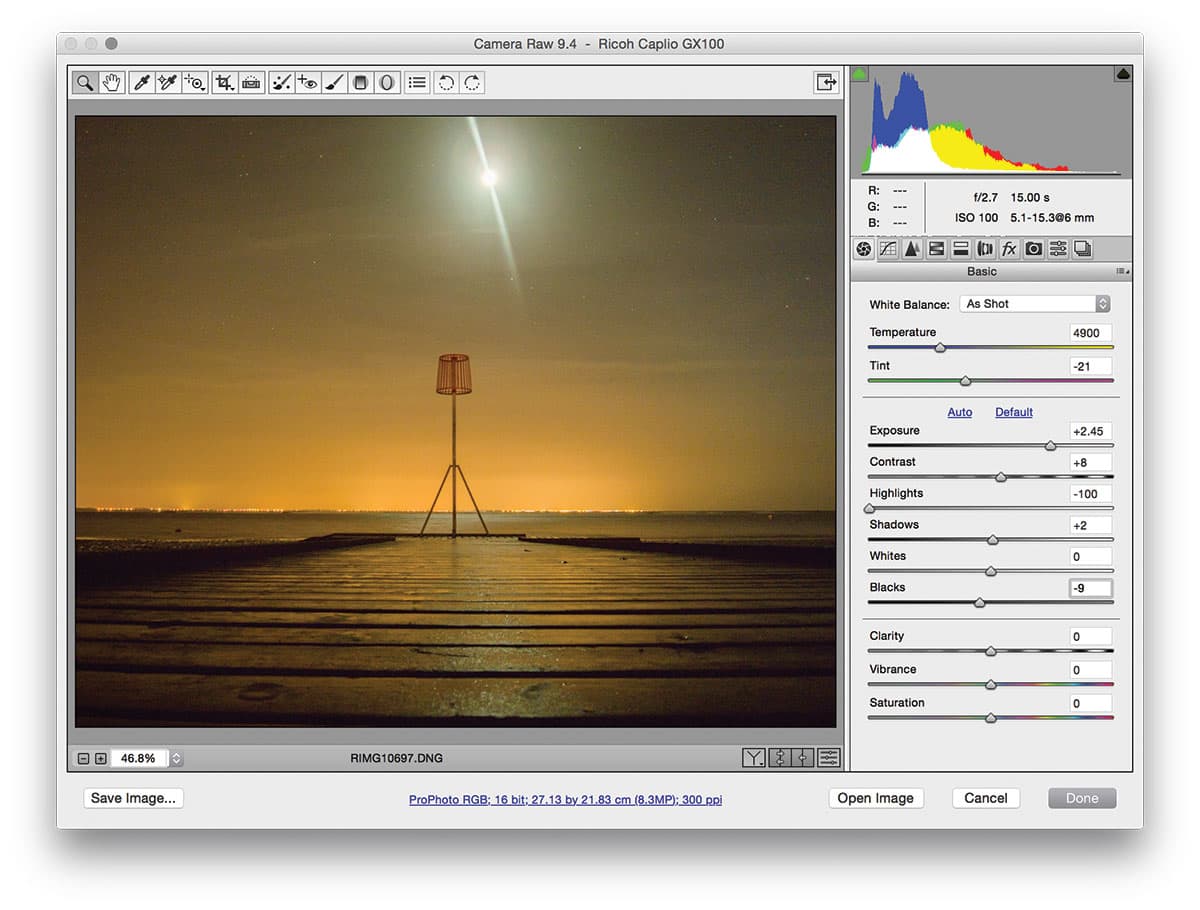
The first step was to lighten the image. I opened the photo in Camera Raw and lightened the Exposure, setting this to +2.45. I set the Highlights slider to -100 to preserve highlight detail, then fine tuned the remaining tone adjustment slider settings.
2. Adjust the white balance
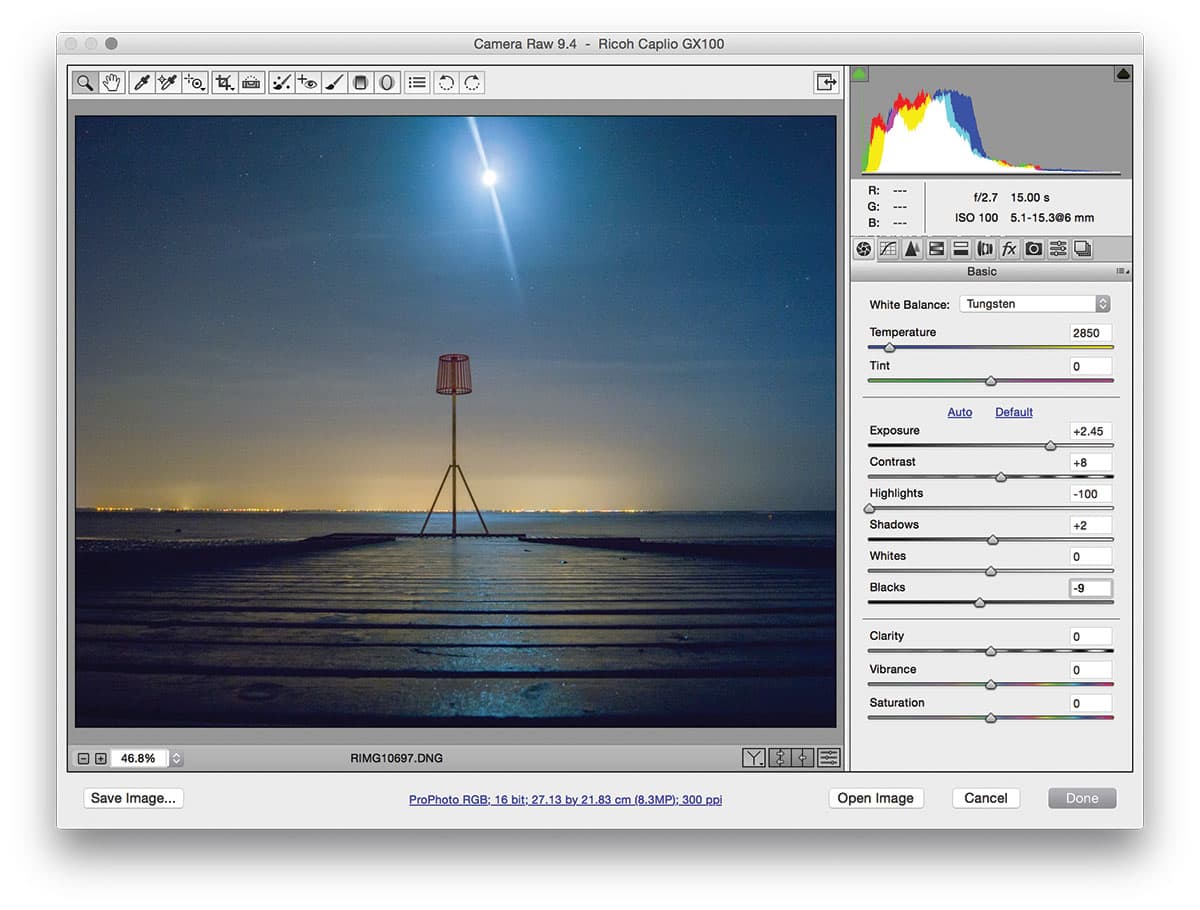
The original white balance setting created a warm-looking image. This emphasised the warmth of the city lights in the distance. In situations such as this, there is not necessarily a right or wrong setting. In this step, I applied a Tungsten preset setting to make the image appear cooler.
3. Reduce the noise
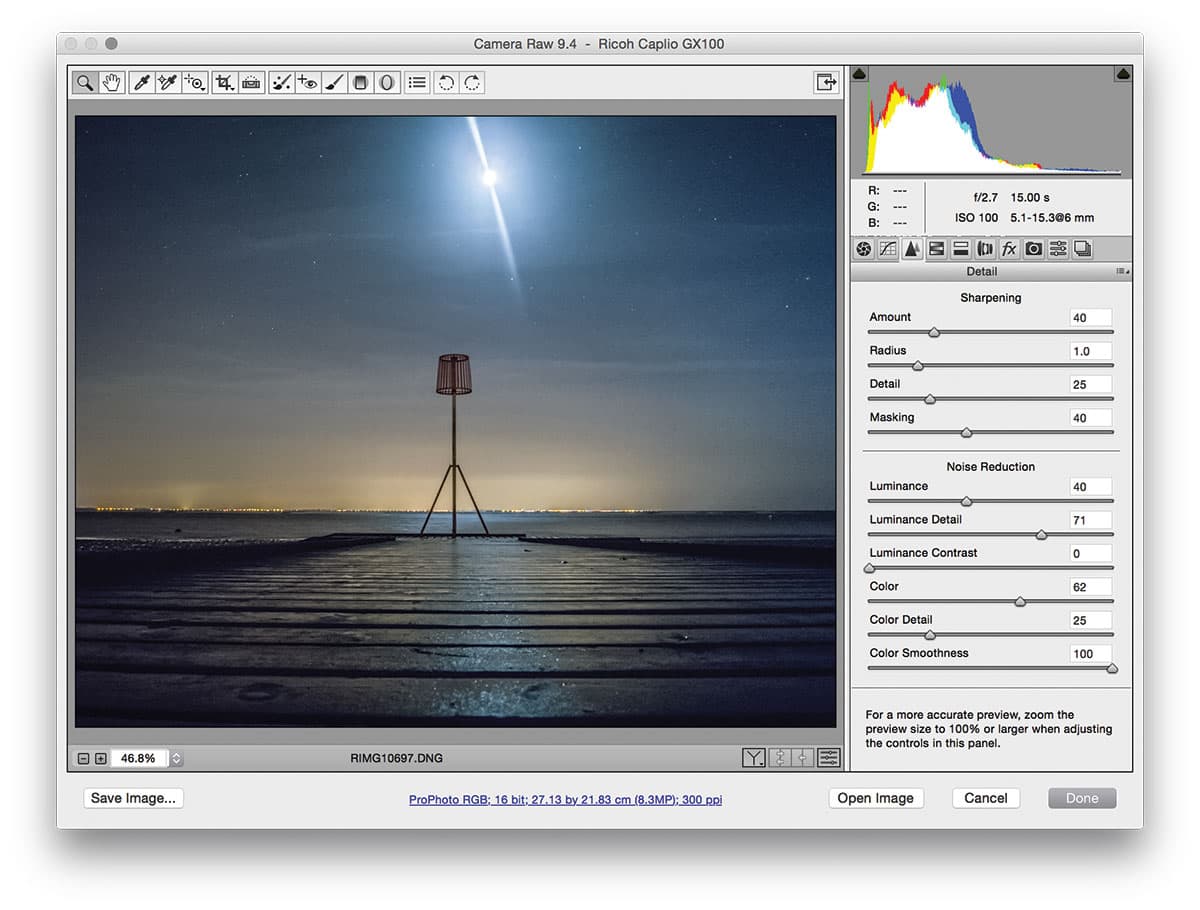
Finally, I added +100 Clarity to add definition, and reduced the Vibrance slightly. In the Detail panel, I set the Luminance noise slider to +40 and the Color noise slider to +62. These were the optimum settings to reduce the noise. I set the Color Smoothness slider to +100 to help remove the larger colour artefacts.


