
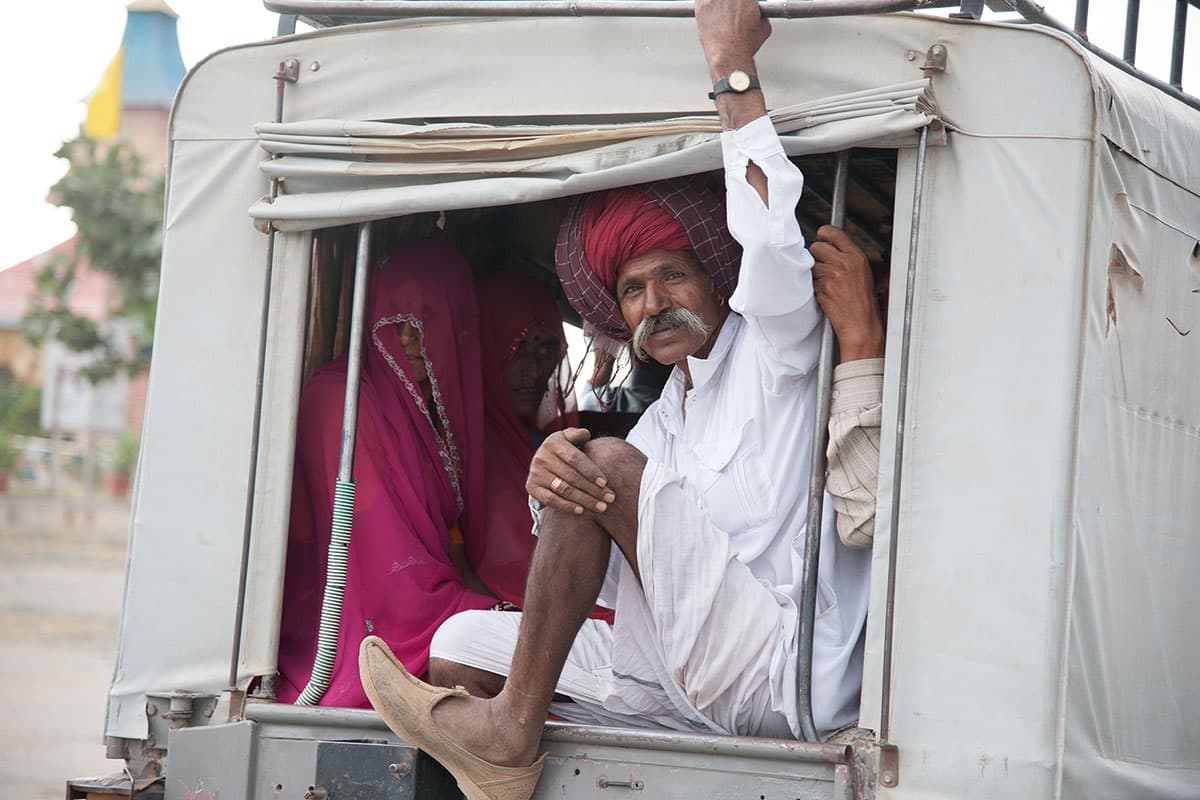
Before
This photograph by Michael Greisman was captured using a zoom lens at the longest focal-length setting and caught a fleeting moment of the passengers in the back of a truck. The following steps show how I used the Basic panel controls in Camera Raw to compensate for the difference in tone between the light-coloured truck awning and the shaded interior. It was also a good image with which to demonstrate how, through the use of the Lens Corrections panel, it is possible to turn the back of the truck around to make it look as though the photograph had been taken more from directly behind the vehicle.
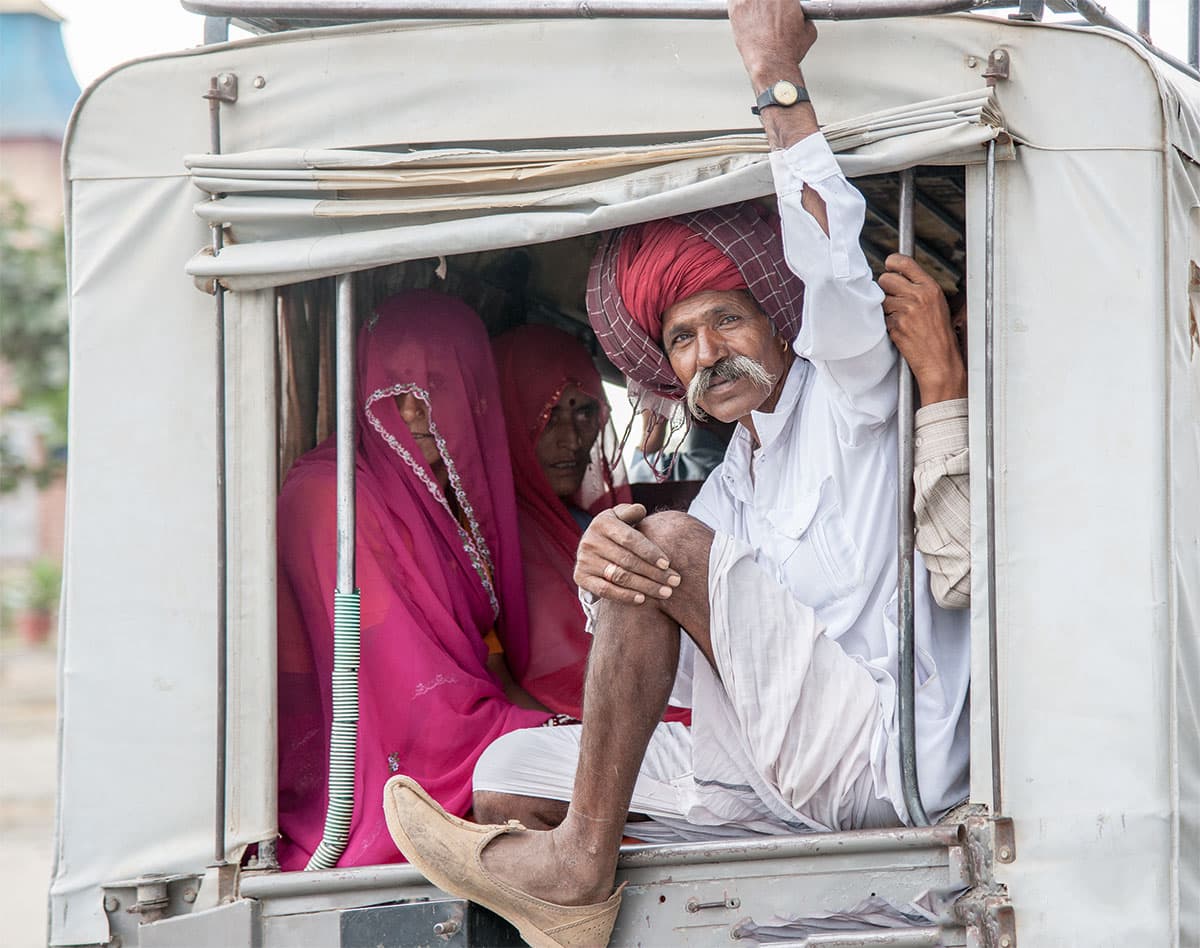
After
1. Apply basic adjustments
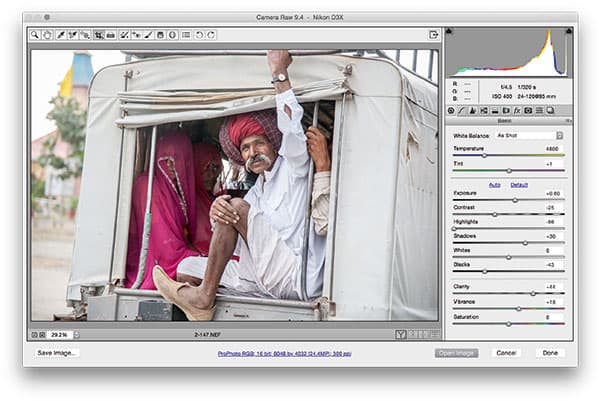
I began by opening the image in Camera Raw and adjusted the Exposure and Contrast to lighten the image and reduce the contrast. I then took the Highlights slider to -99 to preserve as much highlight detail as possible and lightened the shadows using the Shadows slider. I adjusted the Clarity slider to add more midtone contrast.
2. Adjust the perspective
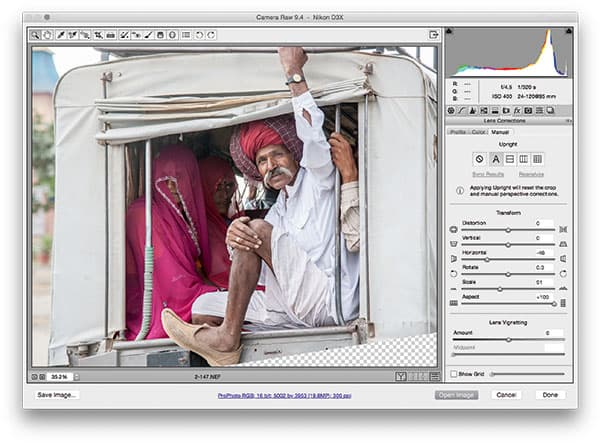
In this step I went to the Lens Corrections panel and applied an Auto Upright adjustment. I followed this by setting the Horizontal slider to -46, which helped make the back of the truck appear more ‘straight on’. I then reduced the Scale to 91 and set the Aspect slider to +100 to compensate for the lateral stretching that had occurred.
3. Using Content-Aware Fill
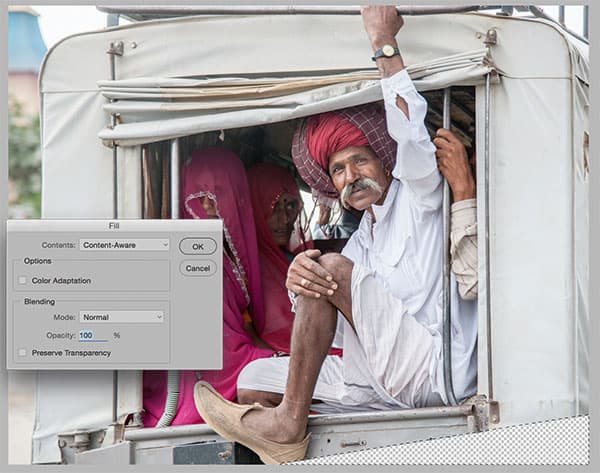
The previous adjustment left an area of transparent pixels in the bottom-right corner. I opened the photo in Photoshop, made a selection of the transparent area and chose Select>Modify>Expand by 10 pixels. I then went to the Edit menu and chose Fill>Content-Aware Fill. This automatically filled the area with pixels sampled from the surrounding area.


