This time last year, ‘LUT’ was not a familiar acronym to digital photographers, but LUTs are becoming increasingly popular as an extra weapon in the photo-editing arsenal. As with presets, LUTs are a great way to give your images, be they raw or JPEG, an instant one-click makeover that can really speed up your editing as well as deliver some dramatic, ‘cinematic’ looks which can suit a variety of genres. One of the best packages for applying LUTs in Lightroom, Lutify.me, has just been upgraded, but before going any further let’s clear up some terminology.
What are LUTs in photography?
LUTs stands for Look Up Tables, and a LUT (pronounced loot) is basically a conversion profile that takes a colour value in your original file, looks it up in a table and returns a new colour value. So it’s actually not much different to a monitor-calibration profile designed to correct the colours a monitor displays, or a printer profile to produce accurate colours in a printed photo. Here, though, this conversation process is being used to shift tones and colours for a creative rather than corrective effect, and this is an important difference to get your head around. LUTs are very well established in the world of video editing and cinematography, but also appeal strongly to stills photographers owing to their instant effects and ease of use.
What is the difference between a preset and a LUT?
So why use a LUT instead of a Lightroom preset or similar? A big reason is that they ‘remap’ colours and tones in ways that a preset, or tools in your software, may find difficult to reproduce. Also, applying a LUT doesn’t shift any of the image adjustment tools in your software in the way that regular presets do. You can apply a LUT after you’ve made your adjustments or before, and then do further editing in the normal way. Also, LUTs are software independent. You can use the same LUT in any software that supports LUT files – Adobe Camera Raw, Lightroom, Affinity Photo or any other LUT-enabled program, including video-editing software. This lets you get the same ‘look’ each time. For travel photographers seeking a particular look for Instagram or a demanding client, for example, this is very handy.
As mentioned, one of the best LUT packages available is Lutify.me, which uses 3D LUTs. These are the preferred choice as they remap the image colours in a three-dimensional colour space and are very much the standard for cinema and stills use. Lutify.me bundles its LUT files into Adobe-compatible profiles which can be used directly by the latest versions of Adobe Camera Raw and Lightroom, and as a set of Capture One Styles.
Lutify.me. No, really…
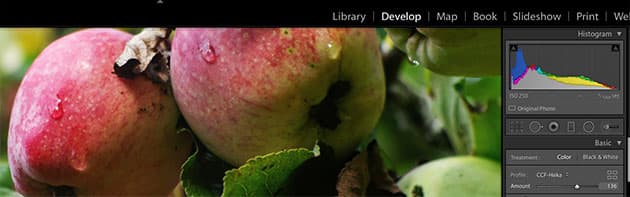
A big attraction of Lutify.me is its ease of use, particularly in Lightroom. The Lutify.me profiles appear under the regular Adobe and camera-specific profiles in the Basic adjustment tab, and you can select them from a drop-down menu or browse thumbnails of your image with each profile applied before you make a choice. It’s pretty straightforward but another recently upgraded feature, called the Previewer, makes it even easier to select and apply LUTs. Rather than squinting at LUTs in the rather busy Develop section of Lightroom, the LUT Previewer enables you to apply LUTs quickly and easily via your web browser, carry out basic adjustments and then export the file – either as a finished version or for further adjustments. You can also layer-on multiple LUTs. As we will see, another addition to the Previewer is a dedicated contrast control slider, which sits next to the exposure and white balance sliders, along with a handy strength (opacity) slider. Other improvements in the latest version include support for sRGB colour-managed images and a reworked CPU shader for more accurate results and speedier performance.
As with Adobe Creative Cloud you pay for Lutify.me via subscription and we’d say the best value is the Pro package, which has a first-year price of $59 (£45.50) and comes with the full set of 213 3D LUTs, along with dedicated Lightroom profiles. It also enables you to save out your image as a LUT for continued editing in Lightroom and other programs. After you have been using the Pro package for a year the annual price drops to $19.99, but best of all, you get to keep the 213 3D LUTs even if you cancel.
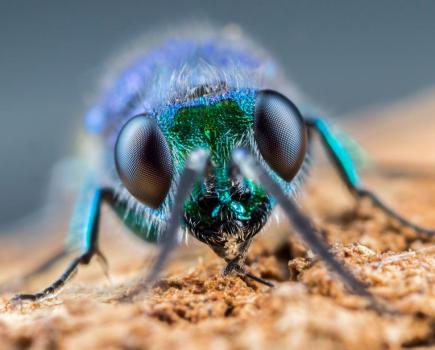
Some LUTs are quite full on, so don’t be afraid to dial down the colour grading as required
How to use LUTs in Lightroom
For Lightroom users, the integration with Lutify.me is seamless, making LUTs very easy to apply. As of version 7.3 of Lightroom Classic CC, Lutify.me LUTs are applied through the Profile Browser option in the Develop tab. Installation is a cinch (see lutify. me/docs). Once installed, you can access the full selection of LUTs under the Profile Browser and they are organised into ten different categories in the Pro package: Alternative Processes, Black and White Films, Cine Looks, Cinematic Base Grade, Instant Films, Contemporary Color Films, Movies Inspired Looks, Skin Tone Manipulation, Teal and Orange, and Vintage Films. To preview a particular LUT, simply hover your mouse over it. Click to apply to your image (you can vary the amount via a slider) and then close the Profile Browser and carry on editing as required.
If the Lightroom interface feels cramped, LUTs can also be applied via the web-based Previewer
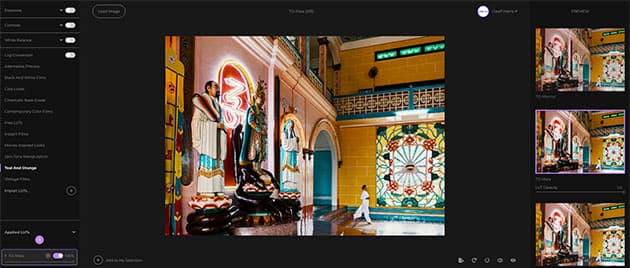
How to use the Lutify.me Previewer
You don’t even need to apply LUTs from within the Lightroom Develop interface. Depending on your subscription, you get full access to the Previewer at preview.lutify.me, which you can open with any web browser. Simply enter your account details and you can apply the full range of LUTs from within a clean, streamlined interface, and carry out some basic edits: Exposure, Contrast (new) and White Balance. These give a good idea of how an applied LUT can be adjusted.
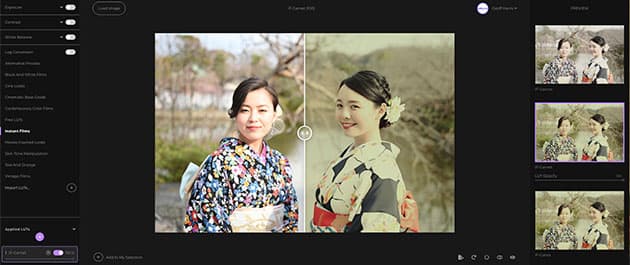
Use split screen to preview a LUT effect, or layer several on your image via ‘Applied LUTs’
Another useful feature is the split view. Even better, you can add several LUTs to one image via the Applied LUTs feature bottom left, to get a bespoke look; this can be saved as a .cube file and used in compatible image editors. Or just add one LUT to an image and save it out in popular image formats.
Best LUTs for photographers
Credit: Geoff Harris
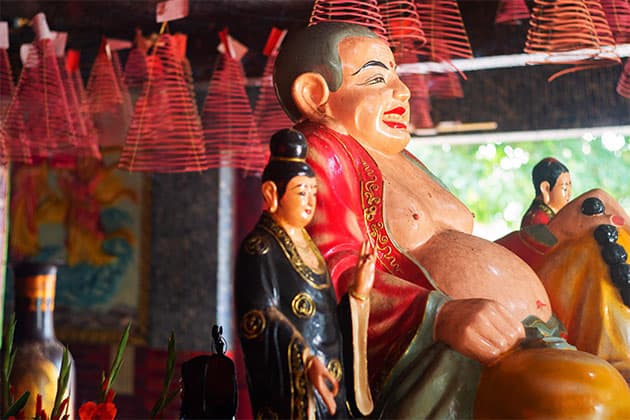
Hydrobius
Contemporary Color Film
Most of the LUTs in Lutify.me are named after stars, which is a bit random, but you can easily see the effect on your image by hovering your mouse over the LUT’s name in the Lightroom Profile Browser. Hydrobius gives lush, rich dense colours and warm tones.
Credit: Geoff Harris
Sorealis
Vintage Films
The vintage film LUT effects are sophisticated, and not too cheesily retro or crude. Sorealis works well as it gives warm colours but a slightly cold colour temperate. All the exposure settings can be easily tweaked in Lightroom, but LUTs can be a great starting point.
Credit: Geoff Harris
Albireo
Alternative Processes
The 16 Alternative Process LUTs are also well worth experimenting with. Albireo adds a rich, warm tone without being garish or overpowering. With over 200 LUTs you are spoiled for choice but soon find your favourites amongst the large selection.

Credit: Geoff Harris
Adhil
Alternative Process
Another favourite Alternative Process LUT is Adhil, which delivers a rich, dense and slightly cold film look. The fine degree of colour grading you get with LUTs could be time consuming to replicate with Lightroom’s standard Develop tools.

Credit: Geoff Harris
Hessex
Contemporary Color Films
For a more up-to-date, vibrant look, the Contemporary Color Films again give an instant colour boost, and Hessex is great for deep blue skies (don’t be afraid to further enhance this using the Hue, Saturation and Luminance tools in Lightroom).
Credit: Geoff Harris
Menkent
Teal and Orange
The Teal and Orange look has been fashionable in cinematography for a while, and you can now add it to your still images thanks to Lutify.me. The key is to experiment and regard a LUT as a starting point for further fine-tuning depending on your creative intent.