
 Martin Evening is a London-based advertising photographer and noted expert in both photography and digital imaging. As a successful photographer, Martin is well known in London for his fashion and beauty work, for which he has won several awards. In 2008, he was inducted into the NAPP Photoshop Hall of Fame.
The Camera Raw and Lightroom Lens Corrections controls have made some significant advances in the last year or so, ever since the release of Camera Raw 7.1 and Lightroom 4.1. This saw some additions to the Lens Corrections panel, which now contains Defringe sliders designed to fix axial (longitudinal) chromatic aberration. This type of chromatic aberration can be caused due to ghosting, lens flare, charge leakage (which affects some CCD sensors) as well as color aberrations.
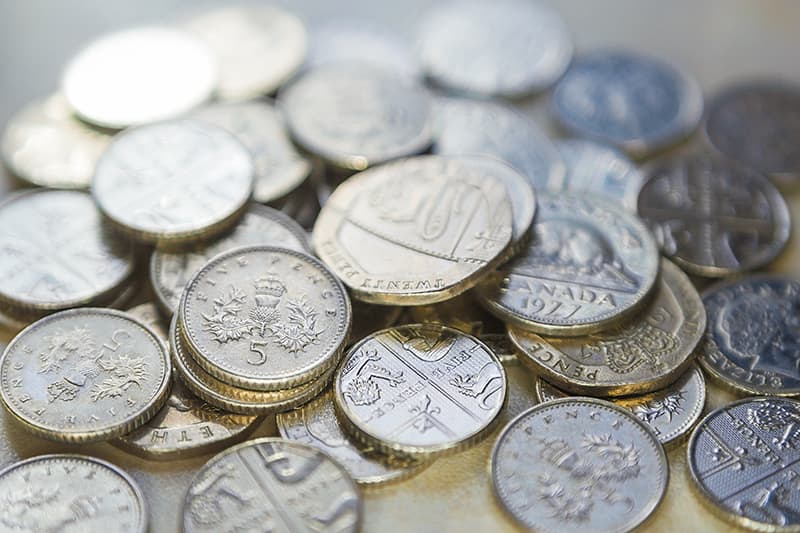
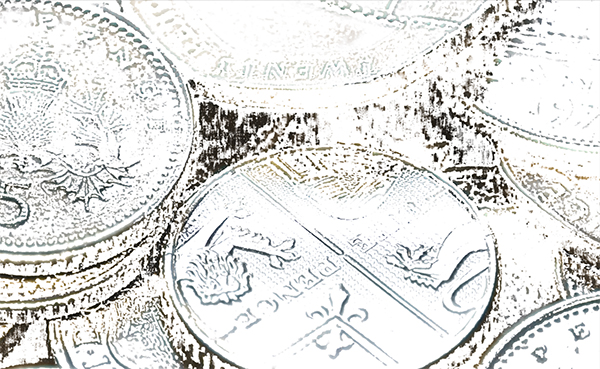
 Before
Unlike lateral chromatic aberration (which occurs towards the edges of the frame), this type of aberration can appear anywhere in an image. It particularly affects fast, wide aperture lenses and is typically most noticeable when shooting at the widest lens apertures, where fringes will usually be at their most visible just in front of and just behind the plane of focus. These will typically appear purple/magenta when they’re in front of the plane of focus, and appear green when they’re behind the plane of focus. But even at the exact point of focus you may sometimes see purple fringes (especially along high-contrast or backlit edges), which can cause flare.
As you stop down a lens, these types of aberrations usually become less noticeable. The following steps show how I was able to fix an extreme example of this type of problem.
How to Remove Chromatic Aberrations – Step by Step
1. The “Before” Image
Here is a before version of the image I was about to process. I specifically wanted to emphasise the typical problems associated with axial chromatic aberration. I therefore photographed these coins using a macro-enabled lens at the widest aperture setting. I also deliberately increased the Vibrance setting in the Basic panel in order to make the fringing problem more noticeable, which will help me remove it.

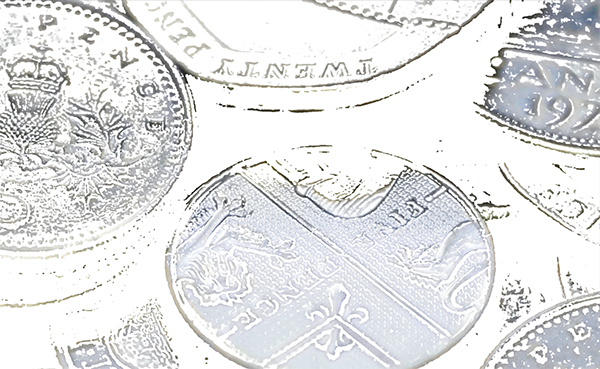
2. Enable Profile Corrections
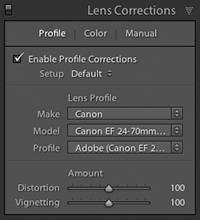
The first step was to go to the Lens Corrections panel and tick the Enable Profile Corrections box in the Profile tab. As you can see, I used the Lightroom program to process this image, but the controls described here are exactly the same as those found in Camera Raw 7.1 or later.

3. Tick “Remove Chromatic Aberration”
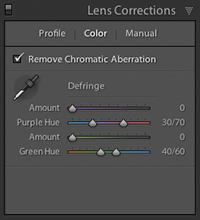
I then went to the Color tab in the Lens Corrections panel and ticked the Remove Chromatic Aberration box. This used to apply a longitudinal chromatic aberration correction based on the available lens correction profile. In Camera Raw 7.1 or later, the process is now auto-calculated within Camera Raw. In this instance it didn’t make much difference to the colour fringing.

4. Use the Sliders

This is where the Defringe sliders become useful. I held down the Alt key and dragged on the two Purple Hue colour ramp sliders. With the Alt key held down, the affected colors appeared overlaid with black in the preview, which allowed me to fine-tune these two sliders to determine the precise colour range for the purple fringing.
5. Adjust the Purple Amount slider

I then held down the Alt key as I adjusted the Purple Amount slider. In this case, the preview revealed the pixels that would be affected by the adjustment and all others were displayed as white. I could therefore determine the correct amount to apply here as I increased the slider adjustment.
6. Adjust the Green Hue Slider

I then did the same thing with the Green Hue sliders. I again held down the Alt key as I dragged each slider. In this instance, the affected green hue colours appeared overlaid with black.

7. Adjust the Green Amount Slider

Likewise, I held down the Alt key as I dragged the Green Amount slider and the preview showed all the pixels that would be affected by a Green defringe adjustment and all others were displayed as white.
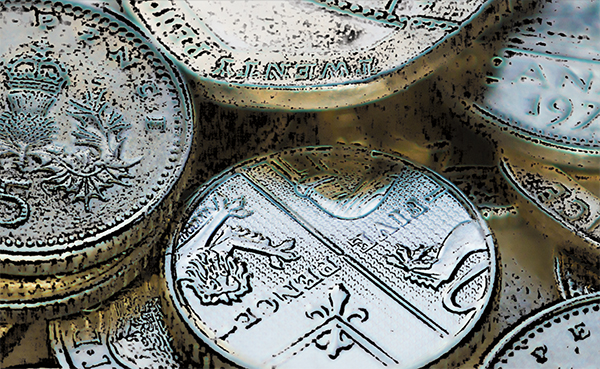
8. Apply capture sharpening

By this stage, the Lens Corrections adjustments had successfully removed all the chromatic aberrations from the photograph, including the tricky axial chromatic aberration fringing. I now went to the Detail panel and applied an appropriate amount of capture sharpening to accentuate the fine detail in the coins.
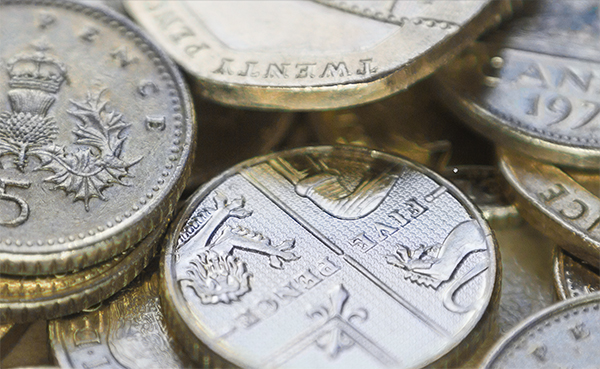
9. Final Tweaks and the End Result
I zoomed out to see a fit-to-screen view and made some final adjustments. Here, I used the Effects panel Post-crop vignette sliders to darken the corners slightly. I also used the adjustment brush to selectively lighten the five pence coin near the centre of the image.

Visit Martin’s website: https://www.martinevening.com/


