There are now myriad ways to convert and edit black & white images, but Silver Efex Pro is still hard to beat. It works as both a standalone program and a plug-in for Lightroom, Photoshop and more, and comes as part of the Nik Collection of editing tools. The latest version has ten new emulations of classic black & white analogue film: Adox Silver Max 21, Agfa Scala 200x, Bergger BRF 400 Plus, Foma 100, Fuji Neopan 400, Ilford Pan 100 and 400, Polaroid 667 and 672, and Rollei 100 Tonal. Read on to discover how get to grips with these emulations, and how to get the most from Silver Efex Pro generally.
Silver Efex Pro: The basics
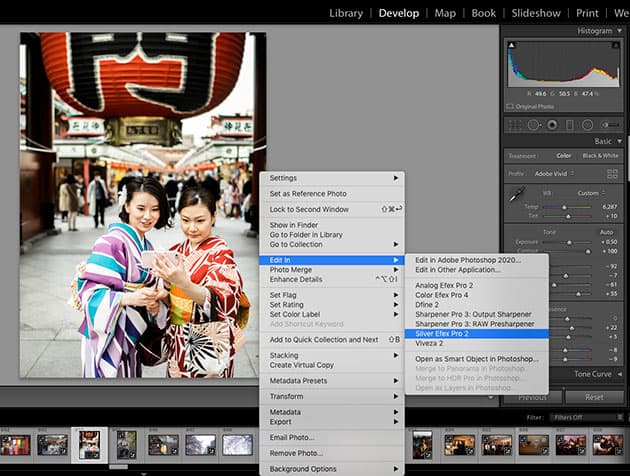
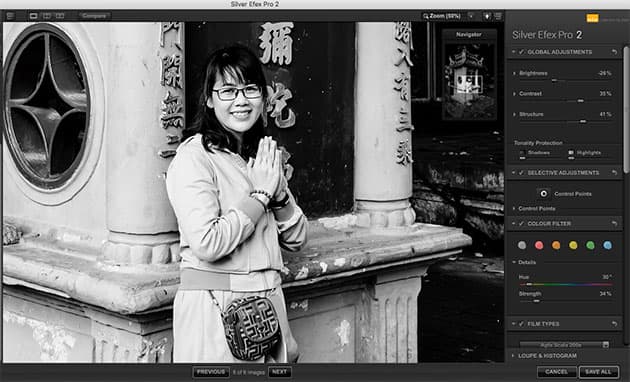
As mentioned, you can work with Silver Efex Pro as a standalone program as part of the Nik Collection, but to get the most of the new film emulations, and much else besides, we recommend opening it as a plug-in for your main editor, in this case Adobe Lightroom. To benefit from the colour sensitivity filters and powerful grain-control filters in Silver Efex Pro, it’s best to make essential adjustments to your original, colour raw image in Lightroom. You then carry out the black & white conversion, and subsequent editing of the image, by opening Silver Efex Pro as a plug-in, as our screenshot above shows (simply right click on the original and you should be able to edit it in Silver Efex Pro, as a converted black & white image).
When finished, you can save it back into Lightroom for further editing or output it. Using Silver Efex Pro as a standalone program to tweak existing black & white JPEG images will work to a degree, but it’s a bit like buying a high-performance car and never getting above a low gear.
Finding the new film emulations
As with so much modern software, the maker DxO has really packed in the features, which is great, but they are not always immediately obvious. The black & white film emulations are located towards the bottom of the panel on the right and are labelled Film Types. Click the arrow to reveal them. The new film types are, helpfully, listed under ‘New.’ Easy enough, but remember that as soon as you hover your mouse over the name of a film type it is applied to the image, so you get a sense of whether it works.
To go back to your original image without Film Types applied, click Neutral. Some other fundamentally important tools in this panel are the Grain and Sensitivity options, the Colour Filter and Selective Adjustments. If you are not happy with the exposure and contrast in your imported image, you can also adjust them with the Preset Library over to the left of the main screen.

The ten new Film Types are a very welcome addition
Which film type to use?
The choice of Film Types can be overwhelming, but as mentioned, you can try them out by hovering your mouse over the name of the film. According to DxO, Adox Silver Max 21 was chosen for its fine grain and ability to produce deep blacks and a wide range of greys, making it useful for portraits. Bergger BRF 400 Plus was picked for its moderate contrast and average grain, which makes it suited to landscapes.
Foma 100, a classic panchromatic film with a fine grain and high resolution, offers a wide range of greys even in bright light, so landscape and studio shooters might want to try it. Ilford 100 and 400 offer versatility and sharpness, while Rollei 100 Tonal offers a fine grain and soft contrasts, and is popular for architecture. Fuji Neopan 400, meanwhile, was originally designed for street photography and reportage. Agfa Scala 200x was a black & white slide film, while the Polaroid emulations are quirky and intriguing. Earlier Film Types are listed by ISO.
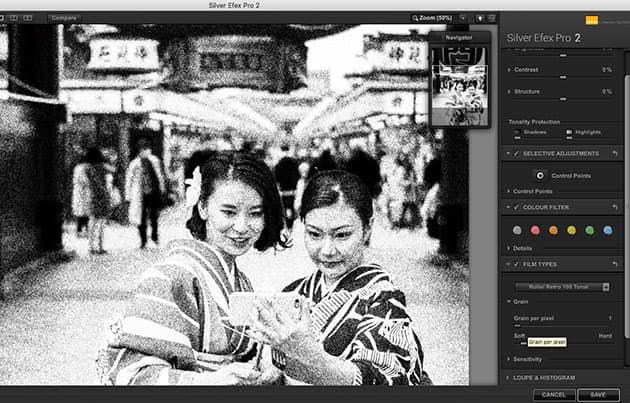
Getting to grips with Grain
‘Grain’ is fundamental to analogue black & white photography, and Silver Efex Pro has some very smart tools for controlling all aspects of digital grain. Move the Grain per pixel slider right over to the left for example, and you get a very grainy, grungy look; slide it to the right and it becomes harder, increasing the contrast so the image looks sharper and ‘cleaner.’ So these tools enable you to amplify or subdue the grain structure for a particular black & white look. Note also that if you increase the brightness and contrast using the Global Adjustments tools at the top of the panel, you can see the look of the grain changing at the same time. Very clever indeed.
The Magnify and Compare tools
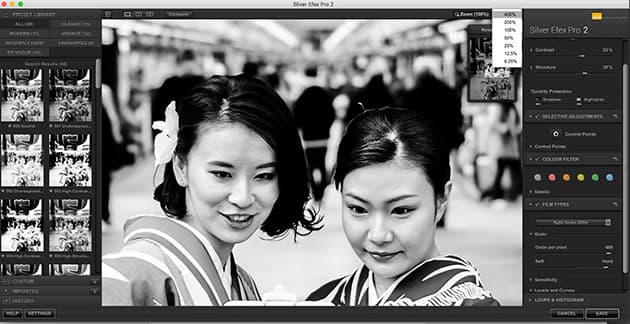
The easiest way to get around the image is to use the Navigator box top right of the main screen: simply click the area you want to zoom into, adjusting the magnification accordingly to check everything over. To the left of the top bar is the Compare button, which enables you to compare your edited version with the original when you click and hold down the mouse. The History function, found at the bottom left of the main screen under the Presets Library, is a bit over-engineered, but the slider does enable you to pedal back through the adjustments if you’re not happy with some of them.
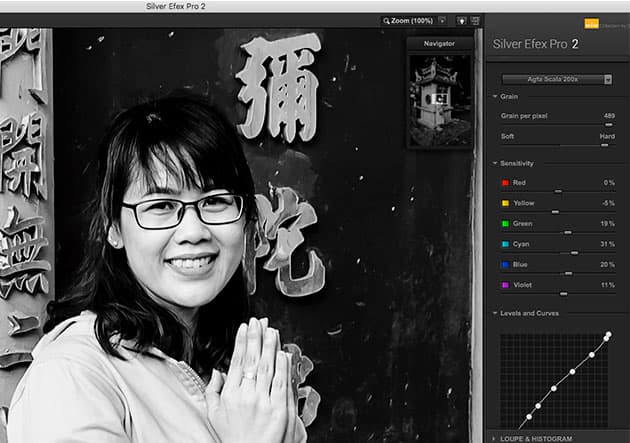
Colour sensitivity
The grain, colour sensitivity and the specific Levels and Curves settings are essentially what make up these classic black & white film emulations. The colour levels and sensitivity are how the colours translate to black & white. If you want to adjust the colours in the Film Types, it’s easy enough, via the Sensitivity tool: move the red filter slider to the right, anything red will get brighter, or darker to the left. So don’t be afraid to experiment depending on the colours in your image, as you can get a totally different look to the original – making the blue sky in a landscape look infrared, for instance, or richer background tones.
Global adjustments
As with any editing program, there is a wide range of tools for tweaking your black & white image in its entirety. Essential functions such as Brightness and Contrast are listed under ‘Global Adjustments’ (they are called ‘global’ as they affect all of the image). ‘Structure’ is an interesting tool, and is one of Silver Efex Pro’s secret weapons: essentially, it gives images more ‘bite’ by exaggerating the contrast around edges, outlines and details. It needs to be used sparingly, however, in order to avoid halos and other artefacts, and works best with highly detailed areas or subjects. Use Tonality Protection, meanwhile, to keep detail in shadows and highlights, but these kind of issues are best fixed when editing the original raw file in Lightroom or Photoshop. Finishing Adjustments, right down the bottom of the panel, enables you to add vignettes, borders and other final touches.
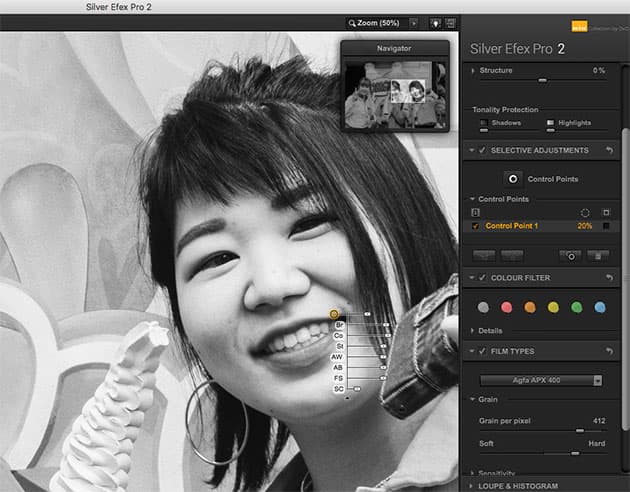
Using Control Points and a last word on Presets
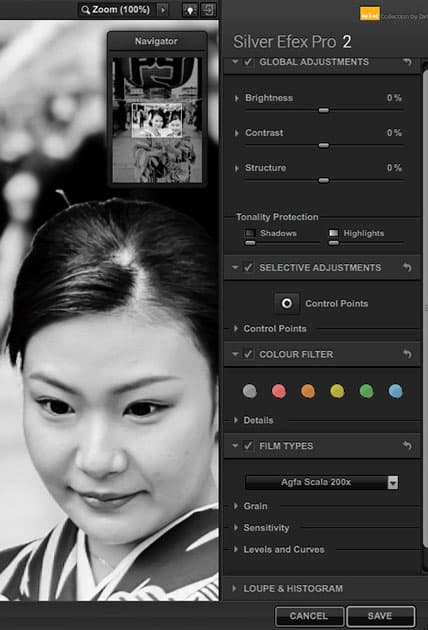
Global adjustments are all very well but for fine-tuning specific parts of your black & white image, Silver Efex Pro uses Control Points, another of its key weapons. It’s an ingenious design but takes a bit of getting used to. With your image open, go to Selective Adjustments, click on Control Point and then drag it to the part of the image you want to work on – the girl’s face in our screen shot (below left). You can then adjust a range of parameters, such as contrast, brightness, structure and so on. Drag the mini sliders to reduce or increase the effect, as required.
After using brushes and other local selection tools in Adobe programs, Control Points can feel a bit weird but you do get used to them. It’s easy enough to duplicate Control Points by holding down the Option (Alt) key and dragging it to a new destination. Last but not least, while the new Film Types are great don’t forget all the existing Presets in the library, top left of the main screen. En Vogue and Classic are our favourites, and all can be fine-tuned as shown.

Levels and curves
You might find a lot of the Film Types are quite high contrast and while you can adjust this using Global Adjustment, it’s also wise to open the Levels and Curves graph, under Film Types. As with the Levels and Curves tools in Photoshop, you can easily move the points around to get exactly the look you want, or see how the graph changes for each particular film. You can also access a Loupe and Histogram, which is right at the bottom of the screen, just above the Save option.
Buying and using Silver Efex Pro
The Nik Collection 2.3 collection comes with six other useful tools for editing and sharpening your images, but Silver Efex Pro is the only dedicated black & white editing program. You also get a full copy of DxO Photolab 2 (Essential), a cut-down but effective general-purpose photo editor which also works seamlessly with the Nik programs. The whole suite retails at £125 and can be downloaded directly from the DxO website (Mac and PC).
For the collection to work with Adobe, you will need:
Website: See nikcollection.dxo.com/ where you can also find out about the system requirements for Mac and PC.
System requirements: Adobe Photoshop CS5 (64 bits) through CC 2020. Adobe Photoshop Elements 12 through 2020 (apart from HDR Efex Pro 2, which is not compatible with Photoshop Elements). Adobe Photoshop Lightroom 3 through Classic CC 2020.
[collection name=”medium”]