
Your guide: John Wade
Regular AP contributor John is best known for his classic camera articles, but occasionally he comes over to the dark side and dabbles with digital. Find him here.
‘Kaleidograph’ is a name I have invented for a technique I first saw demonstrated in the days before digital. Using film, it was a difficult process to master. In the digital age, it’s a doddle. As a starting point, there are two simple processes to learn, needing only an elementary grasp of Photoshop.
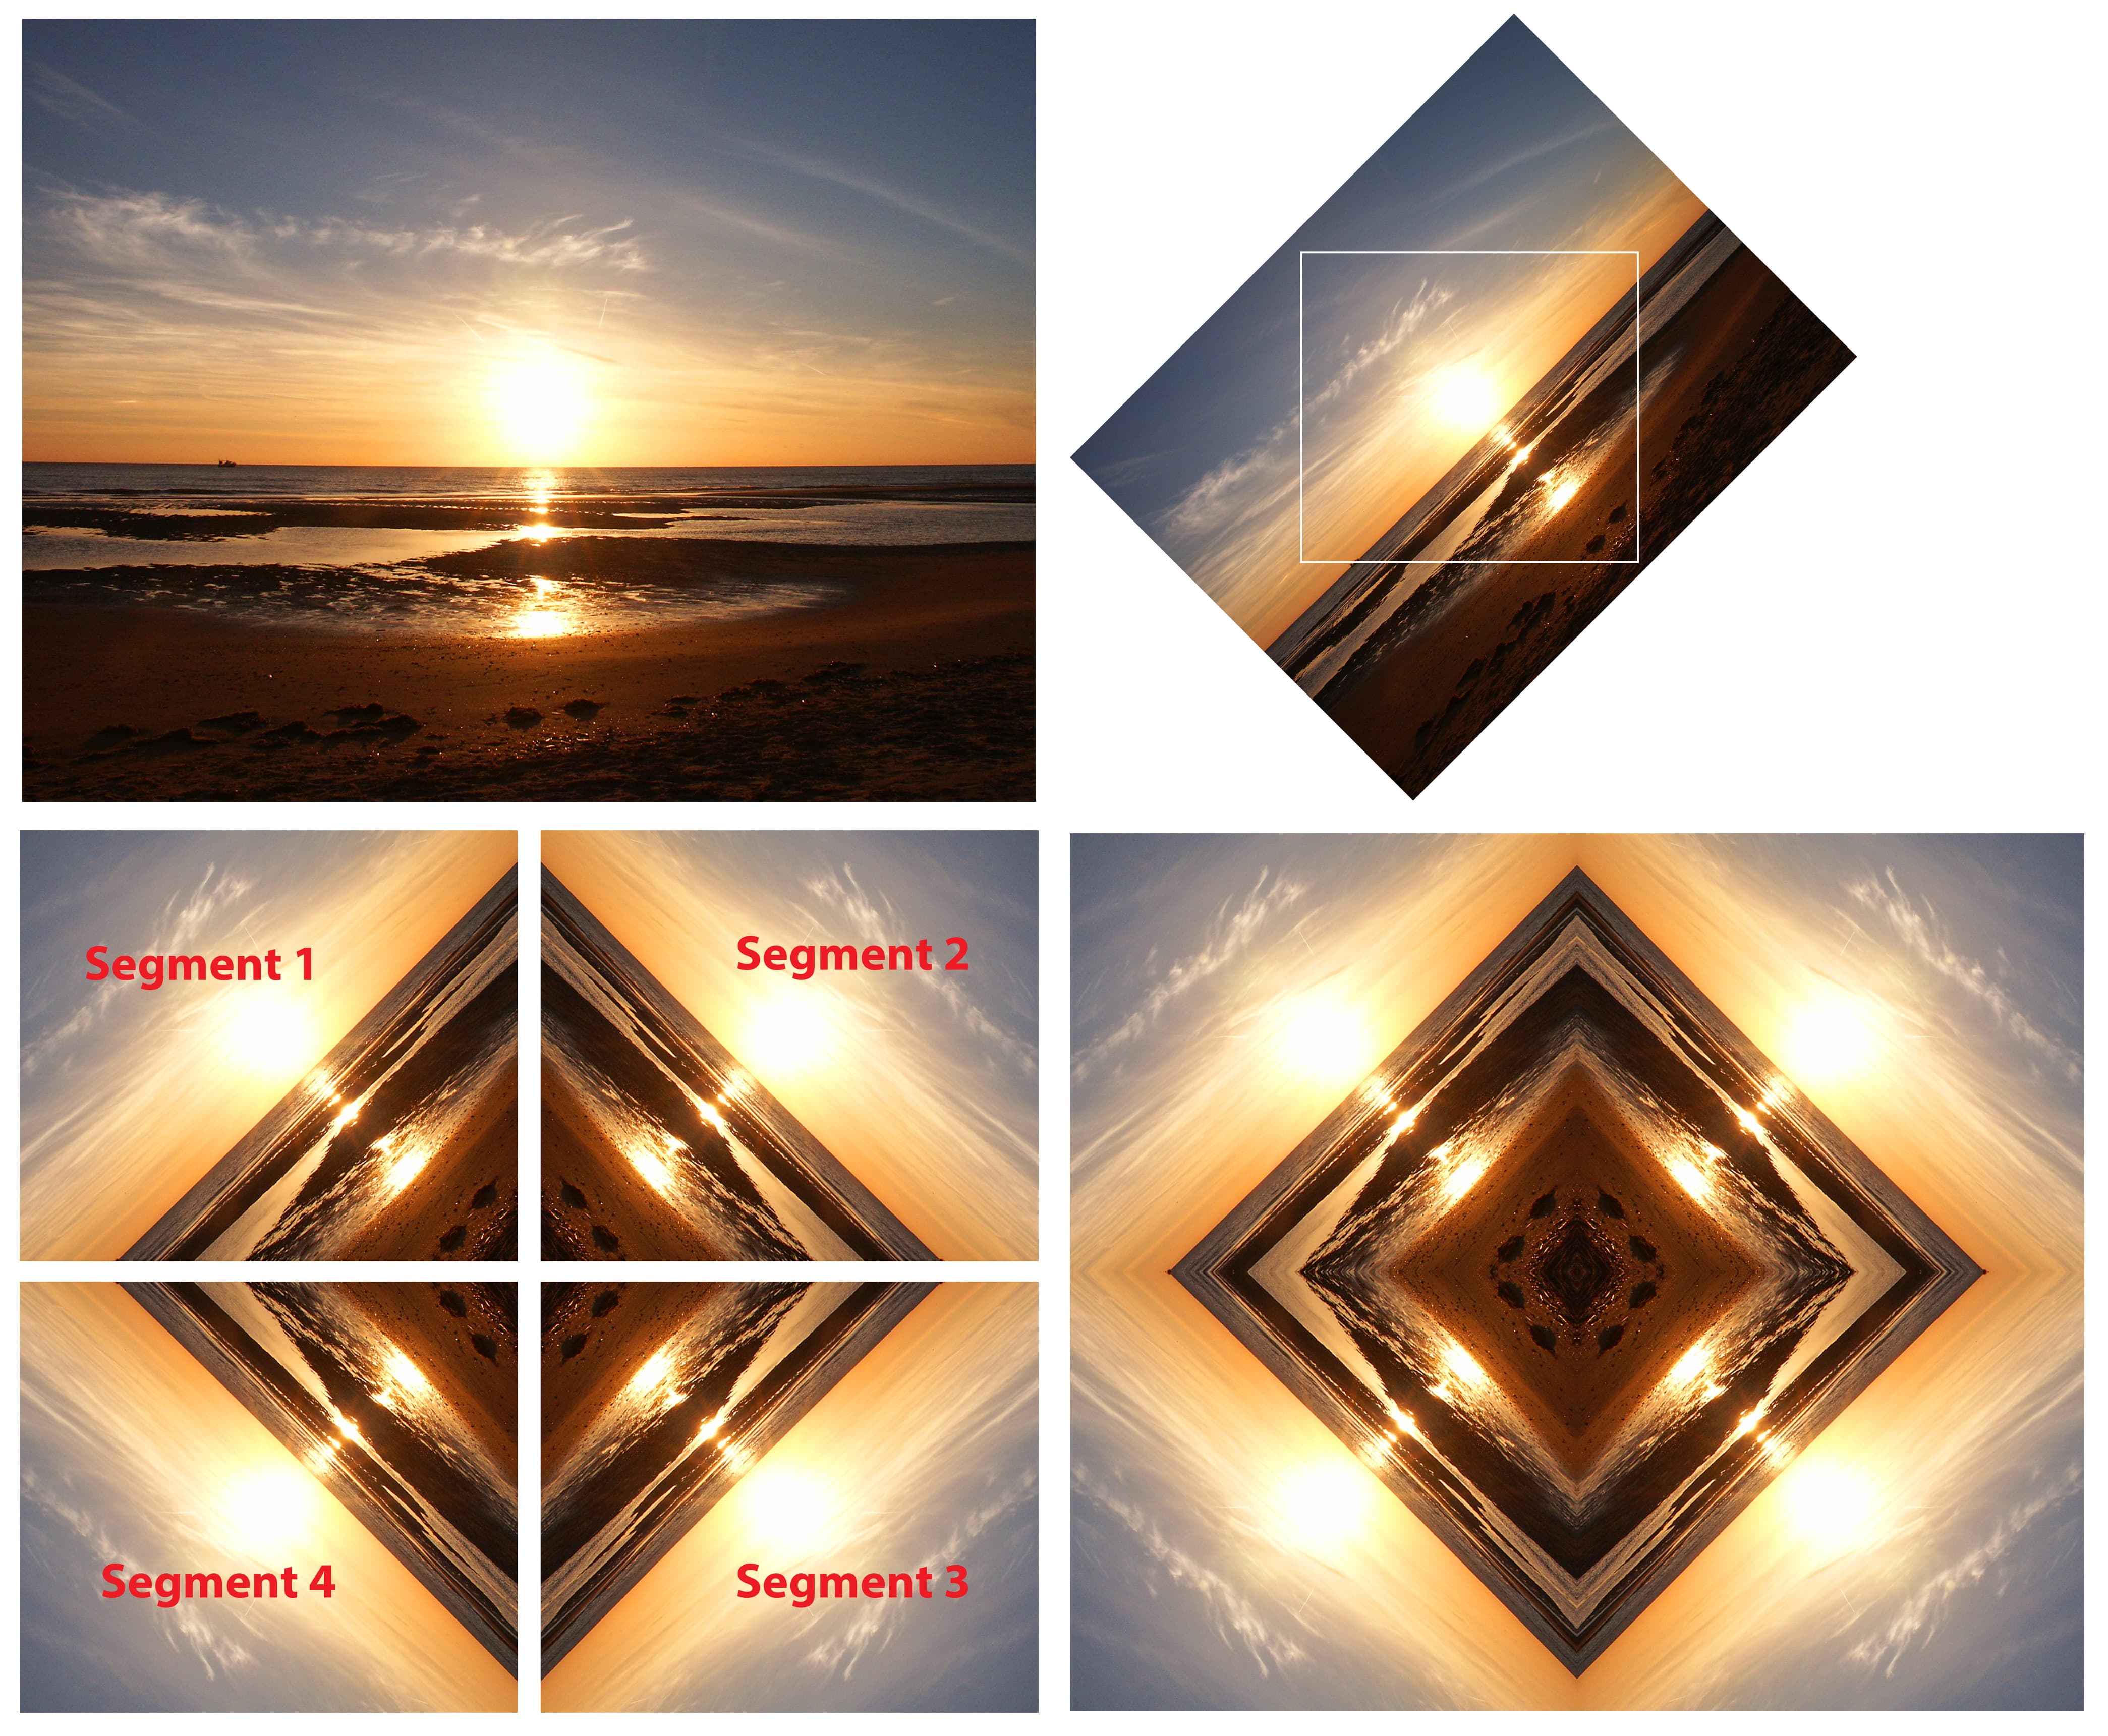
Top left, original picture; top right, rotated and segment 1 identified; bottom left, segment 1 in place with the other three flipped and positioned; bottom right, the finished kaleidograph.
Copy, flip and paste
Choose a suitable picture, rotate it 45° and crop a square section out of the centre. Call this segment 1 and copy it.
Open a new document, adjust the canvas size to twice the width and height of segment 1 and paste that segment in the top left corner.
Copy segment 1 again, flip it horizontally to make segment 2 and paste that beside segment 1. Copy segment 2, flip that vertically to make segment 3 and place it beneath segment 2.
Copy segment 3, flip it horizontally to make segment 4 and place it beside segment 3 and below segment 1. This will have automatically created four layers on one background, so flatten the layers. You’ve just made your first kaleidograph.
Twist, flip and paste
Copy any kaleidograph you have made with the above technique and paste it into a new same-size document. Open the perspective tool, grab the handle that appears at the top left of the image and distort it by dragging the handle all the way to the right. This will turn your image into a kind of ‘egg-timer’ shape on a separate background.
Copy that shape, flip it 90° and fill the background with it. Use the distort tool to make small adjustments until it fits and fills the available space. Flatten the image. Now you’ve made a second type of a kaleidograph.
Repeat the process
Both of these processes can be used as the basis for even further manipulation. Instead of starting with a normal image for the first version kaleidoscope, you can, for example, use an already created kaleidograph as your starting point and repeat the processes all over again. The more you do it, the more abstract the design becomes, creating unexpected and often beautiful images that seem to materialise from nowhere.
Taking things further
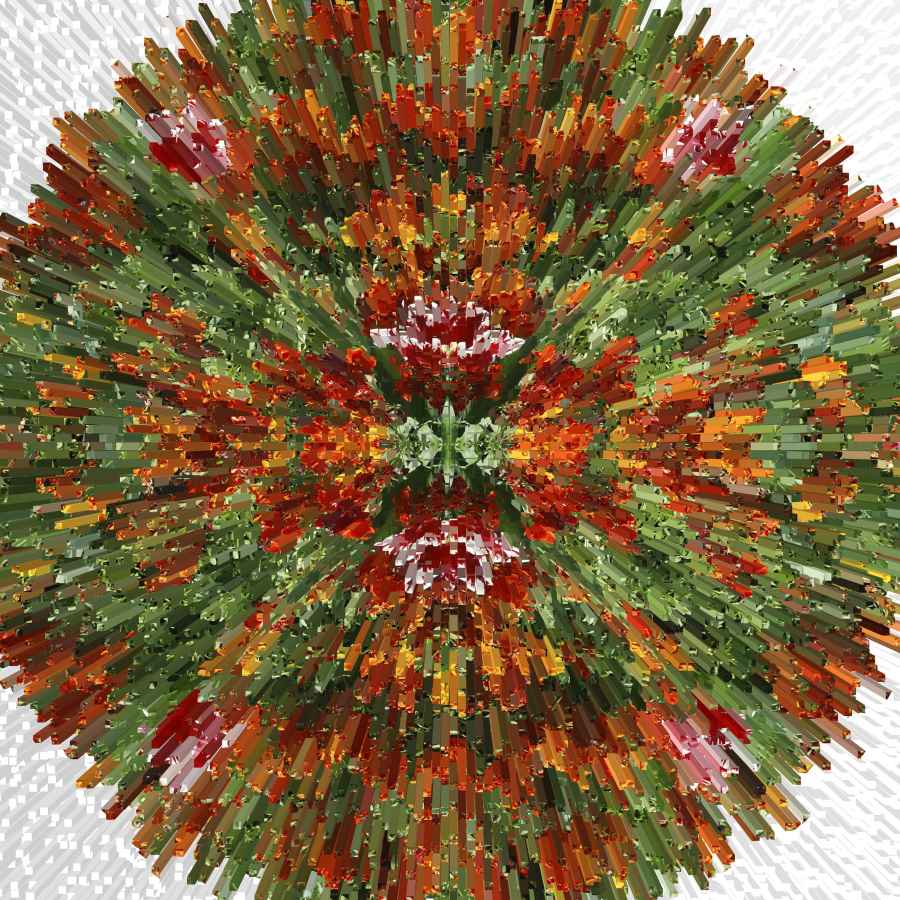
Here an image of a bed of tulips has been turned into a kaleidograph, then a circular portion cut out of the centre and subjected to Photoshop’s Extrude filter.

Photoshop’s twirl tool turned loose to twist a kaleidograph made from a sunset sky (below). Photoshop’s polar coordinates tool is a strange filter that takes a square or rectangular image and warps it into a circular image.
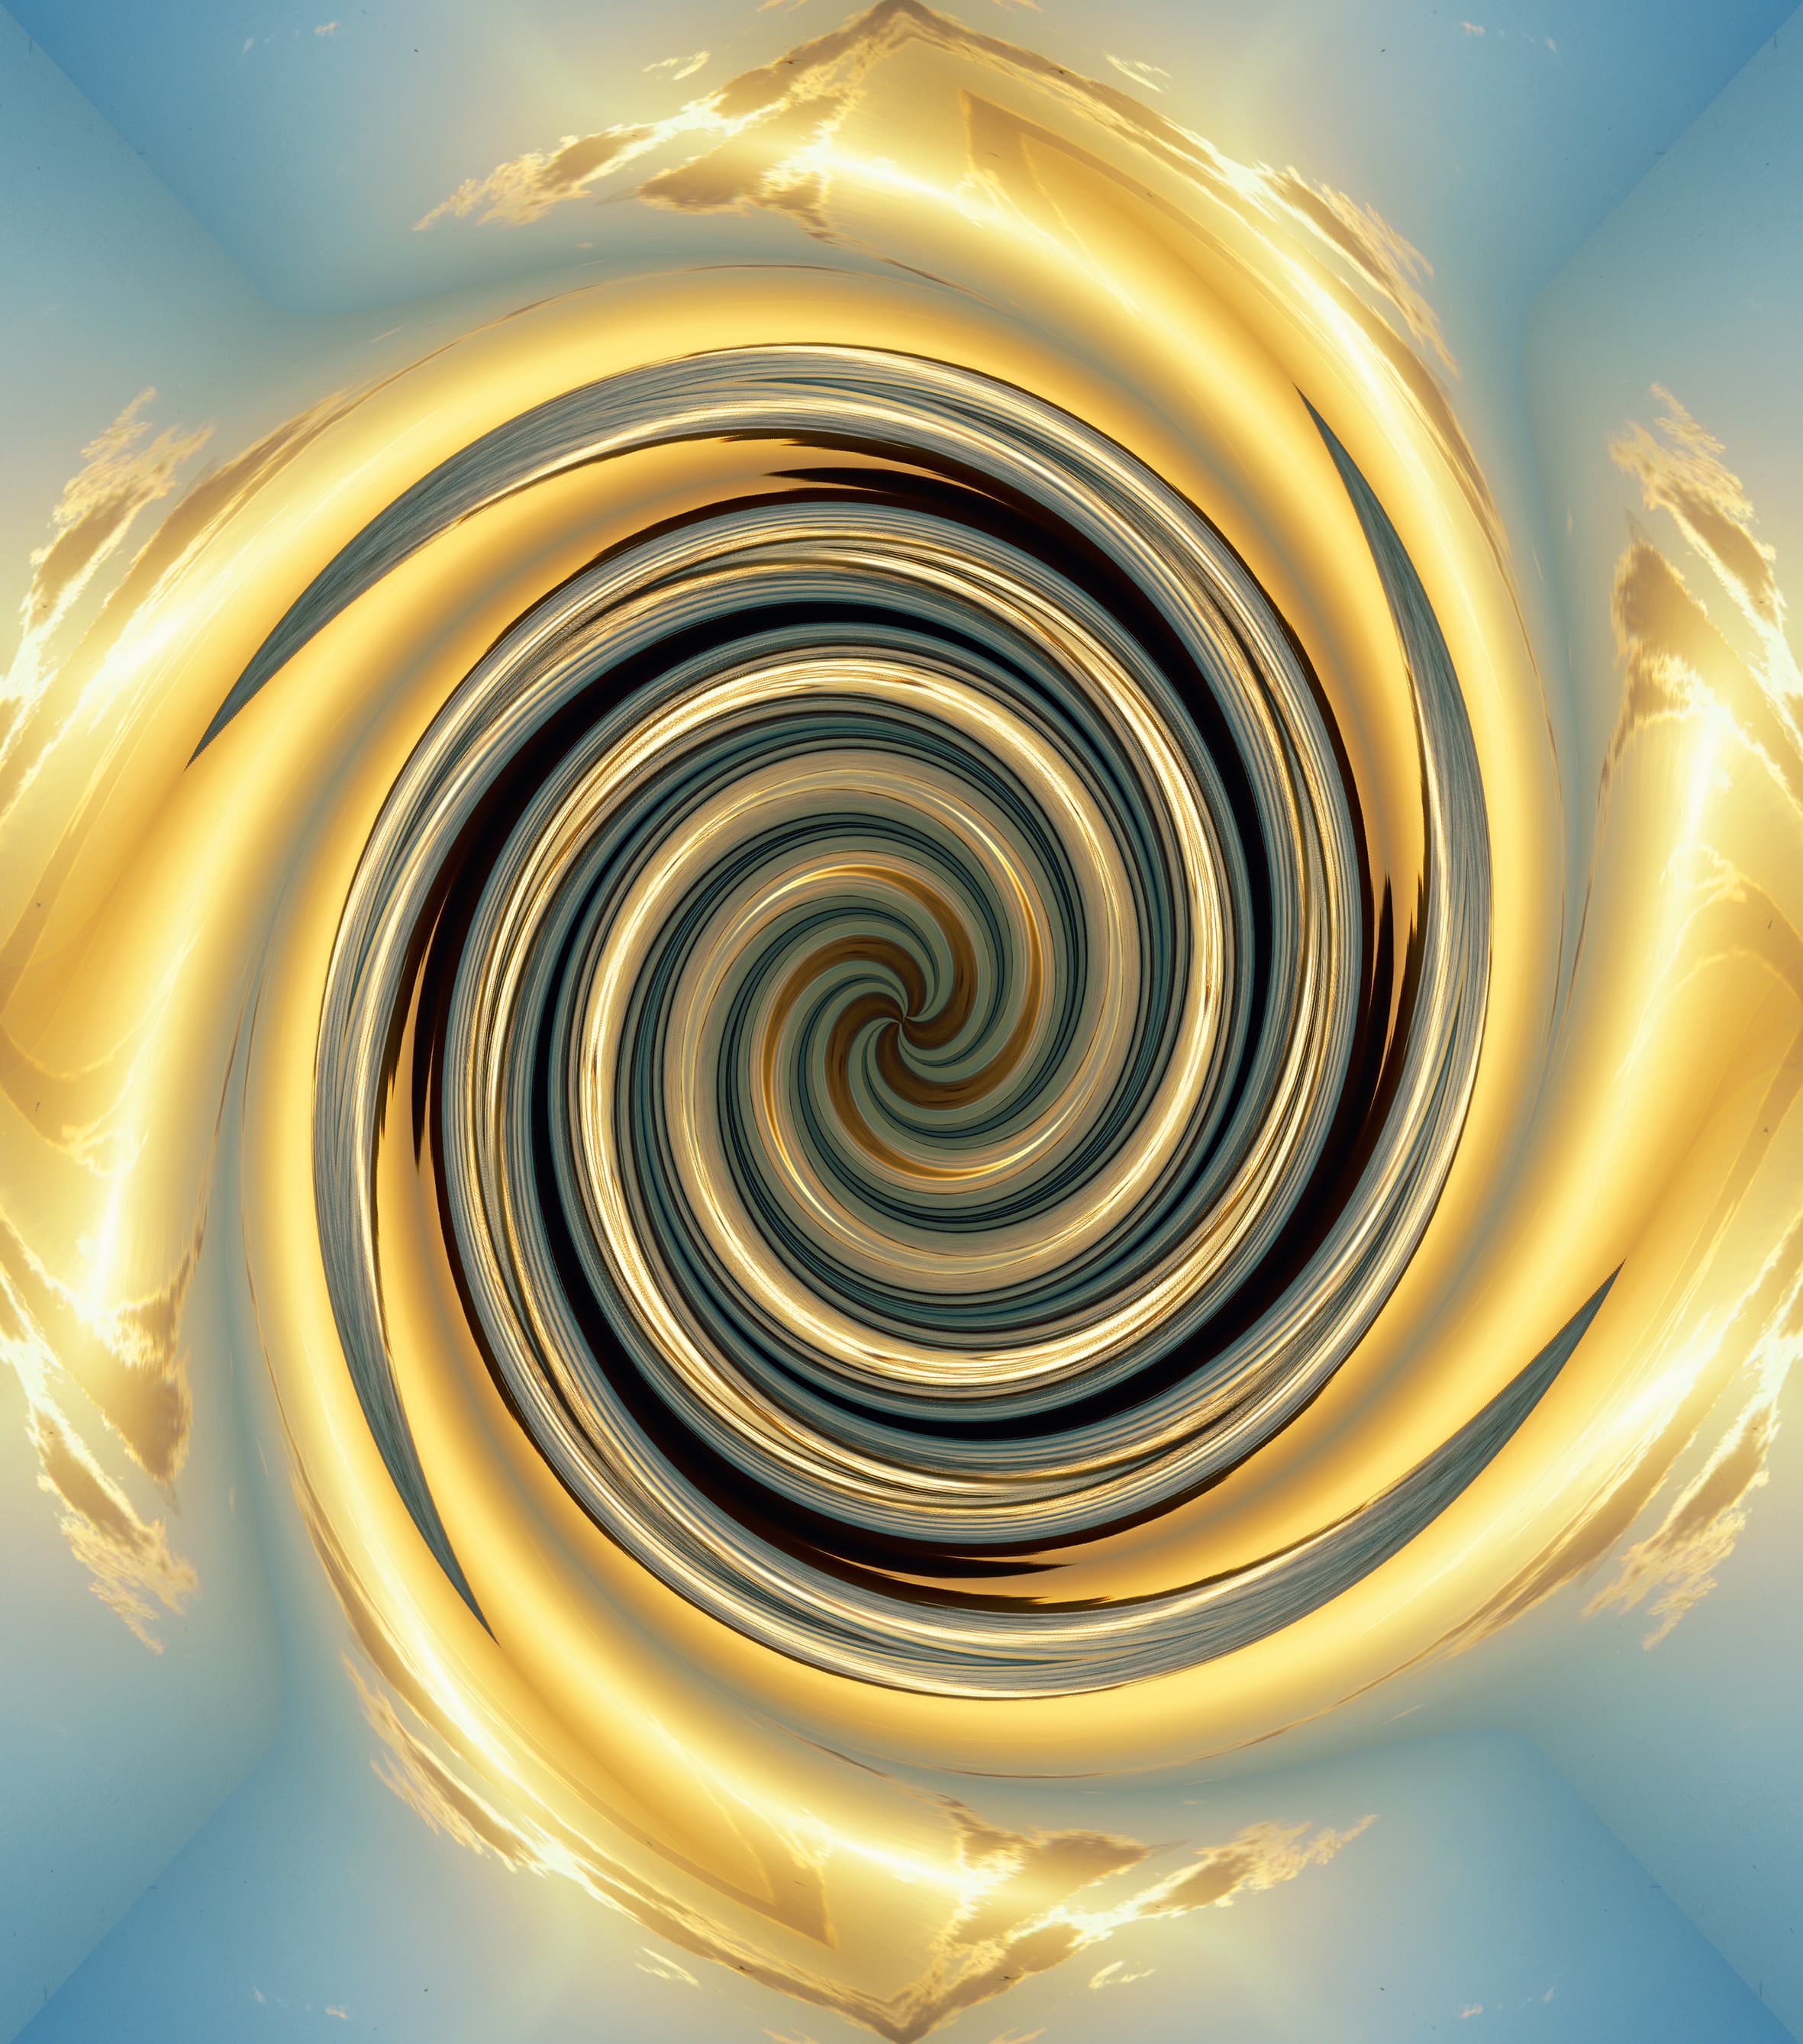
Apply it to a kaleidograph and you get weird effects. The original subject for this was a back-lit tree, while the egg-timer shape was created from a sunset over the sea kaleidograph.

The two halves were then copied and swapped to lay flat side against flat side with points at each end. Copying and pasting four versions of the same image together created the glowing diamond effect below.

Further reading


