Looking to make your black and white images stand out? Give them added punch and drama by using the dodge and burn tools…
Converting a colour image to black and white might seem like one of the easier Photoshop techniques to carry out.
If you’d like to produce mono shots that stand out from most others, though, there’s a lot more to it than simply dragging the Saturation slider from right to left.
To control the colour channels that make up a great black and white image, it’s vital to use a Black & White adjustment layer. The advantage of this is to give you all the control you need should you want to make further adjustments in the future.
Two other Photoshop tools that come into their own when creating great black and white images are the Dodge and Burn tools. Used to enhance the contrast between the brightest highlights and darkest shadows, it’s important to know how these work.
Follow these six steps over these two pages and you’ll be on the right track to creating better black and white images…
Create black and white images in Photoshop in six steps…

Create black and white images in Photoshop: Step 1 – Turn the image mono
 Convert your image to black and white.
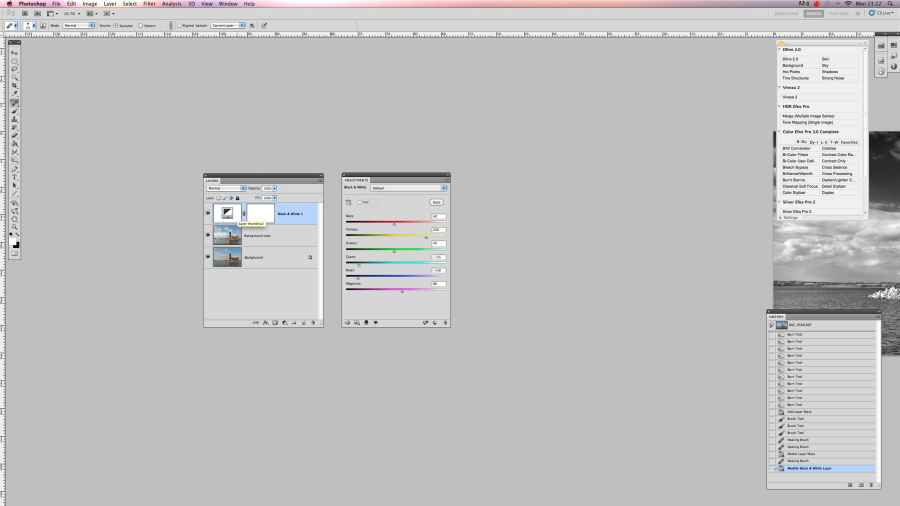
Then create a black & white adjustment layer by clicking on the icon in the Layers palette.
Alternatively, you can select Layer>New Adjustment Layer>Black and White.
Then click OK.
Create black and white images in Photoshop: Step 2 – Darken the Sky
 The black and white adjustments panel precisely controls the various colour tones in the image.
To darken the sky to make it more dramatic, we dragged the Cyans slider to -135, and set the Blues slider to -140.
Create black and white images in Photoshop: Step 3 – Enhance the tone of the building
 The Yellows slider is great for brightening up the lighter areas in an image.
We’re going to use it here to enhance the brightness of the church.
Drag it right to a value of around 200.
Create black and white images in Photoshop: Step 4 – Select the Dodge tool
 Click on the eye icon next to your adjustment layer to compare your image to your original.
Now select the Dodge tool by pressing ‘O’.
Holding Shift at the same time will cycle through the Dodge and Burn tools.
Create black and white images in Photoshop: Step 5 – Create a duplicate layer to work on
 Select the background layer and go to Layer>Duplicate Layer. Zoom into the image.
With the Dodge tool set to Highlights and 20% exposure.
Go over any highlights in the image you’d like to brighten.
Create black and white images in Photoshop: Step 6 – Darken with the burn tool
 Switch to the Burn tool. Set it to Shadows and 10% exposure.
Carefully brush over any dark areas to darken them even further.
This will serve to boost image contrast.
Now save the file with a new name.
Advantages of working with adjustment layers
 Provided you save your image as a .psd (Photoshop) file, it will give you the option of returning and making further changes to the black and white adjustment layer you created.
This is the benefit of working with adjustment layers, as they are non-destructive, which allows us to modify our adjustments long after they were originally made.
To make any further adjustments to the black and white adjustment layer, just double-click on the layer thumbnail icon to the right of the layer visibility icon and it will instantly load the adjustments panel.
Of course, if you do make any changes in the future, don’t forget to save the file before closing it.


