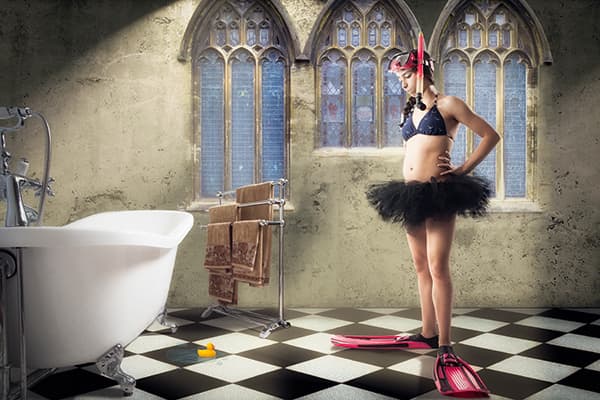

I had recently renovated the master bathroom in my house and, as part of the project, installed a claw-foot bathtub. For some reason, a comical image of a ballerina in a tutu staring down a rubber duck who’d been in the tub stuck in my head, and this concept was born. My daughter Natalie is a dancer, so she ‘volunteered’ for the project.
The bathroom isn’t large enough to create the scene as a single exposure. And there are the normal bathroom accoutrements, such as the vanity and the mirrors above it, which would only serve to confuse the scene. I needed to simplify the environment, and therefore knew I would have to create the image as a composite, selecting only those items required to tell the story.
I confess that I didn’t think this image all the way through at inception; some of the elements found their way in as I was in the process of creating it. I really didn’t know what I was going to use as a background, for example, but knew once I had the key elements in place – the tub, the duck and the ballerina – I would figure something out.
If I was going to make this a lighthearted image, I thought, I might as well go over-the-top with it, hence the swimsuit and snorkelling gear.
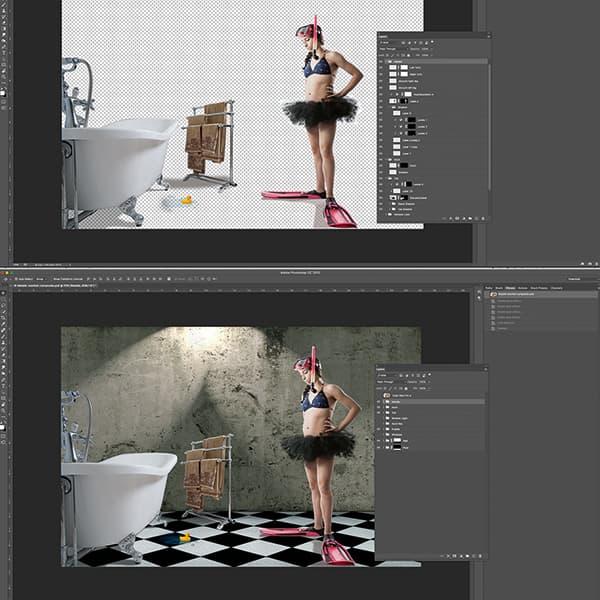
The base image of Natalie – complete with tutu and snorkelling gear, plus the duck – was taken in the studio. Although I shot the tub using an umbrella-mounted strobe, there’s a window at its rear that contributed significantly to the exposure, so I needed to have a strong backlight on her to mimic this. I also shot her against a white cyclorama in the studio, knowing it would be easier to cut her out using it. I placed the duck on the floor to give her a target to stare at; I would handle it separately in post-production.
Even though the image is lighthearted, to complete it I needed to add emotion. Usually this is done using shadow, but in this case I decided to add warm ‘light’.
Key images
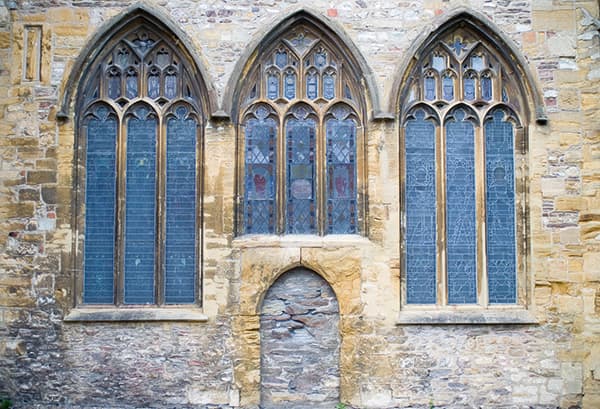
The windows are taken from a photograph I took of St Mary Magdalene Church in Taunton, Somerset.
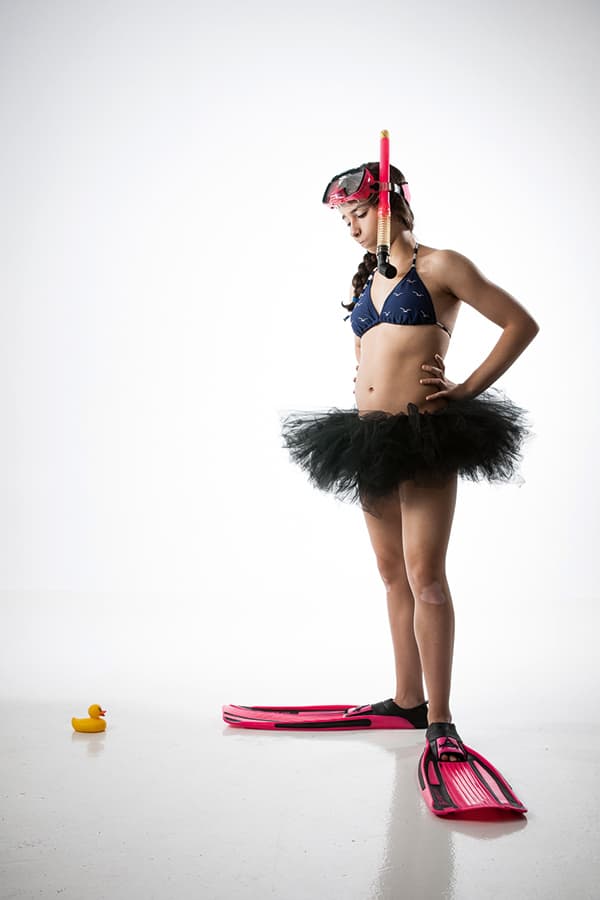
My daughter Natalie was photographed against a white background.
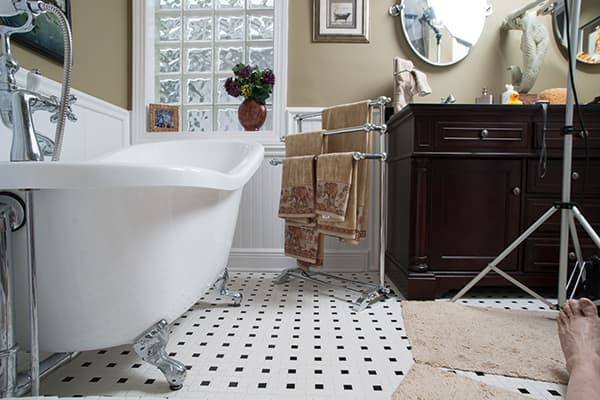
The straight shot of my newly refurbished bathroom and its claw-foot bath provided the inspiration for the composite.
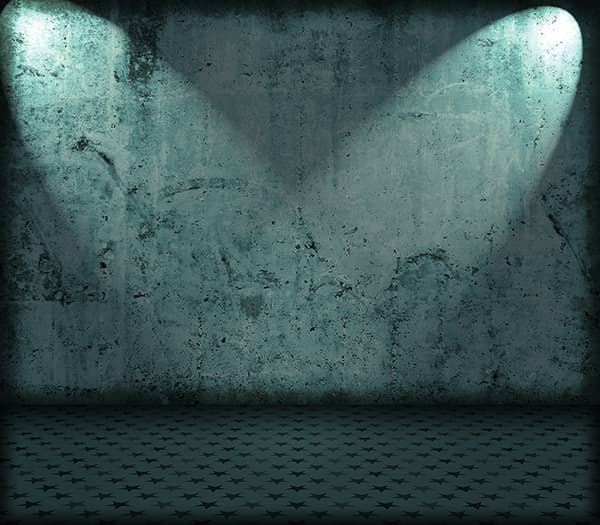
The wall is created from a royalty-free stock image, and provided the texture I needed.
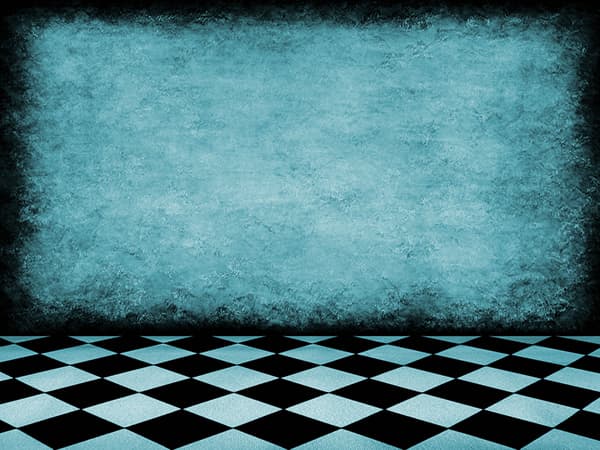
The checked floor is also a free stock image, and matches the reflections in the bath’s feet.
Step by step
1. Base
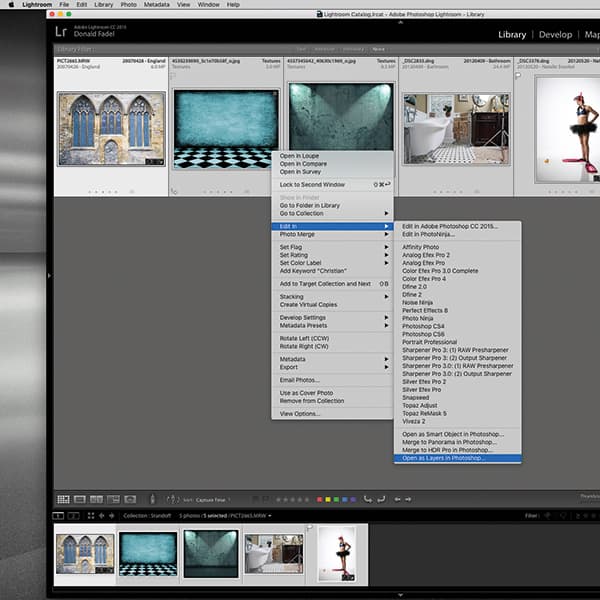
The composite is created from two base images (Natalie and the bathroom), which were shot in raw and processed in Lightroom. The windows are from an image I took of St Mary Magdalene Church in Taunton, and I used two free stock images for the wall texture and the floor. These were loaded into Photoshop.
2. Masking tub

I first masked out the tub using the Pen tool. The upper image shows the selection process; the mask it produces is underneath. Some clean-up was required to remove the tag on the towel.
3. Masking Natalie

Natalie was shot against a white background, to make selection easier. I masked her out using the Magic Wand tool on the background and Refine Edge to clean things up. Some cyclorama background is under the tutu, but changing the blending mode to ‘multiply’ eliminates this once the background is applied.
4. Duck and puddle
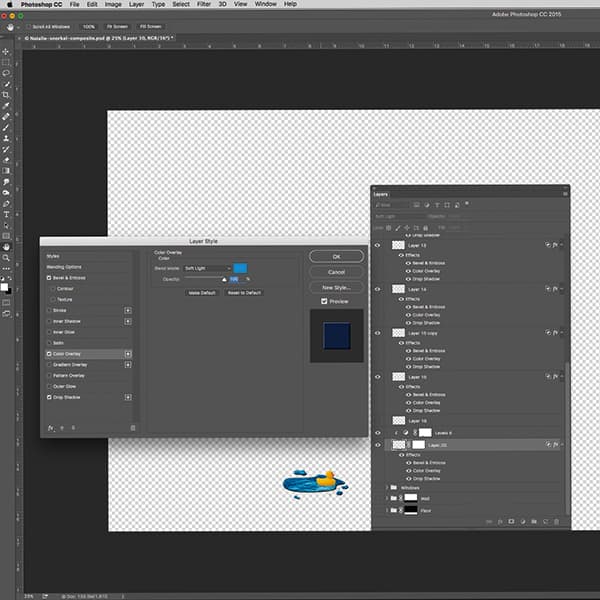
I cut out the duck to position it independently. The puddle is synthetic. I used Bevel and Emboss, Color Overlay, and shadow layer Effects to add depth. Soft Light Blend Mode makes the floor appear transparent. I added some ‘splashes’ using the same technique. Shown here at 100% Opacity, I lowered it to 33%.
5. Stock images
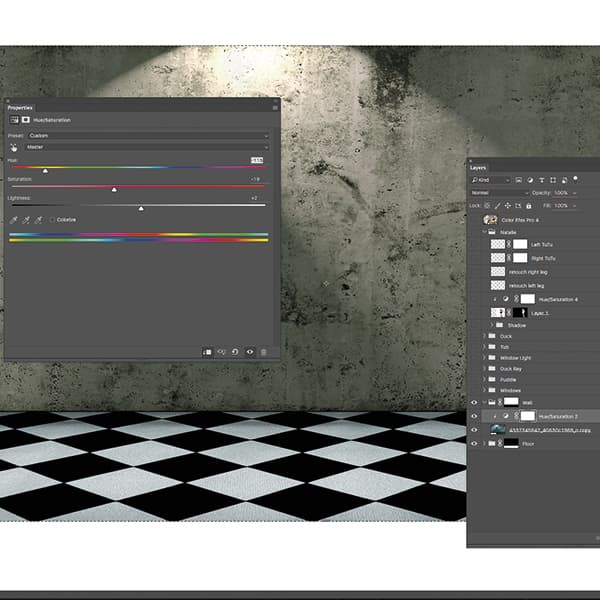
The free stock images I found online make up the floor and the wall. I searched for a checked floor pattern to match the reflections in the tub’s claw feet. I changed the colour and tonality using Hue/Saturation adjustment layers.
6. Shadows
Generally, the hardest part of a composite is to create realistic shadows. There are many ways to do this; here, I used a combination of Paint, Layer Opacity, Blend Modes (Multiply) and adjustment layers. You can see just the shadows in the top image and the bottom in context.
7. Windows
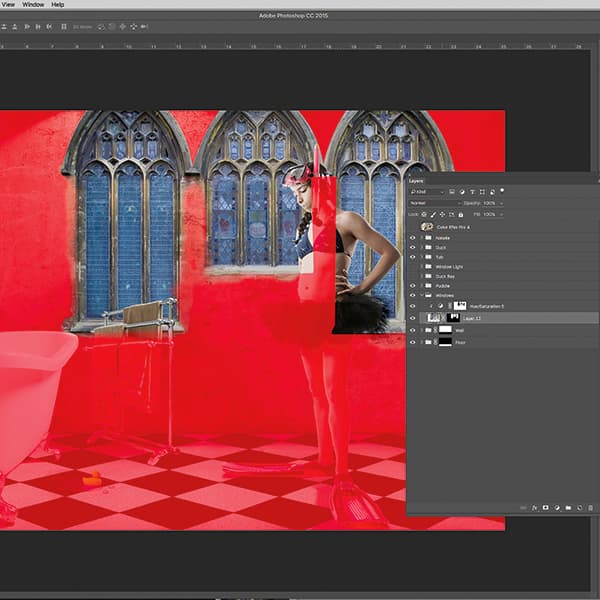
The windows are then masked in. Hue and Saturation adjustment layers – clipped to the image layers – are applied to match the rest of the image. Clipping layers, which apply changes only to the underlying layer, are used extensively.
8. Adding light
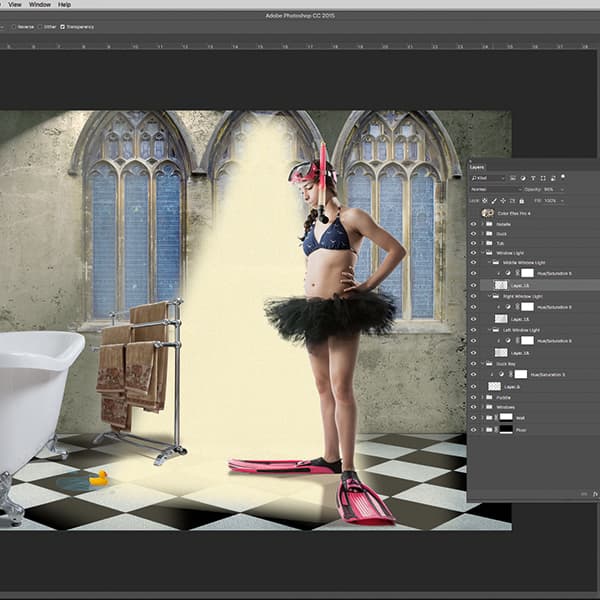
I added ‘light’ coming from the windows to help set the mood. These are simply a yellowish paint, which then had the Noise Filter applied and the Opacity lowered to taste. I show the middle window’s ‘light beam’ at 100% Opacity.
9. Finishing touches
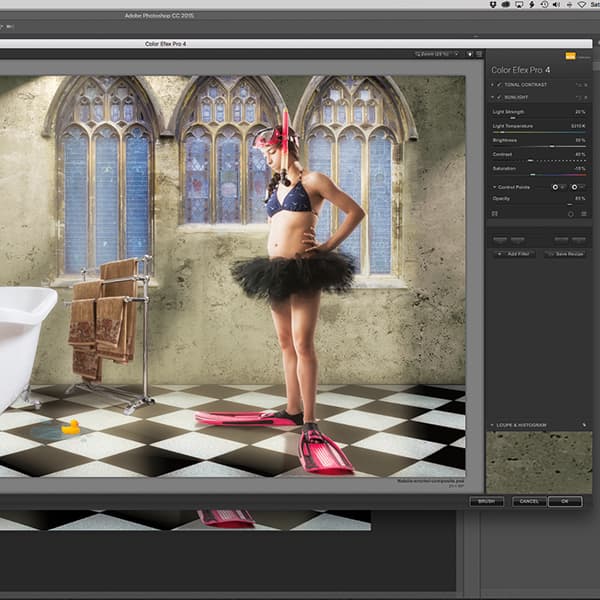
Finally, I tied everything together using Nik’s Color Efex 4 Sunlight and Tonal Contrast filters at a slightly lower Opacity (74%). I finished up the image back in Lightroom, adding a vignette.
Don Fadel

Don is based in Florida, USA, and specialises in commercial photography. He is fascinated by light in all its forms – created as well as found – and embraces digital photography, and essential tools such as Photoshop and Lightroom. Website: kidona.com.


