
Before.
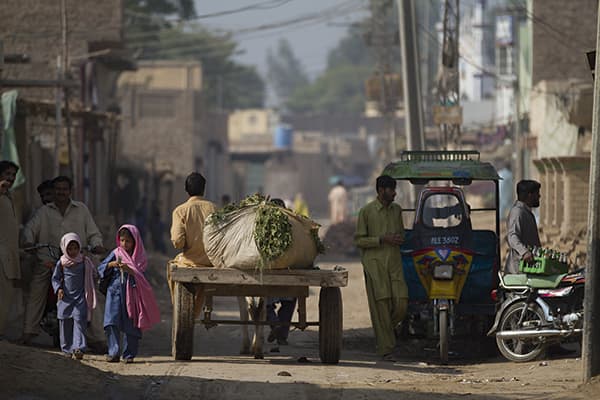
The crop aspect ratio of the photographs we take is often heavily influenced by the aspect ratio of the camera itself. With a digital SLR camera the aspect ratio is usually 3:2, while many medium-format cameras have a square format. This definitely affects the way photographers shoot. Personally, I like to shoot with a view of how an image might be cropped afterwards – something that stems from my background as a commercial photographer where I always second-guessed how an art director might eventually want to use my photos. With this particular image by Javaid Akhtar there were a lot of interesting things going on, but their arrangement suggested it would best suit a cinematic crop format.
After.
1. Crop the image
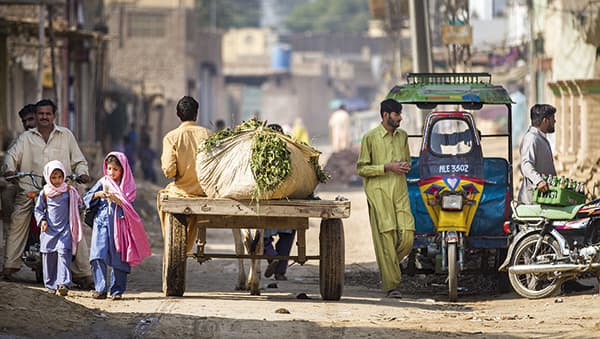
 The first step was to apply a cinematic-style crop. The aim here was to apply a crop that hinged on the subject content and focused on the people in the image. There was also a chap on the left who had clearly spotted the photographer taking the photograph, so it helped to remove him from the scene.
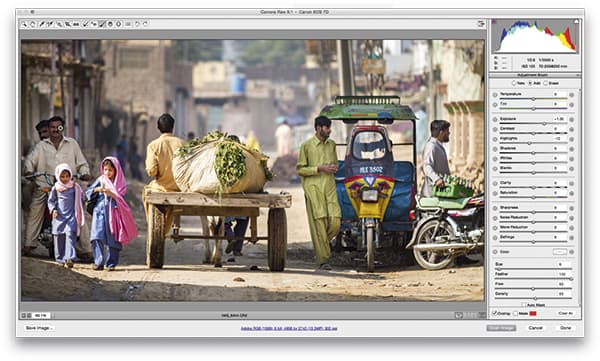
2. Basic panel adjustments
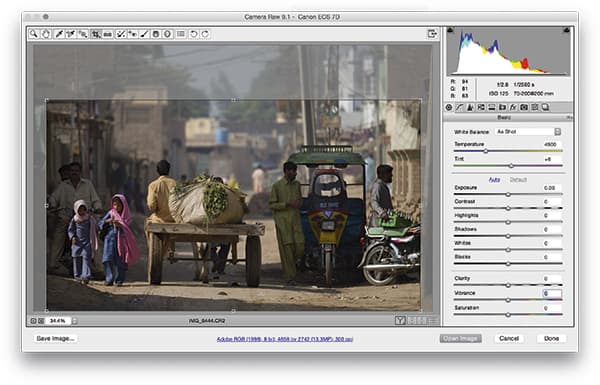
 Having done that, I went to the Basic panel in Camera Raw and clicked on the Auto button to apply an auto tone adjustment. This mostly lightened the image. I followed this by making a few further tweaks to the Highlights, Shadows, Whites and Blacks sliders to fine-tune the settings.
3. Add localised adjustments
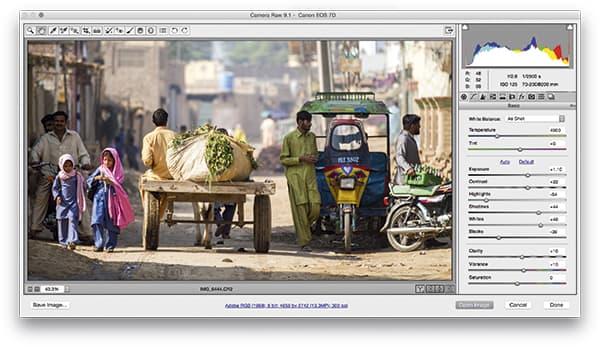
Lastly, I added a Graduated Filter to darken the top section of the image. I then selected the Adjustment Brush and applied a Lightening Brush adjustment to the darker areas like the bodies and faces of the people. In this case I set the Exposure slider to +1.3.


