Of all the image-editing Photoshop tools that have changed photography in the past 25 years, Layers is undoubtedly the most important. Among the many things you can do with them, they let you combine images, change tones, add design elements like text, try out filters and take your images in all kinds of different directions. What’s more, by keeping each element within an image separate and editable, they’re essential for a non-destructive workflow. We’ll explore some of the ways in which layers enable us to get creative with our images in Photoshop Elements. We’ll begin with the fundamentals and explore features like Blend Modes and Layer Masks, before explaining how to create stunning layer-based effects.
How layers work
One of the greatest strengths of Photoshop Elements is its Layer controls. These are found in the Elements Expert mode. The other editing modes hide layers from you, but if you want to get the most out of Elements, then it’s essential that you explore the possibilities of working with them. But what exactly are they? Layers are like sheets of tracing paper laid out on top of one another. Any transparent or semi-transparent parts allow the layers below to show through. As such, you can do all manner of creative things, like combine several photos into a composite, blend layers with opacity or blending modes, change colours, add tonal effects and much more. Crucially, because each individual element within the image is housed on a separate layer, they all remain editable throughout the workflow. Saving the image as a PSD file means that all layers will be intact the next time you open the image.

Credit: James Paterson
The layer stack
Layers can either be created by making a new one, or they are automatically generated whenever you copy in a separate image or part of an image. These layers form a stack, which can be viewed and edited using the Layers Panel. The hierarchy of the layer stack is important, as layers on top will obscure those below. As well as pixel-based layers like images, there are other types too. Adjustment Layers are tonal effects that work over all the layers below them in the stack. And vector-based layers like text or shapes let you include design elements in your document.
Credit: James Paterson
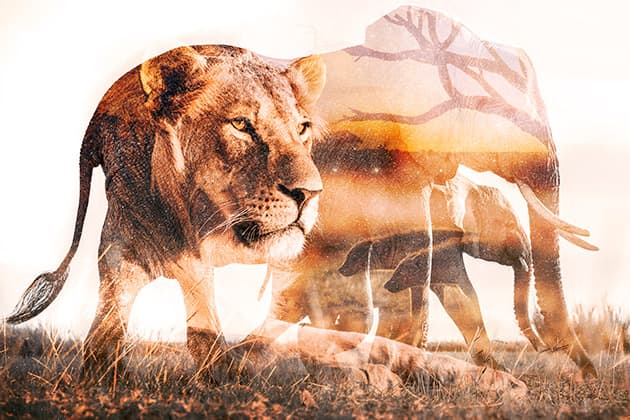
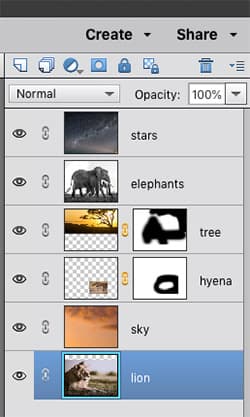
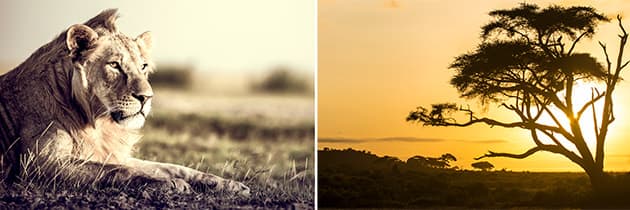
The Layers Panel
The Layers Panel is the control centre for all your layers. The icons dotted around the box allow you to create new layers, add masks, make adjustment layers, and group layers together.
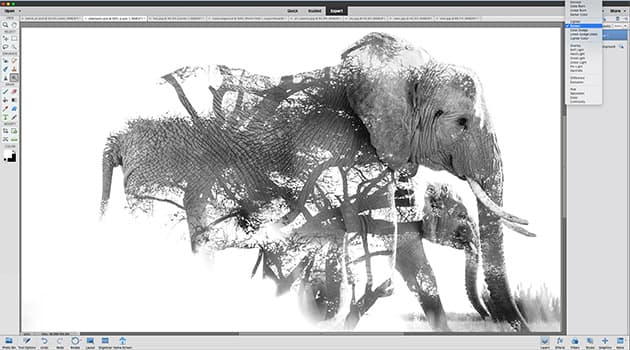
- The lion layer is a pixel-based layer on which all the others are stacked.
- The sky layer is set to the Overlay Blend Mode, which boosts colour and contrast.
- The hyenas are blended at 70% layer opacity, and a layer mask has been painted to make a smooth transition between this layer and the others.
- The tree layer is set to the Soft Light blend mode and masked to only show in the top right of the frame.
- The elephants layer is converted to monochrome and set to Screen, which results in this multiple- exposure effect.
- Finally, the star layer is set to Overlay so that the bright stars blend with the layers below.

You can convert separate layers to black & white in the stack. Credit: James Paterson
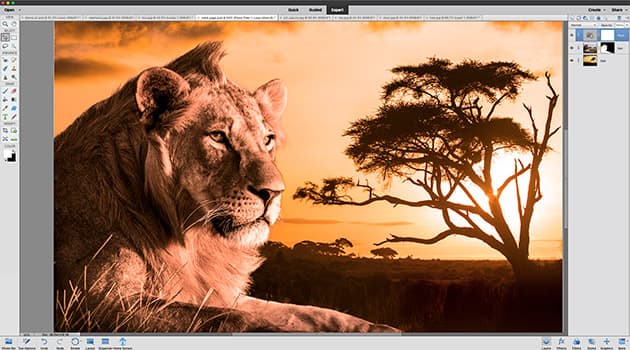
Layers and workflow
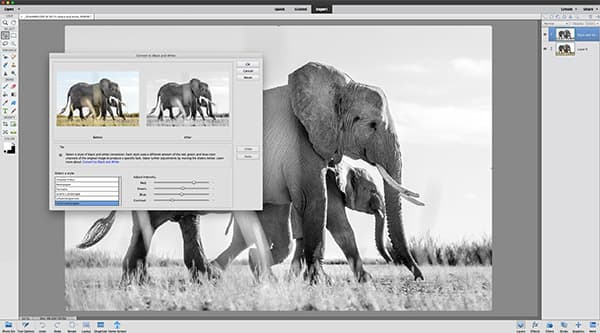
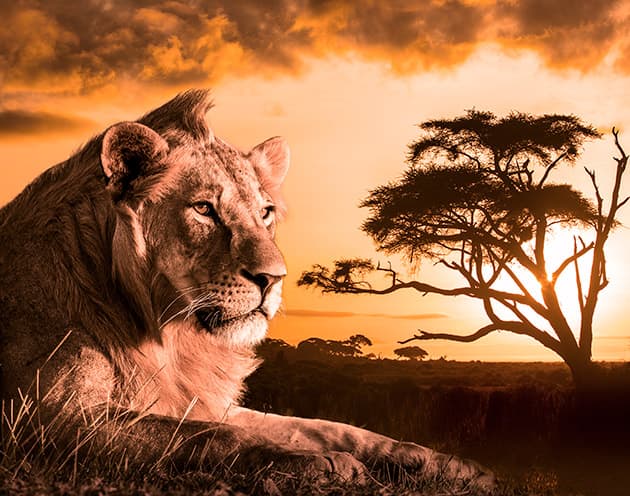
One of the biggest benefits of using Layers is the control it gives you over your workflow. When you first open an image it’ll appear as the ‘Background’ Layer. The wrong thing to do is to start making changes to this layer. Instead, if you want to alter it, first duplicate it (either hit Cmd/Ctrl+J or drag it to the New Layer icon in the Layers Panel) and then start making changes to the duplicate layer. Your original image is untouched, so you can always go back to it if necessary or make another copy to try something different. This is the basis for a simple non-destructive workflow. It might sound dull, but ‘non-destructive’ is a hugely creative way to work, as it gives you the freedom to try out different effects and experiment with tonal treatments, so you can take an image in all kinds of creative directions. Here by making our duplicate layer black & white (using Enhance>Convert to Black and White), we can always revert back to the colour version if we need to.
Six things you can do with layers
Credit: James Paterson
Combine photos
One of the simplest ways to blend two layers is to lower the opacity of the top layer so that the layer below partially shows through. We do this by adjusting the layer opacity at the top of the Layers Panel. The opacity slider is also very useful for altering the overall strength of an Adjustment Layer.
Credit: James Paterson
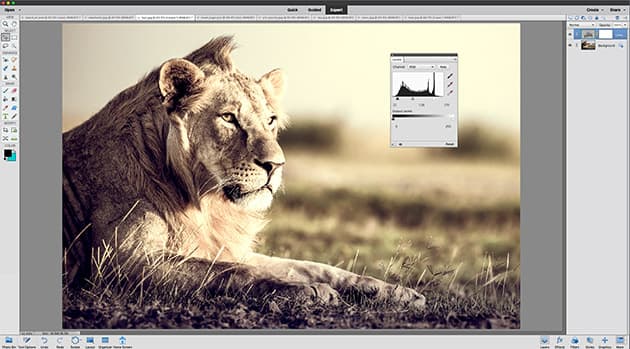
Adjust tones
Adjustment Layers are tonal effects that affect all the layers below them. To add one, click the circular ‘Create Adjustment Layer icon in the Layers Panel. Here a Levels Adjustment lets us boost contrast and add a colour cast. The settings can be edited at any time by double-clicking the layer thumbnail.
Credit: James Paterson
Create composites
Layer Masks allow us to create composites by hiding or revealing parts of a layer, so that the layers below show through. We simply add a mask, then paint with black over the image to hide areas, or white to reveal them. It’s like an eraser, only nothing is ever lost but is only hidden from view.
Credit: James Paterson
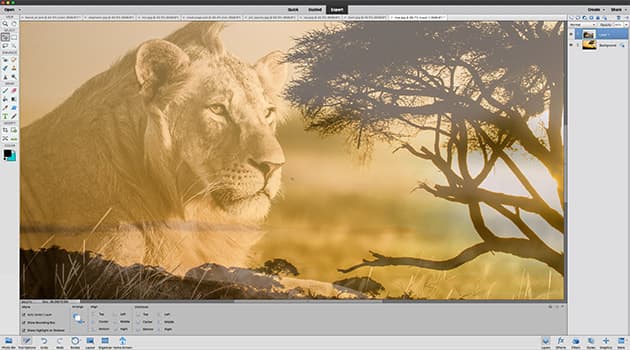
Blend images
Found at the top of the Layers Panel, the list of 25 layer blending modes lets you combine layers in creative ways. It’s not always apparent which blend mode will work for your images, so it’s worth experimenting with different modes. Here the Screen mode lets us merge the trees and elephants for a simple double exposure.
Credit: James Paterson
Add graphics
You can arrange all kinds of graphics and shapes on separate layers, which is helpful for all kinds of tasks – from designing posters to laying out web pages. Elements offers a handy selection of ready-made shapes and graphics for you to play with, found under Window>Graphics.
Credit: James Paterson
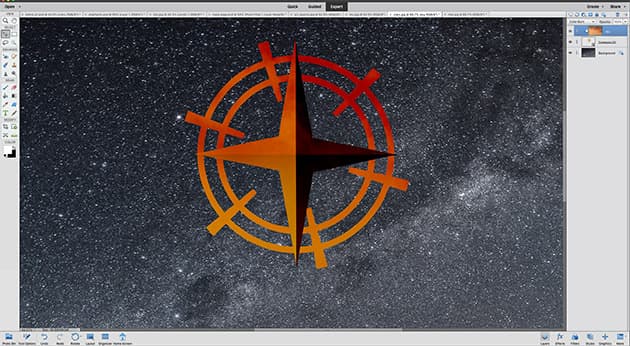
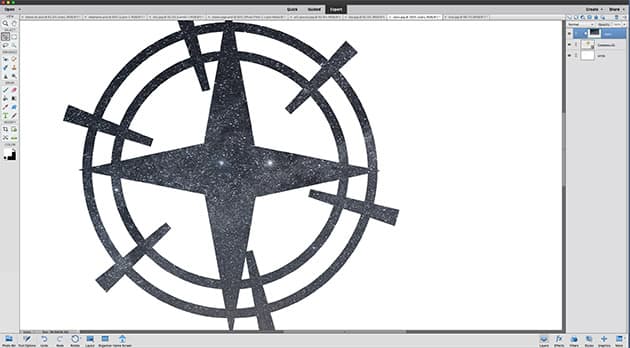
Apply Clipping Masks
A Clipping Mask confines the upper layer to the outline of the layer below. So it works well when you combine an image with a strong shape. Simply drag the image layer on top of the shape layer, then right-click the top layer and ‘create clipping mask’. Here it lets us ‘clip’ an image of stars to the shape of the compass.
Using layer masks you can combine images together for a flawless result. Credit: James Paterson
10 quick layer tips
- Hide all layers Alt-click the eye icon on a layer to hide all others, and Alt-click it again to reveal them.
- Speedy copies Hold Alt and drag any layer, layer mask or style up or down the layer stack to make a quick copy.
- Select the outline Hold Cmd/Ctrl and click on any layer or mask thumbnail to load the shape of the layer as a selection.
- Painting masks When painting a layer mask, hit X to flip between black (which hides) and white (which reveals).
- Embed Layer Masks A layer can have more than one mask working over it if you turn the layer into a group (Cmd/Ctrl+G).
- Merge a copy Hit Cmd/Ctrl+Shift+Alt+E to create a new layer containing a merged copy of all the visible layers.
- Experiment with blend modes Use Shift and plus or minus to cycle through layer blend modes (when not using a brush-based tool).
- Adjust your adjustments Double-click the thumbnail on any Adjustment Layer to re-enter and adjust the tonal settings within.
- Make a clipping mask Alt-click the line between two layers, and the top layer will only be visible where it overlaps the layer below.
- Drag and drop To quickly copy one image into another, use the Move tool to drag it to the tab of the other image, then down and in.