Night landscape photography
 Most photographers tend to undertake their landscape assignments in the daylight hours, and the hours immediately prior to and after sunrise and sunset are often held up as the best time to get interesting light. However, more adventurous photographers will also find that many landscapes work just as well in the dark of night.
Photographing images at night by shining a torch at your chosen subject using the technique known as ‘painting with light’ is actually a relatively simple process and, as a bonus, doesn’t require lots of expensive equipment to achieve stunning results.
I love shooting at night as it allows me to re-visit locations I have already been to countless times and photograph them in a completely different and distinctive way. It also allows me to get out taking pictures on the short winter days and the process is surprisingly relaxing and enjoyable.
Night landscape photography: Planning
As with all photography, planning in advance on how to best use the available light to your advantage is paramount to taking good pictures. Despite being dark, a wonderful variety of lighting conditions are still possible and these will affect the images you produce.
Weather conditions and light pollution are two such factors that can have a dramatic effect. For star-trails it’s essential to pick a clear night, but that doesn’t mean you should ignore cloudy weather. Although cloudy weather means you will not be able to record star trails, moving clouds can still make for some stunning pictures, particularly when they take on the colours of light pollution from built-up areas.
Before taking pictures you need to find a suitable subject or location. There is no point in looking for these in the dark, so ensure you seek them out during daylight hours. When I find a suitable subject I try to pre-visualise how it will look in the dark. I frame up suitable compositions and carefully search the area for potential hazards such as a river or potholes, as these can be hard to see in the dark even with a torch.
I find subjects that include a strong outline against a night sky work particularly well. Windmills, churches, trees, or rusty farm machinery all make for some fascinating images. By adopting a low viewpoint in our images we can then use a powerful night sky to add further drama to our pictures.
When in remote, dark areas there are basically three main light sources that can be utilised to illuminate your chosen subject: moonlight, flashlight and torchlight.
Moonlight is probably the most powerful lighting source and it also has a dramatic effect on how our images will appear.
Both torchlight and flashlight are great for lighting most subjects and offer a lot of control over what areas of the scene you wish to illuminate. With a torch it’s possible to light just one particular subject or a small area in a scene.
A good quality flashgun, meanwhile, will allow you to illuminate a relatively small section of an image with the bonus of being able to control the power output. When fitted with coloured gels a flashgun can add a splash of colour to scenes.

A mix of flash, torchlight and my car headlights lit this barley field in Norfolk.17mins @ f/10, ISO 100.
Taking Pictures
Night landscape photography – Taking pictures
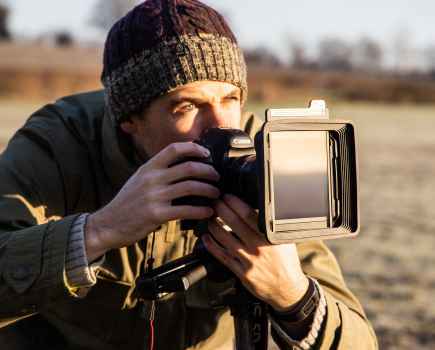
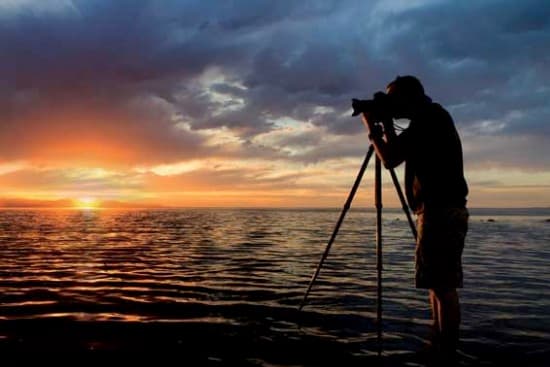
Taking night pictures requires only the most basic kit. The essential items are a DSLR with a bulb facility, a lens, a sturdy tripod, a cable release or remote to lock open the camera’s shutter and a light source to illuminate the subject.
I like to arrive at my chosen location while it’s still fairly light to enable me plenty of time to easily compose and set the focus on my camera before it’s dark. When setting up I always make sure my tripod is on secure ground before suspending my camera bag from the hook on my tripod. This helps to steady the camera and also ensures that it is not going to blow over should there be a sudden gust of wind.
With long exposures digital noise can be a major problem so it’s essential to keep the ISO as low as possible, usually around ISO 100 or 200. To reduce noise you could simply use Noise Reduction if your camera has such a facility. I find this works well, though the downside is that the exposure time is effectively doubled while the camera takes a dark frame to identify noise.
Because of this I find it generally acceptable to use for exposures up to five minutes. For longer exposures I turn it off and apply any required noise reduction in post-processing.

A small amount of cloud has added interest to this otherwise clear sky above Happisburgh Lighthouse on the Norfolk coast. 4mins @ f/5.6, ISO 200.
Once you are ready to take the image, lock open the shutter using a cable release or remote and take a note of the start time. While the shutter is open the next job is to begin illuminating your main subject using a torch or flashgun. I always make sure I stand to one side of the camera and avoid walking into the exposing frame with a visible light source.
The amount of light your subject requires will depend on several things including the actual subject and the distance from your camera.
For subjects such as windmills I normally use a mixture of flash and torch light. When painting by torchlight it’s important to use slow and even strokes without leaving the torch shining on a particular part of the image for too long.
If the subject is more than 20 metres away from the camera then it will require considerably more light than you think. Getting the correct exposure requires a little bit of trial and error, so it’s important to remember the length of the overall exposures and roughly the number of flash bursts or the amount of time you illuminated the subject using the torch.
Once you feel you have given the subject long enough, then release the shutter or cable release lock and review the completed image on the LCD screen of your camera.
Night landscape photography – Equipment
 DSLR with Bulb Mode
To achieve successful night images that allow a long enough exposure to capture movement you will need to check that your camera has the facility to lock open the shutter using B or Bulb Mode.
Chris Uses:
Canon EOS 5D with 17-40mm, 100-400mm and 100mm Canon lenses
Alternatives:
Almost all DSLRs and a small number of compacts have a Bulb mode
A Sturdy Tripod
Exposures can run from minutes to hours so a sturdy tripod and head is crucial. For extra stability avoid raising the central column and if your camera has the facility to suspend your camera bag from it, use this to aid stability.
Chris Uses:
Gitzo G1227 MK2 Carbon Fibre Tripod (£400)
Alternatives:
- Velbon CX 440 (£40)
- Manfrotto 190XPROB (£100)
- Giottos MTL8350B Carbon Fibre (£200)
Battery Grip
 Not essential, but if your camera can accept a battery grip it will allow you to use more than one battery in your camera at a time, so you can take longer exposures before the camera’s power runs out.
Remote Release
A remote or cable release is essential to allow you to lock open your camera’s shutter button over a long period of time and allow you to walk round the side of your subject to illuminate it with your chosen light source.
Chris Uses:
Canon RS-60E3 remote
Alternatives:
- Nikon MC-DC2 (£20)
- eculine Twin 1 R3 Universal (£30)
Light Source
 A light source is vital to allow you to illuminate a subject. A flashgun that can be used off camera, and a powerful torch, will both come in handy. Remember to carry a spare torch with you to find your way back to your car.
Chris Uses:
A Canon 550EX Flash Gun and a Challenge 2m Candle Power Rechargeable Spotlight
Alternatives:
Sigma EF530 flash (£120)
by Christopher Herring