Landscape photography is one of the most popular and widely practised branches of photography, and with good reason: the UK is home to numerous national parks and thousands of square miles of truly stunning countryside, much of which is easily accessed via public paths. Off the beaten track, the views can be even more dramatic, especially if you plan ahead or if you’re lucky enough to get interesting light on the day.
From the rolling green hills of the Cotswolds to the stark mountains of the Scottish Highlands, the UK offers everything from tranquil woodland to thundering waterfalls – all of which can be captured as jaw-dropping images with a bit of forethought, practice and luck.
The first and most important thing to bear in mind is that amazing landscape photography doesn’t happen by accident, or at least it very rarely does. Those spectacular landscape images we’ve all seen on the cover of National Geographic magazine and suchlike are the result of extensive planning, good equipment, solid technique, patience and, yes, sometimes a bit of luck too.
In other words you don’t just take amazing landscape images, you have to create them, and in order to do that you need to have a good idea of precisely what it is that you’re trying to capture in the first place and how best to go about it. Landscape photography doesn’t have to be all about wide open horizons, jagged mountains, lakeland reflections and colourful sunsets either; you can find just as much beauty in mist and rain and dark storm clouds too. The key is in how you compose and capture your image and how you tweak it at the post-production stage.
If you’re lucky enough to live within walking distance of a beautiful location, then this is a good place to practise your technique, and also to try the same shot at different times of the day without having to do much forward planning. If you live in the middle of a city, however, then chances are you’ll need to drive somewhere first and perhaps even do a bit of walking once you get there.
Over the next few pages we’ll look at everything you need to consider, from planning a route, to useful trekking aids, important landscape factors such as weather and light, essential camera gear and accessories, plus an overview of useful camera settings to use.
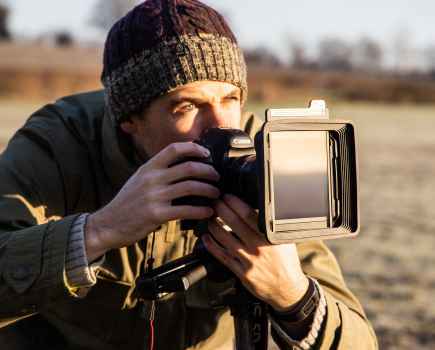
Copyright: Phill Hall
Finding a location
While the UK is well-served with great locations within easy walking distance of a car park, you may well want to get a bit more adventurous and discover your own views and vistas a bit further off the beaten track.
Most professional landscape photographers prefer to take this approach, as it allows them to create more unique images while enjoying the benefits of getting some exercise and enjoying the outdoors. Indeed, for many, hiking and photography go hand in hand.
If you are planning on hiking long distances across open countryside with your camera then you’ll need to make sure you go prepared; take appropriate clothes for the day, including a set of waterproofs and, of course, a weatherproof rucksack to safely store all your gear in. Weather can change quickly in the countryside and while it might be sunny when you set out, you don’t want to get caught out in the rain unprepared. Given that you may have to cross shallow streams or traverse wet ground, a decent pair of waterproof hiking boots is also a sound investment. If you’re planning on covering longer distances in sparsely populated countryside then a map and compass are both essential items to bring along, too. Ordnance Survey’s Explorer (1: 25,000) and Landranger (1: 50,000) map ranges cover all of the UK’s national parks and scenic beauty spots and are ideal for trekking with.
If you’re venturing somewhere new and want to keep a log of your travels then you can do this in a number of ways. You can still buy standalone GPS receivers, although thanks to the prevalence of GPS connectivity on mobile phones they are generally considered to be a bit anachronistic these days.If your phone does sport built-in GPS connectivity, then there are numerous apps available that will employ this to log your route as you walk. ViewRanger GPS is a popular free app available for Android, iOS and Windows Mobile that employs downloadable maps (not all of which are free) and works with your phone’s built-in GPS receiver.
Alternatively, some cameras feature built-in GPS connectivity that allows them to record the latitude and longitude co-ordinates of captured images. Just be aware that using GPS for prolonged periods can be a significant drain on your phone or camera’s battery, so always carry a paper map as backup and never rely solely on electronic devices to plot your route, or to get you out of trouble should you become lost.
The UK benefits from an extensive network of public footpaths, bridleways and other rights of way. While we obviously can’t endorse trespassing on private property in order to bag a great shot, the Countryside and Rights of Way Act of 2000 enshrines in law your right to stray as far as you like from public paths in certain areas of open countryside and public land. In Scotland this ‘right to roam’ is even more extensive. For more details on where the right to roam applies, the Ramblers Association (www.ramblers.org.uk) provides plenty of useful online information.
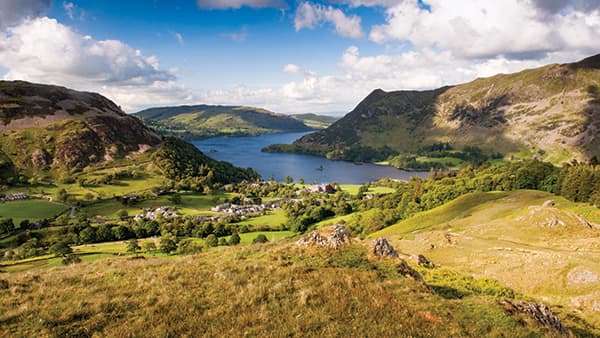
Copyright: Phill Hall
When to shoot
The countryside is constantly changing and the same view will often look completely different at different times of day, depending on weather conditions and the direction and intensity of the natural light. The colours of the landscape also change throughout the seasons and can make a huge difference to how a particular view presents itself. Understanding these variables and using them to your advantage is key to getting a great shot, and is often what makes the difference between a good landscape image and an exceptional one.
While the warmer temperatures of summer might be more conducive to walking, there’s plenty to be said for shooting in the three other seasons. Autumn sees a dramatic change in the colour of many deciduous trees, while winter opens up a palette of greys and browns and ghostly trees shorn of their leaves. Spring, meanwhile, sees the emergence of bluebells and fruit tree blossoms – both of which can make excellent landscape subjects.
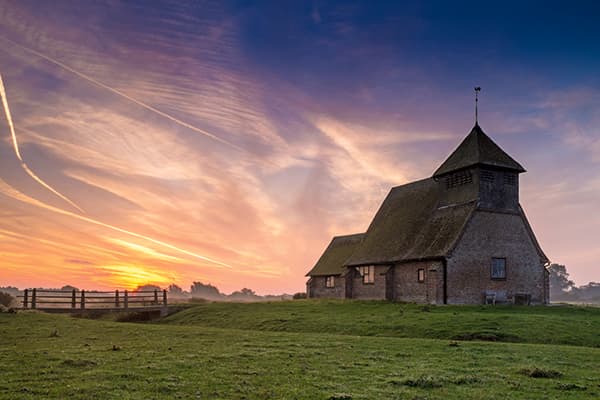
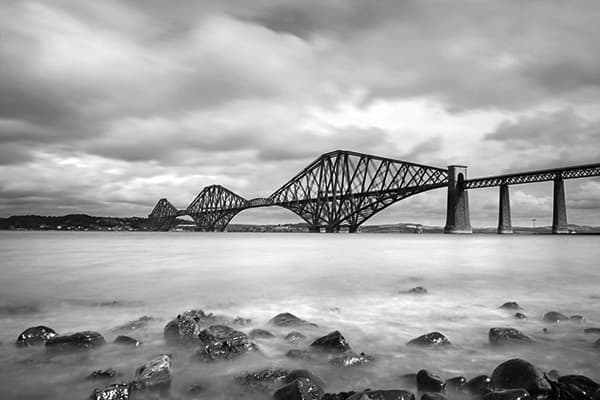
Regardless of the time of year you venture out, natural light is by far the most important element of good landscape photography. Without good or interesting light your images will lack the punch that dramatic light naturally brings to landscape imagery. The sky doesn’t need to be clear either; a scattering of clouds can add extra interest or increased drama to images, bouncing or scattering the sun’s light around in interesting ways. Even grey, misty days can be used to good effect if you want to convey a sense of serenity or bleakness in your images. That said, grey days with 100% cloud coverage produce a flat light that tends to make dramatic landscapes look flat and lifeless. In this situation, shooting in monochrome can often rescue an otherwise pedestrian image.
As regards the time of day that’s best suited to shooting landscapes, most pros prefer to shoot either early in the morning or late in the afternoon and early evening. At these times the sun is lower in the sky, which creates raking light that has a dramatic effect on the natural contours of the land. Shooting in the midday sun is generally considered to be the worst time of day as the sun will be directly overhead, which has the effect of flattening out the landscape.
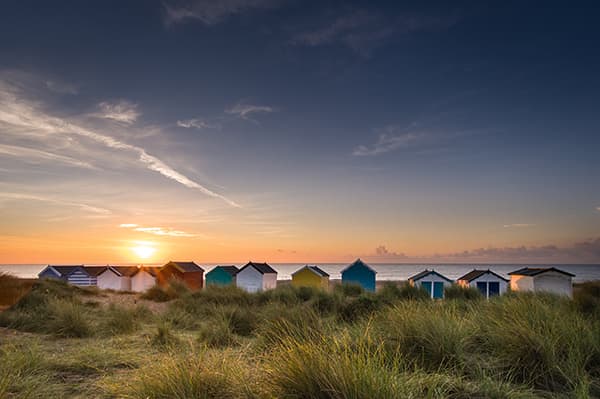
Another great time to take landscape images is the so-called ‘golden hour’, that is to say the hour after sunrise and the hour directly before sunset. This is when the sun is at its lowest, providing enough natural light to bathe the landscape in soft yet directional light while highlighting cloud detail. During the golden hour – especially in the evening – you will often find that the low sun introduces a warming orange glow to things, which can also be used to great effect.

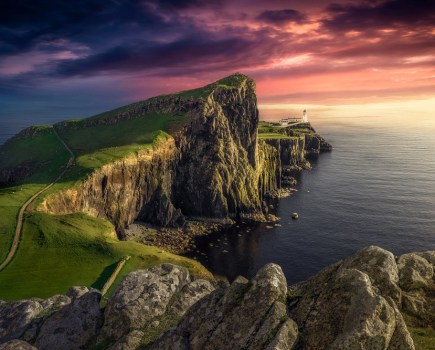
In the golden hour – the hour after sunrise or directly before sunset – the sun is at its lowest, bathing the landscape in soft yet directional light while highlighting cloud detail. Copyright: Phil Hall
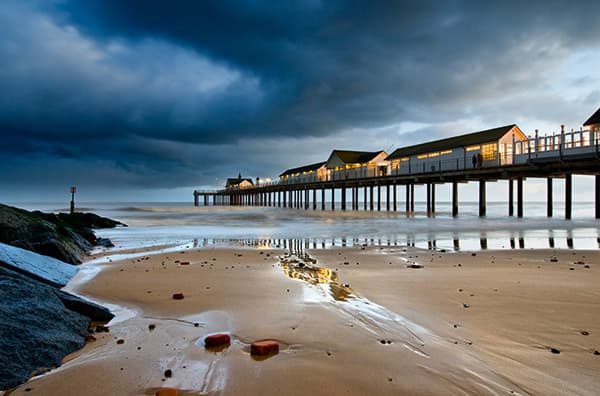
Sunrise and sunsets can also help to produce amazing landscape images and to this end it pays to take notice of the density and type of cloud coverage well in advance of the sun going down as this will give you a good indication of the type and intensity of the sunset that’s to come, giving you valuable time to get into position with your camera. As a rule, the best types of clouds for sunsets are the thinner, wispier types that occur higher up in the atmosphere as these have the effect of intensifying the dramatic colours produced by the setting sun.
Look out for high-level altocumulus, cirrocumulus and cirrus clouds as these generally produce the most dramatic sunsets; if the sky has a partial covering (ideally 30-50%) of these an hour or so before sunset, then you have a better chance of a good sunset. In addition to photographing the actual sunset, it’s always worth waiting for 20 or so minutes afterwards as the afterglow effect can be every bit as dramatic as the actual sunset – especially if the sun is setting over a large expanse of water such as the sea.
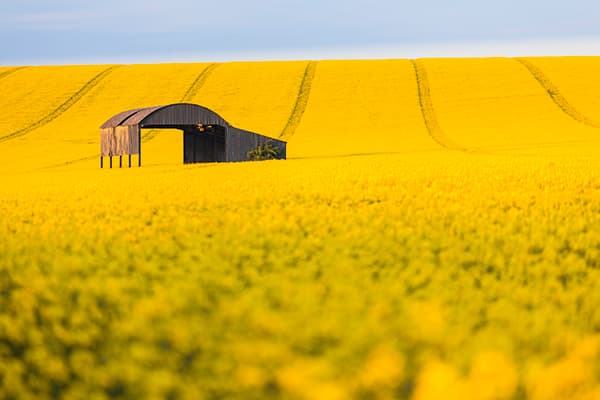
Copyright: Phill Hall
Essential equipment
If you want to take creative landscape images, you’ll need the right equipment. As a starting point you should aim to use a camera with as big a sensor and as much resolution as you can afford – ideally a full-frame or APS-C sized sensor. The primary reason for this isn’t so much the 3:2 native aspect shared by both (although this is certainly useful), but rather the increased dynamic range that larger sensors tend to offer. This will enable you to preserve more highlight and shadow detail when faced with a high-contrast scene. While many modern Micro Four Thirds cameras are undoubtedly capable of excellent image quality, the native 4:3 aspect isn’t always ideal for framing landscapes. You can usually opt to select 3:2 instead, though this will incur a drop in overall resolution.
In addition to your camera, a decent tripod is another essential item of kit. Without one you will struggle to keep images sharp when using slow shutter speed and small aperture combinations, especially when shooting at dawn and dusk. When choosing a tripod, the trick is to strike a good balance between build quality and overall weight: there’s no point buying a lightweight tripod that won’t stand up to outdoor use in a bit of wind, or indeed a tank-like tripod that’s too heavy to carry comfortably for longer periods of time.
One final accessory that’s especially useful is a set of physical filters. The four most popular filter types for landscape photographers are neutral density (ND), graduated neutral density (ND grads), polarising filters and UV filters. The first two are designed to prevent light from reaching the sensor while maintaining colour neutrality, whereas polarising filters are designed to filter out reflected light from non-metallic surfaces. A UV filter, meanwhile, will reduce the amount of blue-tinted haze in bright sunshine – and will also protect the front element of your lens from accidental damage.
Technique
To improve your landscape photography, study the work of established landscape photographers and make sure you put in plenty of practice. Copyright: Michael Topham
Good landscape technique isn’t something you can learn overnight, and to really get good at your craft you will need to study the work of established landscape photographers and put in plenty of practice. Composition rules such as the ‘rule of thirds’ provide a useful framework within which to experiment, but don’t feel you have to stick rigidly to the rules at all times.
As far as camera settings go, you should aim to shoot at as low a sensitivity as possible – ISO 100 or thereabouts – as this will give you the cleanest results and is often where your camera’s sensor offers the highest dynamic range. When shooting wide-open landscapes you will also want to try to shoot at your lens’s sweet spot for maximum sharpness across the whole frame. This varies from lens to lens, but is often found between f/8 and f/11. Using higher apertures than this – for example f/18 or f/22 – will allow you to use longer shutter times but doesn’t always produce results that are as sharp, especially along the edges and corners of the frame. One last thing, always shoot in Raw if you can, as this will give you maximum flexibility at the post-processing stage.