Ever wondered how to photograph panoramas? Our panorama photography guide will help you to give your photographs a unique look by widening your horizons…

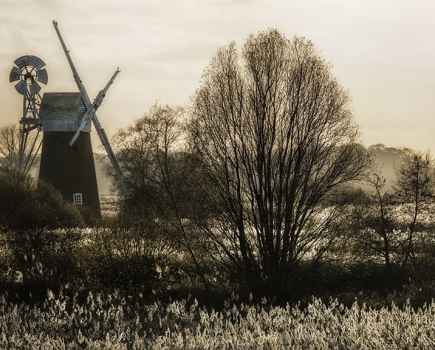
Corpach, Scotland – Only use the panoramic format where it works with the scene in front of you. With experience, you learn when it will work or not.
Why shoot panoramas?
Even though a traditional landscape can be shot in two format orientations – horizontal or vertical depending on which suits the composition of the scene the best – sometimes neither quite seems right for the subject.
Even shooting horizontal with a wide lens, you may not get all the vital elements in the frame. And if you do, then you may end up with some wasted space within the composition, which distracts from the main focal points and the overall composition is let down.
There is a third format however to consider and one that is not often used, but is very natural to the way we view the world. I’m talking of course about the panoramic.
This format is very useful for landscape photography, as it quite easily captures the essence of a place with a single shot. It is such a wide, striking format that it draws the viewer in, making them feel as though they are actually there in the picture.
How to photograph panoramas: What camera to use?
The traditional way of shooting this format was with a specialist .lm camera such as the Fuji GX617 or the more compact Hasselblad XPan. Anyone who has owned or used either of these cameras will know that this panoramic format is one that you easily fall in love with. It is partly due to the success of the Hasselblad camera that the format gained greater popularity.
For many years, I worked with the Fuji model and used it to hone my skills in composing successful panoramics. The image quality it produced was staggering and you could easily produce massive images from a scanned file.
With the advancement of digital photography and, more important, stitching software like the Photomerge feature in Photoshop, there is now a second way to shoot panoramics rather than with film. And although the techniques are different in how you produce the final image, the art of composing a panoramic stays the same.
One of the main advantages of using digital for shooting panoramics, is the range of lenses that you can now shoot the panoramic with. My Fuji model only came with three lenses, but now, with a digital SLR you can use the full range on lenses that you may own to compose your shots.
Digital has also made full 360° panoramics simple, as well as advanced techniques such as multi-row panoramas. It’s certainly cheaper to shoot a panoramic digitally, with the film and scanning costs involved. However, although the actual technique of shooting this format is more involved than with a film camera, the process is quite simple. It now gives everyone with a digital camera the opportunity to try this exciting format.
How to photograph panoramas: Setting Up
The most important factor in producing a digital panoramic, is keeping things level. There’s no point setting up the tripod, slotting on a spirit level in the camera’s hotshoe and levelling the camera, because as soon as you pan the camera, it will go off level.
You need to make sure the base on which the tripod head sits is level. You need to adjust the legs of the tripod or, simpler still, buy a levelling base that sits between the tripod legs and the actual head.
Several manufacturers make these, including Gitzo and Manfrotto; by using these, once the platform is level it should be possible to pan through 360° without a hitch.
When setting up the camera, it makes sense to put it in the vertical position to gain maximum pixel depth. You’ll also need to decide where the image will start and end. Although you can create short and full round panoramics, 90° is a good starting point and one that matches those made with the standard lens of the film cameras.
Remember to set the camera on manual focus, as well as manual exposure and white balance. This is because you need to keep all the images that make up the panoramic the same in terms of exposure and focus. Otherwise the images won’t match and your software will have a hard job stitching successfully.
Beware of moving objects with the panoramic area, too. Elements such as breaking waves or traffic can cause alignment problems. Often these can be rectified with a little retouching in post-production. You may need to use the cloning tool to remove any repeating subjects, so don’t let these things put you off as you will gain experience in coping with them.
How to photograph panoramas: Composition

Salford Quays, Manchester – The format can be used to create dynamic compositions that a standard format just can’t compete with.
Composing a panoramic takes practice and comes more naturally to some people than others. The common mistake is to just take a shot of a wide, open scene placing the horizon in the centre of the frame, which just leads to a dull, boring image. You still need to comply with the basic rules of composition, such as the rule-of-thirds. You also need to allow stronger elements such as the sky or land to dominate where needs be.
Try not to include too much of a scene into the composition as well. Instead, be selective and only compose with the key elements. Think about foreground subjects or objects nearer the camera that will provide welcome interest.
Don’t be afraid to cut off elements of a scene that won’t fit into the letterbox style of the image. It’s inevitable with such a narrow format for this to happen, so as long as it doesn’t distract from the main subject, you can safely allow this.
Not every scene and subject works as a panoramic, so don’t force a composition either. Some scenes almost feel made to be shot this way, but if you try to make every subject work in the format, this again will lead to dull and awkward images.
How to photograph panoramas: Verticals

Limehouse Basin, London – Vertical panoramics can be very striking but need lots of foreground interest. This image was still cropped slightly to remove some distracting pavement.
The vertical panoramic is a much underused and relatively rare sight, even those taken on film cameras.
As we don’t naturally see the world this way, finding subjects to suit it is the hard part. One of the main problems comes with needing to fill the frame on the extra length.
This of course means more sky and lots more foreground interest, and often there is just not enough of this. Or, to put it another way, there is plenty of sky and loads of foreground, but unfortunately, it is just bland and boring and therefore distracts from the main composition.
As you will have already realised, shooting regular-shaped formats vertically doesn’t work on all subjects, and so vertical panoramics are even more challenging.
It’s this very challenge, however, that makes them unique. Not only is it very rewarding when you find an ideal subject, but when the subject does work, it makes a very striking composition and an exciting final image.
How to photograph panoramas: The Nodal Point
Specialist panoramic heads are available to help you to get the best out of your panoramics and also fine-tune your settings so that the camera rotates around the Nodal Point of the lens.
This is essential if your scene contains near and far objects where the images would suffer from parallax error. This is caused when you rotate the camera between frames and the alignment of the elements in the scene change slightly. This means that the frames don’t line up correctly when stitched.
However, if you overlap your images by at least 30%, the software should be able to account for this and find a suitable blending path through each image.
To be extra critical you can set the camera up so that it rotates around the lens’s optical centre. This is often referred to as the Nodal point (although this term is actually incorrect and often wrongly referred to such, but that’s another subject altogether!).

Picture 1 shows an example with the optical centre of the lens correctly set up. The two fork handles are in alignment with one another.

Picture 2 shows what happens as you pan the camera without the optical centre of the lens correctly adjusted.
Special panoramic brackets are also available from different manufacturers such as Manfrotto and Nodal Ninja (with prices ranging from £100 to £300+) that allow you to correct this parallax error. They may be worth investing in if you are serious about your panoramics.
AUTHOR: Craig Roberts


