Photoshop has a number of sharpening tools. Credit: James Paterson
Sharpening is one of those image-editing tasks that can be frustratingly ambiguous. For those new to the idea of sharpening their photos, several questions arise: When do we sharpen? What tools do we use? And crucially, what is the optimum amount of sharpening to apply?
The sharpening tools in Photoshop and Lightroom can be powerful, but for the uninitiated, the terms can seem confusing. For instance, ‘Unsharp Mask’ – one of the best tools – sounds like the opposite of what we’re trying to achieve (in fact, it’s called this because it blurs and then subtracts the blur, resulting in enhanced edge details). Elsewhere, settings and sliders with names like radius, threshold, detail and masking are hardly self-explanatory. Even those who have been editing and sharpening images for years would be hard-pressed to come up with a simple explanation for these controls.
To muddy the waters even more, there are different sharpening stages to think about, such as Capture Sharpening and Output Sharpening. Capture Sharpening usually occurs near the beginning of the image-editing process, and here the aim is to make the image appear sharp to the eye. Digital images are inherently soft, so some initial sharpening must take place just to make them look acceptable. For JPEGs, this can sometimes take place in-camera. For raw photos, this stage usually takes place in your chosen raw editor, like the Details Panel within Lightroom or Photoshop’s Camera Raw plugin (by default, they both set a sharpening amount of 25 and radius 1.0).
By contrast, Output Sharpening should be undertaken at the very end of the image-editing process, upon resizing and outputting the image to a different format. If, for example, you resize your image from the full-resolution camera version down to a much smaller 600-pixel wide for a web page, then the Capture Sharpening applied to the full-resolution version will not be relevant to the much smaller 600-pixel image. So the aim is to sharpen with the specific output and resolution in mind to ensure that the image looks nice and sharp when viewed in its end format, whether that be a print, online gallery or another type of media.
The tools you use at the Output Sharpening stage depend on your workflow. If you exclusively edit and output your images in Lightroom, then the Lightroom Export controls offer sharpening settings that, while deceptively basic, apply a finely balanced level of sharpening for the chosen output. If you prefer to use Photoshop to fi nish editing your pictures, then there are several cherished sharpening filters that are more than up to the task.
With all the information available about sharpening, not to mention the multitude of tools and (often contradictory) advice out there, it can be easy to overcomplicate something that should essentially be very simple. We should sharpen an image to a point where it looks crisp, and no further. It’s tempting to think there’s an optimum setting, perhaps a magic number that will produce the very best sharpening effect – but this number doesn’t exist. Here’s the secret: eyeball it.
Your eyes are the best judge, and you know what needs to be crisp and what doesn’t. As with most image-editing tasks, it should be about what you want to get out of your image. That being said, there are things we can do to help us to judge. We should zoom in to 100% to check the effects of sharpening, so that we can judge the fine detail at its output size. Another trick that some fi nd useful is to begin by setting a very high sharpening strength, then dial down the settings until it looks right. The theory here is that it’s easier to recognise over-sharpening than under-sharpening. There are also several sharpening pitfalls to avoid. Watch out for haloes appearing along edges and be careful not to over-sharpen fi ne detail in noisy images, as it can amplify the noise.
Sharpening tips and tricks in Photoshop
Credit: James Paterson
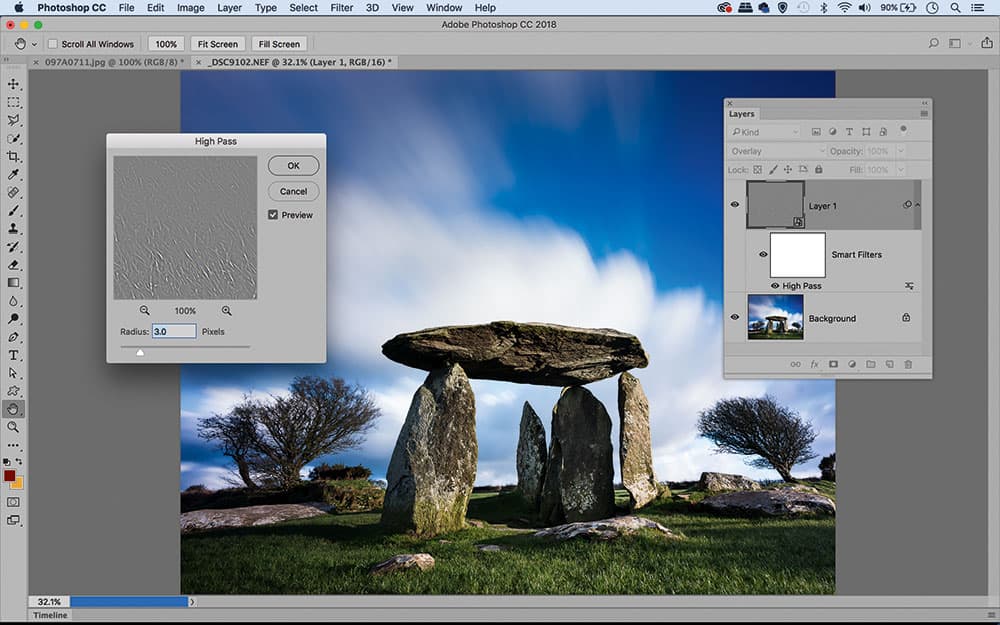
1. The High Pass technique
In Photoshop, hit Cmd/Ctrl+J to duplicate the layer. In the Layers Panel, right-click the layer and ‘Convert to Smart Object’, then go to Filter>Other>High Pass. Set amount to about three pixels and hit OK, then change the layer Blend Mode to Overlay for a lovely sharpening effect. If you need to tweak the strength, double-click the layer’s smart filter.
Credit: James Paterson
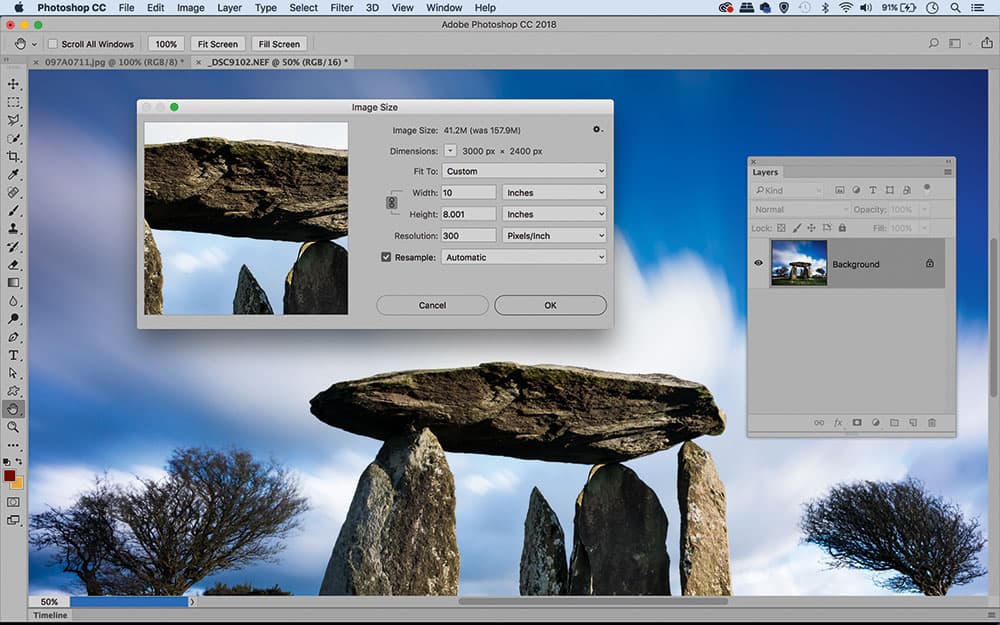
2. Sharpening for print
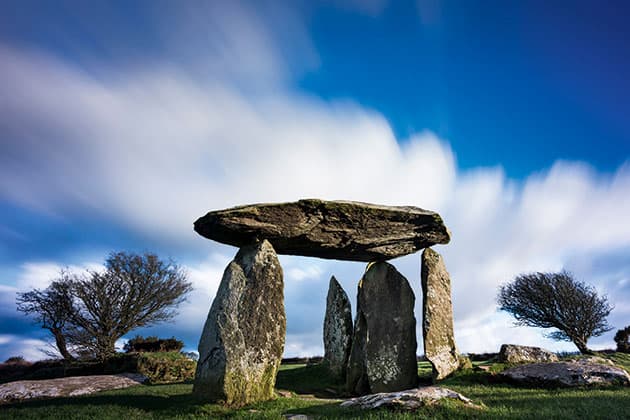
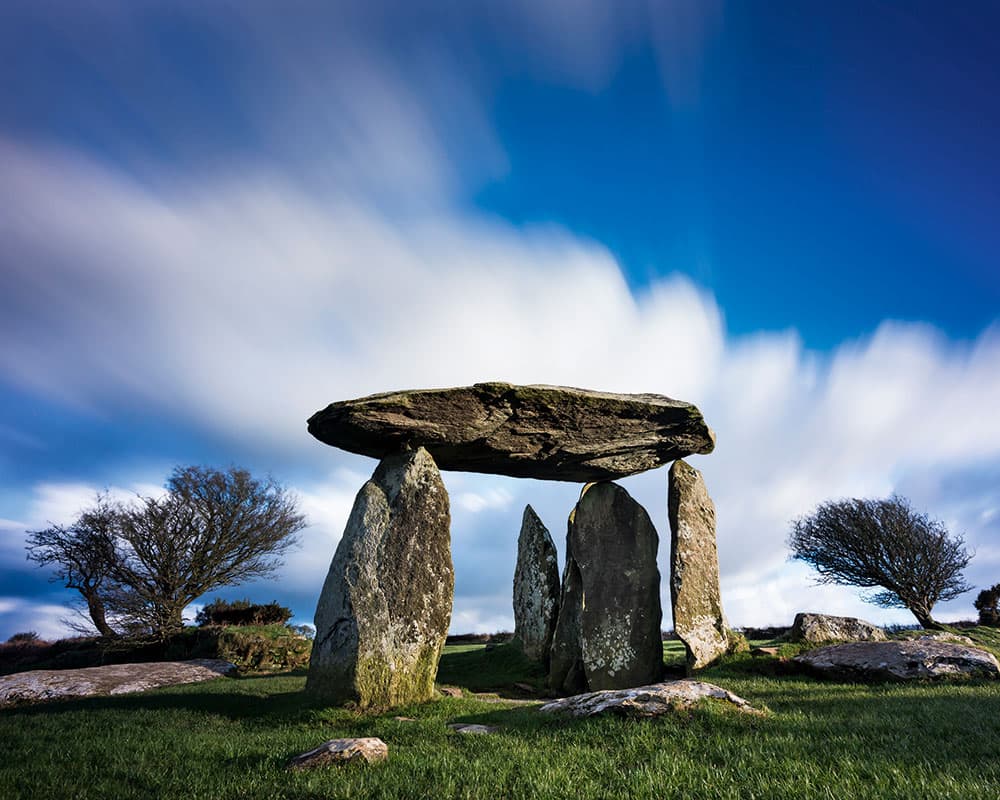
When sharpening for print, you should always do so after resizing. The correct resolution for prints is 300 pixels per inch. So a 10in print should be 3,000 pixels wide. Prints have a higher crispness threshold than on-screen, so in general, push the sharpening effect slightly further than you would with an on-screen image.
Credit: James Paterson
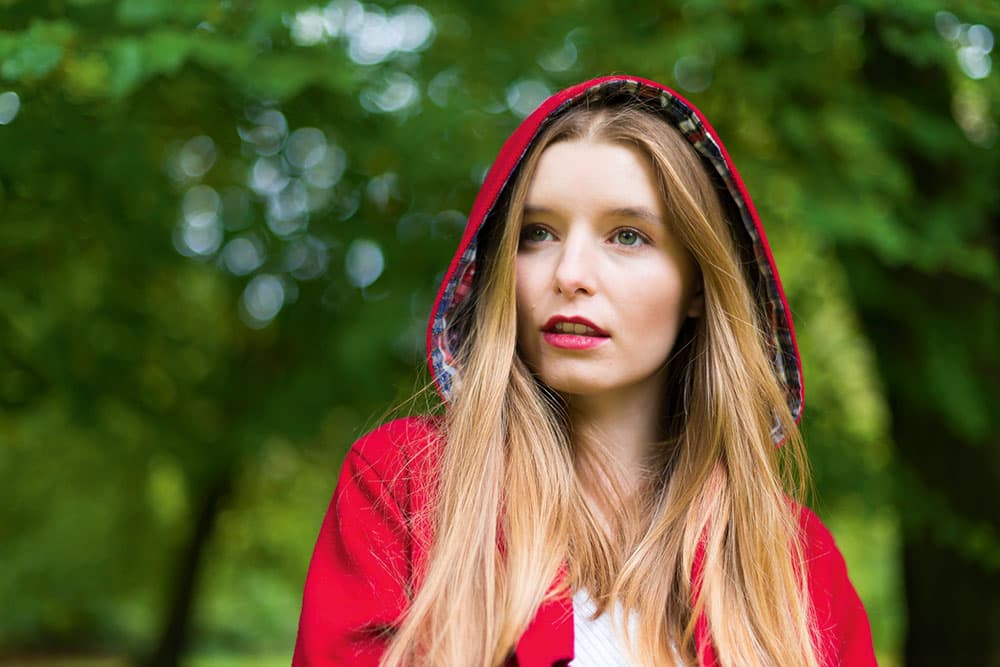
3. Settings for landscapes and portraits
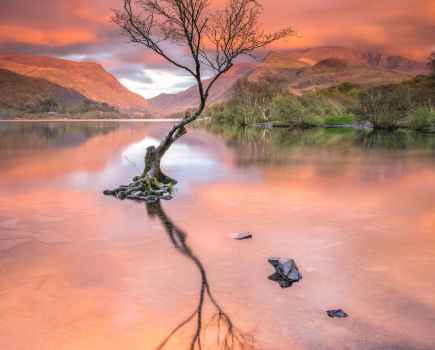
Several sharpening tools offer a Radius slider, which controls the distance from an edge in which sharpening occurs. In general, we should use a smaller radius in images with high detail, such as landscapes, and a slightly higher radius in images with less detail, like close-up portraits.
Credit: James Paterson
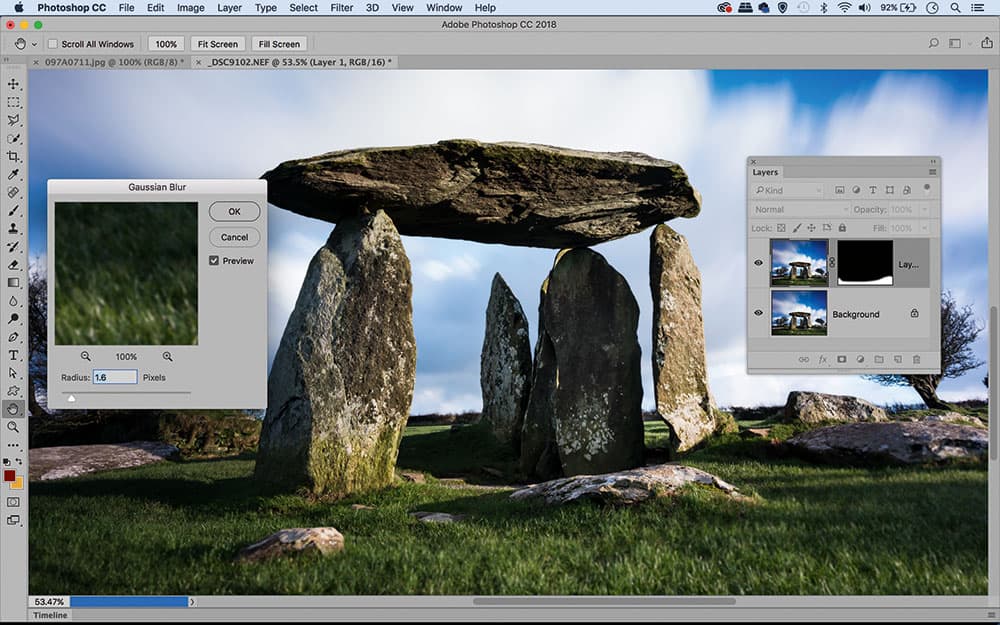
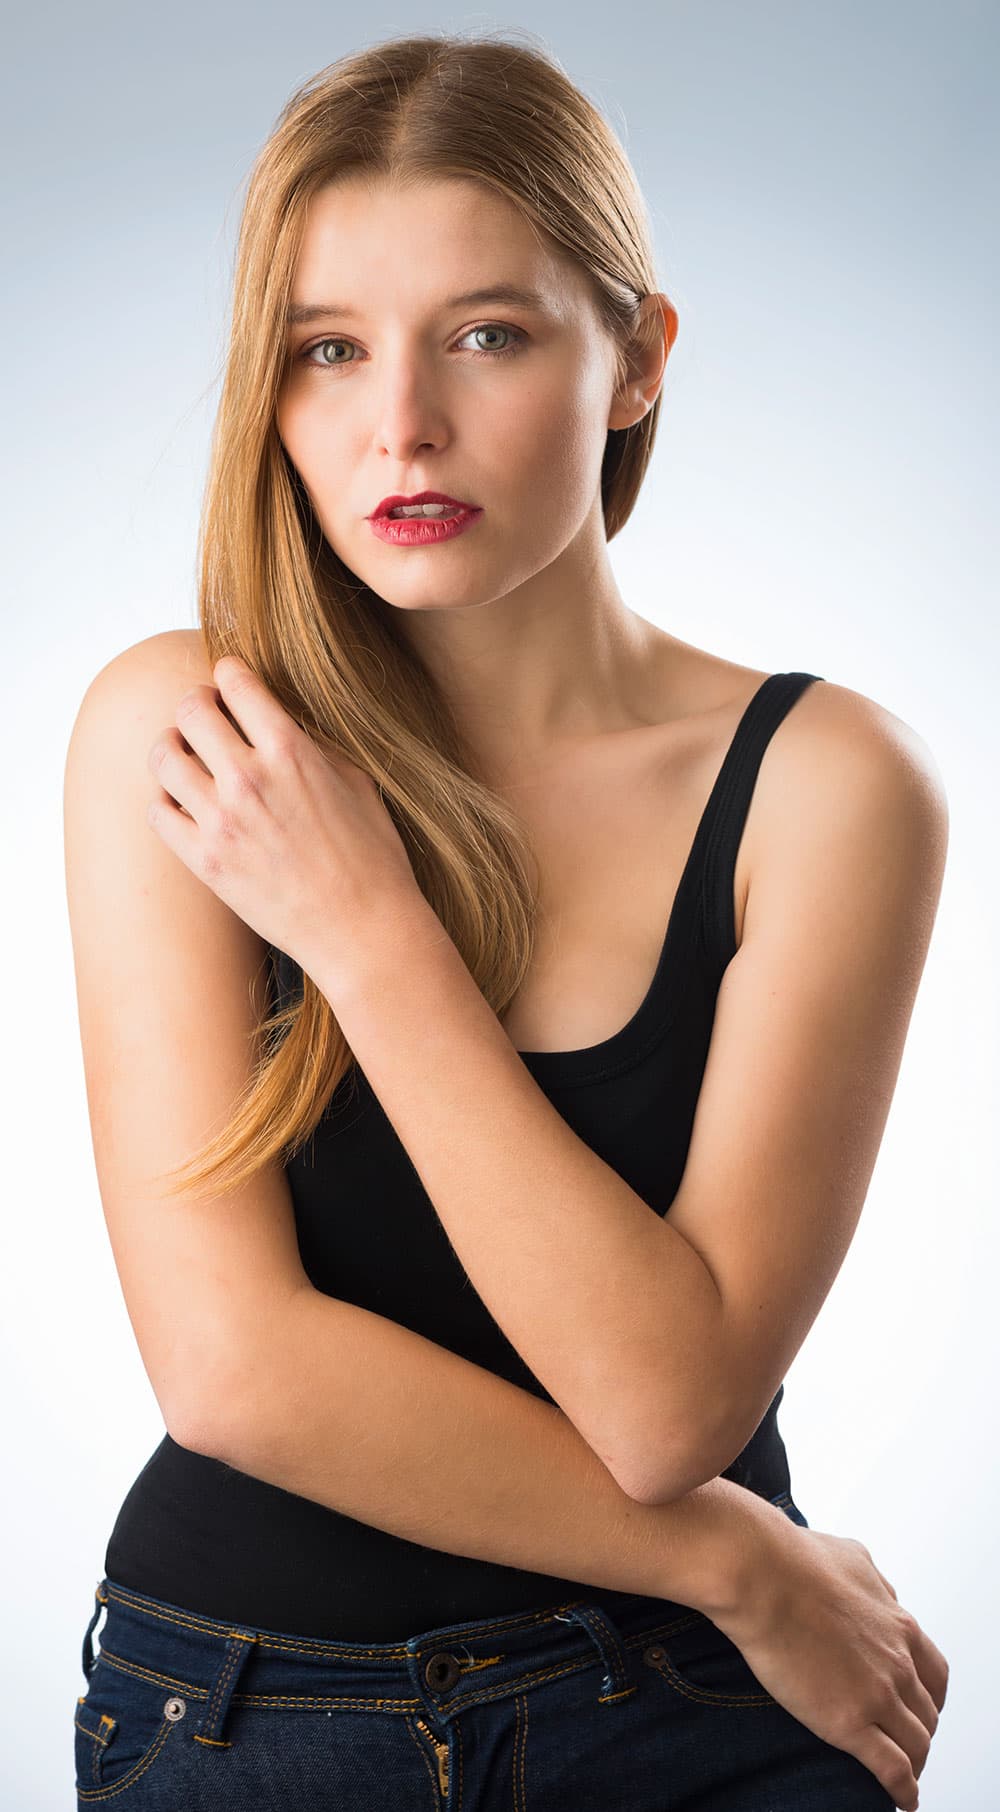
4. Soften everything else
If you want to emphasise the sharpness in a certain area of an image, one trick is to blur everything else. Duplicate the layer in Photoshop and apply a blur filter (Filter>Blur) such as Gaussian or Lens Blur. Next click the Add Layer Mask icon in the Layers Panel, and paint black over the parts you want to keep sharp.
Credit: James Paterson
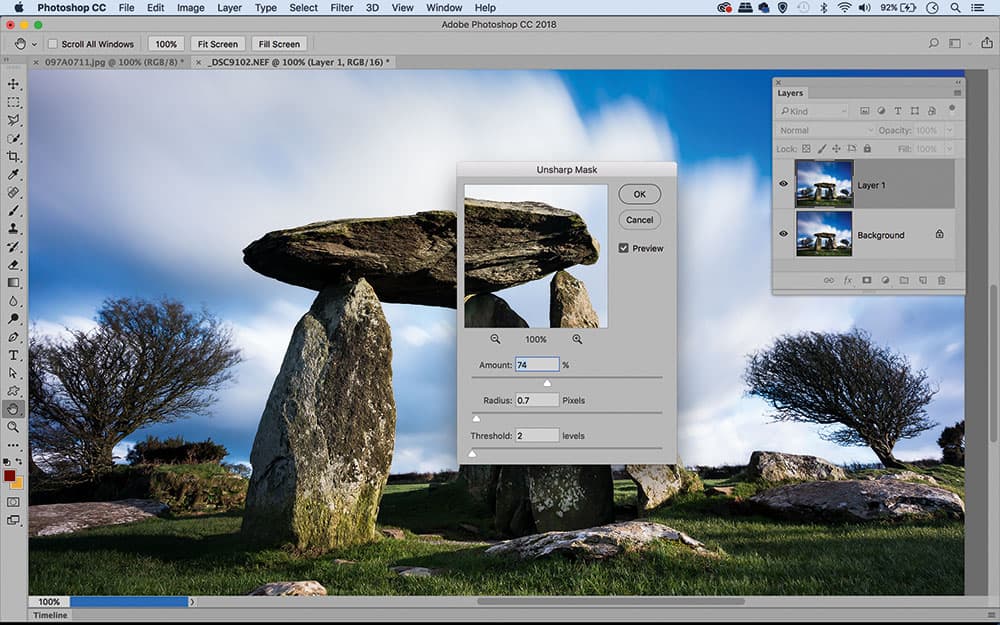
5. Unsharp Mask sharpening
Found under Filter>Sharpen, the Unsharp Mask command is one of the best sharpening tools in Photoshop CC. It has three adjustment sliders. The ‘Amount’ slider controls the overall sharpening strength. ‘Radius’ determines the width of the edges that are sharpened. ‘Threshold’ lets you exclude sharpening from fine details and noise.
Credit: James Paterson
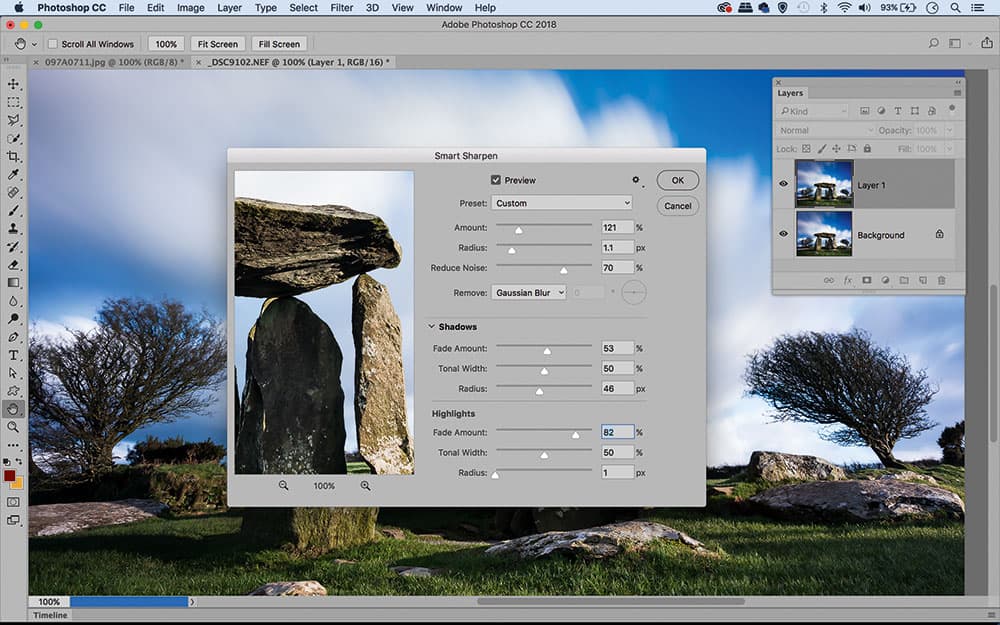
6. Smart Sharpen command
Smart Sharpen (found under Filter>Sharpen) is another Photoshop method that should be considered alongside Unsharp Mask. It has similar settings to Unsharp Mask, but also lets you apply sharpening independently to shadows and highlights (using the Fade sliders for each), and uses a slightly more advanced method for edge selection.
Localised sharpening
There are a number of ways to apply localised sharpening in Photoshop, Camaera Raw and Lightroom. Credit: James Paterson
Most images have unimportant parts, out-of-focus areas or smooth surfaces without any detail. Why bother sharpening these parts? Instead, apply sharpening only to the bits that matter. There are several different tools for this. Camera Raw and Lightroom both offer the Adjustment Brush. With this, you can simply load the brush with a sharpening effect, and then paint over the image to selectively apply it.
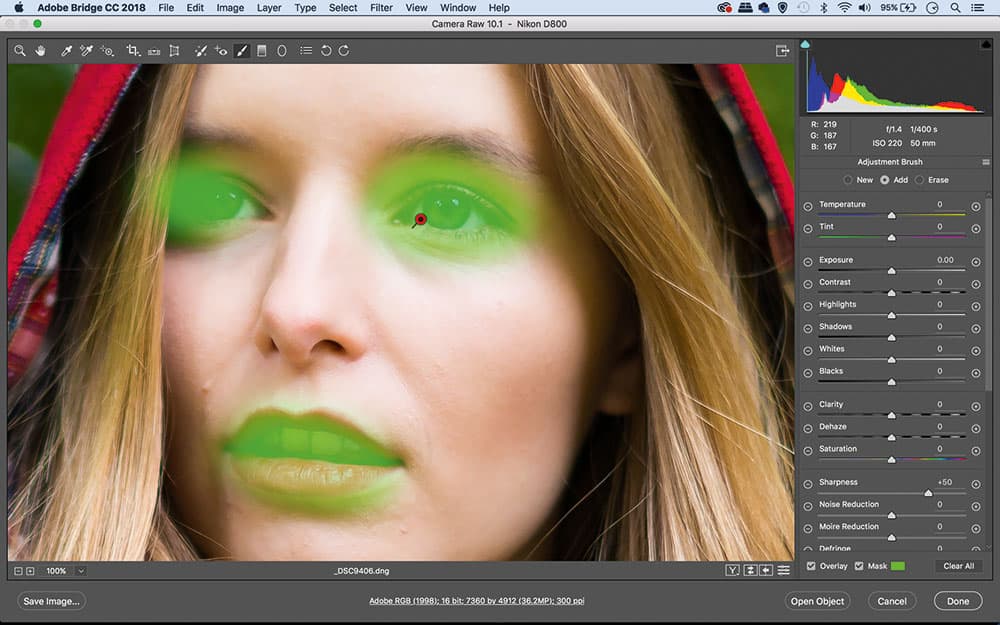
Apply local sharpening with Adjustment brush. Credit: James Paterson
Photoshop also offers plenty of methods for local sharpening. The simplest is the Sharpen tool, which has been improved in recent versions of Photoshop and is now very good. A layer mask is also an effective tool for localised sharpening. We can simply apply universal sharpening to a duplicate layer – be it through the Unsharp Mask or Smart Sharpen filters, or the High Pass Sharpening method described above – and then paint with black or white on a layer mask to either hide or reveal the effect over parts of the image.
Get to grips with Lightroom’s Detail Panel to sharpen images successfully. Credit: James Paterson
Sharpening with Lightroom’s detail panel
Credit: James Paterson
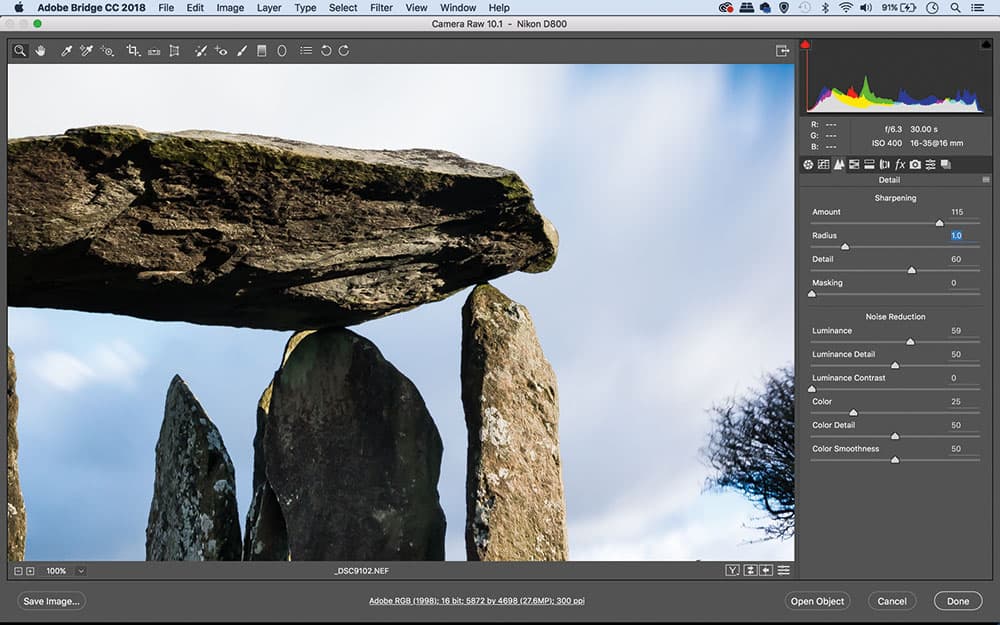
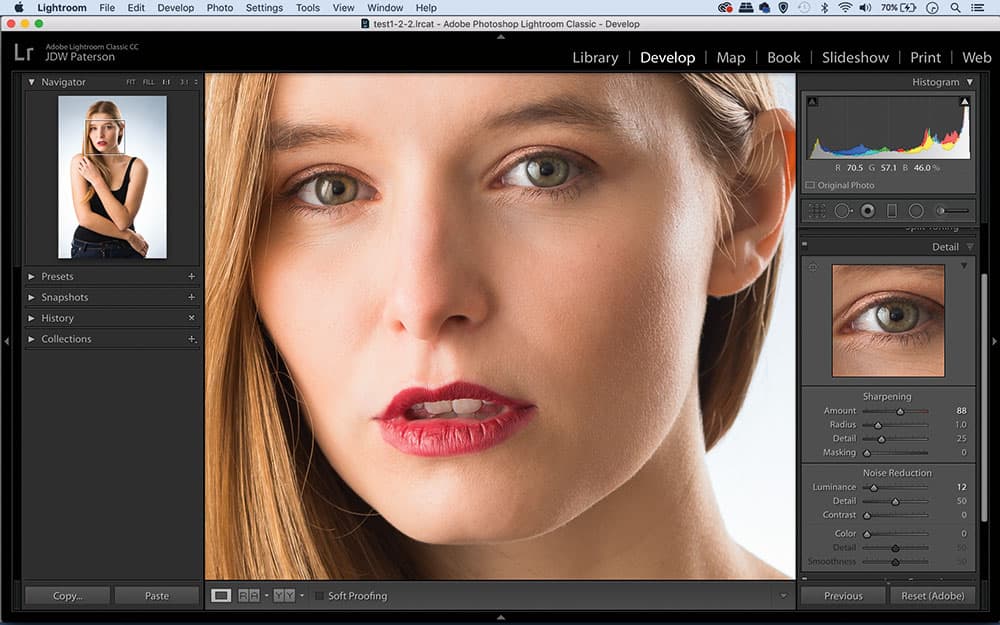
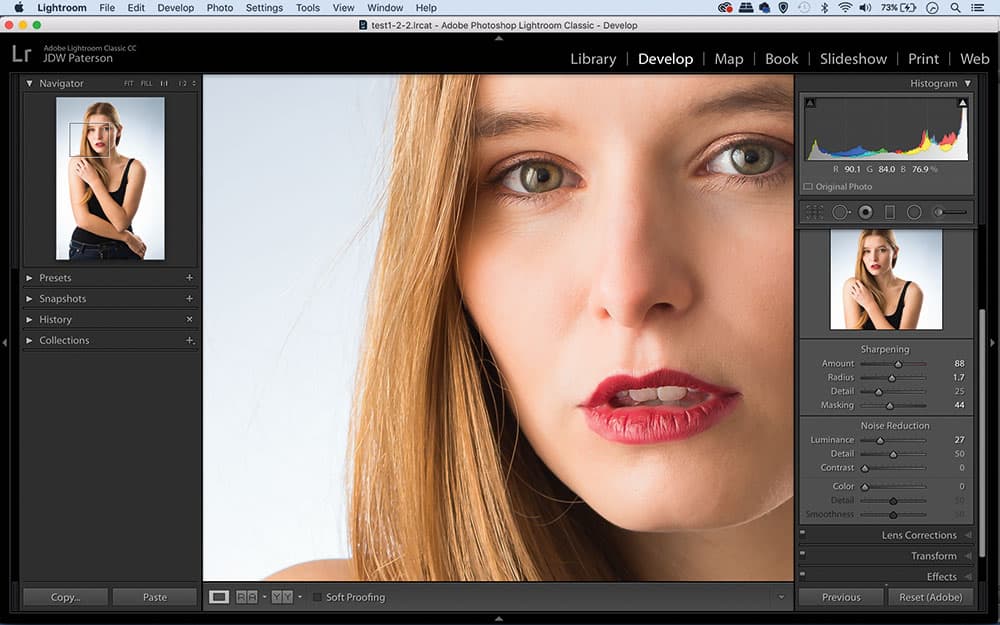
1. Sharpening amount
Head to Lightroom’s Develop Module (or open it in Photoshop’s Camera Raw) and go to the Detail Panel. Sharpening is best judged at 100% view (double-click the Zoom tool in Camera Raw or click 1:1 in Lightroom’s Navigator Panel). Begin by dragging the Amount slider across to increase the sharpening strength. But note that too much sharpening will increase noise.
Credit: James Paterson
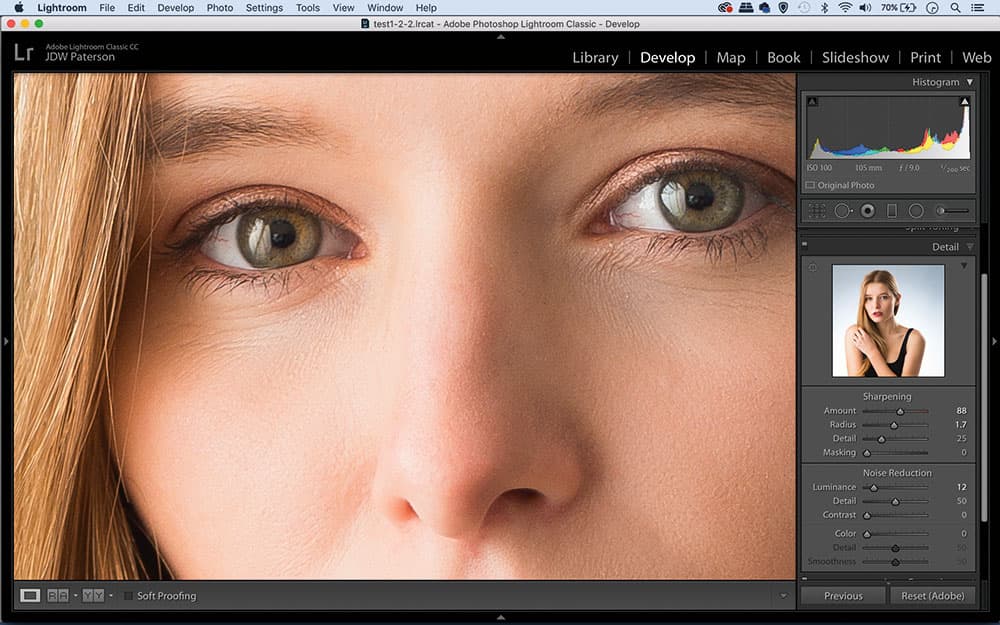
2. Control the edges
Sharpening is effectively just a very localised shift in contrast – where dark edges meet light edges, the dark side becomes darker, the brighter side lighter. The Radius slider determines the area in which this shift in contrast occurs. For instance, when set to 1.0, the contrast change happens for a distance of one pixel from the edge. I recommend keeping the value set between 1.0 and 1.5.
Credit: James Paterson
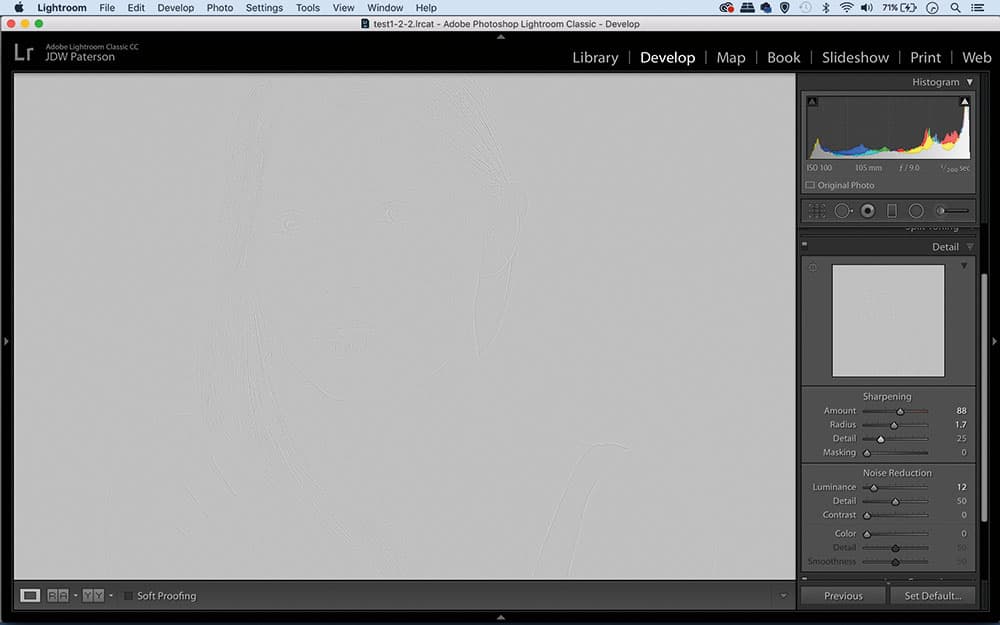
3. Set a detail threshold
This controls what is detected as an edge. Set a low detail and the sharpening will be restricted to the most obvious edges within the image. By contrast, set a high detail and even the finest edges will be sharpened. High detail is good for pulling out texture, but can lead to increased noise. I tend it keep it under 50. Hold Alt for a grayscale detail view.
Credit: James Paterson
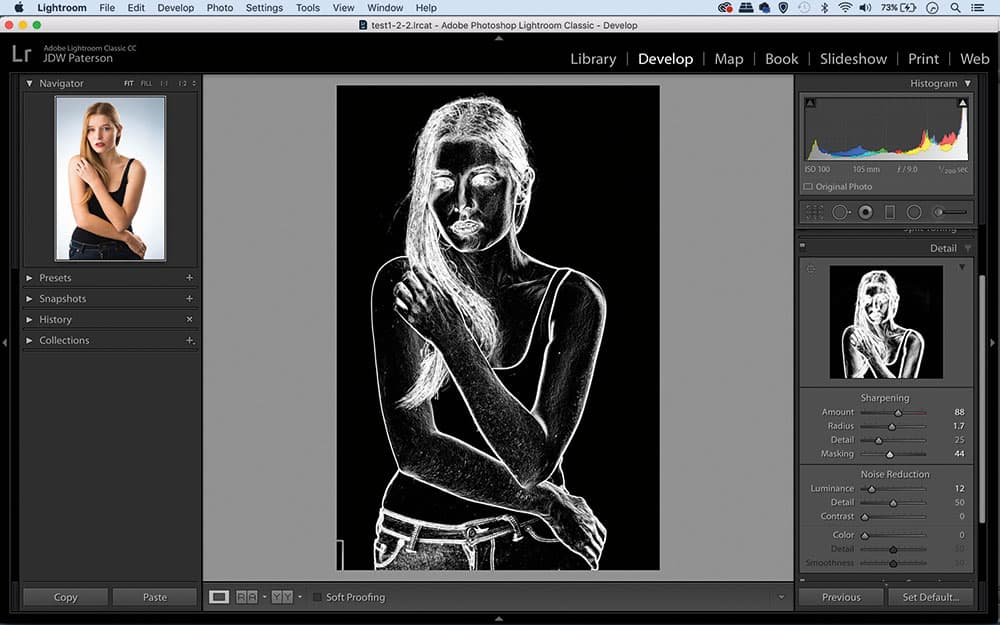
4. Mask the sharpening
This slider is useful for removing sharpening from areas that don’t need it, such as smooth expanses of sky. After applying Amount and Radius settings, hold Alt and drag the Masking slider. As you drag, areas of the image will start to turn black – these parts will be excluded from the sharpening effect. The softer the background, the better the results.
Credit: James Paterson
5. Reduce image noise
Sharpening and noise reduction are two sides of the same coin. Sharpening enhances edge details, while noise reduction reduces grainy noise, sometimes at the expense of fi ne detail. As such, strike a balance between the two. For noisy images, begin by applying noise reduction, which is found in the Detail panel, too, then go on to sharpen the image.
Credit: James Paterson
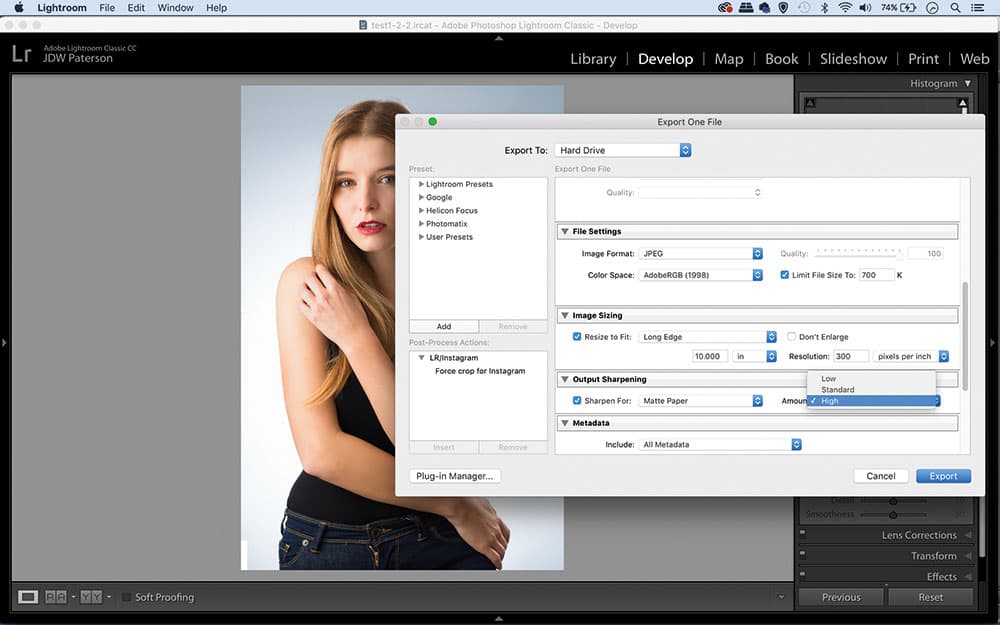
6. Apply Output Sharpening
Output Sharpening is found in Lightroom’s Export dialog (File>Export) or Camera Raw’s Save dialog. After setting the image size, go to the Output Sharpening section below. Choose between screen, matt paper and glossy paper, then select one of the three sharpening strengths. You’ll also find similar settings to the right of Lightroom’s Print Module.