How many times have you carefully set up your composition, then dialled in the aperture, shutter speed and ISO to get the exposure spot on, only to realise when you zoom in on your shot that your subject is a little soft? It’s happened to all of us photographers, many, many times over. Ensuring your images are as sharp as possible is all about persistence and practising several key techniques that will ensure consistency. In this piece, I’m going to outline a number of steps you can take to make your images sharper more frequently and highlight some essential camera features that will help to banish the blur.
How to take sharp portrait photographs
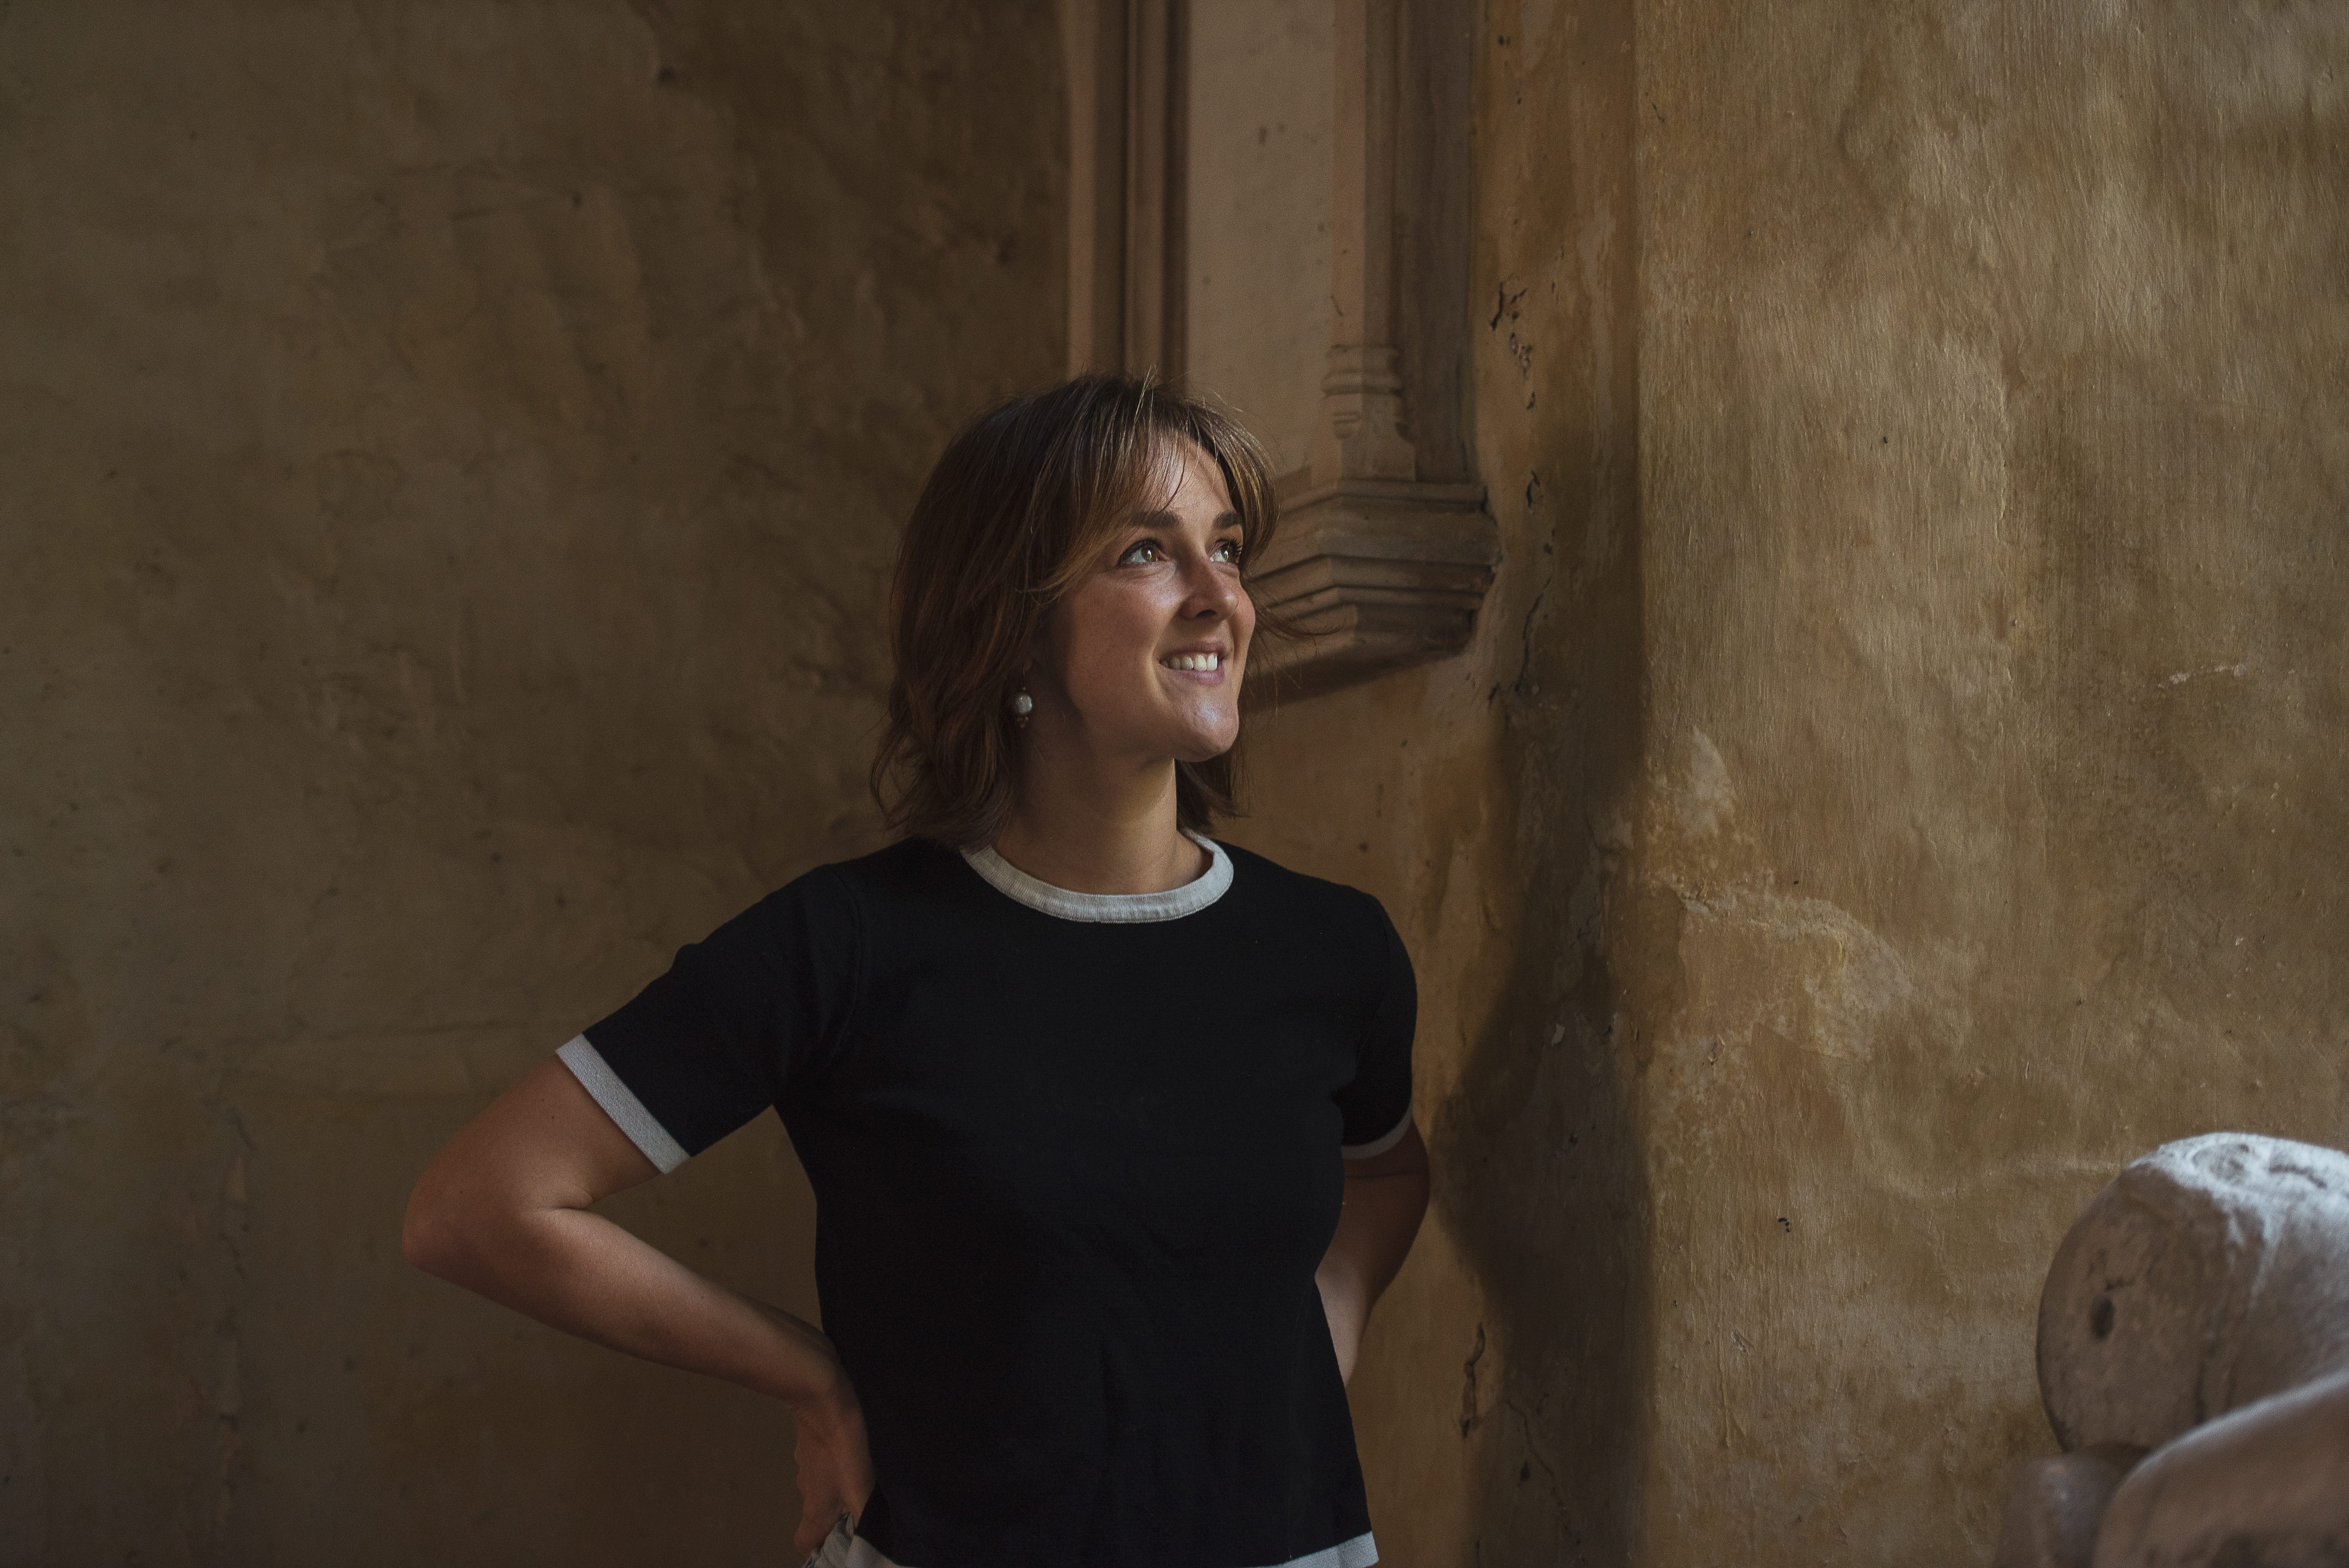
Before we concentrate on anything else, the first step towards sharper shots is to be aware of what needs to be in focus, and by how much. When photographing live subjects such as people, it’s best practice to focus on the eyes. That’s because, as a viewer, this is where our attention is first drawn. Likewise, if the subject isn’t square-on and one eye is closer to the camera, the viewer will look there first, so this should be where we set our focus. The next step is to determine how much needs to be sharp – that is, how great should our depth of field be?
As we know, depth of field is dependent on how wide or narrow our aperture is. To increase the depth of field, we narrow the aperture and vice versa. Interestingly, focal length also plays its part in influencing depth of field – the longer the lens, the shallower the depth of field. For example, if shooting a portrait on an 85mm lens, we’ll need to take into account the shallower slice of focus this provides and adjust our aperture accordingly.
How to take sharp landscape photographs
Sharp landscape photographs are easy to obtain using one of two methods. Either by focusing at the hyperfocal distance in the scene, or by taking a series of images in which the focus shifts from foreground to background, then creating a single ultra-sharp image later as a composite in postproduction. The quickest way by far is to use the hyperfocal distance – that is, the point in the scene to place your focus from which to achieve the greatest depth of field. A good rule of thumb is to place the focus point at double the distance of the nearest object in your composition. For example, if the nearest object is one metre away, focus to two metres to make foreground and background equally sharp.
The more labour-intensive method, focus bracketing (aka focus stacking) sees us take shot after shot, with the focus point gradually moving from the closest object in the foreground to infinity. This can be achieved manually by adjusting the focus ring between each shot, but many DSLRs and mirrorless cameras now come with a built-in focus-bracketing function where you can define the ‘step-size’ (distance between each focus point) and how many shots to take in one run from the lens’s minimum focusing distance up to infinity. With the images on the card, it’s then a case of loading them into software such as Adobe Photoshop to generate a focus stack and convert the separate photos into one sharp shot.

How to take sharp macro photographs
Macro photography is unique in that it showcases some of the shallowest depth of fields known to any photographic discipline. A difference of millimetres can see subjects thrown wildly out of focus. So it follows that focus bracketing is useful not only for landscapes, but also macro subjects. Again, you could use the in-camera focus-bracketing feature to create a composite stack of sharp shots. If your camera doesn’t have this feature, then a macro rail could be used in order to physically move the camera incrementally closer to the subject.
However, these two methods will only work on inanimate subjects. Shooting live subjects with focus bracketing can only be carried out handheld. It’s more difficult, but there is a trick. Switch to manual focus and adjust the focus ring to its minimum focusing distance. Next, engage continuous burst mode and rock back and forth from your subject as you take multiple shots. The more you practise, the easier it becomes, and it makes all the difference to bug shots. Two or three shots in series like this should be achievable with only an hour of practice, but my personal record is about seven shots in sequence handheld.
How to take sharp action photographs
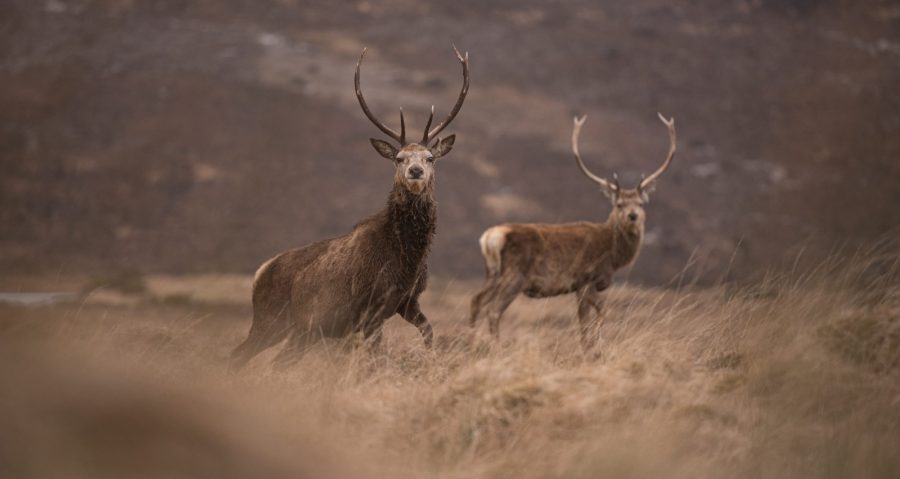
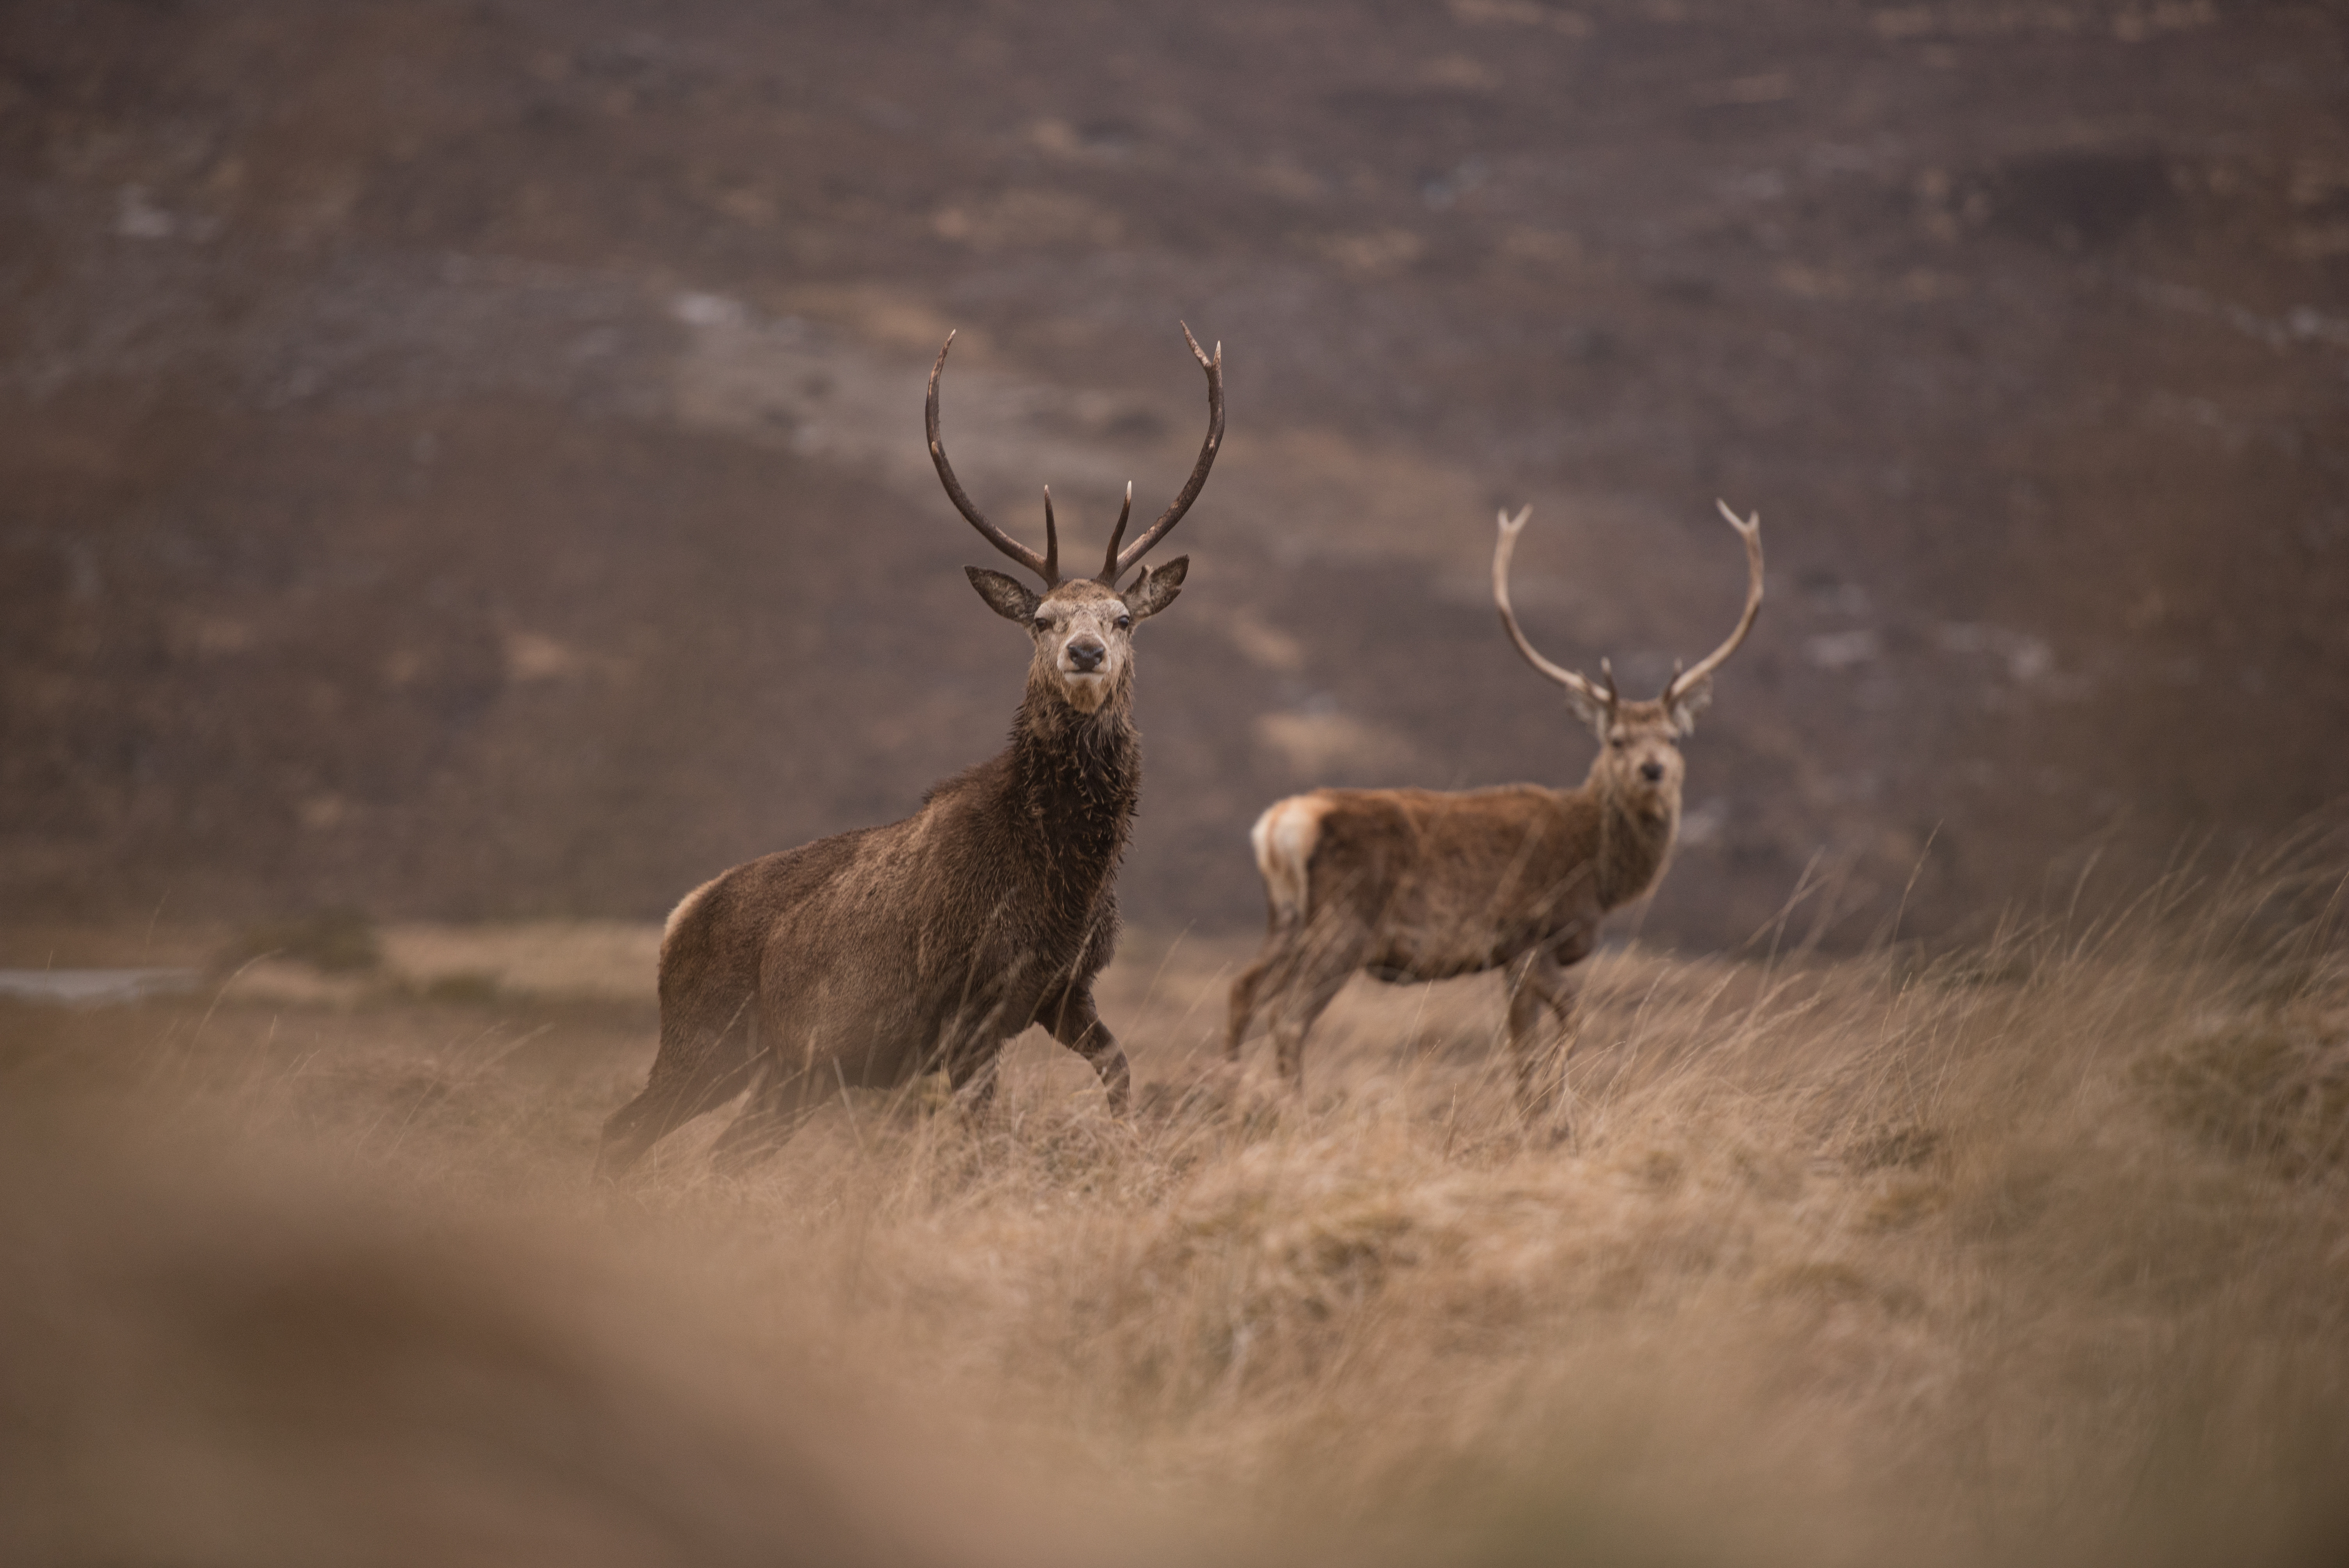
Fast-paced action, whether wildlife or sports, places great reliance upon autofocus tracking and fast shutter speeds. The first port of call when adjusting the autofocus parameters is to switch to single-point autofocus mode. This may sound counterintuitive, because it gives you the smallest area from which to define focus, and when your subject is moving at speed surely you’d want that AF point to be as large as possible? But in practice, the bigger AF point zone (such as group mode) makes the camera second-guess where you really want your focus – it gives it too much information, and often ends in erroneous focus. Single-point AF is precise and unequivocal, so long as you place it directly over your subject. With heavy telephoto lenses that are a strain on the arms, it’s best to use a monopod mounted on the lens collar, or a bean bag if you’re lying on the ground. This allows you to stabilise the camera and track your subject smoothly without arm fatigue wobbling the camera, giving you a higher hit rate.
Action shots with moving subjects also require faster shutter speeds to freeze them in motion. For sports games, aim to shoot between 1/500sec and 1/8000sec depending on the amount of available light. If your subject reappears in the same spot over and over (ie by a goal during a football game) then pre-focus at the point where your subject will become sharp and track their movement until they’re in the zone. This can be extremely useful for wildlife action shots where animals return to the same spot – for example, a kingfisher using a single perch from which to hunt for fish.
Top tips for sharp photographs
How much focus?

Decide what you want in focus first. If it’s a portrait, perhaps you want just the person in focus. If so, use a longer lens and a wider aperture. However, if the background is important, then make sure that’s in focus, too, by either using a wider lens or narrowing your aperture to create a greater depth of field.
Focus on the eyes
When you are shooting live subjects, the majority of the time you want to focus on the eyes, or the eye closest to you. Move the autofocus point around inside the viewfinder until it sits over the eyes of the subject, or focus on the eyes then recompose your scene before taking the shot.
Keep things quick
Shooting action requires a fast shutter speed to freeze the movement. Speeds of 1/500sec and faster should freeze almost any moving subject and avoid camera shake. However, when panning with your subject you can create the illusion of speed by slowing the shutter speed slightly and blurring the background. When shooting long distances, even on telephoto lenses, it’s possible to get sharpness front to back by increasing ISO and narrowing the aperture, with the sacrifice of shutter speed Nikon D750, 70-200mm lens, 1/200sec at f/8, ISO 100
Use auto ISO
When you have your aperture and shutter speed set perfectly, the most frustrating thing can happen – the light changes. Instead of ruining your settings (and therefore how sharp your subject is) turn on auto ISO and let the camera adjust exposure for you. In this case, ‘Auto’ is a good option to go for.
Focus from the back

Back-button focus is another useful setting (certain function buttons and AE/AF-L buttons can be programmed to do this if necessary). Ensure release priority is turned on, rather than focus priority, as this will let you take a photo when you want, rather than when the camera decides a subject is in focus or not.
Continuously focus
Instead of re-pressing the autofocus button as a subject moves, engage continuous autofocus mode. It will automatically adjust focus for as long as the AF button is pressed over the AF point. Some modes such as face recognition are able to track subjects automatically as they move through the frame.
Jason’s tips for sharp photographs
Image stabilisation
Whether in-lens or in-camera, image stabilisation (IS) is a fantastic way of keeping everything steady and thereby getting sharp shots – as long as your focus is spot-on and your aperture is narrow enough for a usable depth of field. IS uses electronic motors to steady the view through the lens.
Stabilisation modes
On some long telephoto lenses, image stabilisation can come in two or three types. First, by stabilising the horizontal and vertical axes. Second, by only stabilising one axis (usually vertical), leaving horizontal movements alone (great for panning shots). And finally, where stabilisation isn’t present until the shutter release button is fully depressed. This is useful when IS would otherwise interfere with composing moving subjects.
Mirror lock-up
DSLRs have a useful feature called mirror lock-up, which does exactly what it says. It locks the mirror up, out of the way of the shutter in the camera body, to minimise vibrations during exposure. You’ll want to use this when shooting on a tripod or during long exposures where even the faintest camera movements create blur. Mirrorless cameras obviously don’t require this feature.
Delayed exposure mode
Some camera features supersede the need for mirror lock-up, such as exposure-delay mode, which both locks up the mirror and lifts the shutter after a pre-programmed length of time (usually one to three seconds). It means you don’t need to release the shutter button again, nor use an external shutter release. Alternatively, you could use the self-timer.
High-resolution multi-shot mode
Some cameras feature a high-resolution multiple-shot mode in which the camera’s sensor shifts around during several quick, successive shots, and combines the images in-camera to produce a higher resolution than the image sensor can otherwise output. This can produce results that look sharper when zoomed in or printed out in a large format, but for the everyday shooter it’s unlikely to make much impact.
Single-point AF
Single-point autofocus mode works from a small focus point which you can place almost anywhere in the frame. It’s useful for precise autofocusing even on moving subjects – though some practice is required to yield higher success rates.
Intelligent autofocus
Face-detection mode is a great modern twist on autofocusing modes. It automatically detects faces in the scene and adjusts focus to keep them sharp, even if moving throughout the scene. On many newer camera models, this also works seamlessly in video mode, reducing the need to pull focus manually.
Manual focus
When faced with a dark scene, such as when shooting astrophotography, autofocus simply won’t give good results.
In these situations, switch to live view and turn to manual-focusing mode. Zoom in on the scene and navigate to a bright star or distant light source. Then adjust the focus ring manually until it is a small, pin-like point of light for sharp shots.
Avoid camera shake
Shooting handheld introduces camera movement, and therefore blur, so utilise a fast shutter speed to keep things sharp. Go as fast as possible while retaining a good exposure, balancing it with aperture and ISO accordingly.
Stop down
To get more of the scene in focus, you’ll have to use a narrower aperture for greater depth of field. Apertures of f/11 or f/16 are commonly used for landscape photography to achieve sharp results from foreground to background.
Jason Parnell-Brookes is an internationally award-winning photographer. He won Gold in the Nikon Photo Contest 2018/19 and was named Digital Photographer of the Year in 2014. He is also a Masters graduate, qualified teacher and writer.
All pictures © jason parnell-brookes