
Credit: James Paterson
1. Quick-start cropping
The Crop tool is found in Lightroom’s Develop Module. Either grab it from the toolbar or hit R (even if you’re in the Library Module, pressing R takes you to the Develop Module’s Crop tool). You can also press Cmd/Ctrl+Alt+R to reset a crop. Pressing A locks or unlocks the aspect ratio.
2. Non-destructive cropping
Lightroom’s Crop tool is completely non-destructive. You have the freedom to return to it at any stage to adjust the crop if you desire. The areas outside the crop are never erased, only hidden. The crop is only irrevocably applied to exported images when a different file format like a JPEG, psd or TIFF is chosen.
3. The tool options
When the Crop tool is selected, the tool panel to the right of the Develop Module displays all the settings you’ll need. You can also right-click for a similar set of useful options. After finishing the crop you can either double-click or hit Enter to apply and dismiss the tool.
Credit: James Paterson
4. Control the box
To begin a crop, either drag the corners of the box or simply start dragging within the image to define a box of your own manually. Hitting X will toggle the crop between a horizontal or vertical aspect. Holding Alt while dragging the corner of the box will resize it from the centre point rather than inwards from one corner, and holding Shift temporarily locks the aspect ratio.
5. The Straighten tool
The Straighten tool lets you manually drag along a line in the image that you know should be perfectly horizontal – such as the horizon or a wall – and the crop will rotate to the line. The tool is found within the Crop tool options but don’t bother getting it from there – simply hold Cmd/Ctrl to switch to it temporarily when cropping.
6. Auto-straighten
The Auto button in the Crop tool panel can be used to straighten a photo automatically, as long as Lightroom is able to detect a horizontal line in the image to work with. It works like the ‘Level’ button in the Transform Panel – where there are other powerful perspective controls.
Credit: James Paterson
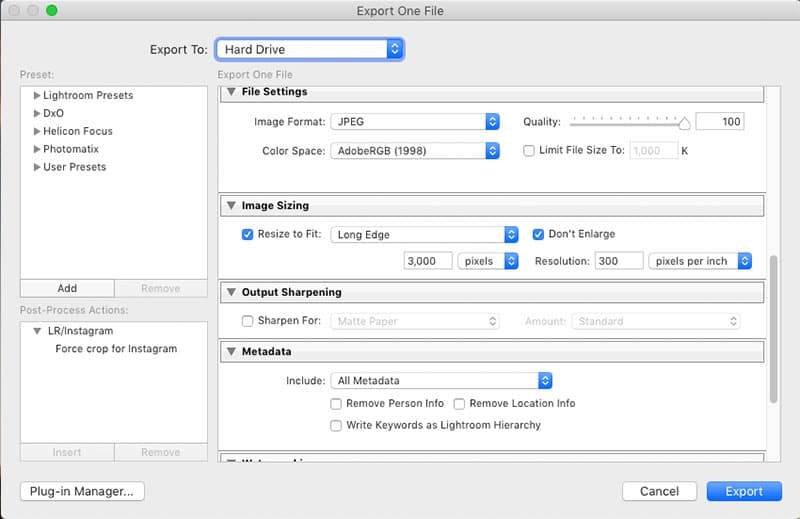
7. Changing the resolution
The Crop tool is purely used to set the aspect ratio; unlike Photoshop’s Crop tool it can’t be used to adjust the resolution or pixels-per-inch. This is set in the Image Sizing options when you export the image. Of course, whenever we crop into an image, to some extent we lose pixels and reduce the overall resolution.
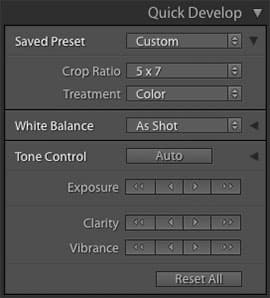
8. Use Quick Develop to set ratios
You can quickly choose a specific aspect ratio for an entire set of photos in the Library Module’s Quick Develop Panel. In Grid view select the images you want to work on and then click the little arrow next to ‘Saved Preset’ and use the ‘Crop Ratio’ dropdown to choose an aspect ratio. Once done, you can go on to adjust crops manually to suit each image with the Crop tool.
9. Apply the previous ratio
There’s a handy shortcut that lets you automatically apply the previously used aspect ratio: hit Shift+A. This can be very useful if you need to crop a range of photos to a specific ratio for printing, as it saves you having to set the aspect ratio for each image manually.
10. Cycle crop overlays
Crop overlays are line guides that ascribe to a different compositional trick used in photography, painting and drawing. When cropping, hit H to turn them off/on and O to cycle through the various crop overlays. Go to ‘Tools>Crop Guide Overlay>Choose Overlays to Cycle’ to customise which overlays make up the list.
Credit: James Paterson
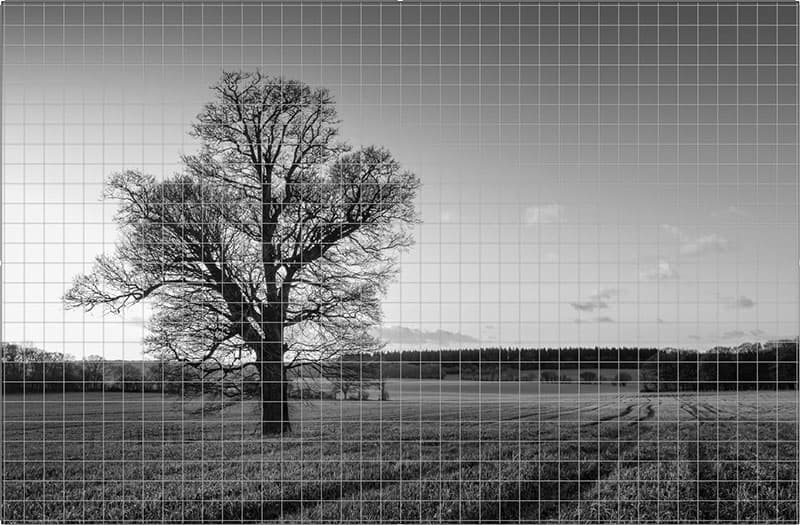
11. The Grid overlay
The first choice of overlay is a simple grid. This can be helpful for lining up straight lines in the image or assessing proportions. Note that you can also view a grid overlay in the Library Module Loupe view and Develop Module with Cmd/Ctrl+Alt+O. Even better, with this grid you can hold Cmd/ Ctrl and drag the numbers to alter grid size or opacity.
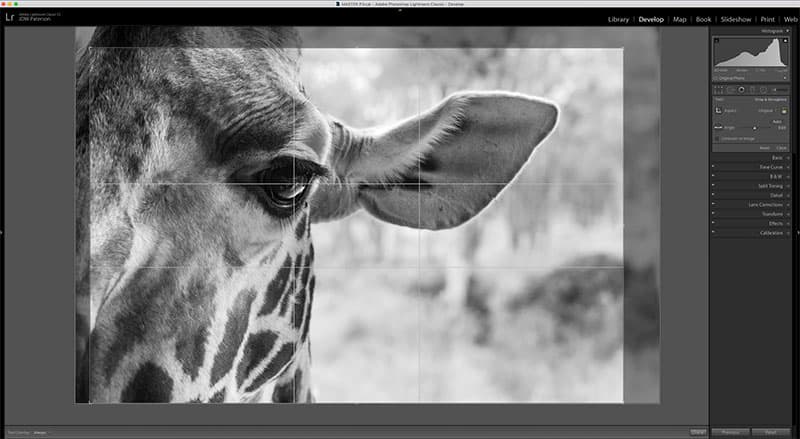
12. The Thirds overlay
The Rule of Thirds is probably the most well-known composition guide, and it’s easy to remember when either composing the shot or cropping in Lightroom. An image is divided into three, horizontally and vertically, and we place important points of interest, such as the eyes in a portrait or the horizon in a landscape, along these lines or at points where they intersect.
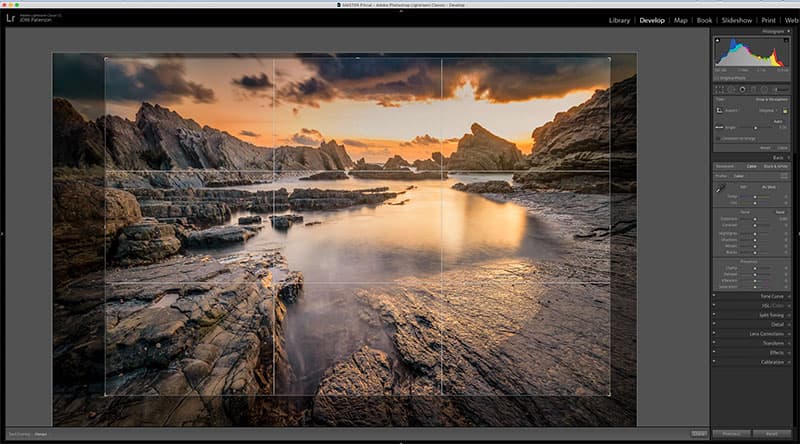
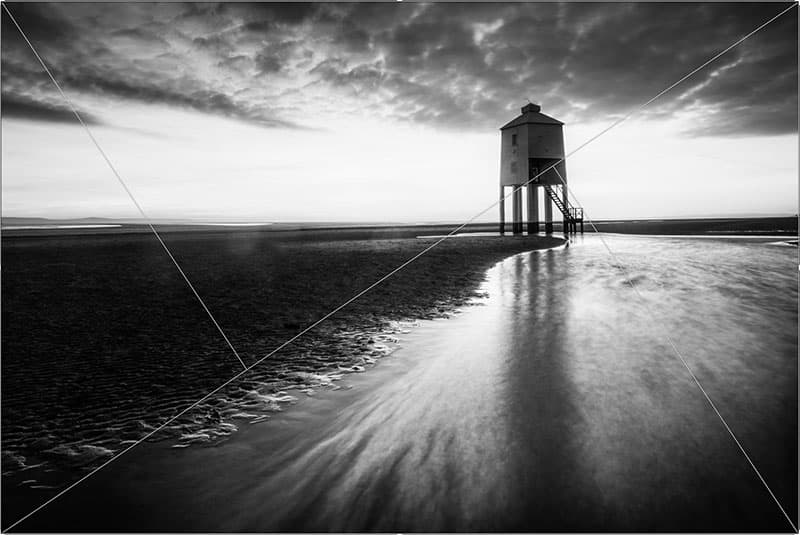
13. The Diagonal overlay
Sometimes referred to as the Diagonal Method or DM, this rule expands on the Rule of Thirds to more precisely determine intersections where points of interest are often placed (either consciously or not) in art. Details like the eyes in a portrait or a tree in a landscape should be placed where the diagonals cross.
Credit: James Paterson
14. The Triangle overlay
To form this compositional guide a diagonal line is plotted between two corners, then two other lines meet it at right angles from the other corners. Use the triangles to separate areas in the frame like this, or position points of interest where the lines meet. You can hit Shift+O to change the orientation of the diagonals.
15. The Golden Ratio overlay
Astonishingly, the golden ratio of 1:1.618 appears all over creation, from the natural spirals on a nautilus shell to the Mona Lisa. For photographs, it is thought to be the basis on which the Rule of Thirds was devised, but the lines appear close to the centre, and arranging points of interest along them can result in a more balanced frame.
Credit: James Paterson
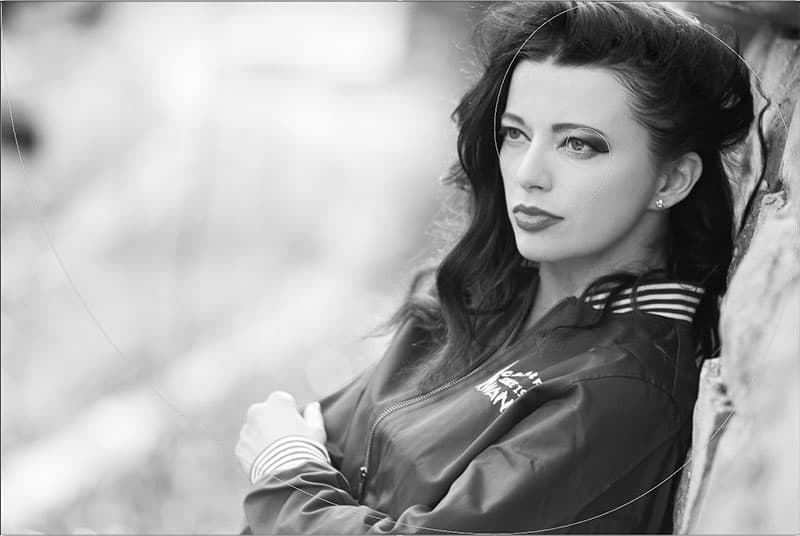
16. The Golden Spiral overlay
This spiral overlay is based on the Golden Ratio and the Fibonacci sequence, which is devised by adding up the two previous numbers in the sequence (0, 1, 1, 2, 3, 5, 8, 13…). It doesn’t necessarily mean your composition has to look like a spiral – rather it’s about placing the important point at the centre of the spiral (in this case the eye), and spacing other points of interest using the lines as a guide.
17. The Aspect Ratio overlay
The last of the crop overlay guides, this lets you see several aspect ratios at once, which can be useful if your image needs to be cropped in different ways for differing purposes. You can customise which ratios are shown under Tools>Crop Guide Overlay>Choose Aspect Ratios.
Credit: James Paterson
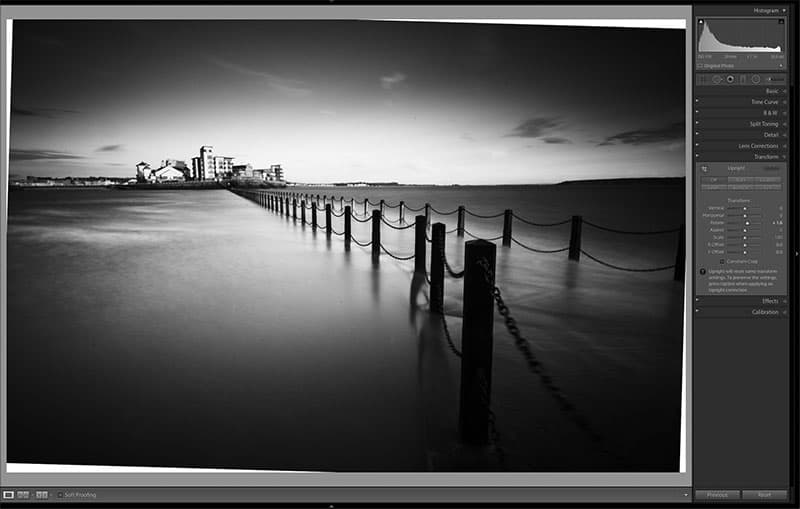
18. Rotate outside the image
Unlike in Photoshop, the Crop tool doesn’t allow you to go beyond the confines of the image, which means if you want to rotate the crop then you can end up losing parts of the edges. But there is another way. Use the Rotate slider in the Transform panel to rotate without cropping in. Once done, you could then fill in the missing edges with Photoshop’s Content-Aware Fill command.
19. Auto-show overlays
If you find the crop overlays distracting then there’s a helpful feature under Tools>Tool Overlay to turn them on or off. There’s also an Auto-Show setting which is arguably the best option, as it temporarily shows the crop overlay while the crop box is being adjusted.
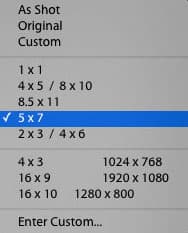
20. Aspect controls
The Aspect options in the tool settings on the right let you choose a ratio. There are several common choices like 7×5 and 10×8 as well as a few useful video ratios. You can also create your own custom ratios if you prefer to. If you hold Alt and click any of the settings, the tool resets any current crop to the image bounds.