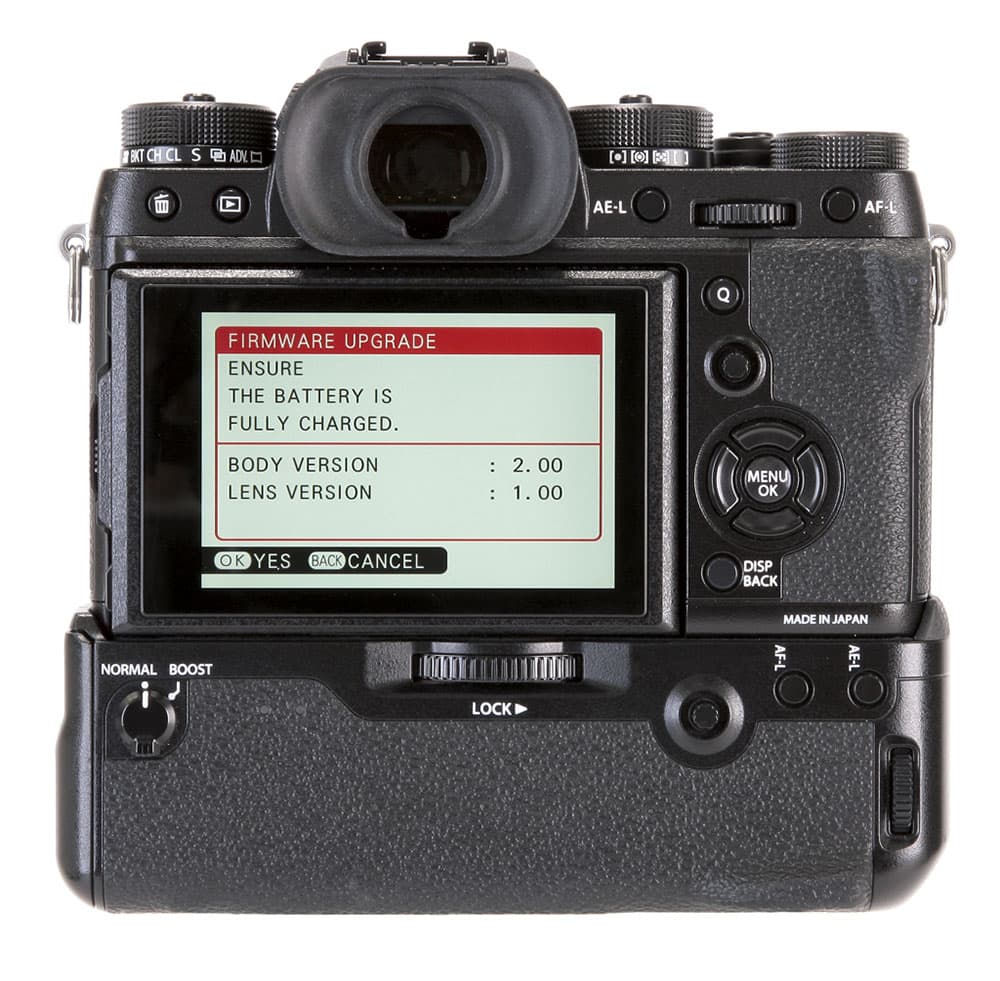
Firmware upgrades can sometimes iron out bugs, so keep your gear up to date
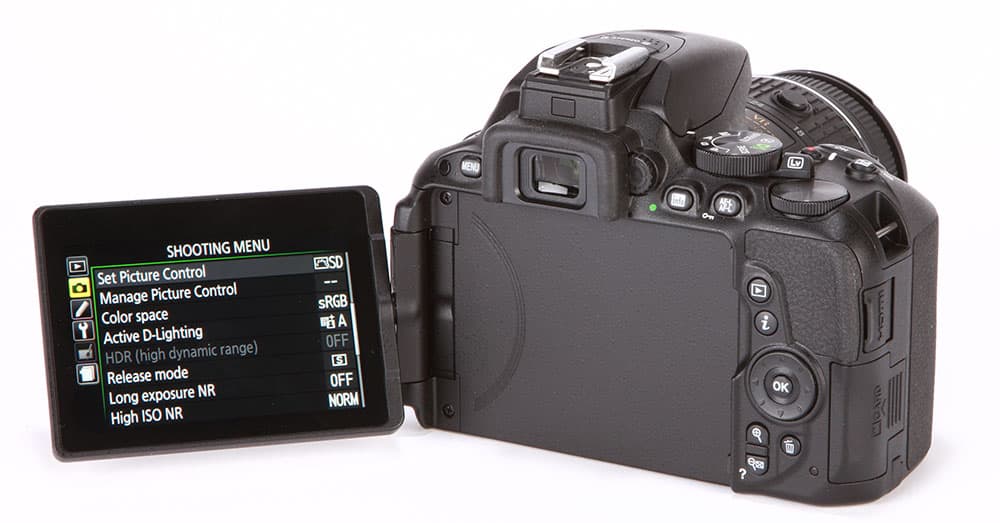
Whether you’re picking up a serious camera for the first time or you’ve just moved up to your next camera in a long line of upgrades, the extensive menus of modern cameras can seem a little overwhelming at first. In the next few pages, I’ll take you through all the steps you should take to ensure you’ve got everything set up just right.
1 Check the firmware
Even if your camera is new, it’s advisable to visit the manufacturer’s website to see if there have been any firmware upgrades issued before you use it for the first time. If you go to the company’s homepage, look for a link to ‘support’, from here you can usually search for your camera by model name and find a link to download the firmware (it may be listed under software download options) if there has been an upgrade.
Firmware is the software that turns your camera from a box of electronic components into a functioning camera. From time to time upgrades are made to iron out bugs and add new features, so it’s advisable to upgrade it if new firmware is issued.
The website will explain the exact steps you need to take to update your camera’s firmware, but the basic steps are usually the same. First, you need to download the firmware, unzip it if necessary and then transfer the file to a card that has been formatted in your camera. Next, insert the card in the camera and follow the steps shown on the website. Your camera must have a fully charged battery or mains power and it’s essential that you don’t turn the camera off or press any buttons while the firmware installs.
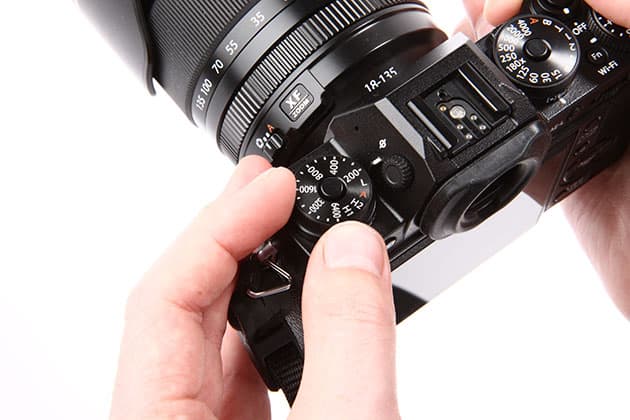
2 Sensitivity
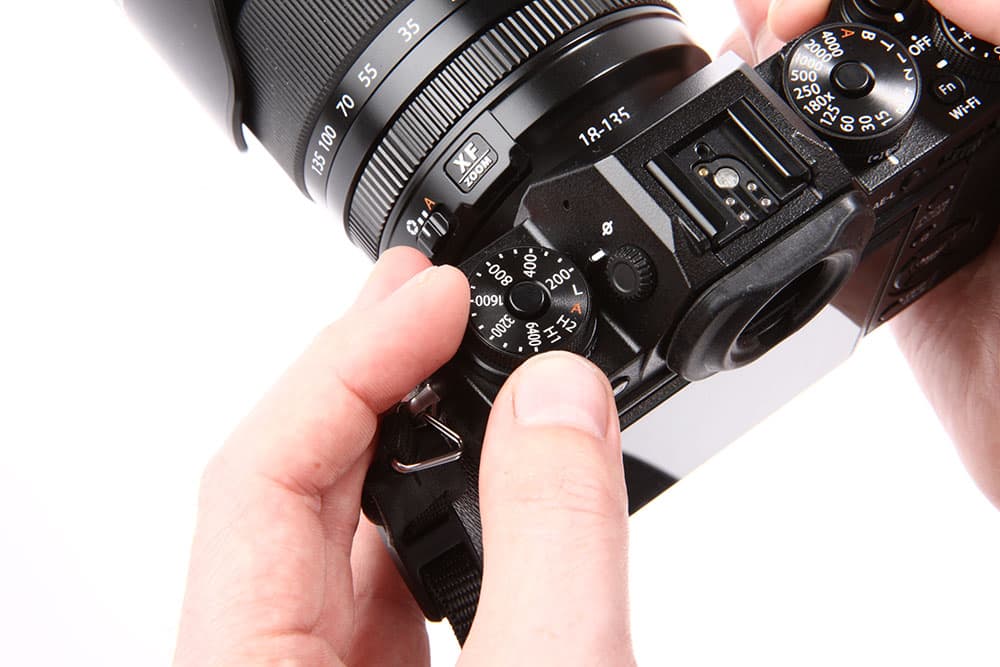
When it comes to ISO sensitivity you may need to experiment to find the highest setting that produces acceptable results
While you can set a specific sensitivity (ISO) setting, it’s more convenient to use the automatic setting so the camera sets the value for you. Many cameras allow you to specify the maximum sensitivity setting to use along with the slowest shutter speed you want to use, which means you can be sure of getting sharp images without too much noise. You need to experiment a little with your camera to find the highest setting that produces acceptable results. ISO 6400 is a good starting point for the maximum, but check to ensure you’re happy and whether your camera can go higher.
Some cameras also allow you to specify a default sensitivity value to use and it’s advisable to set the lowest native setting to ensure the best quality images.
While you’re sorting out the sensitivity setting, you should also browse through the menu to find the option to activate the expansion settings – just in case you need to take a shot in very low light and don’t mind lots of noise.
3 Get the cards sorted
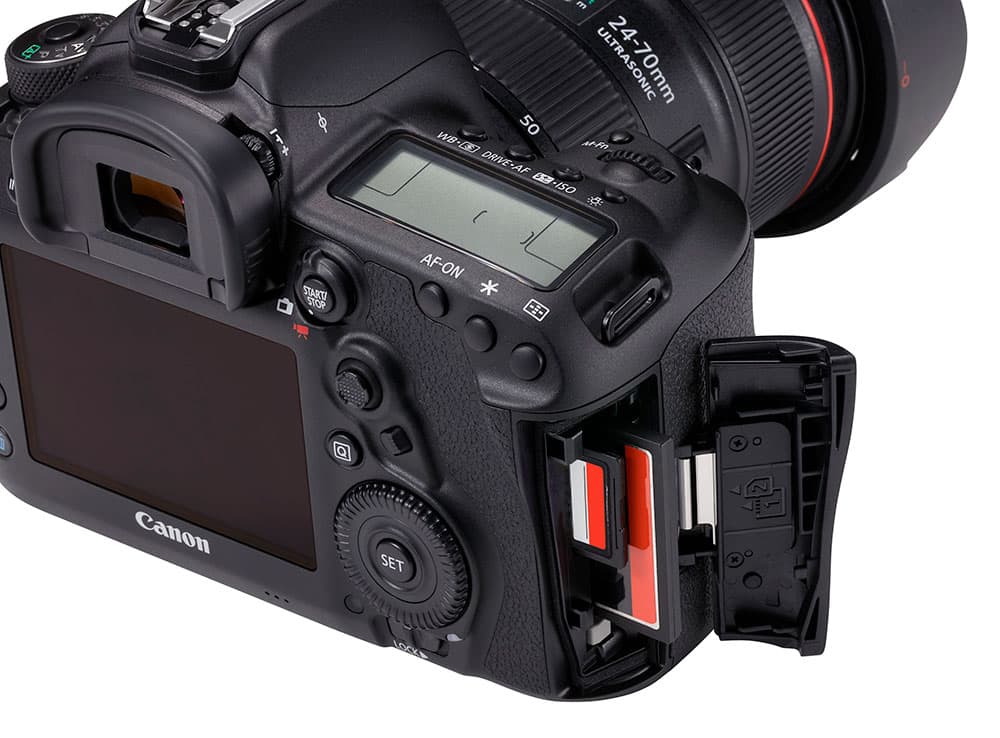
Your first move when you insert a card into a new camera should be to format it. This clears any images and prepares the card to receive images from the new camera. This seems to be especially important with Sony cameras as they like to have an image database prepared from the outset.
If your camera can accept more than one card it’s usually possible to specify how they are used. The default is usually (but not always) for the second to be used as an overflow that fills once the first is full. However, there may be options to let you put one type of file on one card and another on the other. Some photographers like to separate the raw and JPEG files, this is especially useful if you need to give someone else your JPEGs and keep the raws for processing yourself. Alternatively, you may like to put stills on one card and movies on the other, it can help you keep track of how much of each you’ve shot.
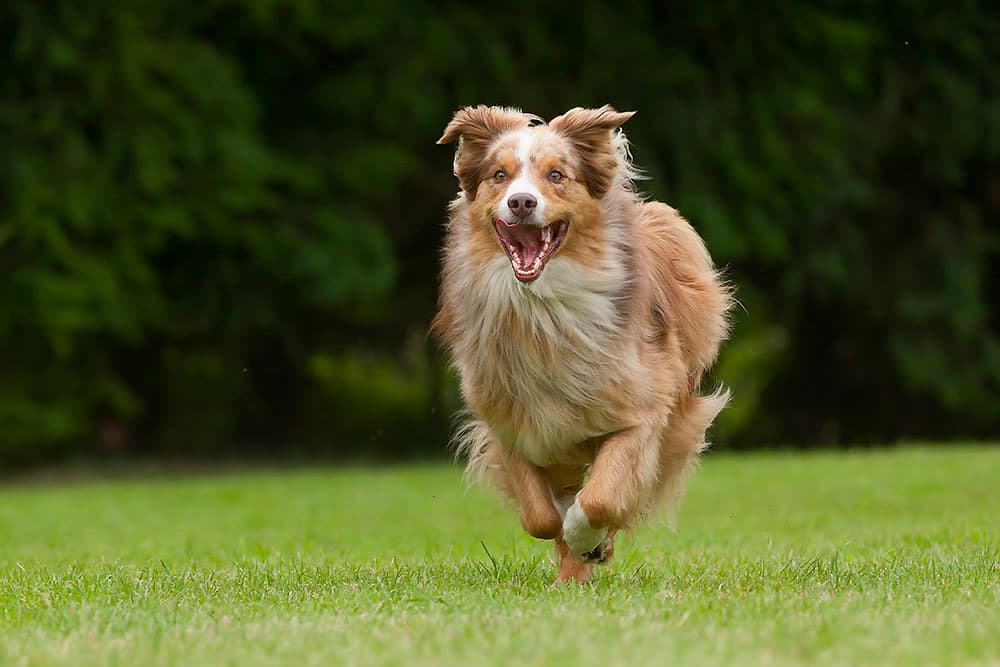
4 Autofocus
If your subject is moving then the continuous AF mode will help to keep things sharp. Image Jon Devo
Most cameras offer three autofocus options – single, continuous and automatic. While the automatic option can be useful if you’re not sure whether your subject will be moving or not, it’s best to use one of the other two if you can to save any confusion (and delay) on the camera’s part. Hence, if your subject is stationary, use single AF mode and if it’s moving use continuous mode.
Another important decision for focusing is the selection of the focus point. Occasionally it can be helpful to give your camera free-run to select the point itself, but as a general rule you’re better off restricting it to a smaller zone. The smaller the area or number of points you give your camera to work with the more careful you have to be about positioning the active point over your subject. With fast-moving, erratic subjects you often need a larger focusing area than with slow, steady subjects because it’s harder to keep the point over the right place. Some cameras allow you to set a single point but use surrounding points if the subject moves away from the first point.
There are a couple of other tricks that you can use to help keep your subject sharp. Some DSLRs, for example, have a cluster of cross-type focus points that are more sensitive than the ordinary linear points. These are usually around the centre of the frame but your camera’s manual will explain their location more accurately. Selecting one of these points gives the camera a better chance of getting the subject in focus. Also, some long lenses have a focus limiter that restricts the distance within which it focuses. If your subject is likely to be within that distance, using this option will reduce the lens’ hunting range and speed up focusing.
5 Set the image quality settings
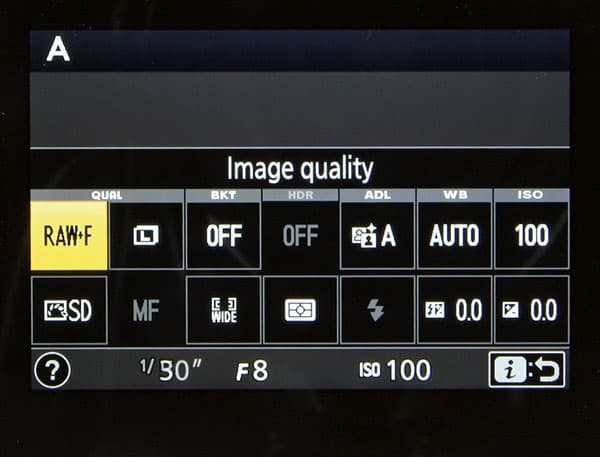
There are often three aspects to image quality – file type, image size and compression level. Memory cards are much cheaper than they used to be, so this makes capacity less of a constraint than it once was. If you can, I recommend shooting raw and JPEG files simultaneously as this gives you data-rich raw files along with JPEGs that are suitable for sharing via social media or email quickly. As you’ve shelled out the money for a camera with a specific (usually high) pixel count it also makes total sense to shoot the largest files possible, and also to use the maximum quality JPEG setting available, often known as Fine or Extra Fine. There are sometimes options for the raw files such as 14-bit or 12-bit and compressed, lossless compressed and uncompressed. Go for 14-bit and uncompressed to get the highest quality possible from your specific camera.
If you want to shoot sport or wildlife and plan to capture long bursts of images in single sequences, you may well need to switch to shooting just JPEG files.
6 White balance
Daylight or Sunny white balance settings are usually a good choice for natural light, but in complex lighting conditions you might want to set your own manually. Image Larry Washburn/Getty Images
While modern automatic white balance systems tend to produce decent images, the Daylight or Sunny settings are usually a better bet in natural light.
In mixed light, or in some artificial lighting conditions, it’s better to use the manual white balance setting. The exact process for setting a manual white balance value varies from camera to camera but the general principal is the same, set the camera to the manual white balance setting mode and then photograph a grey card in the same light as the subject. Then you need to tell the camera (or confirm) that you want to use that image to set the white balance. You can use that setting for as long as you’re shooting in the same lighting.
7 Get the colours right
Picture Styles or Controls can be useful for giving colours a quick boost. Try Landscape or Vivid options
Cameras offer two colour spaces to be used for JPEG files, sRGB and Adobe RGB. Adobe RGB has a wider colour gamut than sRGB so it’s a good choice if you want to edit these files, it can also result in more vibrant looking images. However, labs and most display system use the sRGB space so if you use Adobe RGB you should change the colourspace before sending the image. So while Adobe RGB gives you more data and flexibility, sRGB will save you time and trouble.
Most cameras also have a selection of settings under something called Picture Styles, Picture Controls or Film Simulation modes. The Standard or default setting is fine for most situations and subjects but you might like to use the Landscape or Vivid options occasionally to give your colours a quick boost.
8 Noise reduction

In-camera high sensitivity and long exposure noise reduction is generally pretty good these days and should be set to the standard level. However, it’s worthwhile shooting raw files at high sensitivity values as this gives you the opportunity to apply a bespoke level of noise reduction at the processing stage.
It can get tedious shooting long exposures with long exposure noise reduction on as it effectively doubles the time each shot takes. As an alternative you can turn it off and make the occasional dark exposure with the lens cap on and the viewfinder covered so that you can use a dark frame extraction technique to deal with noise.
9 Image stabilisation
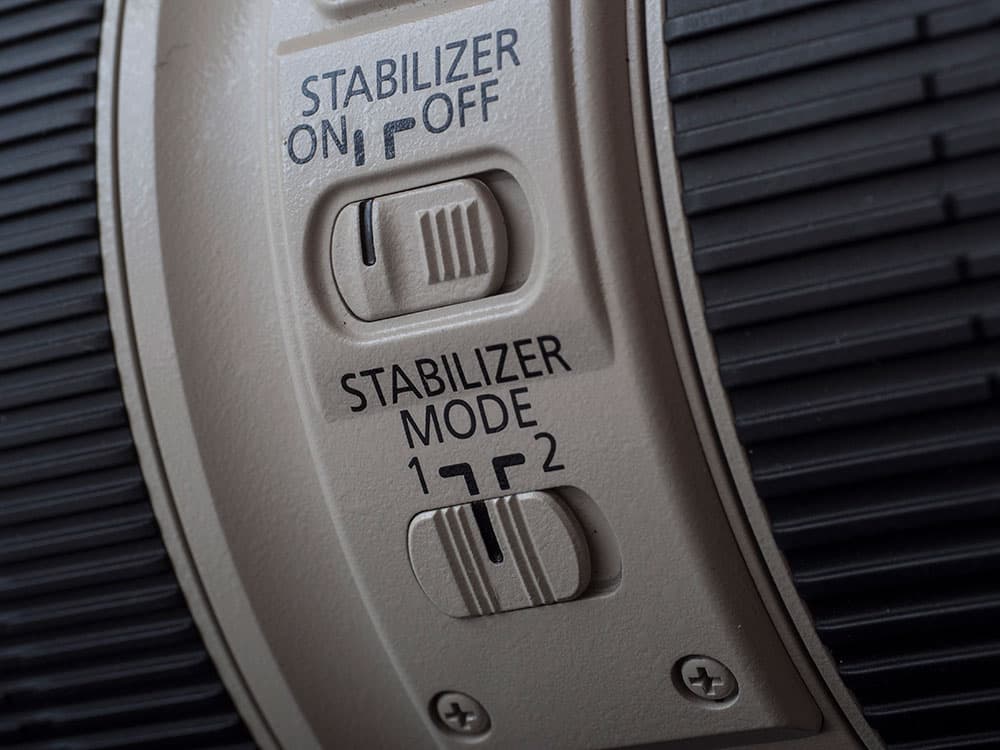
The default setting for image stabilisation (IS) should be on, you really only need to turn it off if you are using the camera on a tripod or shooting intentional camera movement images.
If your camera can be set to only use IS as an image is taken, try to use that option as it will give you the maximum degree of stabilisation.
10 Exposure metering
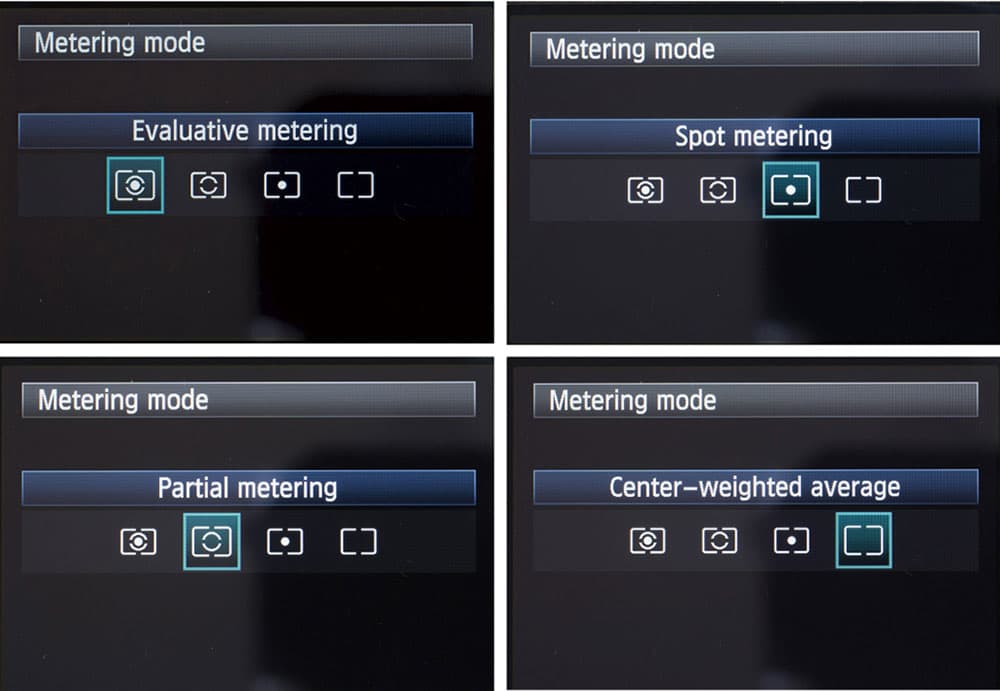
Most cameras have at least three metering modes. The first and most commonly used employs all the metering areas and is often called something like Multi-zone, but it’s also known as Evaluative on Canon cameras, Matrix on Nikon cameras and ESP on Olympus cameras. This makes a good general-purpose choice, especially with digital cameras, and mirrorless models in particular as you have the opportunity to assess exposure by eye and histogram. Centre-weighted metering puts greater emphasis on the exposure of the centre areas of the frame (or the area around the active AF point), and it’s useful in high contrast situations or when your subject is backlit.
The third option, spot metering, uses a very small part of the scene to assess exposure. Although this point can be at the very centre of the frame it can be better to link it to the active AF point – you may be able to do this via the menu. This lets you measure exposure from a very precise area and prevent very bright or very dark areas from influencing the exposure of the whole image.
11 Drive mode
If you know your subject is going to move quickly, switch to continuous high mode. Image Hans Surfer/Getty Images
While you may often want to fire off one image at a time, rather than setting single drive mode it’s often a good idea to select your camera’s low continuous shooting mode. With a little practice you’ll be able to shoot just one image when you want but with the freedom to capture a sequence of images if some action should develop quickly. Using the low continuous mode rather than continuous high option, prevents you from firing off a huge stream of images accidentally. However, if you know your subject is going to move quickly or there’s some fast action anticipated, switch to continuous high to give you the best chance of capturing the moment.
12 Customise
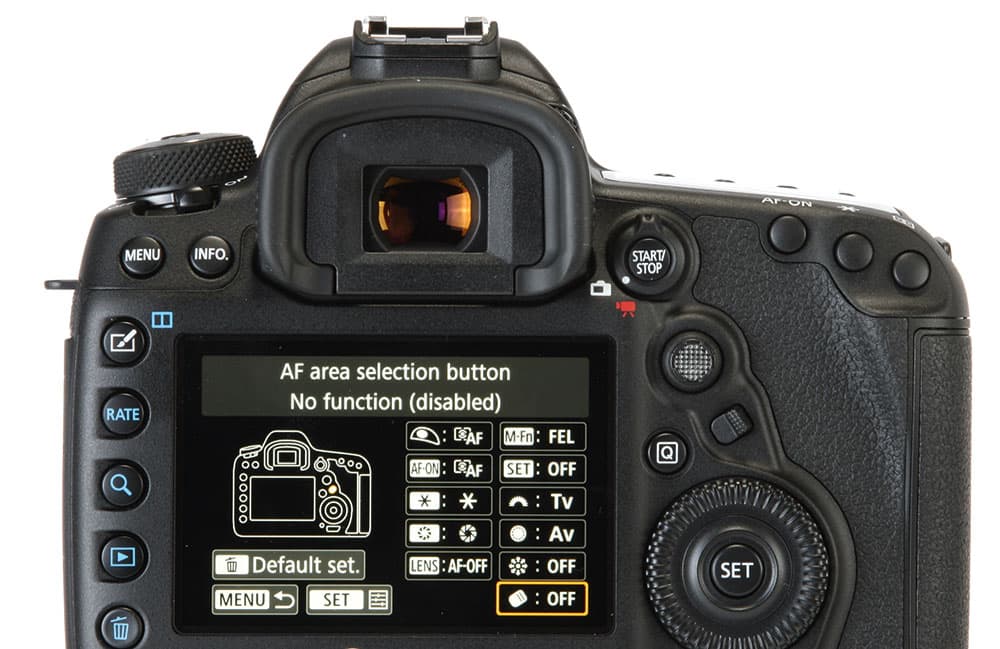
Many dials and buttons can be customised to suit the way you shoot
Most cameras offer a selection of customisation options that allow you to tailor the camera to your shooting preferences. It’s often worth using your camera for a little while to see if there any things that bug you – perhaps you always rotate the wrong command dial to change aperture for example – before making any changes. Take a look in your camera’s customisation menu and see what options are available, and consider trying some of them.
By default, some cameras have a two-stage process for setting the AF point but sometimes it’s possible to set the navigation controls to adjust it directly, saving you valuable time. Likewise, you may like to move the focus activation away from the shutter button and use back-button focusing – it’s useful for sport and when you are pre-focusing.
Because you can check the image in detail, the depth of field preview button is less useful in digital photography than it is for film. That makes it available for an alternative use, perhaps bringing up the electronic level to ensure horizons are straight or to activate the histogram view to check exposure.
Many cameras have a Function or Quick Menu that allows you to access key features quickly, and in some cases it is customisable. Alternatively (or in addition) there may be a ‘My Menu’ page to which you can assign some of the features you use most often. You’ll soon get a feeling for the options you use most often. Mirror lock-up, self-timer, exposure delay, card format and dynamic range optimising features are often very popular choices for quick access.
13 EVF/LCD brightness
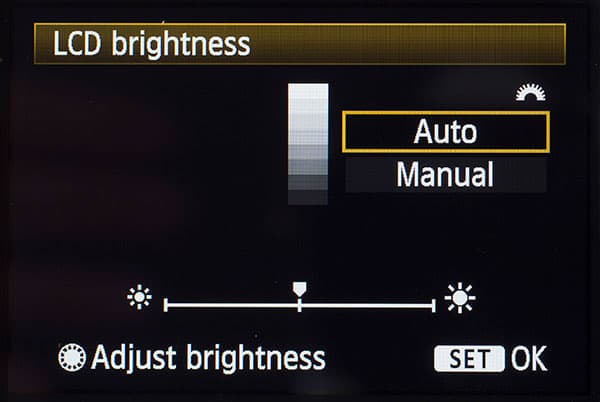
In many situations you will be able to get away with using your camera’s main screen in its standard setting, but in very bright conditions you may need to turn its brightness up to give you a clearer view. Sony cameras have a Sunny Weather setting that boosts the screen’s brightest. While this will make it easier to compose images in sunshine it’s important to remember that the exposure may look off, so keep an eye on the histogram view.
Because electronic viewfinders are shielded from sunlight you don’t usually need to increase their brightness in sunny conditions, but in low light you may want to reduce it to be kinder to your eye, which will be accustomed to the dimmer conditions.
Photographer and journalist Angela Nicholson started reviewing cameras for Amateur Photographer in 2004 and was our technical editor before leaving for pastures new in 2010. She’s tested everything from camera straps to backpacks, compacts to medium-format cameras and has set up more cameras than she cares to remember. See www.angelanicholson.com.