There have been some brilliant innovations in photography but which camera manufacturer has introduced the best in recent times? Angela Nicholson weighs up the choices in the latest of our Nobody Does it Better series.
Innovations such as 35mm roll film and autofocusing have had a huge impact on photography and more recently we’ve seen how Eye AF can make it easier than ever to get the most important part of the subject sharp.
Each camera manufacture offers a few unique features that are designed to make the photographer’s life easier or more enjoyable, but Olympus really stands out in this area with some brilliant innovations.
Chief amongst Olympus’s impressive innovations is Live Composite mode, an evolution of Live Bulb and Live Time mode which take the guesswork (or maths) out of shooting long exposures.
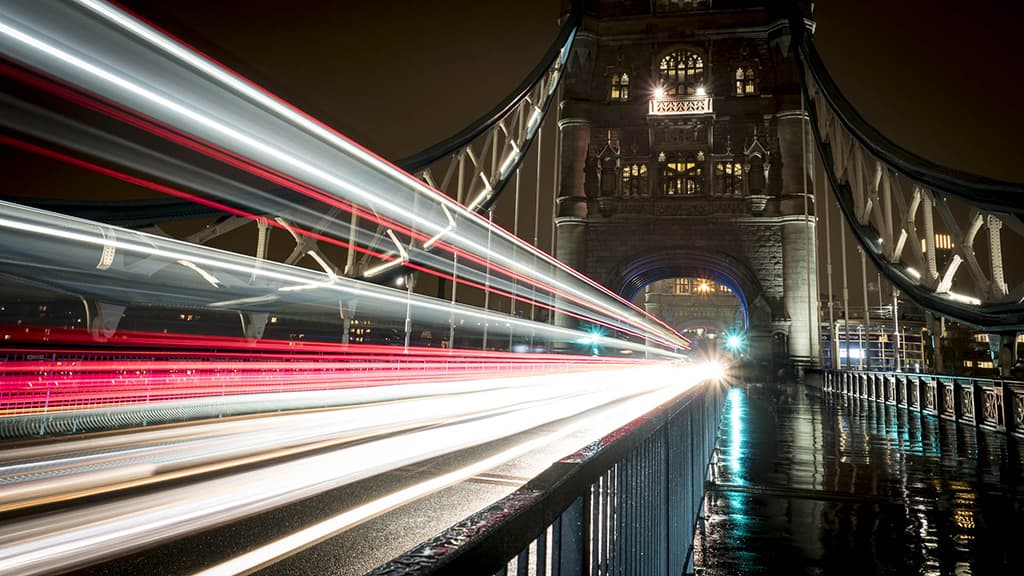
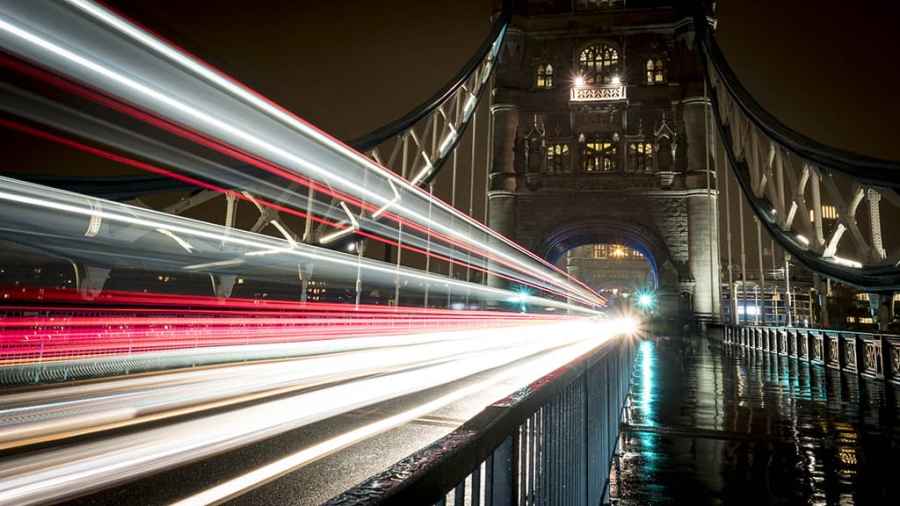
Live Composite mode in action
The genius feature of these modes is that you can see the image build up on the screen on the back of the camera during the exposure. That means that instead of having to calculate how long to expose a scene for and then hover with nervous anticipation next to your camera during the exposure, only finding out if you got it right after the allotted time, you just need to watch it appear and close the shutter when you’re happy. It feels a bit like stepping back into the darkroom and developing a print in a tray.
The difference between Live Bulb and Live Time mode is that in Live Bulb mode the shutter stays open for as long as the shutter button is pressed whereas in Live Time mode, the shutter opens with the first press of the button and closes with a second press. It means that there’s no need to keep your finger on the shutter button during the exposure in Live Time mode, making it a better option than Live Bulb mode in most situations.
Live Composite mode
While Live Time mode is a great choice for many long exposure images, Live Composite mode is designed for shooting things like fireworks and traffic trails or when painting with light – anything where light is being introduced into a scene.
As with Live Bulb and Live Time mode, you can see the image build up on the camera’s screen, with the camera recording a series of images that are composited in real time. The clever bit is that after the first shot, the ambient brightness doesn’t change, only those areas that are bright-er than in the first shot are recorded.
With a night-time city scene, for example, this means that buildings and streets stay the same, but the lights of passing vehicles record as light trails. It means that you can build up the trails without worrying that the brighter parts of the surroundings will burn out.
This ability of Live Composite mode to seemingly treat different parts of the image selectively causes some head-scratching amongst experienced photographers who are used to longer exposures resulting in highlights being at risk. However, Live Composite mode works in a similar way to the ‘Lighten’ Blend mode in Adobe Photoshop, only changing areas that are brighter than the original ‘base’ image.
How to use Olympus Live Composite mode
As Live Composite mode is for shooting long exposures, it’s important to mount the camera on a tripod. Ideally, use a low sensitivity setting to capture the best image quality possible and com-pose and focus the shot as usual.
There are two methods available for using Live Composite mode. With cameras like the Pen E-P7 and OM-D E-M10 IV that have an ‘AP’ setting on the mode dial, it’s just a case of changing the mode setting and selecting ‘Live Comp’ from the list that appears.

Then, when the shutter release is pressed, the camera will take a series of images and you’ll see the composited result appear on the screen. When you’re happy with the image, it’s just a case of pressing the shutter release again to stop shooting.
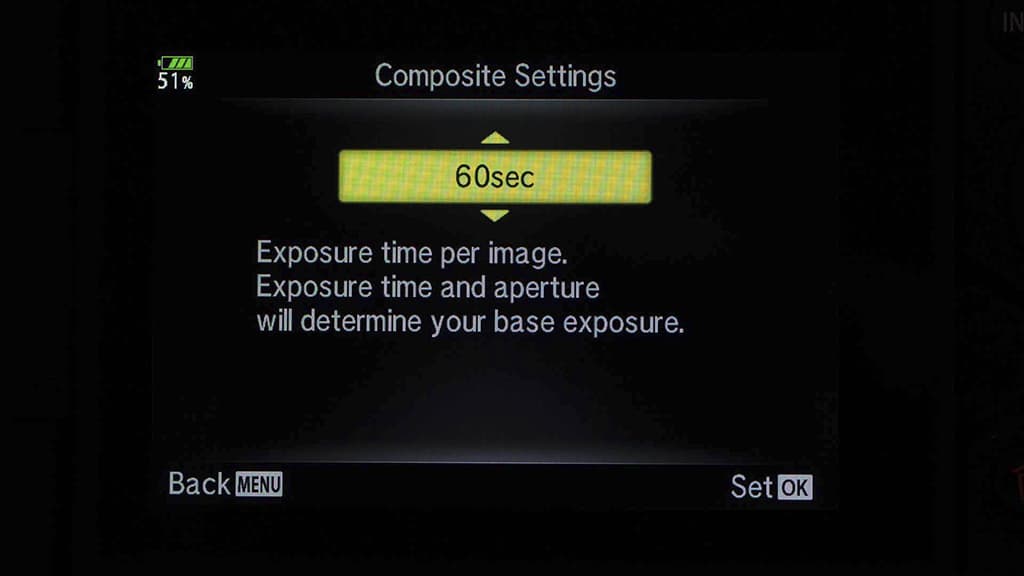
You get more control with more advanced cameras like the OM-D E-M1 III. On them, Live Composite mode is selected in manual exposure mode by adjusting the shutter speed, lengthening the exposure beyond 60 seconds until ‘Live Comp’ is visible.
However, before selecting Live Composite mode, it’s a good idea to take a couple of test shots to find the shutter speed that delivers the image with the background exposed as you want it in the final version. With that done, set the camera to manual exposure mode and adjust the shut-ter speed until Live Composite modes activated and do the following:
1. Press the Menu button and use the up/down navigation buttons to set the exposure time to the base exposure you found earlier, before pressing the ‘OK’ button.
2. Press the shutter release once to take the base exposure.
3. Press the shutter release again to set the camera shooting a series of images in silent mode. The exposure time of each image will be the same as the base image.
4. Watch the screen on the back of the camera and when you’re happy with the image, press the shutter release again to stop shooting.
Other great Olympus innovations
Olympus debuted another couple of innovations with the OM-D E-M1X. The most significant of these is Intelligent Subject Tracking which initially could be set to ‘Trains’, ‘Motorsports’ or ‘Air-planes’, but following a firmware upgrade also now includes ‘Birds’.
The desired subject is set via ‘Tracking Subject’ in the camera’s main menu. With that done, it’s just a case of pressing the ‘OK’ button to activate the Super Control Panel and then accessing the focus mode options and selecting C-AF+TR (continuous AF and tracking). Once this is set, the E-M1X will put a box around the chosen subject when it enters the frame.
Another noteworthy innovation introduced by the E-M1X was Live ND mode. This mimics the effect of putting a neutral density filter over the lens to enable longer exposures than normal. What’s a little bit different, however, is that you see the blurring of any movement, which helps you decide which shutter speed to set.
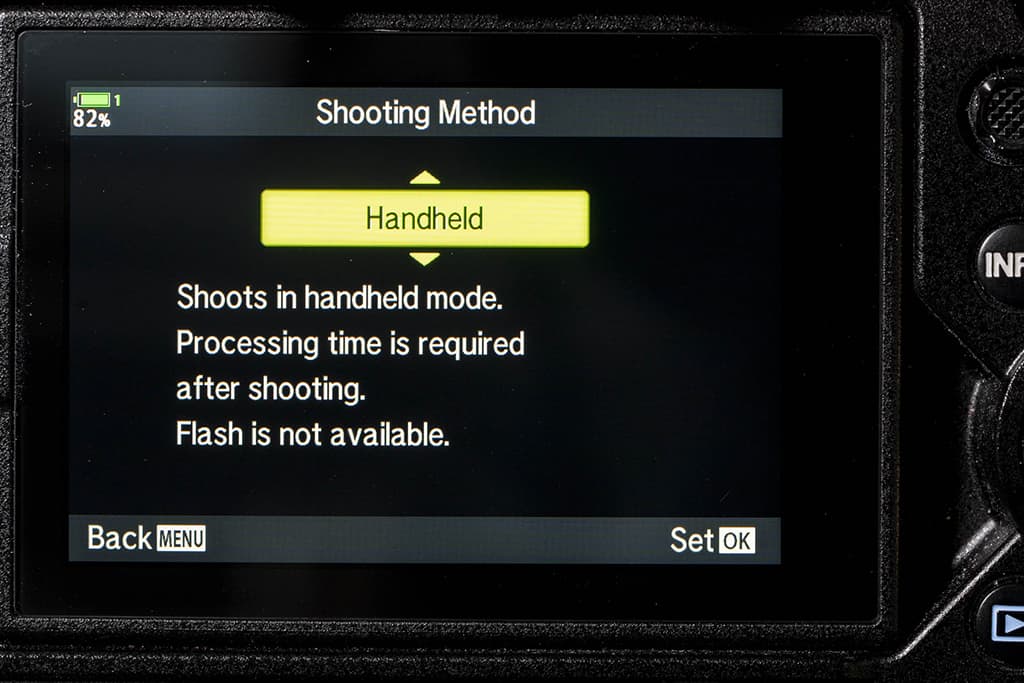
Finally, we shouldn’t forget that Olympus has a great High Res Shot mode that makes use of its excellent in-camera stabilisation system to shift the sensor between each of a series of shots to enable a larger than normal image to be created. What’s more, Olympus has two versions of this mode, one that’s designed for use when the camera is on a tripod and the other that can be used when the camera is hand-held.
Further reading
Previous ‘Nobody Does it Better’
Best image stabilisation