As the nights draw in and the temperature drops, the coming of winter brings with it myriad opportunities for all photographers. So whether you’re interested in portraits, landscapes, nature or cityscapes, there’s no reason to let your camera slip into hibernation while you wait for the fairer weather of spring.
Winter is a season of extremes that brings with it unique weather conditions including frost, snow, ice and mist; all of which can form the foundation of highly creative images spanning this variety of subjects. The hardest part of winter is staying motivated when it’s freezing cold outside, but make the effort to get out, and you’ll undoubtedly be rewarded.
Credit: James Abbott
1. Camera settings for snow
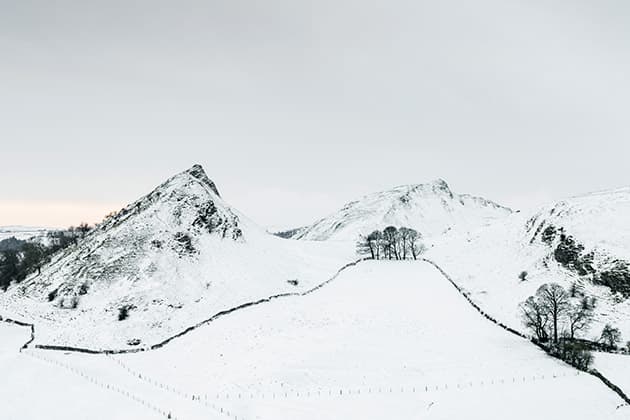
Shooting snow-covered landscapes is a firm favourite, and with the right camera settings you can achieve perfect exposures and white balance in-camera. Shooting in raw is always useful because it provides greater latitude for making adjustments during post- processing. When shooting snow on a cloudy day with daylight white balance set, it’s common for images to have a bluish colour cast; so if this is the case switch to Auto white balance and adjust in post-production.
Another commonly experienced problem when shooting snow is ‘grey’ snow. Since camera metering systems ‘see’ everything as mid-tone grey, it’s all too easy to underexpose the scene and end up with grey rather than white snow. In this situation, depending on the conditions, you’ll need to add exposure compensation between 0.7 and 2.0 stops of overexposure in order to photograph the snow as the eye sees it. Just keep an eye on the histogram to make sure you haven’t clipped the highlights.
Credit: James Abbott
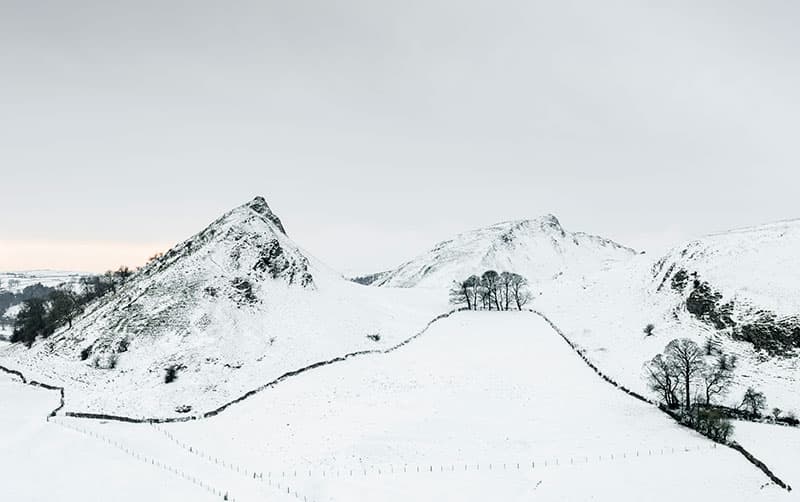
2. Filters for winter shooting
In winter, the filters you normally use – polariser, NDs and ND grads – remain just as effective as at other times of the year. Polarising filters are particularly useful with piercing winter light, as they can be used to reduce glare, remove reflections from water and other reflective surfaces, as well as deepen blue skies.
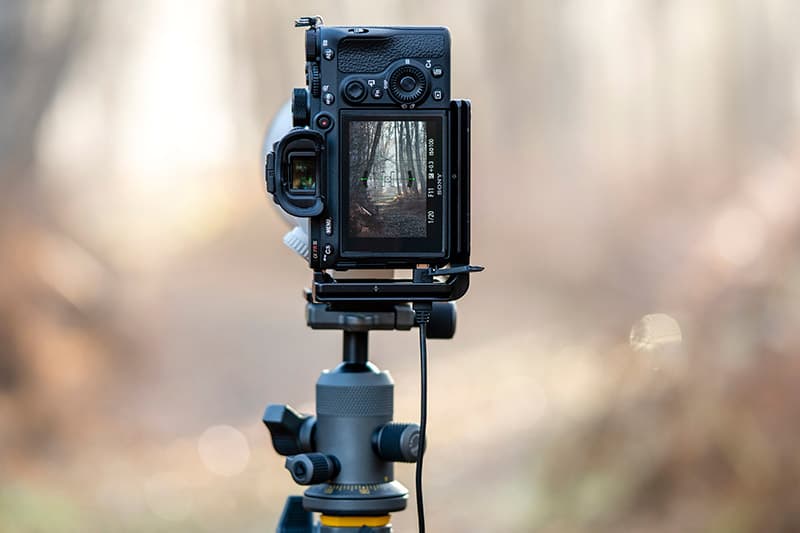
3. Focus manually when it’s snowing
Falling snow can play havoc with AF systems, simply because the active focus point will lock onto whatever is behind it. To avoid focusing errors when shooting during a snowstorm, simply switch to manual focus so you can lock focus on the desired part of the scene and use Live View focus zoom for precision focusing.
4. Battery drain in the cold
When shooting in cold temperatures, typically below 0°C, you may find that your camera battery discharges much quicker than usual. Charge hasn’t actually gone down, and the battery will function normally once warmed up, so the way around this is to keep a spare battery in an inside jacket pocket to keep it warm, and swap between the two.
Credit: James Abbott
MYTH BUSTER
5. You have to shoot in manual mode
It’s a common misconception that to be an advanced photographer you must shoot in manual mode. When shooting with extreme ND filters, in the studio or when you need to lock exposure, this may indeed be the case. But, for the majority of shooting, aperture priority combined with exposure compensation will provide identical results faster.
6. Let your camera kit acclimatise
When returning to a warm environment from the cold, leave your camera and lenses in your kit bag for a few hours to allow them to slowly warm up to ambient temperature. This will avoid condensation which, in extreme cases, can cause damage to electronic components and cause mould in lenses.
7. Keep warm and dry
It’s a bit of a no-brainer, but keeping warm, dry and comfortable is essential for successful winter shooting. Outdoor or hiking clothing is designed specifically for this and will certainly help you keep shooting for longer. Plus, gloves that are designed for photographers provide a flip back on the thumb and index fingers for tactile camera control while keeping your hands warm.
Credit: James Abbott
MYTH BUSTER
8. You have to avoid bad weather
Even when the sky is grey or it’s spitting with rain, it’s still possible to shoot great images; you just have to approach each situation creatively and use the right technique for the conditions. When shooting this image, it was spitting with rain and a storm was coming in, but by holding a lens cloth over the filters on the front of the lens it was possible to keep shooting.
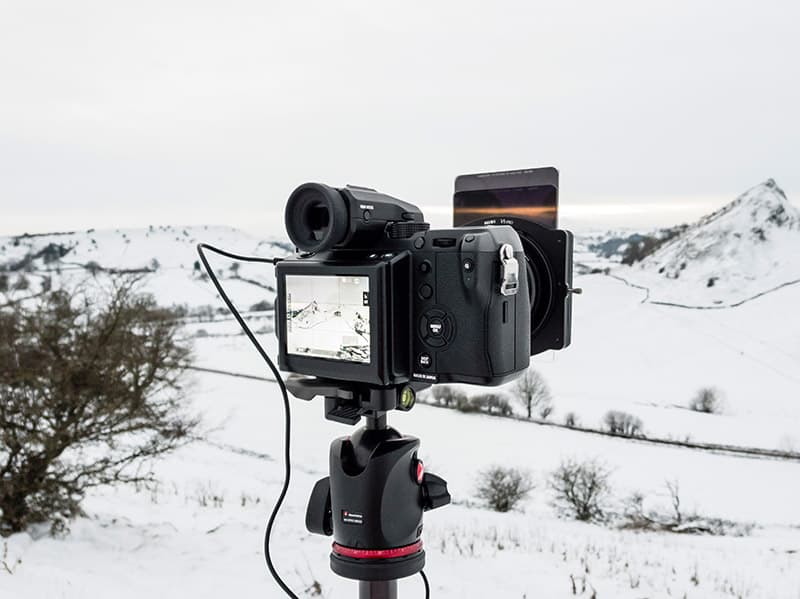
9. Get a perfect exposure in adverse conditions
Drop-in/sheet filters can be a magnet for snow and rain owing to their prominence on the front of lenses, which can make capturing detail throughout the scene difficult if you can’t use ND grads. The simple way around this problem, though, is to attach the lens hood to your lens in order to protect the front element from rain, and to shoot HDR.
Most cameras offer Auto Exposure Bracketing, which is where you set the mean exposure and the camera will automatically take additional exposures – one that’s two stops underexposed and one that’s two stops overexposed. These three shots can then be merged into a single image using special HDR software or Lightroom.
Credit: James Abbott
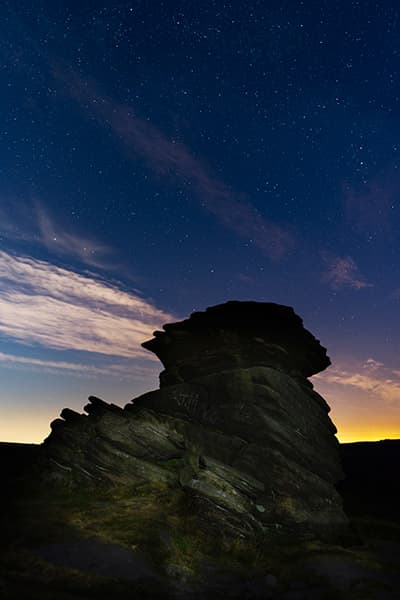
10. Take advantage of longer nights
Astrophotography is popular all year round because the night sky reveals different features at different times of the year. But winter is considered one of the best times because the nights are longer and, most importantly, there’s less atmospheric pollution than in summer. You’ll get the best results from dark sky areas which, with a little online research, can be easily found.
Camera settings vary from location to location, but as a rule of thumb, you’ll need to shoot in manual mode with a shutter speed in the region of 20 seconds with a fast, wideangle lens such as f/2.8, or ideally f/1.4. ISO will need to be set between 800 and 3200. Manually focus to infinity and set ISO to 3200 before taking a test shot, and reduce ISO as required for a correct exposure. Don’t forget your shutter remote and tripod.
11. Golden hour is more manageable
Shorter days means sunrise is later in the morning and sunset is earlier in the evening than during the summer months. Weather apps and websites such as the Met Office provide daily sunrise and sunset times, not to mention detailed hourly forecasts, so you can plan your shoots with a reasonable degree of precision.
Credit: James Abbott
MYTH BUSTER
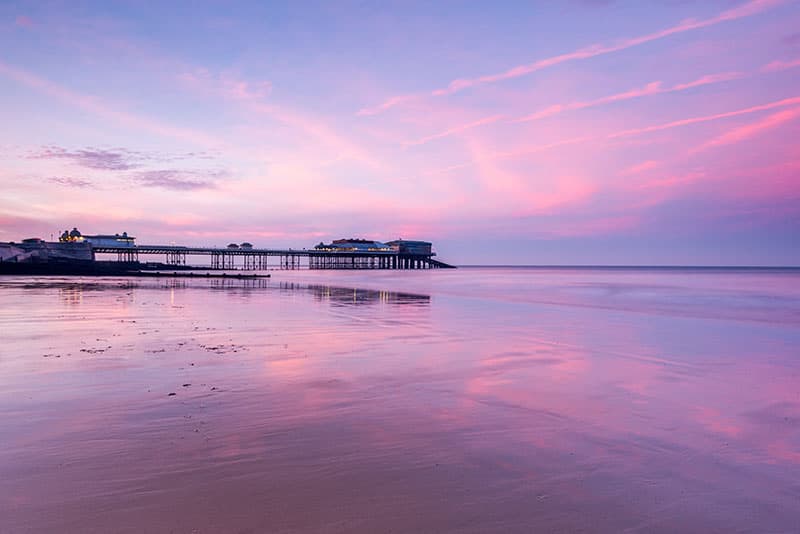
12. True winter shots feature snow or ice
There’s no getting away from the fact that an image featuring snow or ice immediately signifies winter. But as you know, winter days can be sunny and clear and that doesn’t make them any less of a winter’s day. This image was taken during a December sunset, but thanks to the colour and clarity in the scene, you’d never know just by looking at it.
13. How to resolve red noses
Red noses in winter portraits are an unavoidable consequence, but one that’s easy to remedy in Photoshop. Using the Lasso Tool, make a rough selection around the model’s nose and set feathering of the selection to between 30 and 100 pixels depending on the size of the face in the frame. Next, create a Curves Adjustment Layer and select the Red Channel. Now simply drag the Curve down and to the right to add Cyan and reduce redness. You can also add a small amount of Green to reduce Magenta (pink) on the nose. Use sparingly to avoid creating colour casts.
Credit: James Abbott
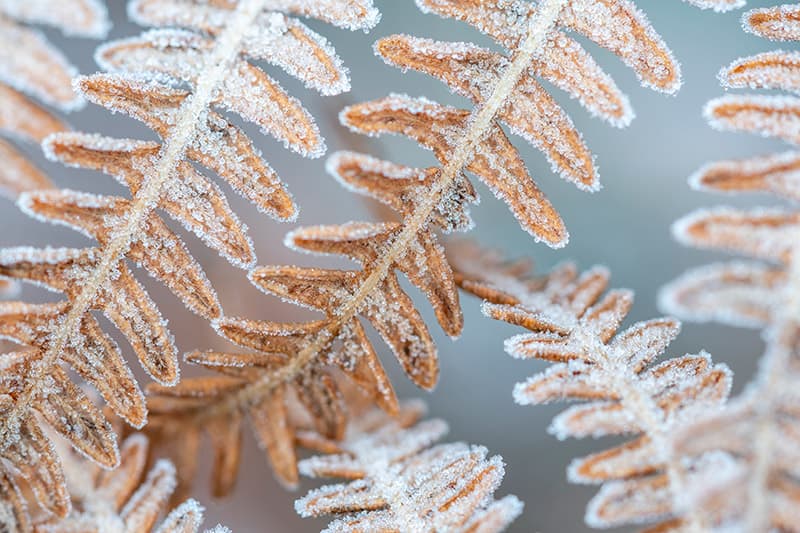
14. Shoot macro on frosty mornings
Few things look more magical to the photographer’s eye than waking up to a frosty morning where the world has been turned into a winter wonderland. Flora takes on new life, and otherwise lacklustre plants and grasses become the perfect subjects for macro photography. For the best results, be out for sunrise and shoot with the camera on a tripod to allow you to shoot at ISO 100 for optimum image quality.
15. Set up a home studio
When shooting portraits, there will be times when going outside simply isn’t an option. And this is the perfect opportunity to create a home studio. A photographic background and studio lights are a huge bonus, but if you don’t have this equipment, window light and shooting with a fast prime such as a 50mm f/1.8 can be a great alternative.
Credit: James Abbott
MYTH BUSTER
16. Winter light is less spectacular than summer
Everyone knows that there’s more light in summer than in winter – the days are longer in summer, and the sun is higher in the sky throughout the day. But in reality, despite lower overall light levels in winter, the quality of light can be just as impressive. And when combined with typical winter weather such as mist, frost or snow, images can be much more dramatic.
17. Stop your tripod from slipping
Wet, slimy rocks can look fantastic in landscape images, but when it comes to keeping a tripod secure on them it’s a completely different story. Solution: many tripod manufacturers sell spiked feet that can be swapped with the standard rubber feet, for seriously improved grip on occasions when you’re shooting in wet or icy conditions.
Credit: James Abbott
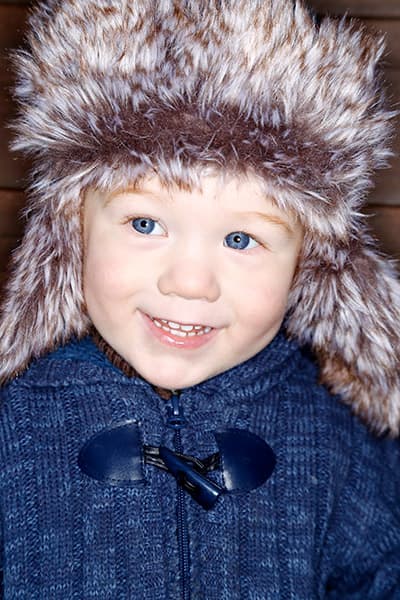
18. Use hats as a focal point in portraits
There’s no doubt you’ve seen portraits of people taken where they’re wearing a furry hat or have a fur-trimmed hood pulled up around their face. It’s far from an original idea but it works particularly well for winter portraits because the hat/hood frames the face perfectly, and a tight crop removes the background so you can shoot anywhere.
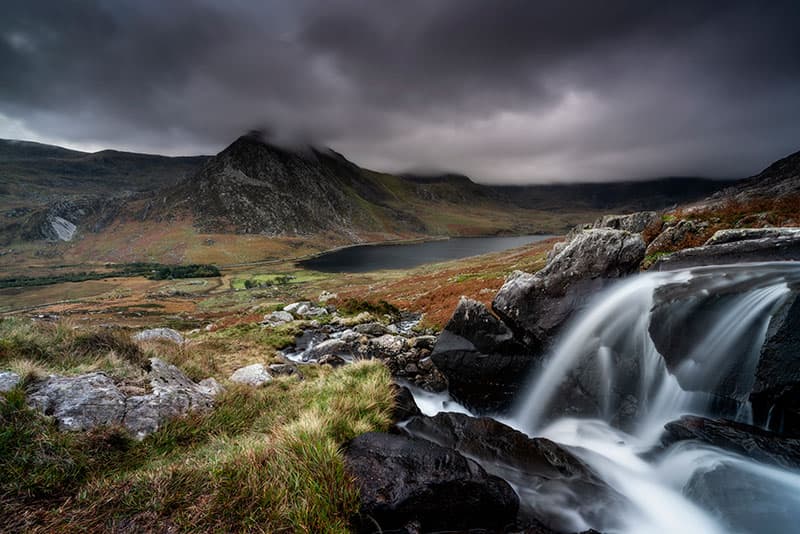
19. Embrace the season
We’ve already discussed typical winter weather conditions, but there’s one more scenario worth looking out for that can produce very dramatic images of the season. Shooting just before or, ideally, just after a storm when clouds are parting to allow light through creates incredibly moody, eye-catching scenes.

Credit: James Abbott
MYTH BUSTER
19. You must have a weather-sealed camera
With a higher chance of rain, having weather-sealed cameras and lenses is always a bonus. But if you don’t have weather-sealed kit, what can you do? One option is to buy a rain cover for your camera, although an option many professional photographers use instead is to drape a large microfibre lens cloth over the camera, lens and filters to keep them dry – it’s as simple as that.
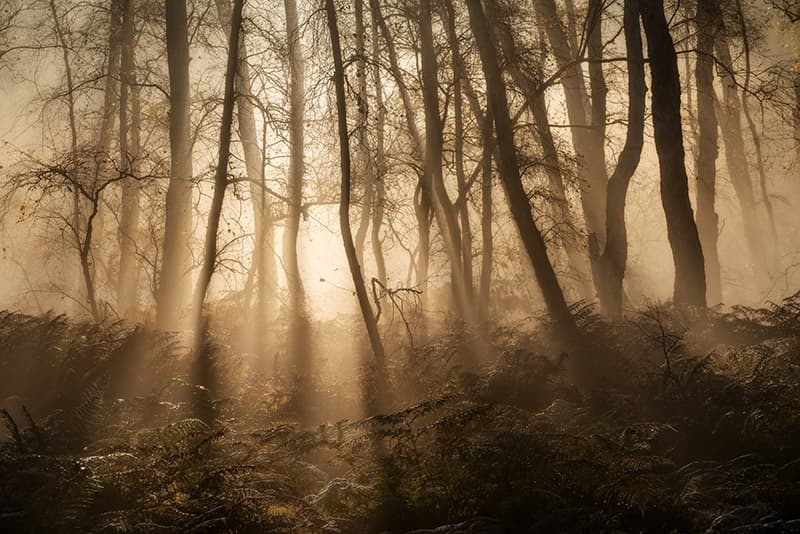
21. Get creative with ICM
With the sun low in the sky all through the day, trees at the edges of forests can often be perfectly lit, making the trees stand out from the darker interior. These conditions are not only suitable for intentional camera movement (ICM) images, but the light can also result in bright and high-contrast images. Shoot in shutter priority with shutter speed set to between 1/8 and 1/15sec.