It’s cold outside, so why not turn your home into your own home studio and get creative without having to take your slippers off?

© Craig Roberts
The idea of still-life and studio photography can easily conjure up thoughts of complicated studio set-ups with expensive, multiple lights, umbrellas and giant softboxes. In an ideal situation and if you have the money this is certainly the professional way of doing things.
But things don’t need to be that complicated, especially when the most dispensable form of quality light is free – daylight. If you can set up in front of a large window in your house then you have the perfect way to get fantastic and professional-looking still-life shots from within your own home studio. So if the weather is rubbish outside or you are just bored of Christmas telly, have a go at shooting some simple still-life subjects.
Make a visit to your local art shop and purchase some large sheets of card in a variety of colours to use as both a base and background. Now you can set yourself up in front of the window either on the floor or ideally move a table in front of the window to allow you to work at a good height. As the window light is coming from only one direction, some sort of reflector is needed to fill in any shadows that you will get. You can purchase fold-up reflectors made by Lastolite or you can make your own out of card covered with crinkled-up kitchen foil taped to it.
Lastolite also make mini light tents that help spread the light evenly over the subject. You place these near a window or with desktop lamps either side and place your subject inside. The panels of the tent light the subject with a soft even light without any harsh shadows. Once you have set up your mini home studio, then it’s time to shoot some subjects.
Indoor Home Studio – Flowers

Flowers can be photographed in many ways within a home studio. © Craig Roberts
Great still-life subjects can be easily photographed with window light. Shoot the flower as a whole, and then crop in tight on interesting features of the flower. Pick out colour, shape, texture and detail. Use a small aperture of f/16 to keep the entire flower in focus, but also try some pictures at a wide aperture of f/4 and just focus on a small part of the flower head, a technique known as selective focusing. The great advantage of shooting flowers in your set-up indoors, is that your pictures won’t suffer from a breeze moving the flower during the exposure, something that can so easily spoil a shot taken outside in the garden.
Indoor Home Studio – Painting with Light

© Craig Roberts
In a darkened room, simply paint around your subject, while you hold the camera shutter open.
1. Best done at night, so you can get the room pitch black. Close the curtains and then set your arrangement up before getting ready to switch the light off.
2. You then need to put the camera onto the B setting, so that you can hold the shutter open for a required length of time. Select an aperture of about f/11-16 just so that everything is in focus and also so the exposure is long enough to do some painting of the subject.
3. Using a torch move it around your subject, keeping it moving throughout the exposure to avoid hotspots.
4. Check the LCD screen and adjust the next exposure to increase or decrease the exposure.
Indoor Home Studio – Food

© Craig Roberts
Raid the fridge and cupboards for suitable subjects. You don’t have to shoot prepared meals like in a Jamie Oliver cookbook. Apples, strawberries, peppers, chillies and even pasta can make ideal subjects to shoot.
If you want to have a go at the kind of glossy, mouth-watering photography that you see in the foodie magazines there are a few tips you should follow for best results.
Preparation
Think about the kind of plates, bowls, cutlery, table cloths and props (such as a vase) you want in your picture. Pick a colour scheme so your elements co-ordinate rather than clash. Make sure the food you photograph is blemish-free.
Lighting
Many types of food wilt under warm lights, so if you’re using tungsten lighting you must work fast. Daylight or flash is better. Food generally looks best when its high key – dark food is unappealing.

All kinds of fruit make ideal subjects. Anything colourful can make a great abstract still-life subject in a home studio. © Craig Roberts
Composition
Food photography is not just a record of the food, but is about creating a mood. Be creative with your shooting angles, crop in on details, and try using a wide aperture to get selective focus on just a small area.
Post Production
Most food pictures benefit from a few touch-ups and levels corrections in Photoshop. Shoot in Raw to give you more scope for adjustment later.
Indoor Home Studio – Kitchen Abstracts

Mundane objects like this cheese grater can take on a graphic, abstract quality if lit and shot in the right way. Image: © Craig Roberts
While in the kitchen, have a go at shooting some utensils too, like cheese graters, knives, forks and coloured straws. Once again, by cropping in tight on the simple, graphic shapes you get wonderful abstract images. You might need a macro lens or close-up attachment.
Indoor Home Studio – Water Droplets

Water droplets are a fun technique that’s easy to do at a home studio, in your kitchen or bathroom, and the results can be highly impressive.
1. Place a bowl of water on a table or set yourself up over the kitchen sink. Fill a strong polythene bag with water and pinprick this to create your drops of water. Alternatively, use a pipette to create drops of water into the bowl as required. This water will show up better on your image if you add a few drops of food colouring to it.
2. You can either use on-camera or off-camera flash for lighting. If using off-camera flash, then ideally place the flashgun to one side of your set-up using an extension cord. This will then fire the flash as you press the shutter. You can use on-camera flash by bouncing the light onto the water from behind your set-up with a piece of white card or envelope.

© Craig Roberts
3. A shutter speed of 1/200th second is required to freeze the drops of water as it hits the water in the bowl. An aperture of f/8 will give sufficient depth-of-field. Set these on your camera in manual mode, but make sure the shutter speed matches your camera flash sync speed.
4. Check the results on the rear LCD and change the aperture for any over or under-exposure adjustment.
5. Take plenty of pictures, as your results will be down to timing and a bit of luck.
Indoor Home Studio – Using Available Light

A window or patio door is a great place to do your still-life photography. The directional light is ideal for revealing shape and texture and can also be balanced and moulded to your needs using reflectors. Light up your home studio without adding a single penny to your electricity bill.
Indoor Home Studio – Using a Lightbox

A good old-fashioned lightbox can be a great light source for the home studio photographer. If you’re an ex-slide film user you may already have one somewhere. If not, they’re cheap and easy to find secondhand. Lightboxes are ideal for backlighting translucent subjects, such as the slices of fruit shown here. Here’s how.
1. Set up your lightbox on a table or the floor, with the camera on a tripod pointing directly over it.
2. Set your white balance. If it’s a daylight balanced lightbox the Daylight WB setting should work best, but depending on the box you have the tungsten or fluorescent settings may be better.
3. Place your translucent subject on the lightbox. If your subject is perishable, such as fruit, you’ll have to work quickly before it spoils from the heat.
4. Fill the frame with your subject, excluding as much of the lightbox as possible. Placing black card around uncovered parts of the lightbox that aren’t in shot will reduce flare, increase contrast and cut the risk of incorrect exposure.
5. Stop down to a mid-range aperture such as f/8 or f/11. Shoot a test exposure, check your histogram and adjust accordingly before shooting. You’ll probably need to add plus one third to one whole stop of exposure compensation to avoid the lightbox recording a dirty grey. Use a remote release to reduce camera shake.
6. Some subjects may benefit from an additional reflector above the lightbox to bounce extra fill light back onto the front.

Rachael Talibart took this stunning shot of kiwis and pomegranates using a lightbox she bought to have some photographic fun during the winter months. ‘I arranged the fruit on a sheet of clear acetate,’ says Rachael, ‘which is crucial if you don’t want a sticky lightbox! Then I set exposure compensation at +1/3 to avoid underexposing the lightbox. Ideally I would have shot at ISO 100 and used a small aperture but the tripod I had at the time didn’t have the flexibility to stand centrally over the lightbox. So I compromised, using ISO 200 and f/5, being careful to make sure that I held the camera parallel to the lightbox. Handholding at 1/40sec with no image stabilisation was possible thanks to the lightness of the Canon 400D and Sigma 50mm DG Macro. I was pleased that at f/5, the image was still sharp from corner to corner. Although I shot in Raw, there was in the end little or no editing required.’ © Rachael Talibart – https://rtalibart.redbubble.com
Indoor Home Studio – Using Your Gear
 White Balance
Depending on your light source, you will probably need to adjust the White Balance on the camera to correct any colour casts. Window light, especially on an overcast day, can produce light that has a cool blue cast. You may find that this suits your subject, but if not then select the Cloudy WB setting to warm up the image. If you are using tungsten desk lamps for your lighting, then these have the opposite effect and give a very warm orange look to the image. Select the Tungsten WB setting to counteract this.
Lenses
 A macro lens is the ideal lens for indoor still-life shots within your mini home studio, but you may get away with using the macro setting on your zoom lens. This may not get you as close as a true macro lens, but is ideal for larger subjects.
Tripod
A tripod is essential to keep the camera steady while you arrange your set-up. As well as holding the camera focused precisely on the subject, which at these close distances is very limited, you will need it to avoid camera shake as your shutter speeds will also probably be quite slow.
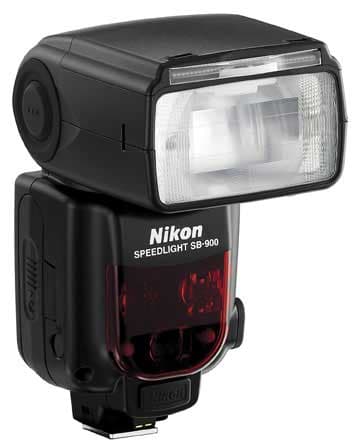
Lights
 While studio flash offers the benefits of high power (for small apertures), low heat and a wide range of clip-on accessories, it isn’t essential. Tungsten lighs are cheaper but they get hot, while handheld flashguns, if used creatively, can produce good results too. Finally, even domestic lamps and torches have their uses in still-life photography and can enhance your mini home studio.
Reflectors
Reflectors are an invaluable tool in home studio photography, whether bought ones such as the folding Lastolite type models or home made. Reflectors can be made from white card or polystyrene, tin foil, mirrors and many other easily attainable materials.
Indoor Home Studio – Top Tips
Look around your home
You’ll find interesting subjects that can be used for still life photos within your home studio all over your house; you just have to look at them a bit differently. Old antiques, kitchen and bathroom items and even food can all make good pictures.
Look around your garden
Fallen leaves, bits of bark, plants, pebbles and toadstools are among the many potential subjects you’ll find close to home if you look.
Use a tripod