
Your guide: David Clapp
David Clapp FRPS has been a full-time professional photographer for 15 years and leads global workshops. An RPS judge for Applied and Travel, he undertakes commissions worldwide, works for Canon UK and is represented by Getty Images. Visit www.patreon.com/davidclapp for video-based lessons, Zoom talks and more.
It’s not too long now until the Milky Way season is upon us. The summer months see a flurry of nighttime activity as photographers scurry out into the night sky in search of otherworldly imagery. Although it may seem from the outset that astrophotography is restricted to those with professional equipment, today’s technology is so good that literally everyone can enjoy it, even with the kit they already own.
Saddle Tor in Dartmoor, photographed in moonlight. This was the very first image I took at night some 14 years ago. With camera performance at a minimum, it reinforces the point that a good concept beats camera technology. Canon EOS 5D, 17-40mm, 30sec at f/5.6, ISO 800
Although astrophotography can be approached at any time of the year, the summer months are by far the most enjoyable. The reason for this, is not only because it is warmer, but the night sky unveils its most incredible feature – the galactic core, the very centre of our Milky Way galaxy.
Between the months of May and late August, the core becomes visible above the horizon, which is at its most prominent in the south of England, which is where a lot of high-quality imagery is created. It may not be apparent, but you could already own the equipment you need for astrophotography, especially if you are a portrait photographer.
Lenses with a minimum aperture of f/2.8 (often referred to as fast glass) are extremely versatile in most photographic genres, from press photography to portraiture and also astrophotography. The brighter the lens, the more light-gathering potential under the veil of darkness.

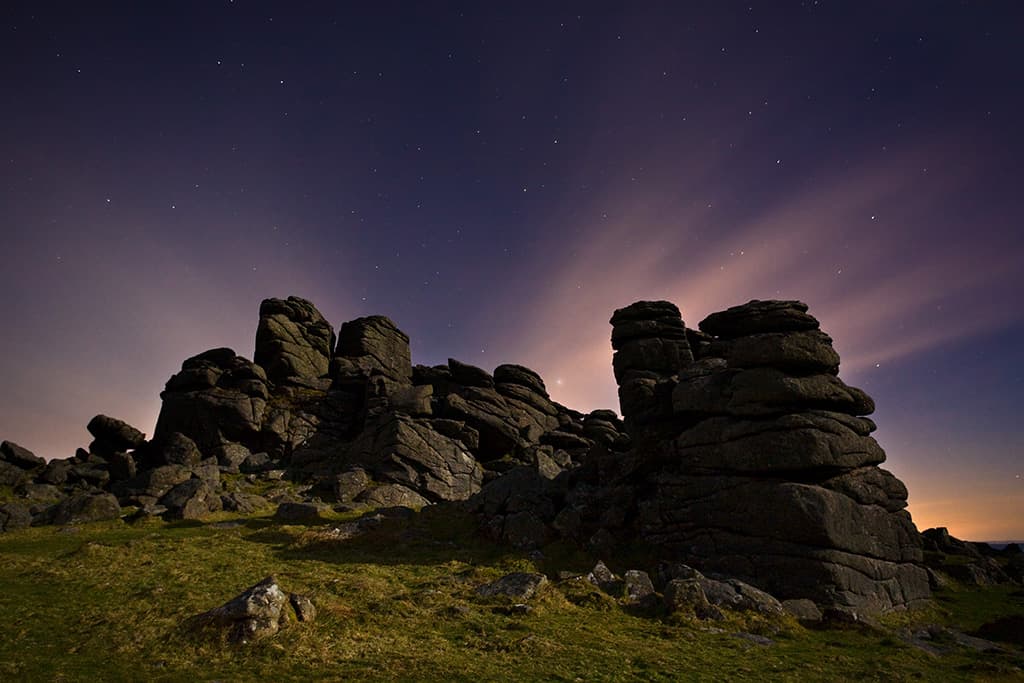
Multiple images stacked together with light painting from two different directions
Canon EOS 5D Mark IV, 16-35mm, 30sec at f/5.6, ISO 800
What about different camera types? Mirrorless or DSLR?
Both can be used effectively for astrophotography, but DSLRs excel in the dark, because they are far easier to compose when the light levels are very low. Mirrorless cameras rely solely on the sensor to view the composition, meaning a blast from a powerful head torch is necessary to get composition right, but both cameras are easy to critically focus.
APS-C or full frame?
The biggest issue is noise, which is relative to pixel size or photosites. The APS-C camera with a relative 24mm x 18mm sensor size often has smaller pixels than a full-frame equivalent of 36mm x24mm. The tighter packed the photosites, the more susceptible to overheating, which generates noise.
Casting this aside, the 1.6x crop is very much welcomed by astrophotographers reaching out towards deep space objects in particular. Although the choices of APS-C f/2.8 lenses are more limited, use full-frame glass for a greater choice. A 16-35mm f/2.8 for example, works perfectly on APS-C and full frame.
So, what do you do when shooting under a dark sky and your camera is a little underpowered? The moon can also be a great asset. Shooting in moonlight can lift your images out of black and provide an all-important light source to add dimension across the landscape.
Adding a constellation into a familiar location adds a magical touch to the this ‘early years’ moonlit landscape. The subtle orange glow is the city of Exeter, 20 miles away. Canon EOS 5D Mark II, 17-40mm, 30sec at f/5.6, ISO 800
Unlike the sun, its reflective surface changes in size, so the intensity ‘waxes and wanes’ as it reaches full moon/new moon respectively. In 2007 I took my first astro image with a Canon 5D and a 17-40mm f/4L lens, shooting the landscape as a full moon rose over Dartmoor.
With a maximum ISO 400, the quality levels were significantly lower than anything achievable with today’s cameras, but the adventures were utterly amazing! If the darks are simply too dark, then light painting is a great option to add some extra tones to otherwise featureless shapes.
Leave the 18000 lumen torches at home – all you need is a cheap 250 lumen head torch and some well-thought-out creative decisions. Use the torch to lift dark spots or to illuminate the foreground. Move away from the camera before light painting – preferably move left or right – otherwise the picture will simply look flat and uninteresting.
When you’re shooting at night, make sure your first attempts are not dynamic landscapes or seascapes. Many photographers make the mistake of previsualising a complex foreground to background image, that requires f/16 to get everything in focus. Although this is achievable by focus stacking, it is way too complex for a first attempt.
Keep the tripod high, one-third land and two-thirds sky, to make it all about the night sky but with a landscape element.
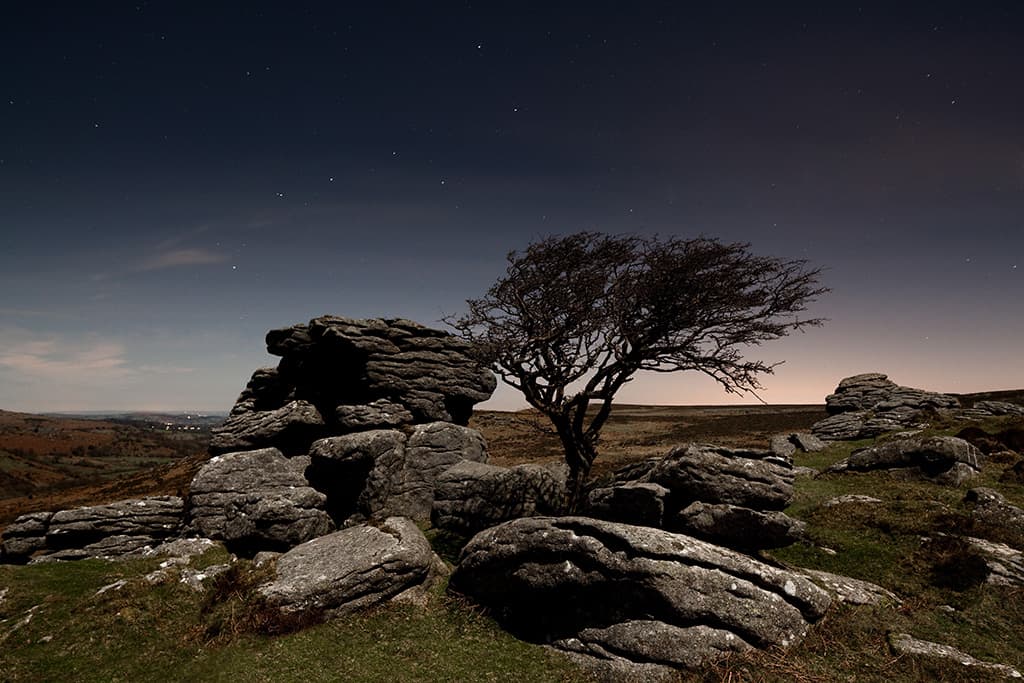
A combination of high ISO and light painting with a low-powered head torch
Canon EOS 5D Mark IV, 16-35mm, 30sec at f/5.6, ISO 800
What, where and when
Find some popular locations near you that others photograph – there is nothing wrong with this. Familiarity will give you a very good idea of how to approach subjects, the difficulties that lie ahead and more crucially how to stay safe. There are three immediate subject differences – landscape, seascape and night sky.
The latter, although included in the other two, means just photographing the sky itself, without a terrestrial element. Firstly, astro images can work at any time of year, but the best season is most definitely the summer months, when the Milky Way’s galactic core is above the horizon. It is best to be in the south of England to take advantage of this, but the density stars are much more apparent regardless. The Milky Way is visible in the SE to SW region. Just remember the further north you are in the summer, the lighter the skies will be and the less the Milky Way will be visible.
Starting with the land, think about simple landscape scenes – a single tree with stars above. These can be taken on farmland (with permission) or a national park. A favourite of mine is Dartmoor National Park that not only provides characterful trees in abundance, but also unusual granite outcrops which can make exciting compositions. Architecture found on open ground, such as towers, chimneys and even old mine buildings, make great subjects.
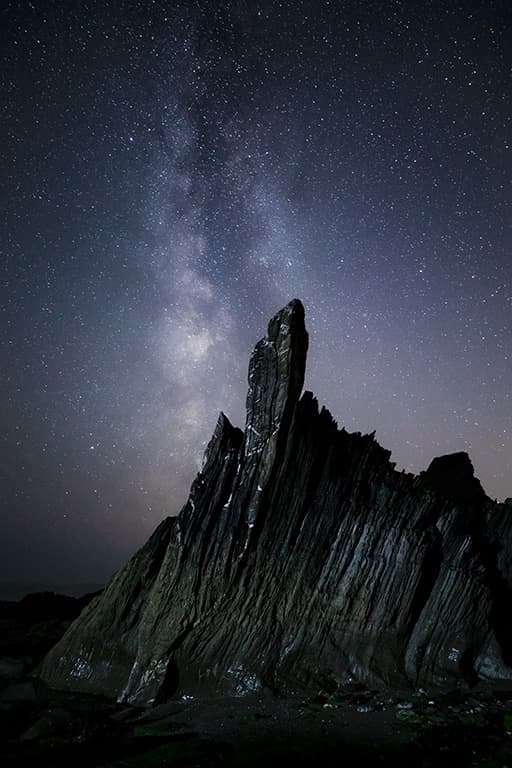
Putting a detailed night sky behind these buildings transforms them far beyond their usual historical character. The beauty of using a building is that it can be approached from multiple angles, not only throughout the night but also as the seasons change. Shooting from a remote beach can provide tranquil astro scenes, but this can often be a little lacking. For something truly interesting it is best to choose a sea stack or a similar large feature and to stand back away from it, simply to minimise any issues with depth of field.
Rocky outcrops and characterful cliffs such as the south-east-facing Durdle Door in Dorset are popular for a reason. Finally, dark sky (low light pollution) areas can provide some fabulous places to shoot the night sky itself. If you are considering using an astro tracker, these places are great for capturing some truly world-class imagery with the right atmospheric conditions.
Avoid thinking these dark sky places are remote wilderness, think coastline too. Your holidays this year could be to a remote island – think the Outer Hebrides or perhaps the mountains of Tenerife, renowned as a true astrophotography mecca.
Getting started with astro photography: step by step
Assembly
You’ll need a wideangle lens, ideally a 16-35mm (or 11-22mm for APS-C). The camera often hangs off the tripod at a lot of awkward angles, so ensure that a good-quality tripod is used, with good weight. A ballhead will allow your camera to point in any direction without a lot of X-Y-Z style difficulty.
Go manual
Use Manual mode to control the aperture, shutter speed and ISO independently. Make sure the camera is in manual focus with all image-stabilisation features switched off on both the lens and in-body stabilisation, if a modern mirrorless camera is being used.
Keep it neutral
Make sure your colour temperature is set to a neutral setting. Access this through the camera’s menu system or use the K setting. Set the camera to 3000K, which will give the night sky a black sky with a slight tint of blue. Fine-tune this in raw software later.
Laser sharp
Always choose mirror lockup (if your camera has a mirror) to keep the image tack-sharp. Attach a cable release or, better still, utilise the camera’s timer mode for better control of shutter speed, especially if you go over 30secs. Choose a 2sec timer to keep hands off the camera.
Base settings
Based off a 24mm focal length, set the aperture to the widest value available, ideally f/2.8. Star trails will become prominent after 25secs, but this varies depending on which direction the camera is positioned and how wide the lens is, but this is a good place to start. I also set ISO to 3200 and Colour Temp to 3000K.
Focus, shoot and review
Use stars or a distant light to precision- focus your lens. Position this light source in the centre of the frame. Click and review the image. The histogram will be very left heavy, but don’t worry about this – there is literally no light. Adjust your settings accordingly.
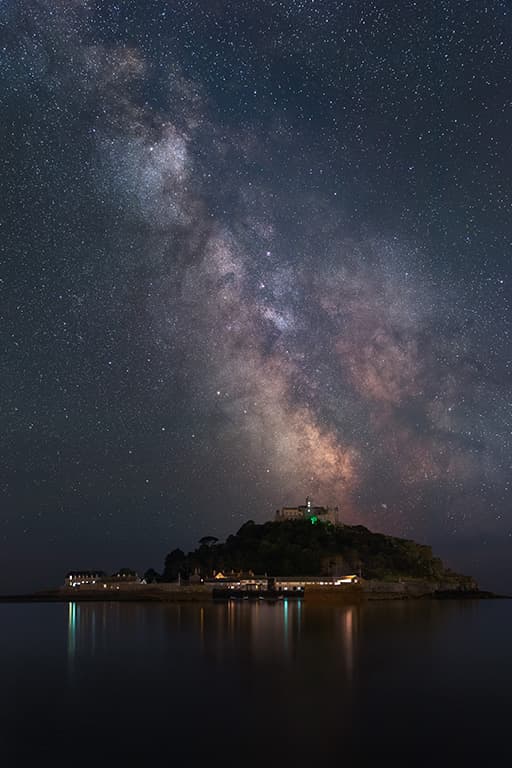
A stellar night at St Michael’s Mount
This July 2020 example from St Michael’s Mount in Cornwall became a favourite coastal astro image for a number of reasons. Firstly, the island is usually bathed in sodium orange lighting, from lamps illuminating it at night.
Owing to restaurants still being closed after lockdown, these lights were switched off, meaning the only light source was coming from Penzance, a few miles away. The night sky was therefore a lot clearer than normal.
Secondly, the humidity was a lot lower than usual on this particular night. On the previous day the humidity was significantly higher, with an obvious hazy backdrop to the island itself. Persistence paid off by waiting another night, seeing the humidity drop to just over 80% which is very unusual at the coast. This meant more clarity, better star detail and better colour.
Understand in comparison that the humidity in deserts is less than 10%. Taken mounted to an astro tracker, this image is a montage made up of ten 1-minute exposures for the sky (tracker on) and a single 1-minute exposure (tracker off) for the island and the sea. Using an astro tracker to rotate the camera with the night sky gives pin-sharp stars at long shutter speeds.
When combined in software, this has given an increase not only in the detail, but also in colours and clarity. Although this seems complex from the outset, it shows the potential of incorporating a basic astro tracker.
David Clapp’s kit list
Lens hood
Believe it or not, a lens hood is a very effective way of stopping moisture and dew from settling on the front of your lens element. Tape some chemical hand warmers to the sides for better effectiveness.
Sky chart
Get a laminated star chart and learn some of the key constellations before you head out. Match this with a compass and learn to orientate yourself with the night sky. It’s a source of great fascination.
Head torch with red LED
This is essential kit for the astrophotographer. Using modern LED torches at night cause ‘burn out’ to your eyes, making it difficult to see through the viewfinder. A red LED will fix that.
Smartphone
Essential for safety, star apps help you to find constellations, planets and much more. Many have guidance features which help you locate subjects whilst on location. They’re also useful for taking notes.
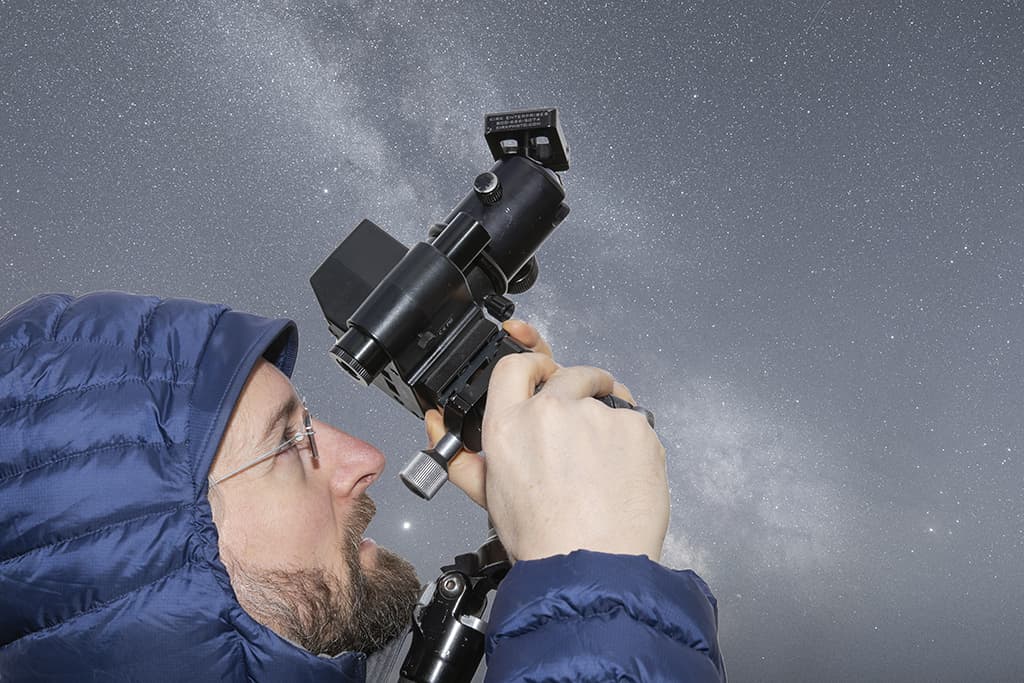
Using a star tracker for the ultimate quality
Your guide: Guy Edwardes
Based in his home county of Dorset, Guy has been a professional landscape and nature photographer for over 25 years. His work has been widely published and he runs a series of popular photographic workshops all over the world. Visit his website.
I shoot mainly wide-field astro-landscape images using a wideangle lens to capture both the night sky and some form of interesting landscape element in the foreground. I use a Canon EOS 5D Mark IV with either an EF 16-35mm f/2.8L III lens or an EF 8-15mm f/4 and a star tracker.
This involves mounting my camera on a device that, once aligned with the celestial pole (North Star), will turn it at the precise speed necessary to compensate for the Earth’s rotation. There are many advantages to using a star tracker.
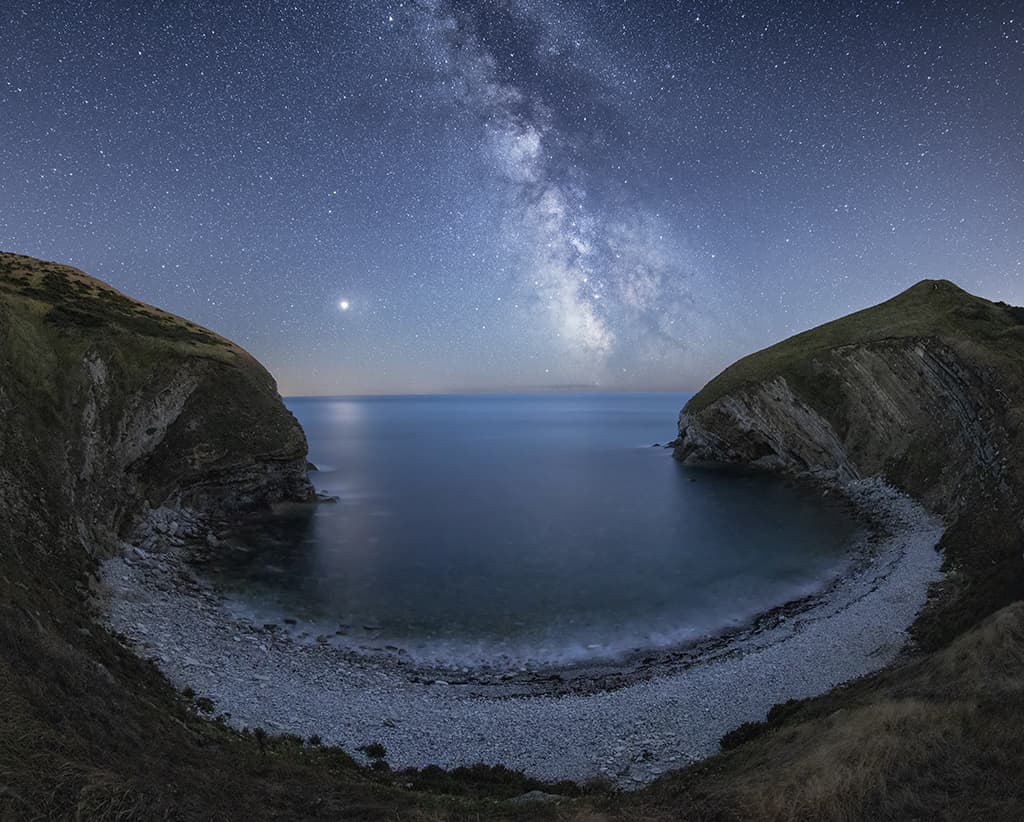
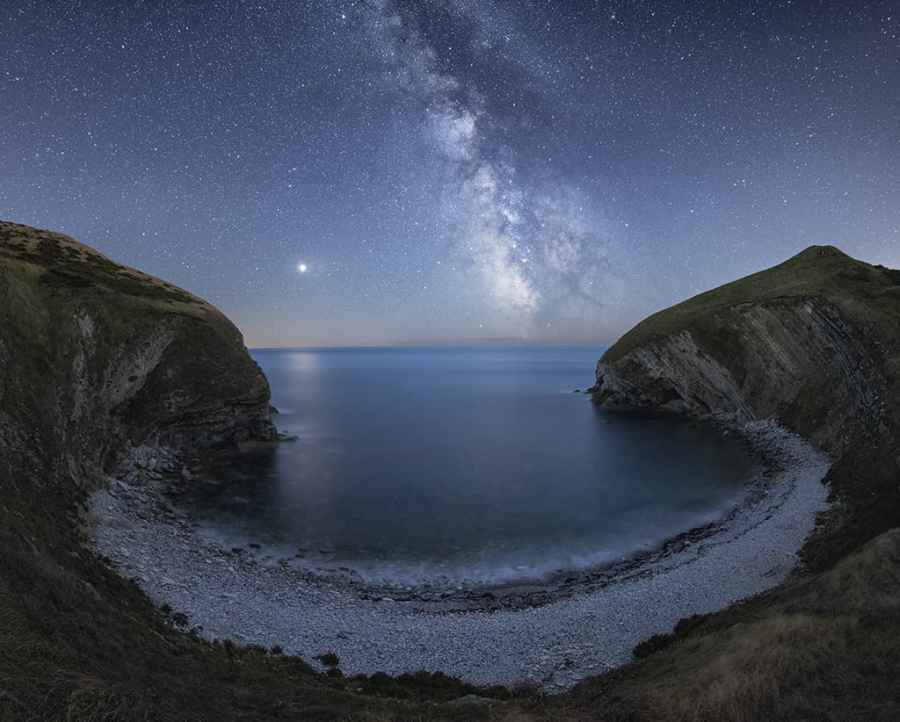
There is very little light pollution when looking south from Dorset’s Jurassic Coast. Canon EOS 5D Mark IV, 8-15mm, iOptron Skytracker Pro. Foreground – 5 mins at f/5.6, ISO 1600. Sky – 6 mins at f/5.6, ISO 1600
Firstly, you are no longer limited to exposure times of 15-20 seconds, as the tracker allows the use of much longer exposure times whilst recording the stars as sharp point sources of light. Therefore, much lower ISO settings can be used, which results in virtually no digital noise in the final image.
Fainter stars will become more visible and there will be more detail and colour captured in features such as the Milky Way. Basically, the quality of the image will be vastly improved.
Secondly, you can continue using whatever wideangle lens you already own, as you no longer need to shoot at very wide apertures – I typically shoot at around f/5.6. When you consider that the basic star tracker I use costs far less than most high-quality fast-aperture wideangle lenses, this can be a serious consideration.
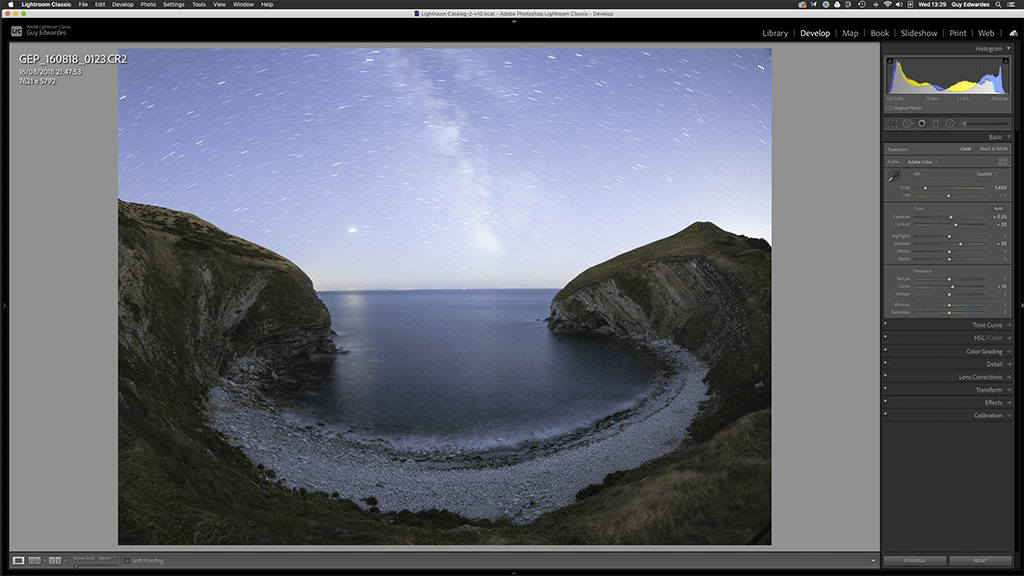
One important point to bear in mind is that because any foreground elements in your composition will be blurred owing to the movement of the tracker, you will always need to shoot two images – one image for the foreground with the tracker turned off, and one for the night sky with the tracker turned on.
This is all done without changing your composition. The two photographs must then be blended together in software such as Photoshop using layers and masks. This is usually a simple process that only takes a few minutes, as long as you have a fairly simple well-defined horizon. It can be difficult to blend the images in some circumstances, such as where the beams of a lighthouse project against the night sky, and in these cases I would normally revert to shooting an un-tracked image at a high ISO.
There are some disadvantages to using a tracker. It takes time to set up and each time you move your tripod you have to align the tracker with the celestial pole all over again. You also have to spend time blending the two images together. However, the huge increase in overall image quality that a star tracker provides means I can overlook these issues for the amazing results that it makes possible!
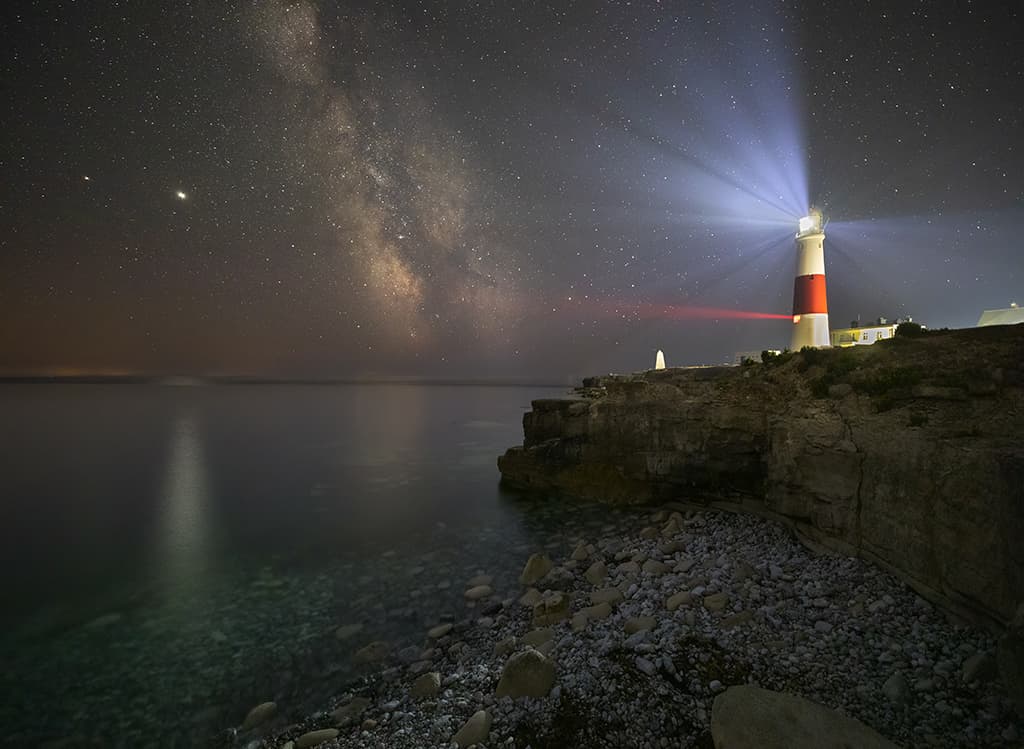
I don’t use my sky tracker when the beams of a lighthouse project against the stars. Portland Bill Lighthouse, Dorset. Canon EOS 5D Mark IV, 16-35mm, 15 secs at f/2.8, ISO 6400
Guy’s six step workflow
1 Do a recce
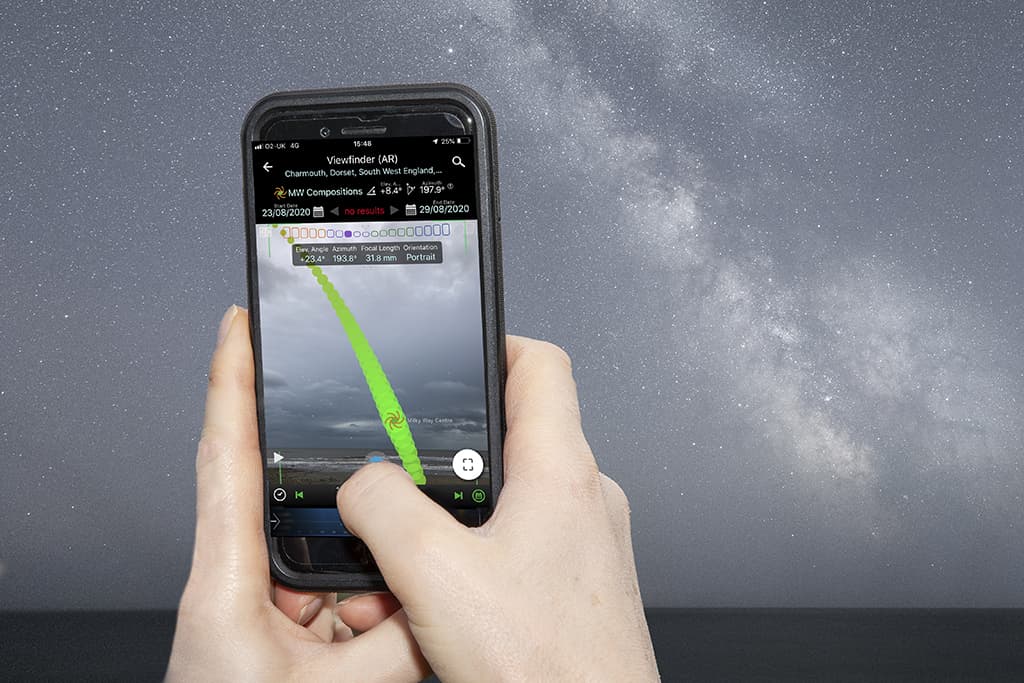
Assess the location and choose your vantage point before it gets completely dark, if necessary using an app to determine the position of the Milky Way in your shot. Carefully set up your tripod making sure it’s as stable as possible and ensuring the top plate is reasonably level.
2. Align tracker
Attach the sky tracker to the main ball head on your tripod. As soon as Polaris becomes visible align the tracker with the aid of the polar scope. Being one of the brighter stars, Polaris is usually easier to find in the polar scope before all the other stars become visible!
3. Attach camera
Attach your camera to your second ball head atop the tracker and set your composition, ensuring all adjustment knobs on tripod and heads are fully tightened. Use live view to zoom in and manually focus on the foreground. Leave the tracker turned off while you take the foreground exposure.
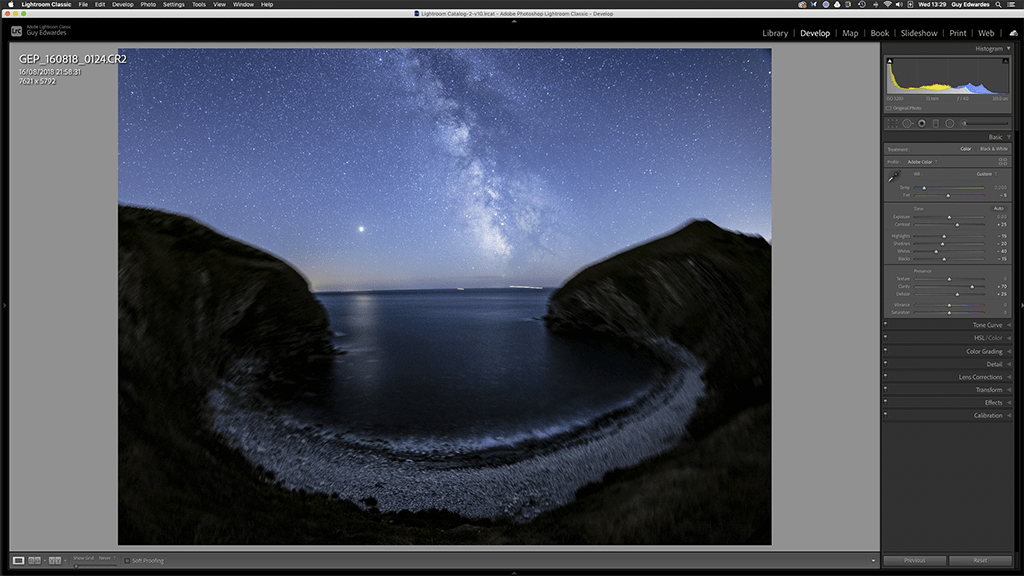
4. Take a test shot
Wait a while for total darkness and use live view to zoom in and manually focus on a star. Turn the tracker on and take your night sky exposure. Take a test shot at a high ISO to determine the correct brightness for the scene, before reducing the ISO and compensating with the necessary longer exposure time.
5. Exposure adjustments
In Lightroom or ACR make basic adjustments to both raw files, ensuring similar brightness and colour levels. The tracked image should be optimised for the sky, revealing texture and contrast in the stars. The other should be optimised for the foreground, revealing detail in the shadows but maintaining the overall appropriate brightness for a night scene.
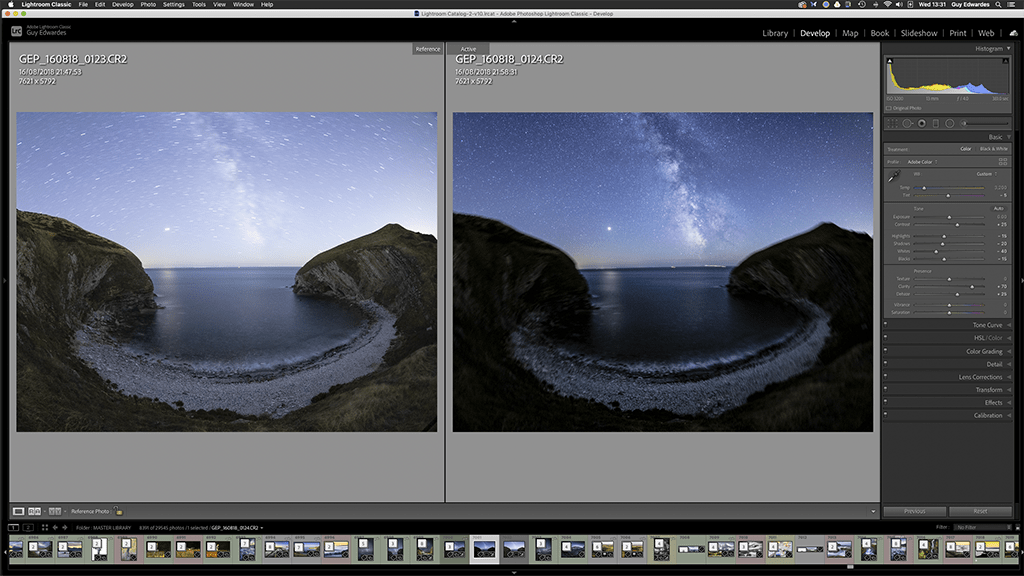
6 Combine image files
Open images as layers in Photoshop, with the foreground image on top. Add a layer mask. Make a selection of the sky (I use luminosity masks to create a self-feathering selection). Use a brush to reveal the tracked sky from the background layer. Drag the foreground layer up to conceal any blurred edges from the background layer. Flatten layers and save.
Guy’s Kit List
iOptron SkyTracker Pro
This tracker is reasonably compact and is supplied with its own polar scope. However, the Move Shoot Move rotator is even more compact and is all that’s required for wide-field astro-landscape photography. This can be purchased with the necessary scope or smartphone (app required) attachment for precise polar alignment.
Additional accessories
It goes without saying you’ll also need a sturdy tripod and two quick-release ball heads. A battery-operated lens warmer will stop your lens misting up as the temperature drops. A head torch with a red light will protect your night vision and you may need a remote release if your camera doesn’t feature Touch Shutter.