Looking back on our pick of the 2010 International Garden Photographer of the Year winners, we bring you a selection of top tips on how to photograph gardens that will have you creating great garden shots of your own in no time.

Finalist, Plant Portraits: Michael Lowe. – Michael used a 180mm macro lens to isolate this section of a Japanese Hibiscus and create a pleasing composition. Canon EOS 5D, 180mm Macro
Though a DSLR isn’t essential, when learning how to photograph gardens, you’ll need a camera that gives you control over the depth of field (DoF). You’ll most likely be either working at small apertures for maximum depth of field, or wide ones to draw attention to a specific element using shallow depth of field. Many compacts have only two or three apertures to choose from and the small sensors make it hard to produce shallow DoF effects.
A macro lens, or a camera with macro capabilities, will increase your options by opening up the opportunity to shoot close-up detail shots of individual plants, or even single leaves or petals.
A telephoto lens, or tele-zoom will enable you to crop in tightly on interesting details – ensure these details aren’t close to the lens, though – and they also make it easier to produce shallow focus effects. Wideangle lenses are good for emphasing foreground elements in relation to the background, and, of course, getting more of the garden in shot.

First place, Garden Views: Marianne Majerus. – Shafts of sunlight penetrate the morning mist in this beautifully lit image, which was the overall International Garden Photographer of the Year 2010 winner. Leica R9, Fuji Velvia 50 film.
Whether shooting entire gardens at smaller apertures, or single stems at close range, your chances of obtaining a sharp image will be dramatically increased if you use a tripod – first, to avoid camera shake, and second, to ensure that your narrow zone of focus falls in the right place.
A handheld reflector will block direct light, or fill in and soften shadows, making a huge difference to the lighting in your pictures. Folding ones are the most convenient to carry and use.
Flash is best avoided as it’s difficult to control, and produces hard shadows. A ringflash or macro light that fits around the lens can be useful for some types of close-up work, especially for insects, as they produce even, shadowless results, but take care to balance the exposure with the ambient light.

Highly commended, Plant Portraits: Jacky Parker. – The choice of slow shutter speed has motion-blurred the soft grasses as they swayed in the breeze, while the sturdier white coneflowers have remained sharp. Nikon D200, Nikkor 105mm micro VR.
A polarising filter will reduce reflections on the surfaces of shiny leaves and petals, and boost colour saturation. It only works at certain angles to the direction of light, so it’s a case of trial and error, but in the right circumstances it has a dramatic effect on your pictures.
How to Photograph Gardens – Camera Settings

Winner, Plant Portraits: Mandy Disher – A simple, almost monochromatic composition of a Cosmos Sonata. ‘I wanted to try to capture its wonderful ethereal qualities,’ says Mandy. Canon EOS 450D, Tamron 90mm Di Macro lens.
For general garden views you’ll need an aperture small enough to get the whole garden in focus. However, be mindful of selecting too slow a shutter speed because plants can be blown around by even a gentle breeze, and will be blurred. Be prepared to raise your ISO setting to ISO 400 to enable you to use the aperture and shutter speed combination that you need.
To single out individual plants (or parts of a plant) within a garden, you’ll need a wider aperture to throw the background out of focus and make your specimen stand out. (Using a telephoto lens will help exaggerate a narrow depth of field.) Use your camera’s Depth of Field Preview to check exactly how much of your subject is in focus, or take a test shoot and zoom in on your LCD screen.

Finalist, Plant Portraits: Carol Sharp. – A 75-300mm tele-zoom used at a wide aperture heped create the ulta-shallow depth of field in this picture of a wild umbellifer, which Carol found growing in a rough bit of land in Umbria, Italy. Nikon D200, 70-300mm, f/5.
Can’t get a shutter speed fast enough to freeze the movement of your plants as they blow in the breeze? Try setting a really slow shutter speed to deliberately blur them. This can sometimes produce great results, especially if there are other elements in the scene that are sharp. You’ll need a tripod, of course – motion blur looks very different from camera shake.
How to Photograph Gardens – Composition

Third place, The Edible Garden: Carlo Silva. – Carlo created a clever still-life of a melon. ‘It was inspired by Jeanne Hébuterne in a painting of Amedeo Modigliani,’ he says. Nikon D200, Nikkor 18-200mm VR.
When confronted with a busy garden brimming with plants of different colours and varieties, it can be difficult to find a good composition within it. Walk around the garden first and study it from different angles to see if any smaller details pop out. You may find it easier to look through your viewfinder and zoom in and out to help find an interesting composition. When you find an interesting view ask yourself what you like about it, then set up carefully and compose your picture to emphasise what it is that attracted you, excluding other distracting details from the frame.
Look out for interesting patterns, either in the arrangement and layout of planting schemes, or within individual plants and flowers themselves. A telephoto lens is good for flattening perspective and emphasising patterns within a landscape, while a close-focusing capability will be needed to crop in tightly on the patterns on a leaf or petal.
Colour is important in garden photography. Try to find compositions of colours that complement one another, or even images comprised almost entirely of a single colour, perhaps with a small area of contrasting colour as a focal point.
With garden views it’s best to compose so that you have a distinct foreground as well as an interesting background to provide a sense of depth, rather than everything being in the middle distance. A wideangle lens can help to emphasise a foreground element.

Highly commended, Wildlife in the Garden: Raoul Slater. – Shooting directly into the sun can produce great results. Raoul took this in his garden. ‘The mosaic took three years to complete and shows our cat Oscar, now sadly departed,’ he says. Canon EOS 30D, 75-300mm.
Don’t shoot everything from eye level. Lowering the camera to waist level or raising it above your head for a high viewpoint (if you can find something to stand on) will often provide a better composition. Look out for opportunities to create more dynamic perspectives, such as by getting down to ground level and looking up with a wideangle lens for a bug’s eye view.
To some extent it’s easier to get good compositions in gardens that are well designed. If this description does not apply to your own garden, head out to a local park or one of the many public gardens run by the RHS, English Heritage or the National Trust. Check on the rules about photography before making the trip, though – the National Trust in particular is known for its hostility towards photographers, especially those with tripods.
Failing that, try taking your subject indoors for a still-life. You’ll need a close-focusing lens, a table, a background of some description, a light source (could be a window, angle-poise lamp, flashgun or even a torch) and some bits of paper, tin foil or mirror as light modifiers, and take your time to produce a perfectly composed and lit image, whatever the weather.
How to Photograph Gardens – Light and Weather

Third Place, Plant Portraits: Sergey Karepanov. – Sergey shot from ground level with a wideangle lens to create a bug’s eye view of these Dutch tulips which has bags of impact. Canon EOS-1Ds Mark III, EF 15mm f/2.8.
Cloudy days can be great for flower details – the lower contrast helps record more of the fine detail. Even rain shouldn’t dampen your enthusiasm, as the tiny raindrops resting on plants can add an extra dimension to your images, especially when photographed close up.
Bright, sunny days, with their harsh unflattering shadows, are rarely a good time for photography, but if you look carefully you can still find photo opportunities that exploit this type of light. In general, during sunny weather, it’s best to restrict your shooting to early mornings and later afternoons when the sun is warmer, softer, lower in the sky, and the long raking shadows provide great photographic potential.

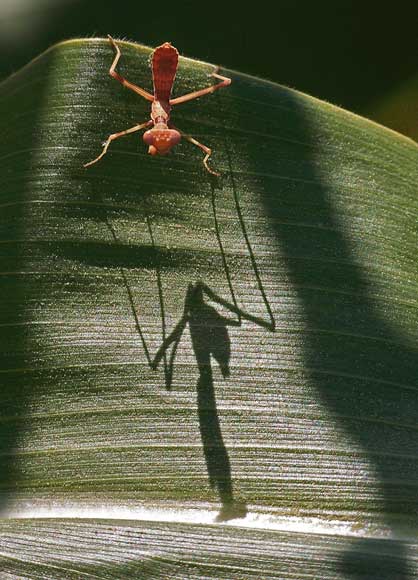
Finalist, Wildlife: J. Keith Berger – Direct sun can produce good pictures too. J Keith shot this on a budget compact. Kodak Z712.
Alternatively, try shooting into the light on sunny days. In the right conditions you can capture atmospheric rays of light beaming down onto the garden, close-up details will have a golden halo around their edges and translucent leaves and petals will reveal their inner veins and patterns. Avoid having the sun directly in shot, though – keep it out of the frame and use a lens hood to avoid flare.
Wind is the enemy of garden photography since it blows plants around, causing motion blur. Calm days enable you to use slower shutter speeds and, as a consequence, smaller apertures for maximum depth of field. On breezy days you can stabilise plants by using a thin cane or kebab skewer as a splint – carefully hidden behind the stem.
For sharp images and precise compositions a tripod is a must.
Be creative with light
Remember you can use anything as a light source, from a torch to a window – you don’t need pro lights.
Collect backgrounds
Look for good potential backgrounds: for example, black velvet, white fabric, slate, driftwood.


