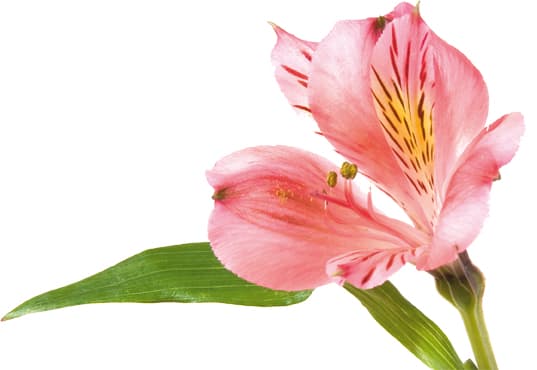
Technique Explained: Photographing flowers in the studio
 Taking flowers and plants out of their natural environment
and placing them in a studio setting allows you to study and photograph them in
a whole new light, quite literally.
Outside, the main light source is, of
course, the sun. Whilst it is possible to use reflectors, diffusers and even
fill-in flash to alter the light, photographing flowers in a more controlled
environment offers far more creative opportunities.
Although perhaps best known for his simple images of calla
lilies against black backgrounds, Robert Mapplethorpe’s body of flower
photographs is in fact far broader.
In
the majority of his images, the flowers, placed in vases, were photographed in
front of coloured backgrounds. The studio environment really allowed
Mapplethorpe to explore different angles and ways of lighting his subjects, and
he approached each flower as if it were a portrait subject.
Regardless of whether you have a small desk lamp, a studio
lighting kit or just natural window light, it is possible to learn from
Mapplethorpe’s images and create your own stunning flower photographs.
Using a desk lamp

Taking photographs like Mapplethorpe’s pictures of calla
lilies can be done using a simple desk lamp and a piece of black paper or
better still, a dense black fabric such as velvet, as the background. The key
to keeping this background looking black in the captured image is to make sure
that it has little or no light falling upon it. You can, of course, darken the
background using image-editing software, but it is far better practice to get
it right in-camera.
To ensure the background stays black, move it as far away from the subject as
possible and turn off all other lights in the room. If there is still some
light falling on the background, you may need to use black card or paper to
block the path of the light to the background, and put it in shadow.
If you find that a single desk lamp does not light the image
as you would like, use a sheet of white paper or card as a reflector and bounce
some of the light back onto the flower to fill in the shadows. Also use the
reflector to ensure that some light bounces back onto the stem of the flower.
When shooting against a black background, if you cannot see the stem, the head
of the flower will look like it is just floating in space.
If the light from a desk lamp is too hard, place a diffuser
between the light source and the subject to soften it. You don’t have to use a specifically designed product – something as simple as a sheet of greaseproof baking paper can help take the edge off of hard lighting.
Backgrounds
 Around the home, flowers are generally displayed in
prominent places such as windowsills, on tables or on a mantelpiece. Of course,
there is no reason why you can’t just photograph them in these locations, using
just the ambient room light. Or you could wait for the perfect time of day when
the room and flowers are lit by sunlight coming in through a window. Often this
light can create interesting shapes on the background, caused by the shadows
that are cast by the window frame itself. You can use these shapes to help add
interest and even to frame the flowers in the image.
One of the most popular techniques when photographing
flowers is to shoot them against a coloured background. Whilst you can paint a
wall for this task, using a piece of paper or card is a far better solution.
Coloured paper and boards are readily available from stationers and art stores,
and for best results I would suggest using A2-size.
 Choosing what colour background to use can be difficult.
Sometimes you will want a very bold image and so use a coloured background that
completely clashes with the colour of the flower. Other times, it is more
appropriate to choose a coloured background that is almost identical to the hue
of the flower.
However, for sure-fire results, try using the tried-and-tested
method of using a colour wheel and choosing two opposing colours.
For example
a red flower against a green background or a yellow flower against a violet one.
Framing and cropping

Mapplethorpe used a Hasselblad for most of his images, which
produces square-format images. However, most of Mapplethorpe’s flower images are slightly rectangular in shape, closer to a 5×4 ratio crop.
Some cameras, such as the Nikon D3, Panasonic Lumix DMC-GH1
and the Olympus E-30 and E-620, have the option to capture images in a square
or 5:4 ratio format, but it is easy to create a mask for your camera’s LCD
using card or tape.
An even easier option is to simply crop the images using
editing software. If you intend to do this make sure that you leave plenty of
space around the flowers. This will allow you to experiment with different ways
of cropping the image, which can dramatically affect the its final look.
Lighting

When photographing flowers you can employ exactly the same techniques to
light the subject as you would a portrait image. Everything from window light
and desk lamps to elaborate studio lighting setups can be used. However, for
the most part a single light and reflector should suffice to light the flower,
with perhaps an additional light to illuminate the background.

Try to light the flower using a main keylight that is
positioned at an angle of 45° to the flower. This looks fairly natural as it
goes some way to replicating the angle of the late-afternoon sun. Of course,
this angle is just a starting point, so move the flower and lighting around to
see how even small changes in can create different effects.
Lighting the background can be done in a number of ways.
Once again, try to approach it as if you were lighting the background of a
portrait image.
Using flat, even lighting on both sides of the background
creates a solid colour; alternatively, put a single light to just one side to
create a gradient on the background. One particular favourite trick of mine is
to use a snoot or flash grid to create a bright spot on the background, right
behind the flower.
TOP TIPS
- The stem of the
flower is important to put the subject in context. So if you plan on lighting
just the flower, try using a piece of white paper to reflect some light back
onto the stem. - If you convert
the image to black & white, try increasing the brightness of the green
channel to make the stem stand out. - Create your own
textured backgrounds by painting card with thick paint, using a roller or
brush. Leave plenty of
space around the flowers to allow you to experiment with different crops and
image aspect ratios. - If using
sunlight from a window it is important to plan your shoot. The light will change throughout the day
and you may find that there is only a short period when the light is perfect. - With coloured
backgrounds and bright flowers, as well as different lights, it is important to
get the white balance correct. Make sure you set a custom white balance by
taking a reading from a grey card.


