
In the first part of this series, we looked at all the role of all the options within Canon’s Custom Menu. In this second part, we take a closer look at a handful of these and what else is possible.
Custom Buttons
Using custom buttons is the most significant way in which an EOS camera can be customised, and the extent to which button functions and dial behaviour can be changed is substantial.
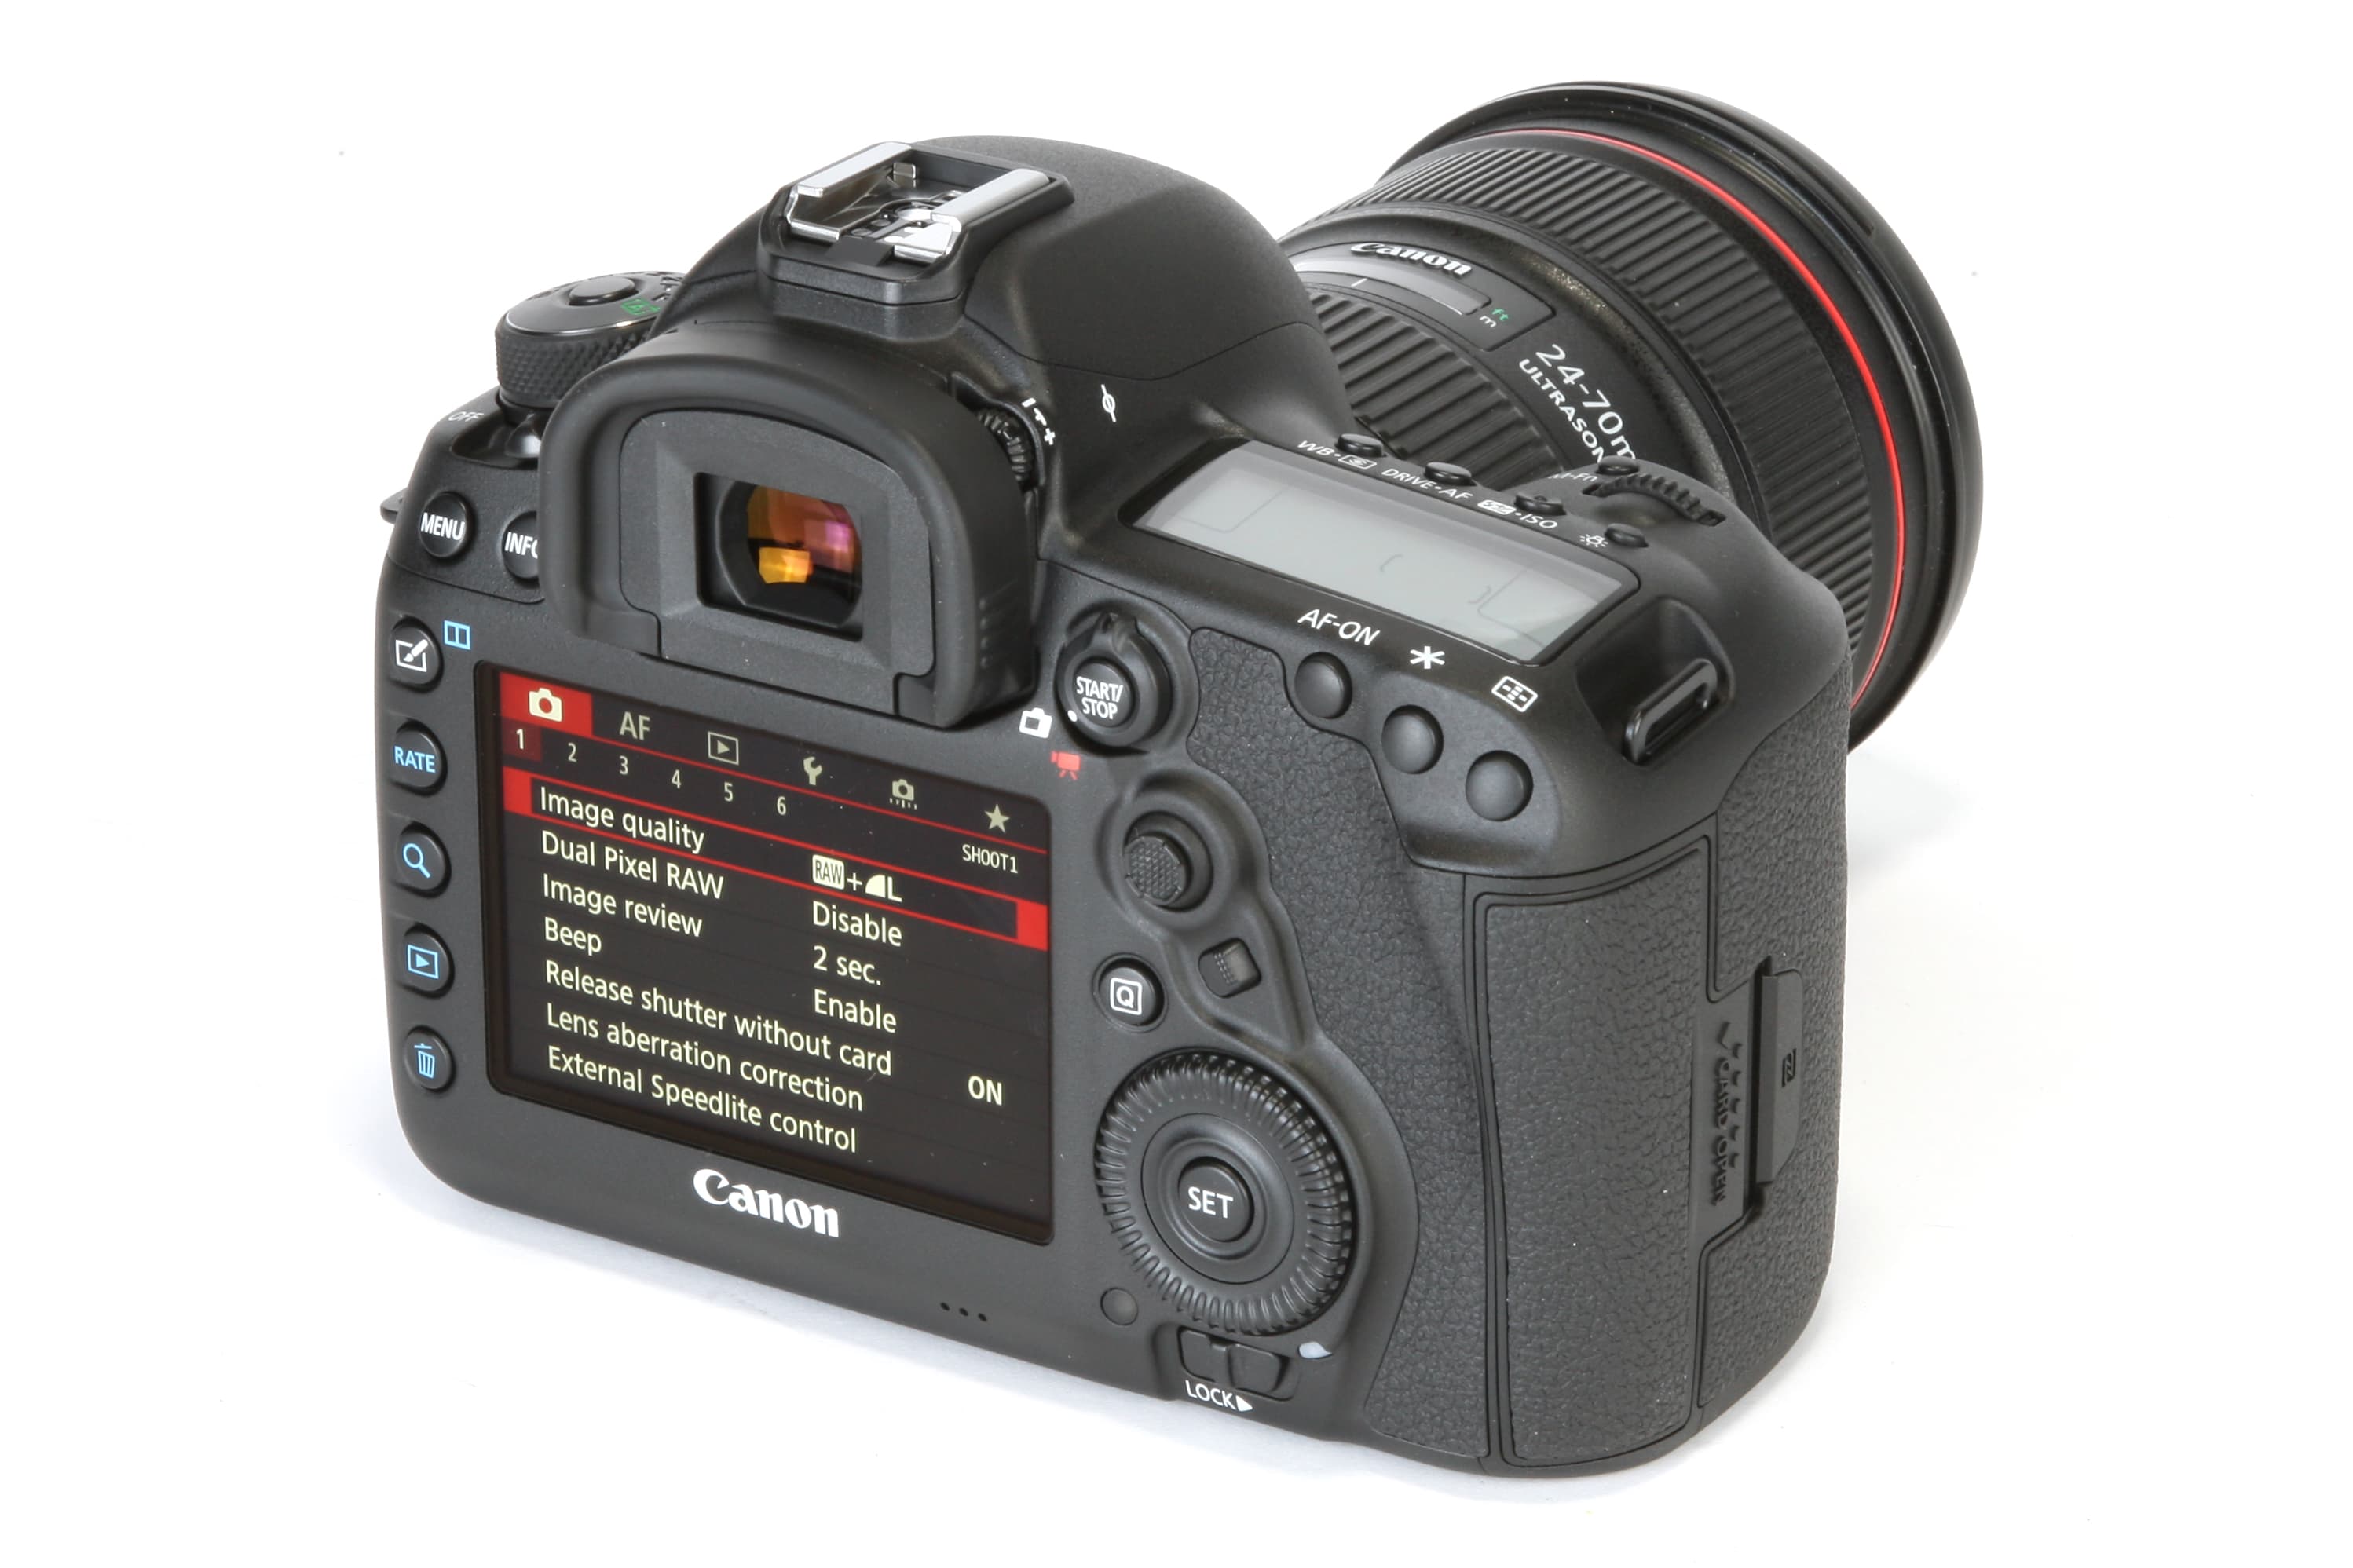
On the EOS 5D Mark IV, for example, there are 37 options that can be assigned over 11 separate controls. Which of these you take advantage of will largely depend on your method of shooting, although the three options outlined below are among the most useful.
Switch to Registered AF point
You can immediately recall an AF point of your choosing by registering it to one of your camera’s controls.
You may find this useful if you want your camera to focus only where a rule-of-third line intersects another, or if you know a moving subject – perhaps an animal, or a person at a distance – will appear in a particular place but you want the flexibility of moving the AF point until it does.
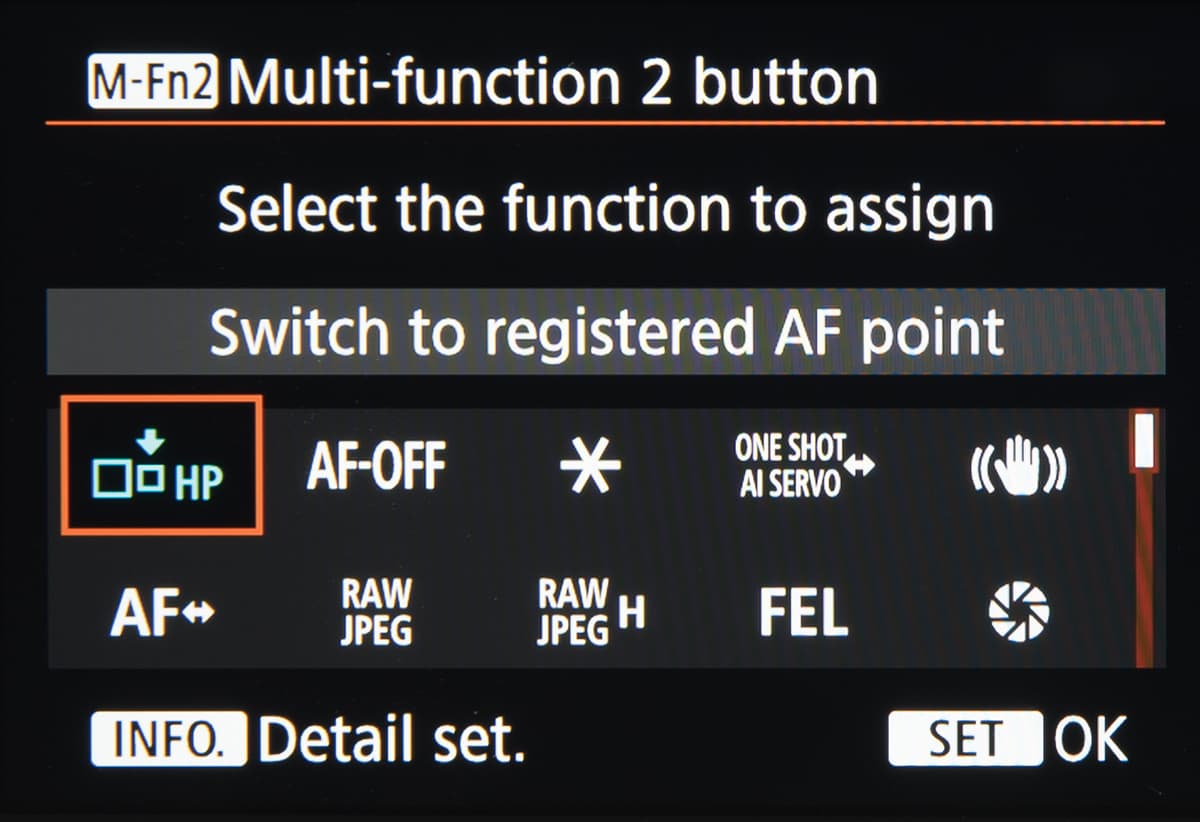
You can register a specific AF point and access it at the press of a button
One Shot ⇋ AI Servo/Servo
This option lets you alternate between One Shot AF and AI Servo/Servo AF options at the press of a button.
You may find yourself in a situation where a moving subject becomes still and you would prefer to switch to One Shot AF, or the other way around.
Aside from convenience – it can be awkward to adjust this through conventional settings with your eye to the viewfinder – what’s particularly useful is that you can determine whether the change happens once you press the button to which it is assigned or only while this button is held down.
Being able to switch between One Shot AF and AI Servo/Servo AF quickly is handy when a moving subject becomes still
One Touch Image Quality
With the One Touch Image Quality option you can program a button to quickly switch from your standard image quality choice to another (for example, from JPEG to raw).
You might want to take advantage of this is when you have your camera set to JPEG for general shooting, but you stumble across a scene with a naturally broad dynamic range, or where you know you may want to carry out heavy post-production, for which you would prefer a raw file.
When you want to make a lot of changes in post-production, it’s a good idea to use One Touch Image Quality and switch to raw
Back-button focus
By default, autofocus kicks in as soon as you start to press the shutter-release button, and this works well for the majority of shooting situations. By disabling autofocus here and leaving it to a separate button, however, you have more say over exactly when the camera focuses and when the shutter is released.
If you’ve ever had your camera refocus when you want to capture an image, perhaps because it was distracted by an object entering the frame, or if your camera failed to focus at a critical moment, focusing in advance is a good idea. As the shutter-release button is no longer in charge of autofocus, the image will be captured at the exact moment it is fully pressed.
Some photographers find this useful for ‘focus and recompose’, where you only need to press the back button once to lock focus on a static subject and can then reframe the image for a better composition.
Others rely on it for capturing a subject that’s only likely to be in the desired focus point for a brief moment (a person surrounded by a frame of some kind or crowd, for example).
It’s also useful in situations that are typically problematic for autofocus systems, such as low-contrast subjects and in very bright light.
Most Canon DSLRs have a dedicated AF-On button for this feature, while more junior cameras can have this option assigned to the * button.
Custom quick control
If you’ve never used White Balance Bracketing or required fast access to the Auto Lighting Optimizer on the Quick Control screen, you will probably appreciate this option.
Not only can you remove the default options from this screen and replace them with others, but you can also move and resize them.
This is particularly useful if you take advantage of your camera’s touchscreen when using this feature, as you can position your most commonly used option within reach of your thumb.
You can even include the date and time here, which you may find useful if you capture events such as weddings.
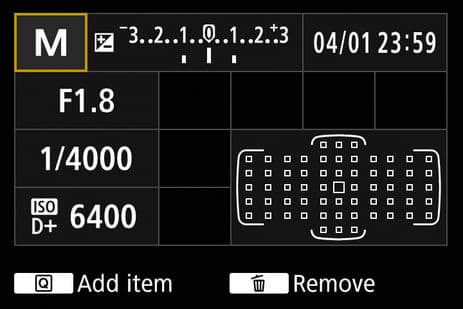
You can remove the default options on the Quick Control screen
C1, C2 and C3
The mode dials on Canon’s EOS cameras have long sported numbered custom shooting modes alongside the more conventional exposure options, and these can be used to adjust the camera to a particular group of settings.
You may find this useful if you frequently find yourself shooting in similar environments. Wedding or nature photographers, for example, can use this to recall a set of options that program the camera to behave as discreetly as possible, with beeping disabled, silent shooting enabled and the instruction to deactivate the camera’s AF assist lamp if there is one.
This feature does not appear on Canon’s most junior DSLRs, while mid-range models such as the EOS 80D and EOS 6D offer two options, labelled C1 and C2. Newer and more advanced models, such as the EOS 7D Mark II and upwards, have an additional C3 option.
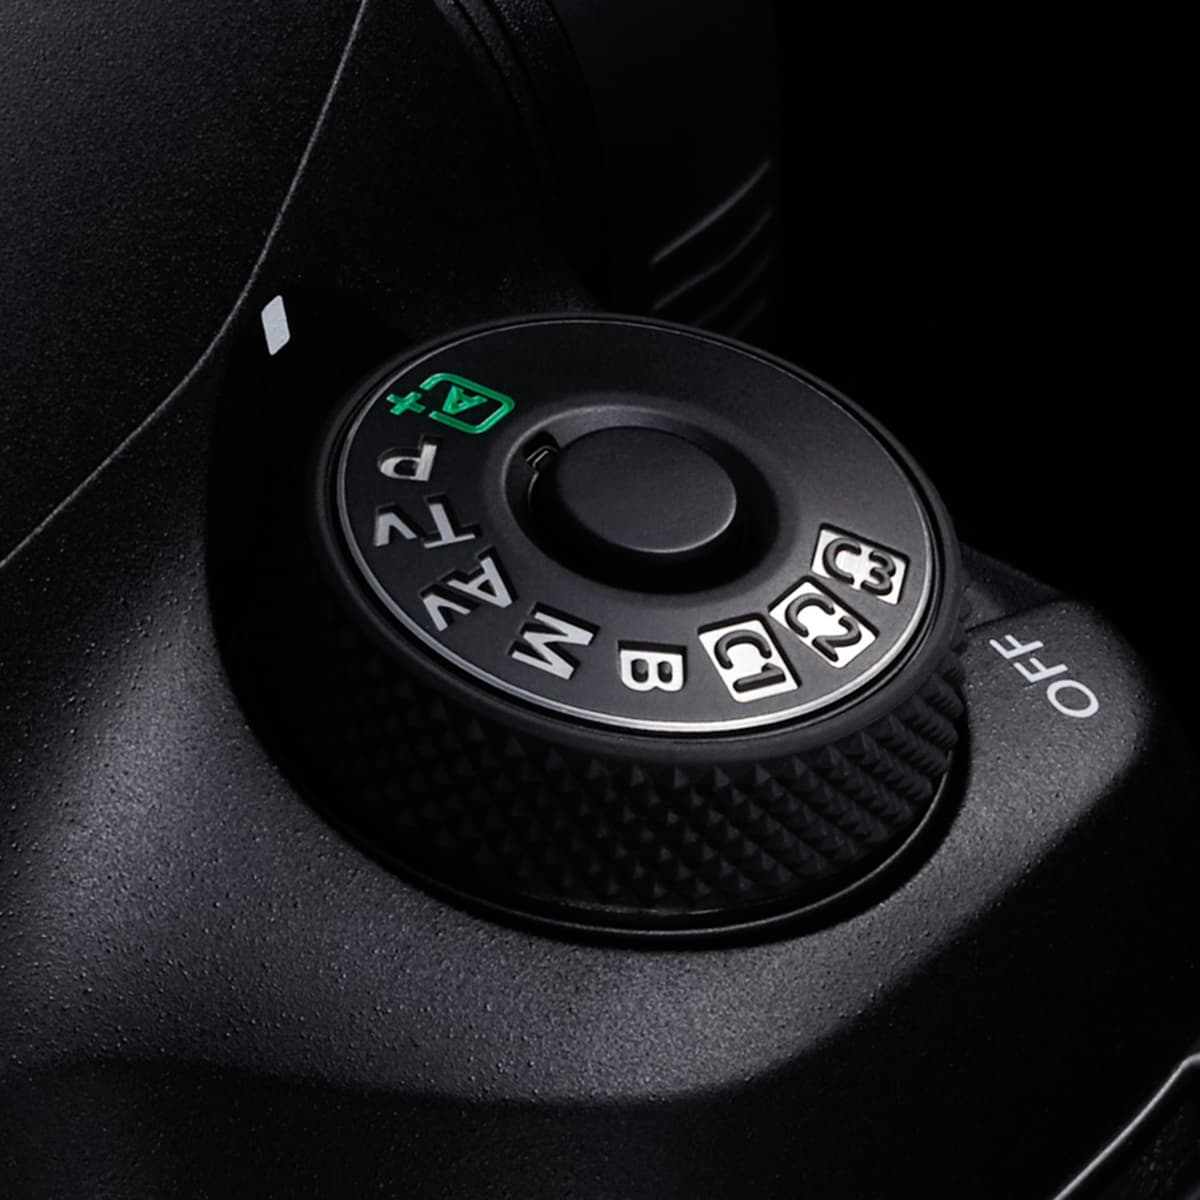
You can assign frequently used settings to one of the custom modes on the mode dial
Viewfinder display
Ever since the EOS-1D X, Canon’s Intelligent Viewfinder display has allowed much more shooting information to be displayed inside the viewfinder than was previously the case.
Much of this information would ordinarily have to be viewed on either the rear or the top-plate LCD screen, so it can be a great time-saver and a good way to ensure that you’re not too busy changing these things as action unfolds. At default settings, however, you’re only likely to see a fraction of what can be displayed.
You probably won’t want to enable all the options, but it’s worth considering if you tend to use the viewfinder for composition and frequently find yourself alternating between different focus, metering and burst modes, among other things.
You can even set this to show the Custom Shooting modes described previously, so it’s useful if you switch between these with some regularity, as well as the electronic level, a feature so useful and unobtrusive that some photographers keep it permanently enabled.

Some people keep the electronic level permanently enabled in the viewfinder to ensure straight horizons
My Menu
Although the various tabs within Canon’s EOS menu provide a logical segregation of options, the likelihood is that you’ll often be constantly scrolling through ones you never use.
Canon’s long-standing My Menu option presents a solution to this by allowing you to quickly group together your most commonly used settings under a single tab.
This is identified by a green tab at the end of the menu system that’s marked with a star icon, and there are no restrictions as to where options are placed as you can sort these in your order of preference.
Currently, on models from the EOS 80D upwards, you can even create separate tabs within the My Menu option and rename them as you wish. So, you could create one tab for focus options, another for metering options and so on.


