Most of us are used to booking our cars in for a routine service, but camera maintenance often gets overlooked until something goes wrong. For example, it’s often only when we’re spending more time cloning out specks from images than it took to shoot them that we start to think about removing the dust from the sensor, and the leg locks on a tripod may have to seize before we realise that a trip to the beach caused some damage.
Camera Maintenance: How to look after your camera
Just like a car, regular camera maintenance and cleaning can extend its life and ensure it delivers the results you expect. And it doesn’t have to cost a fortune, because you can do some of the work yourself, ensuring your camera lasts longer, and keeps on working. Read on to find out how.
How to protect your camera against the weather
Prevention is better than cure, and one of the best ways to ensure your camera stays in top condition is to protect it from harsh environments. If your camera is weatherproof, it should be fine in rain, but it’s unlikely to appreciate being submerged. If your camera isn’t weatherproof, some form of cover is advisable in bad weather and when you’re going to a sandy beach in windy conditions. You can buy dedicated camera covers, but a clear plastic bag over your camera with an elastic band holding it tight to the lens, or even a shower cap, can work effectively.
Very humid or cold conditions can also be an issue for cameras and it’s important to let them acclimatise accordingly. If your camera is exposed to high humidity for a long time, it’s worth having it checked by a service centre to make sure it’s okay and fungus-free.
Camera Maintenance: Sensor cleaning
A grubby sensor is one of the most annoying issues for photographers. When there are just one or two marks appearing in your images, the natural inclination is to clone them out, but they have a habit of proliferating. And while it’s easy to clone out a mark from a clean sky, it’s trickier when it’s over a vital detail.
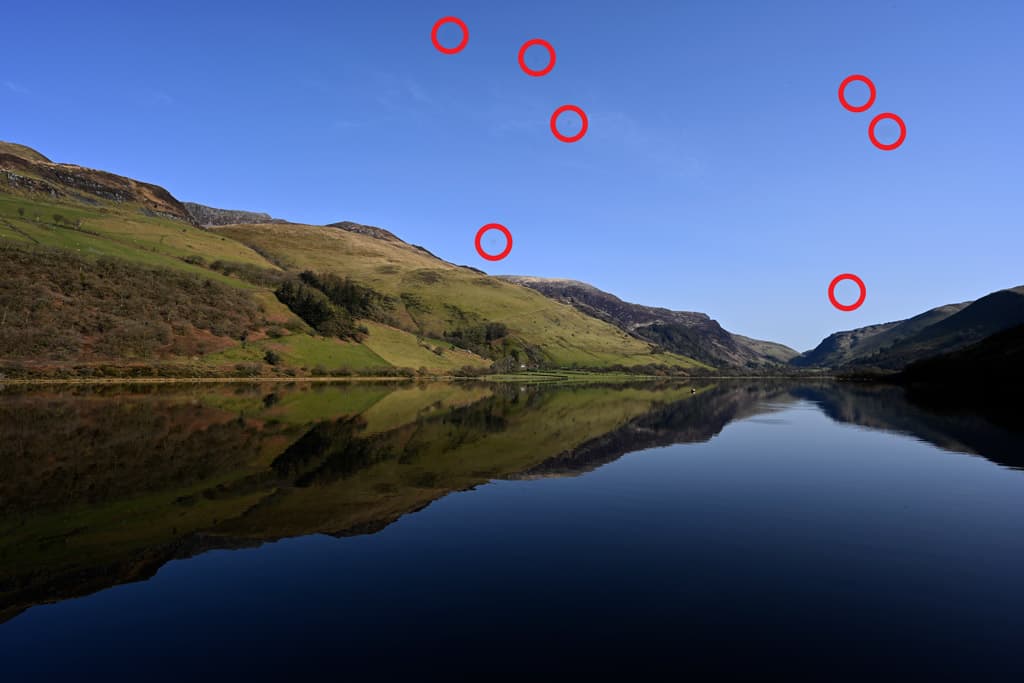
Camera sensor with dust, highlighted with red circles
The first step is to use your camera’s own sensor-cleaning system. This can sometimes be set to vibrate the sensor as you turn the camera’s power on or off. While setting it to work as you switch on the camera may seem like a good idea, it can sometimes mean missing those fleeting moments when you want to power up the camera as fast as possible and take a quick shot. Consequently, I prefer to set the cleaning cycle to run on power-down if I can.
Alternatively, you can fire up the cleaning mechanism whenever you like. This is activated via the menu, and you’ll feel the sensor vibrate inside the camera once you hit ‘Start’. If this doesn’t shift a problematic mark, more direct action is required. Digital SLR cameras have a sensor-cleaning mode that lifts the mirror to let you reach the sensor. This will usually only operate when the battery is at or close to full charge because it’s important that the mirror doesn’t flap back down half-way though the process. Obviously, that’s not an issue with mirrorless cameras.
How to clean your camera’s sensor
Knowing that the sensor is the most expensive part of your camera doesn’t do anything to steady the nerves the first time you clean it, but it is something that can be done at home provided you have the right gear. There are lots of gadgets for cleaning a sensor, but a good bulb blower that’s specifically made for cleaning a sensor and purpose-made swabs and cleaning fluid are simple and reliable. Don’t use a bog-standard blower as that can spit bits of rubber/plastic onto your sensor. And never use canned air – the propellant is bad news for the sensor!
Ideally, you should clean the sensor in a dust-free environment, but few of us live in those. Basically, don’t do it immediately after dusting or vacuuming. Steam from a shower can help eliminate dust, so a bathroom can be a good location for sensor cleaning, but wait until the steam has settled, as you don’t want any of that moisture inside your camera.
Read our detailed guide on how to clean your camera’s sensor.
Expert camera maintenance
If you don’t fancy cleaning your camera’s sensor yourself, there are plenty of places where you can have it done. However, bear in mind that another speck of dust can land on your camera’s sensor the next time you change lens, so it’s worthwhile plucking up the courage to do it yourself. Also at around £30 for an APS-C format sensor clean and £55-60 for a full-frame sensor clean, you’ll save quite a bit of money if you do it yourself.
Many DSLRs have an autofocus micro-adjustment feature that enables you to get the best from your lenses. This is designed to correct the slight variations that can happen as a result of manufacturing tolerances, and it may be required with a new lens or camera. Again, this is something that you can do at home, but if your camera and lens develop significant focusing issues after a period of use (or a drop) there may be a problem, and it’s advisable to take them to a service centre.
Whether it’s a smashed screen, broken dial, jammed shutter, loose aperture blades or a stuck memory card, a service centre that’s approved by your camera or lens manufacturer is the best place for repairing physical damage or resolving a sudden inexplicable breakdown.
I’d also recommend taking your kit in for a thorough check if it’s taken a dunk in water. Even if you follow all the usual advice of drying the camera with a cloth, putting it in a warm (not hot) place and putting it in a bag with silica (or rice), it’s best to get it checked out. Water damage can take a while to show its impact. The delicate circuits within the camera may corrode slowly and problems can develop later down the line.
Part of the service
Some camera service centres offer a routine service that includes aspects such as sensor and focus screen cleaning and a few checks for a fixed fee. At Canon UK’s service centre this costs £90 for a camera such as the Canon EOS 5D Mark IV, for example, while a premium service that adds recalibration (if required) costs a total of £117.
Other centres such as Fixation don’t offer a routine service as such. They check aspects such as the focusing, metering and lubrication against standards set by the manufacturer and look for wear and tear; then they send you a free no-obligation estimate for any work that’s required. In both cases, there’s additional cost for any parts and labour that are required.
Camera insurance
While good camera insurers will pay out for accidental damage to a camera, they are sometimes very specific about the exact circumstances in which the damage occurred. If you’re travelling with your camera when it’s damaged, for example, they may require proof that it was in a purpose-made case. Similarly, mechanical breakdown may only cover for items that are less than five years old.
Camera maintenance: How to check and clean your camera
It still pays to use a cloth to clean the camera body exterior
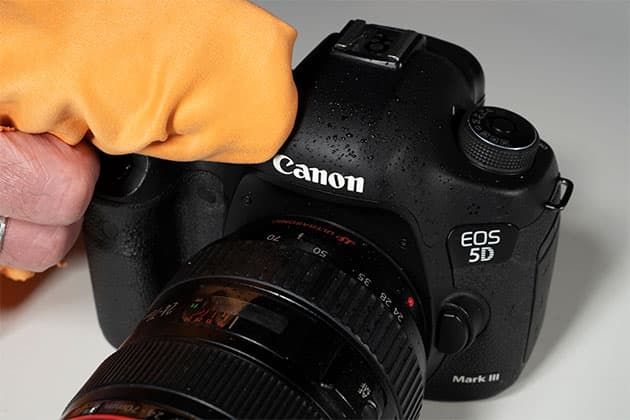
One of the best ways to ensure your camera gear lasts well is to give it a good clean occasionally, especially if you’ve been on a sandy beach or in salty sea spray. Even if your camera is weatherproof and sealed, use a soft cloth to dry it if it gets wet. A lot of this is common sense, so don’t get complacent.
Use a bulb blower
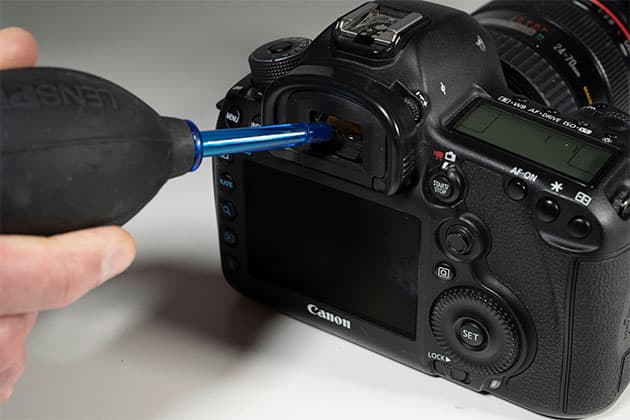
Use a bulb blower to remove loose sand and dust. It’s useful around buttons and dials as well as the viewfinder, card bay, battery compartment and connection ports. However, don’t use canned air as the high pressure can blast dust deeper into small crevices, even though weatherproof seals.
Use a brush to remove dust
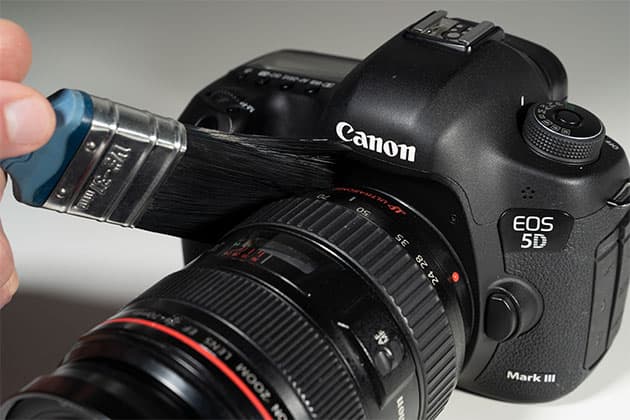
A brush is useful for removing dust that a blower won’t shift. Use light strokes to flick the dirt away. Pay particular attention to areas like the lens mount; you don’t want any debris such as sand or grit getting on to the mount or inside the camera when you remove the lens. It can cause expensive internal damage.
Wipe down your camera
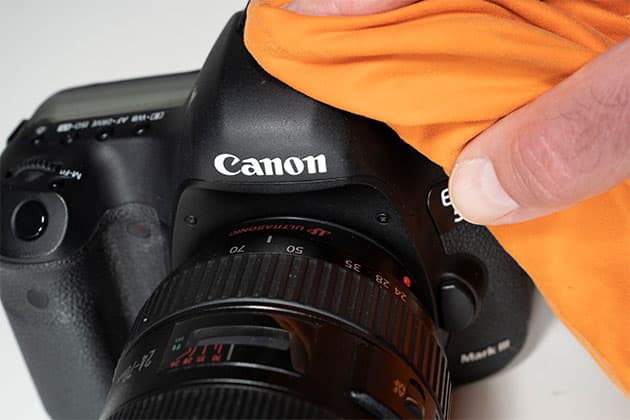
Once anything that might scratch your camera or lens is removed, use a very slightly damp cloth to wipe away any salt or mud that’s remaining. Even if you can’t see any salt, it’s worth wiping the whole camera down to remove any corrosive residue. Rinse the cloth and repeat.
Check camera port covers
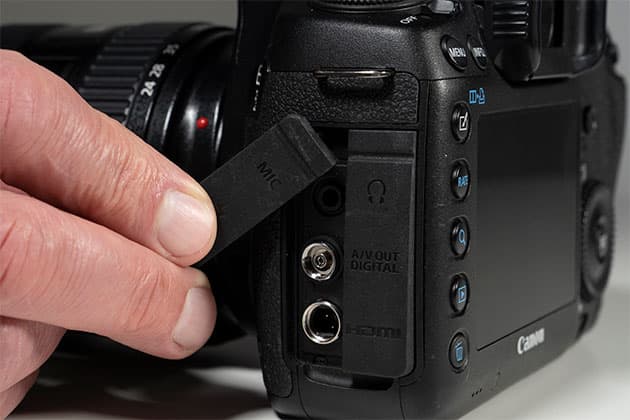
Check your camera’s port covers and doors, making sure they are all in place and t well. They are integral to any weatherproofing and keep dust at bay. If any are missing, order replacements and refit them as soon as possible in order to keep your camera in good condition.
Clean with alcohol or lens cleaner
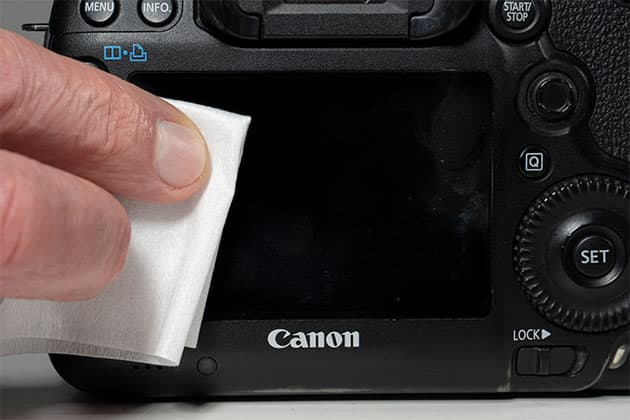
If necessary, use a high-concentration isopropyl alcohol or lens cleaner on a lens tissue to clean the LCD screen and remove any fingerprints or nose marks. You only need a drop or two of the cleaner on the tissue as a little goes a long way – just wipe until it’s clean.
How to clean and maintain accessories
Lenses
Always store unmounted lenses with both end caps on, preferably upright and in a bag, case or cupboard that prevents dust from settling on them. Before you pack a lens for use, check the elements at either end and give them a wipe with a clean lens cloth and cleaner, if necessary.
Camera Bag
Brush down the exterior of your camera bag to remove any sand or dirt. Then empty it and shake it outside with all compartments, pockets and flaps open. If necessary, put a nozzle on your vacuum cleaner and give the whole bag a thorough clean, remembering inside all the pockets.
Tripods
Tripods get pushed into mud, sand and water, and need a little love, too. As soon as you can after using yours, give the legs a rinse in clean, fresh water. Extend the legs fully and give them a good wipe before leaving them to dry in a warm room. After a bit of use, the nuts and bolts of a tripod can work loose, so check them all on a regular basis and tighten them if necessary. If you have more than one camera, make sure that the quick-release plate is returned to the tripod head after use.
Filters
Treat filters carefully, like they are an element of a lens. Use a bulb blower or brush to remove any loose dirt without scratching them. Then use a clean lens cloth, if necessary, with some cleaning solution like LEE Filters’ ClearLEE Filter Wash to remove any finger prints, grease or watermarks.
Batteries
Remove batteries from devices such as flashguns so there’s no risk of them leaking into your gear. Try to use high-quality rechargeable batteries and chargers, and store them carefully. Another good tip is to number your batteries so you can be sure to use them in rotation, because this increases their life.
Service centres
Advanced Camera Services Ltd Tel: 01953 889324
Canon Service and Repair Centre Tel: 020 7660 3510
Fixation Tel: 020 7582 3294
AJ Johnstone & Co Tel: 0141 221 2106
H Lehmann Ltd Tel: 01782 413611
Nikon UK Service Dept Tel: 0330 1230932
Park Cameras Tel: 01444 237070
Photographer and journalist Angela Nicholson started reviewing cameras for Amateur Photographer in 2004 and was our Technical Editor before leaving for new pastures in 2010. In 2018 she founded SheClicks, a community for female photographers. She’s broken remarkably few cameras over the years, so who better to provide tips on camera maintenance and making cameras last?
10 essential camera accessories for beginners