
1. Rainy Windows

Rainy Windows. Photo by Phil Hall
While we shouldn’t get bogged down with the idea of good or bad weather for photography, rain is something that divides us. Some will want to keep their cameras safely tucked away in their bags, while others will embrace the conditions. If you’re in the former camp, don’t discount rain, as it is possible to turn it to your advantage and still stay dry.
By staying inside and opting to photograph rain on windowpanes, it’s possible to create some creative abstract images while making the viewer look at a scene that they’ve probably seen before in a new light.
With the UK blessed with its fair share of rainfall at this time of year, there’s bound to be an opportunity to capture rainy windows at some point this weekend.
- You can try practising at home, but unless you’re lucky enough to have a striking view on your doorstep you may have to venture a little further afield to find a strong shape for a background.
- Use a relatively fast lens that can focus moderately close. This will allow you to blow the background out nicely but focus nice and close on the raindrops. Experiment with different apertures.
- Try shooting in low light looking out at an artificially lit scene. The defocused lights and background, coupled with the foreground raindrops, will generate a lovely abstract result with bags of colour.
- Once imported into Lightroom or Photoshop, boost the Clarity slider to really bring out the detail in the raindrops and increase the Vibrance. Lift the shadows a touch, while keeping an eye on the histogram.
2. Shooting in the rain
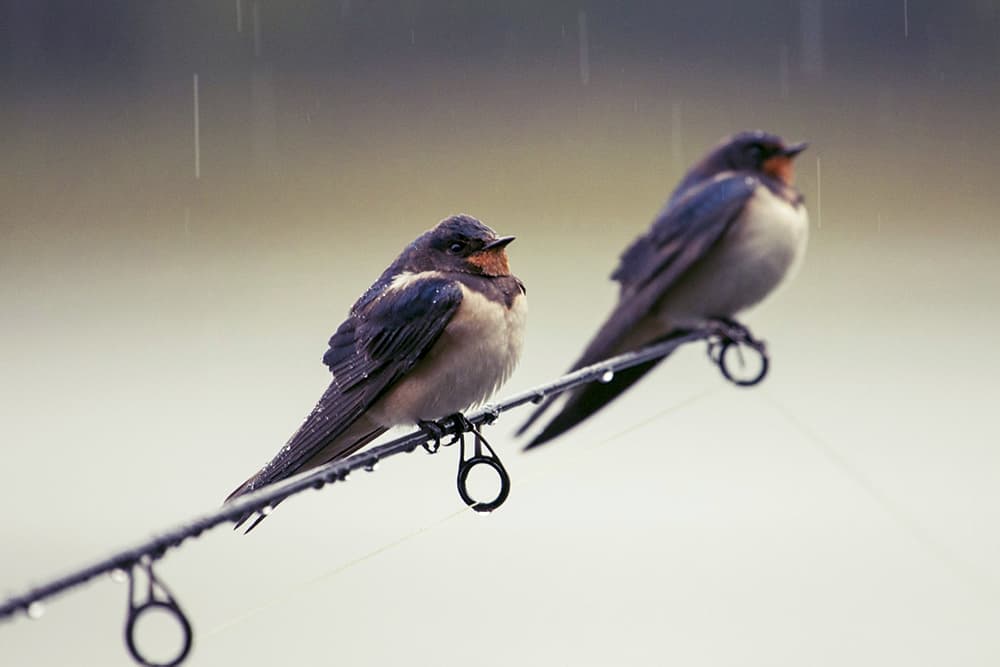
Try to capture the atmosphere of the rain – such as these birds on the end of a fishing rod. Photo by Callum McInerney-Riley
When you draw back the curtains and see that it’s raining outside, the thought of picking up a camera and heading out might not seem that appealing. However, don’t let the weather put you off. There are plenty of subjects you can capture when it’s wet, and the rain gives a unique perspective to things that many photographers simply overlook.
For example, landscape images that include foliage, rocks, trees and other plant life become far more tonally rich. Also, in urban scenes the reflections on a cobbled street or road can add much more drama to a particular shot. Most cameras should be fine in light showers, but do be aware that if your camera doesn’t have weather sealing then you shouldn’t subject it to extreme conditions or heavy showers.
- This is the simplest tip – dress accordingly. If you are soaking wet within 10 minutes, you won’t be comfortable. Wearing waterproof clothing and a hood will keep you warm and dry.
- Try to find some surfaces that are reflective. Reflections add another dimension to an image and can transform a regular dull street scene into a glowing one with the help of a little rain.
- Experiment with shutter speeds to try to capture raindrops. By adjusting the shutter speed, you will be able to capture the shot with a misty fog effect, sharp water drops or blurred raindrops.
- Try to capture the atmosphere of the rain, such as someone trying to avoid getting wet or struggling with an umbrella
3. Colourful still life
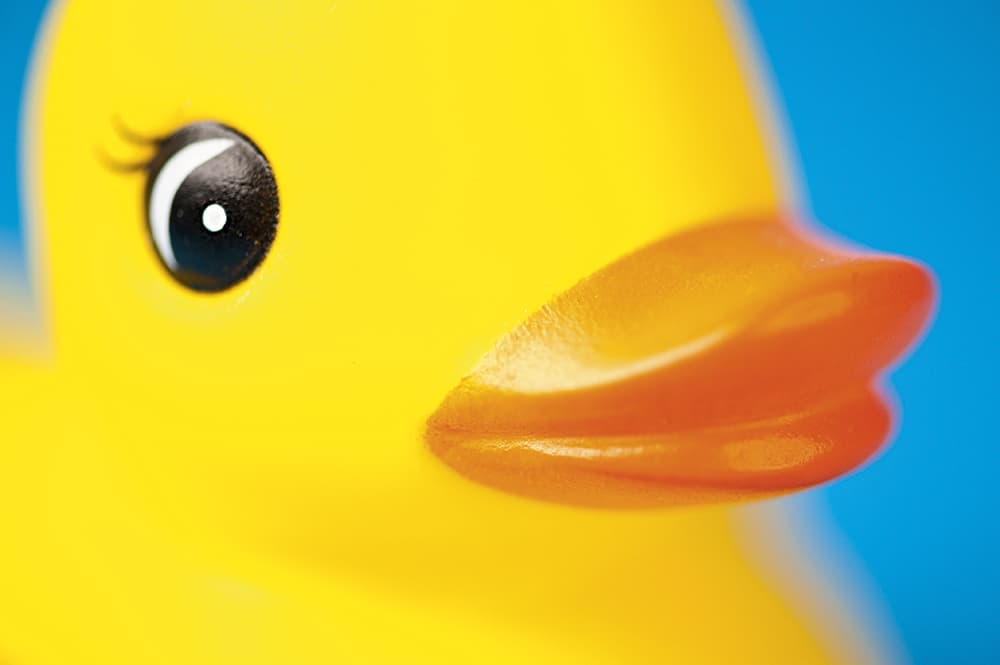
Photo by Phil Hall
If it’s too mserable outside, why not stay at home and challenge yourself to shoot a colour still life image? You may think that you need a load of kit to achieve this – especially various bits of lighting – but you’ll be pleasantly surprised at how simple it can be.
The first thing to do is to choose your subject. Flowers are an obvious choice, but don’t discount anything else that catches your eye; even simple objects can take on a whole new appearance when looked at differently. Be bold with your choice of subject, and you’re likely to get striking results. Once you’ve picked your item, and you’re happy with it, make some space on a table and then set to work creating your still life.
- Bold, colourful backgrounds that are either in harmony with your subject, or create a striking contrast, are key. Experiment with different backgrounds, from simple sheets of card to Perspex and textured material.
- There’s nothing to stop you using flash to control the lighting, but natural light can be just as effective. Shoot near a large window using reflectors to bounce light around your subject. Don’t discount black boards to stop light leaking.
- Rather than working on a single composition, work hard to look for interesting angles from the same subject – get three shots you’re happy with and you can then think about creating a still-life triptych.
- Depending on what you end up shooting, a macro lens may be desirable, but in most cases not necessary. A fast 50mm prime lens is always a great choice. While you may want to handhold your shots, think about using a tripod.
4. Cross processing

The cross-processing effect bleaches out skin tones and makes eyes stand out. Photo by Phil Hall
Back in the days of film, colour negative and transparency film required two quite distinct chemical developing processes – C-41 for neg and E-6 for slide. Pop a film through the wrong process, though, and all was not lost. The images could still be used, and the film would often yield some quite unusual colour shifts. While not suited to every subject, some photographers really embraced this look and would experiment with different film stocks to get the result they were after.
With the advent of smartphone photo apps, this retro look is more popular than ever. Rather than relying on an automated app to apply the look, you can easily do it yourself in either Photoshop or Lightroom, and the results are much more effective.
- Using Curves, select the RGB channel from the drop-down menu and apply a strong ‘S’ curve to boost the overall contrast of the image to make the cross-processed effect appear more pronounced.
- Now, adjust each Channel individually. The trick is to apply an ‘S’ curve to both the Red and Green Channels, raising their prominence in the highlights and reducing them in the shadows.
- The opposite is true for the Blue Channel. Opt for an inverted ‘S’ curve – add more blue to the shadows and drop them in the highlights. The severity of the adjustments you apply will vary from image to image.
- Instead of applying an inverted ‘S’ curve to the Blue Channel, you can drag the top right point downwards a little, and then drag the bottom left point upwards. Experiment to see which look you prefer.
5. Shoot your own ‘In the bag’
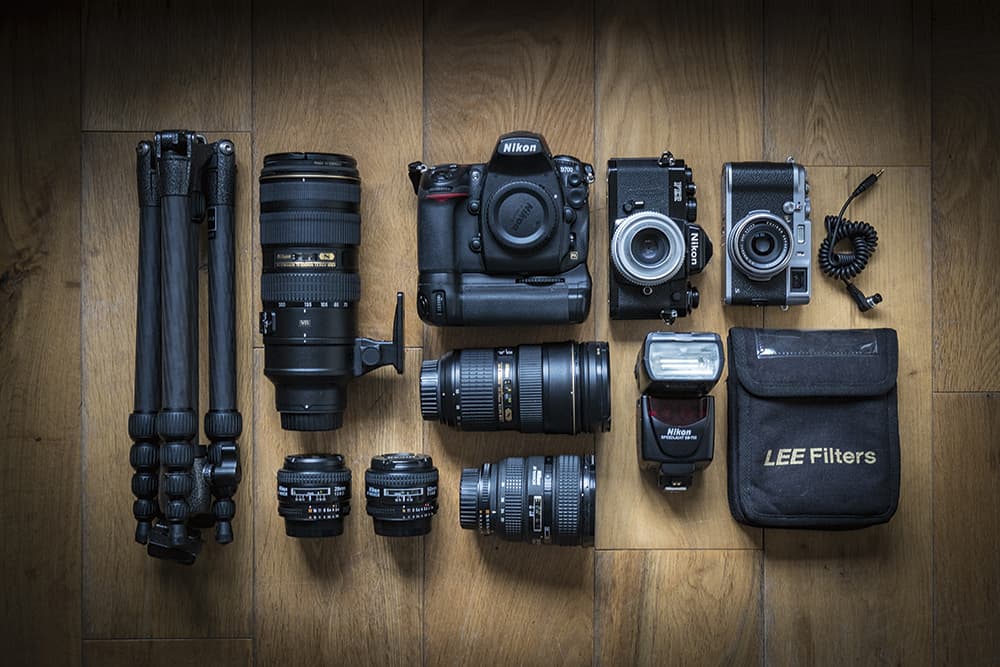
While the final image is the most important part of photography, for a lot of us the kit we use and shoot with is just as enticing. Photographers are also incredibly nosey when it comes to gear, and an open camera bag is like a light to a moth as we can’t help peering over to see what others are shooting with.
Our regular In the Bag feature is a showcase for photographers to reveal what’s in their camera bag, allowing us to have a guilt-free poke around the kit they use. But instead of looking at others, why not have a go at doing your own? If you’re happy with the result, send it to us at appicturedesk@timeinc.com to show off your gear to everyone else.
- For the most pleasing results and to satisfy the perfectionists among us, try to line everything up as neatly as possible when arranging your kit. You’ll be amazed what a difference it can make.
- Think about the surface you lay your gear on – the lounge carpet won’t really cut it. Instead, look for a background that perhaps hints at the subject you shoot the most or a surface with a pleasing texture.
- With all your gear laid out neatly on the floor, you’re probably going to have to reach for your smartphone to capture the shot. However, if that’s not up to scratch, think about borrowing a friend’s camera.
- While your cameras and lenses will draw the eye in, the accessories or other little pieces that you find invaluable can be just as interesting. Don’t forget to include them in the photograph!
6. Re-process an old image
Re-edit: Work on the original image with its default settings, so you’re not influenced by your previous edits

Original
When it comes to starting out in image editing, we’ve probably all been in the same boat. Getting to grips with the software, particularly when it’s a powerful package like Adobe Photoshop or Lightroom, can be a daunting process, with so many tools to learn. And in the early days, while still trying to understand the program, images you edited may not have always been processed as well as they could be. Besides, with the array of new controls that appear as editing packages are upgraded, you’re now sure to get even more out of the image than before.
So this weekend, why not go back and find an image from your archives you may have processed when you were less experienced? Re-edit an image, transferring all the knowledge and skills you’ve learned since and see what you come up with.
- When you open the raw file, make sure you revert to the default settings, so everything’s back to zero. You don’t want to be influenced by what you thought was acceptable a few years ago. Instead, start from scratch.
- You may find that complex Photoshop layer masks are no longer necessary. With controls like the Adjustment Brush in Camera Raw and Lightroom, you can make adjustments that are much easier to control.
- Be honest with the images you work on: if it requires too much work to make it look half decent, then it’s probably not worth bothering with. Rather, move on and find another image that shows more potential.
- Remember to apply adjustments like Lens Corrections. In the past, you may not have been able to correct for this, but now there’s a good chance you’ll be able to find your lens profile or make corrections manually.
7. Pintrest mood board
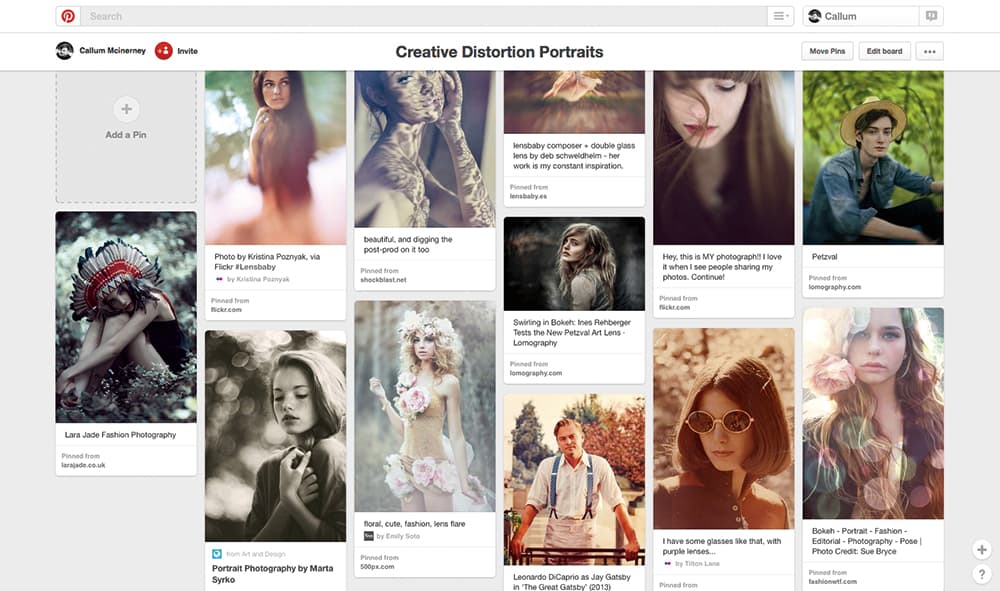
Most photographers have a head full of ideas for specific images they’d like to take in future. However, all these ideas can be overwhelming, and need some organising in order to create a clear vision of what to shoot. It’s not uncommon for photographers, or any kind of visual artists, to create mood boards to help achieve their vision.
Pinterest (www.pinterest.com) is one of the best tools to help you gather inspiring photographs into a collection, using either its browser-based platform or the app for Android or iOS smartphones. You can search for images other photographers have taken, or add images you find online to your virtual ‘pin board’. This is useful for any type of photography, whether it’s replicating a style, achieving a specific technique or gaining a certain mood in post-production.
- First, create an account. It’s easy to do, as you can sign in with your email and simply create a username and password. Alternatively, you can use your Google+, Facebook or Twitter accounts to register automatically.
- Once you’ve set up a Pinterest account, you can start creating your own board or even multiple boards. To help you get acquainted with how it works, we suggest starting out with one basic board.
- Using the search bar, type in keywords to explore images that other users have pinned. Alternatively, upload your own images or add something you’ve found online, and would like to remember, to your board.
- If you’d like to keep your posts private, it’s possible to create a secret board that only you, and anybody you choose to share it with, can see. This is particularly useful if you’re collaborating with another person.
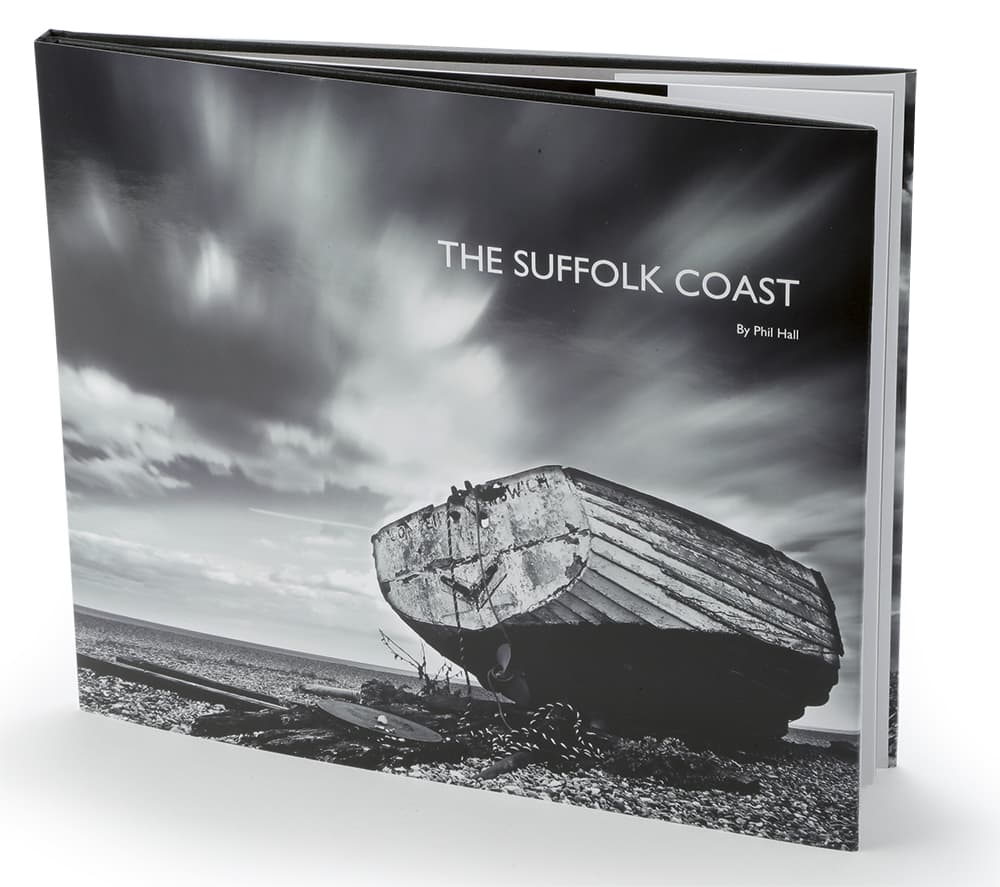
8. Make a photo book
 With the majority of us now viewing our images via digital displays, it seems a shame that they’re simply going to languish there as a series of 1s and 0s.
So why not look through your images this weekend and select your best shots to create a beautiful coffee-table book? While hardback photography books were once the sole preserve of the ‘highly regarded’, modern-day printing now means anyone can produce their own high-quality photo book. You can make a special one-off edition, while some printers offer the option of bulk ordering, bringing down the unit cost. There is also an extensive range of sizes, finishes, paper types and bindings to choose from.
So unshackle your images from the hard drive and create a beautiful photo book. It’s a much more satisfying way of looking and showing off your images, as well as doing your hard work justice.
- While there’s nothing wrong with a ‘best of…’ method for selecting images, a cohesive selection of shots from your portfolio that follows a theme or story can work really well together.
- Look at the layout and style of books you admire for inspiration, paying attention to how the images have been laid out. Don’t be afraid to let a single image breathe on a spread with a blank page next to it.
- Photo books are more than just bound portfolios, so take time to work on a title, introduction and other details, such as page numbering and footers. Also, make sure spelling and punctuation are spot on.
- Double-check that you’re happy with everything about each image, from the overall look to the absence of dust marks. The last thing you want is to get your photo book back and find it’s ruined by stray blotches.


