You can purchase Photoshop Elements for a reasonable one-off cost. Credit: James Paterson
As Adobe Photoshop CC’s little brother, Elements often gets a bad rap – it doesn’t have the same set of features as Photoshop CC and is geared more towards beginners. But most casual CC users would admit that they barely scratch the surface of its labyrinthine feature set. So if you’re happy to forgo advanced controls like 3D or video editing, you might find that Elements offers everything you need, and all for a reasonable one-off cost rather than an ongoing monthly subscription.
The Elements Camera Raw editor is a case in point. While it does lack the selective tools and black & white controls that are found in both Photoshop CC and Lightroom, it nevertheless offers an array of useful tonal sliders, plus tools for setting white balance and cropping, as well as comprehensive sharpening and noise-reduction controls. Besides, if you find that you need to make selective edits or convert to mono, then you can always open the image in the Elements editor for further tweaks. Below we’ll take a look at the key features of the Elements Raw editor.
Essential tools

Hand tool Use this tool (or simply hold Space) to scroll around an image when zoomed in. Double-click the icon to bring the image back to full screen.

Zoom tool Use this (or press Cmd/Ctrl and + or – ) to zoom in close or to back out. Double-click the icon to zoom to 100% (actual pixels) view.
White Balance eyedropper Use this tool to click on a neutral point in an image in order to set the white balance and correct colour casts.
Crop tool This lets you make non-destructive crops. Right-click for different ratios and click X to change the orientation.

Straighten tool Use this to straighten wonky horizons in landscapes. Simply drag along the horizon line to correct it.
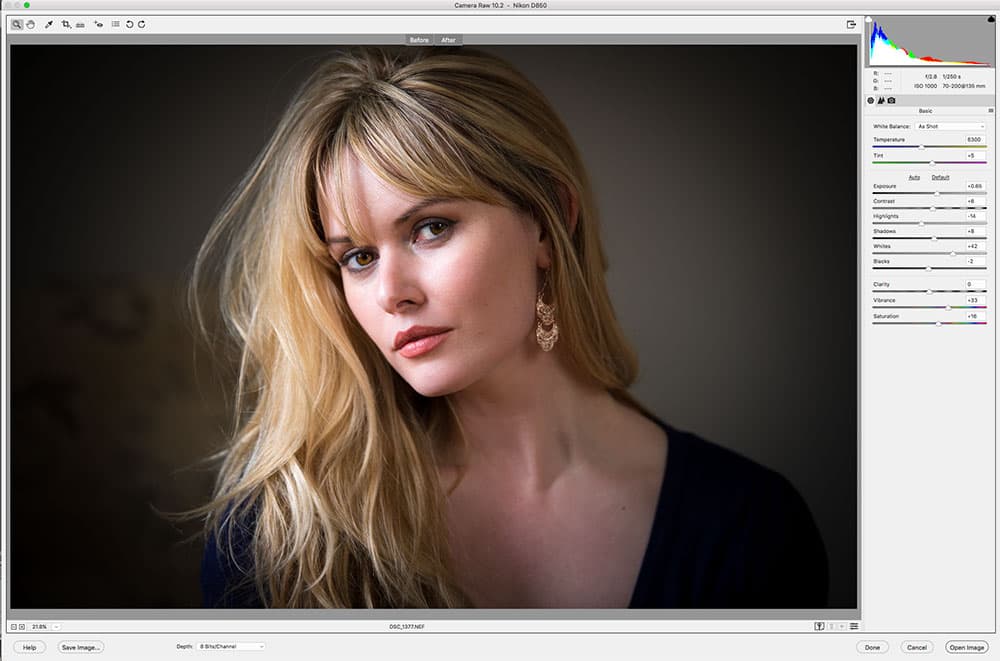
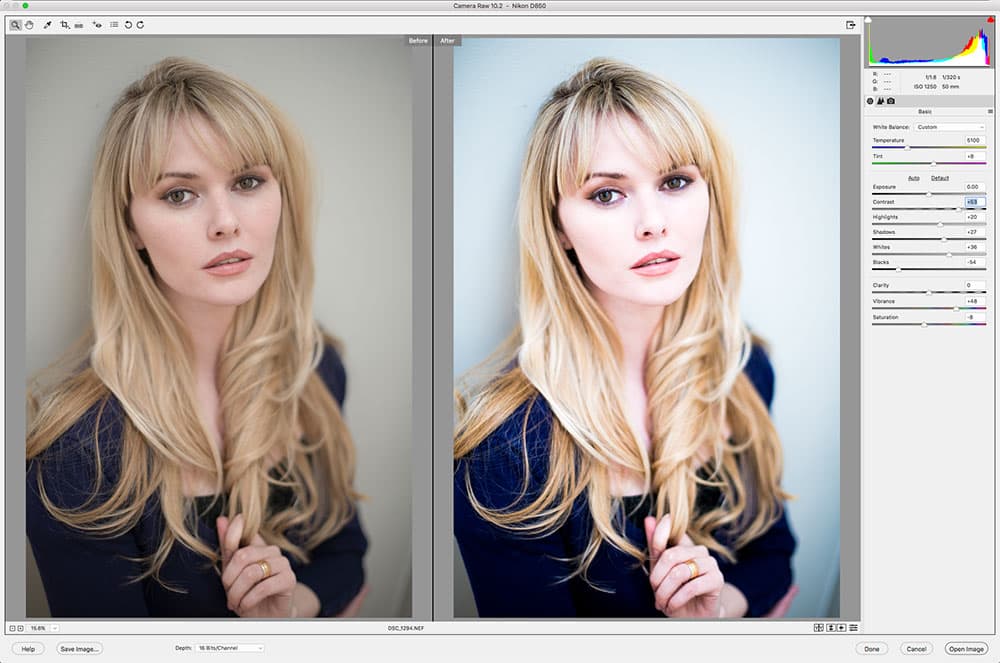
A raw photo will automatically open in Camera Raw. Credit: James Paterson
Get started with the Basic panel
When we open any raw photo in Elements the Camera Raw plug-in will automatically appear. It acts as a gateway, letting us begin our raw photo editing by enhancing tones, colours and details. Once open in Camera Raw, the Basic panel on the right is the ideal place to begin enhancing tones. It’s usually best to start at the top and work downwards through the sliders.
Start by setting the white balance. The ability to change white balance in post-production is one of the key benefits of shooting in raw. The dropdown menu here lets us select familiar white balance presets like tungsten or shade. Alternatively we can tweak Temperature and Tint manually, or use the White Balance tool to click over a neutral point in the image.
Below this are the tonal controls. They include the Shadows and Highlights sliders, which are very effective at pulling details out of those areas. They demonstrate another of the main benefits of editing in the raw format: the fact that raws have greater dynamic range than JPEGs and therefore hold more detail at the tonal extremes.
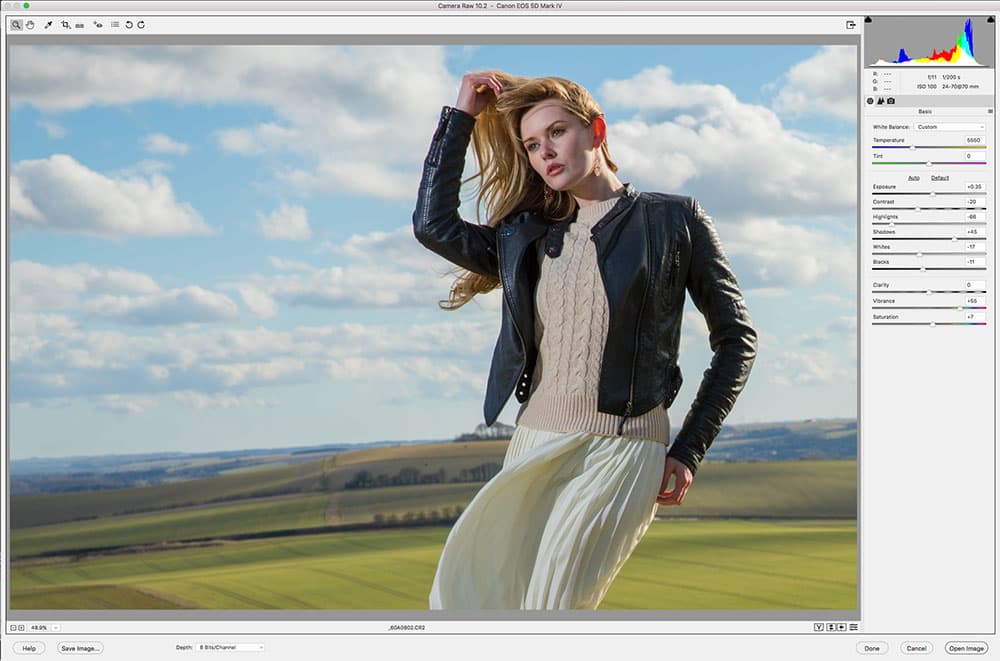
Use the Vibrance slider to boost weaker colours. Credit: James Paterson
Enhance your colours
The Vibrance and Saturation sliders within the Camera Raw Basic panel let us boost colour intensity. This is especially helpful when editing raw photos, as raws tend to look a little flat and dull on initial viewing (this is because camera manufacturers expect raw shooters to want to make their own boosts). A quick boost to either slider will make colours appear more punchy and full. Each behaves in a slightly different way. Saturation applies a universal boost to all colours at once. By contrast, Vibrance targets and enhances the weaker colours and preserves those that are already strong. As such, Vibrance is particularly useful for portraits as it lets us boost dull colours without overcooking the reds and oranges that often dominate skin tones. Here increasing Vibrance lets us boost the blues and greens without overly affecting the subject.
Hold Alt while dragging the sliders. Credit: James Paterson
Set white and black points
The Camera Raw Basic panel offers Whites and Blacks sliders. They let us set white and black points, allowing us to define the tonal range of an image. To some extent, we can also use the sliders to rescue clipped details. Ideally we want images to display a complete range of tones from black to white, while guarding against blown-out highlights or pure black shadows. By adjusting the Whites and Blacks sliders we can ensure the tonal ranges reach pure black and pure white without clipping.
In order to use the sliders effectively, we need to employ a simple keyboard shortcut. Hold Alt while dragging either slider. This gives us a grayscale view that clearly displays clipped pixels as we drag. In most cases we should move either slider to a point just before clipped pixels begin to appear.

You can batch edit your photos in Camera Raw to speed up your workflow. Credit: James Paterson
Batch edit your photos
The changes that we make to a raw photo in editors such as Camera Raw don’t actually alter the image file directly. Instead they simply affect the way the image looks within the program. Edits are only ‘burnt in’ when we either open the image into the main Elements editor or save it in a different format like a JPEG or TIFF. This ‘parametric editing’ brings a number of benefits, not least the fact that you are able to make universal changes to entire batches of photos at once. This is easily done in the Elements Raw editor. We simply drag our set of raw photos into the Elements interface. Then once they open in Camera Raw, we can either press Cmd/Ctrl + A to select them all or Cmd/Ctrl + click to highlight several of them in the filmstrip on the left. Once that’s done, we can then go on to make any changes using the sliders and panels on the right. This can be especially useful when we need to correct white balance across an entire set of photos.
Credit: James Paterson
Non-destructive editing
One of the best things about raw photo editing is that everything we do to a file in the raw editor remains non- destructive. So the next time we open the image, everything we’ve done – from cropping to sharpening – is editable at any time. Once we’re finished editing the raw photo, we can click Open to bring the image into the main Photoshop Elements editor. Alternatively, if no further edits are required we can simply close the image. Any changes are automatically saved within the raw file. If you want to remove previous changes made, you can restore the Camera Raw defaults using the flyout menu at the top right. The View options, found at the bottom right of the image, are also handy if you want to check your edits. They give you various split-screen before/after views like this.

Camera Profiles
Within the Camera Profiles dropdown you’ll find a list of profiles that match the picture-style options offered by your camera. These can be useful for kickstarting the editing process by giving your image a range of tonal treatments. Note, these are only available when editing raw files. If you choose to edit a JPEG in Camera Raw (in Elements, you can go to Open > Edit in Camera Raw to do this) then the profile will be embedded.
Why edit in raw?
For those not used to raw editing, Camera Raw can seem baffling: why can’t we open our raw files in the Elements editor like we can with JPEGs? Elements is a pixel-based editor, and in their raw stage, the pixels have yet to be fully realised. Raws contain unprocessed image data. As such, each pixel has extra data that allows us to take it in one direction or another, with greater editing headroom than if the image was a JPEG. Here’s where this plug-in comes in (or Capture One, Affinity Photo, Lightroom or any other raw editor). This way, we have more control over adjustments.
Raw sharpening and noise reduction
Camera Raw offers a powerful array of sharpening and noise-reduction controls within the Detail Panel (accessed by clicking the triangular panel icon on the right). Here are the key sliders explained. In most cases, holding Alt while dragging a slider will give a grayscale view to help you judge the effect.
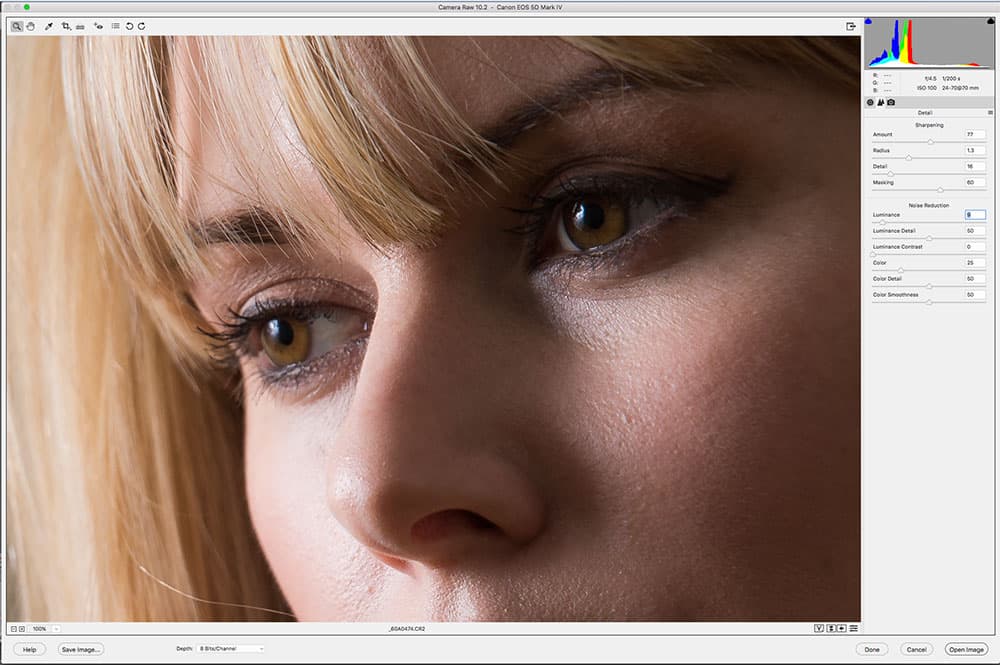
Click on the triangular icon to access sharpening and noise reduction. Credit: James Paterson
Sharpening Amount
This slider controls the overall strength of the sharpening effect by increasing the contrast along edge details within the image. The correct amount will depend on the subject and resolution of the image. Push it until details are sharp, but beware of increasing image noise.
Radius
When we sharpen a photo we are simply increasing contrast along edges, where light pixels meet dark pixels. The Radius slider determines how far from the edge the sharpening – or ‘halos’ – will occur. A high radius is usually more suited to images with areas of low-frequency detail such as portraits, while a low radius may be better for detailed scenes like landscapes.
Detail
This lets us suppress halos and artefacts by controlling how much high-frequency detail is sharpened. A lower value is better for restricting the sharpening to strong edges, while a higher value is better for emphasising textures and surfaces in the scene.
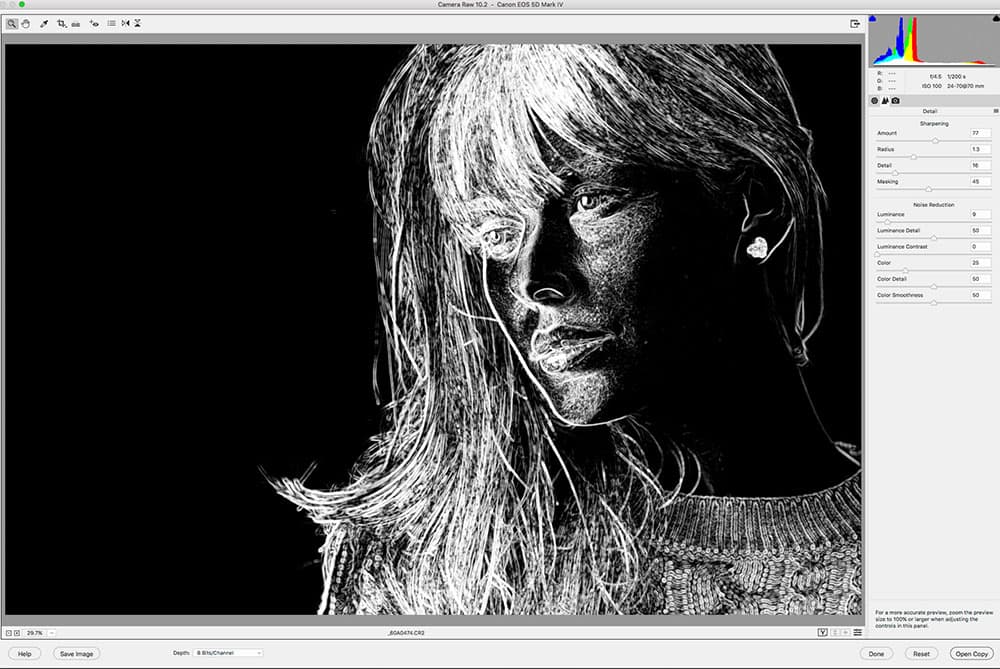
Masking will allow you to restrict the effects of sharpening to areas of detail. Credit: James Paterson
Masking
This lets us restrict the effects of the sharpening to areas of fine detail, allowing us to exclude featureless or blurred parts of the photo from becoming oversharpened. Hold Alt while dragging the slider for a black & white view. As you drag the slider across, areas will begin to appear – these will be excluded from the sharpening.
Luminance Noise
This lets us combat the grainy noise that often occurs when we shoot at high ISOs, or if we attempt to rescue an underexposed photo. Drag the slider to a point where the noise disappears, but beware of blurring fine details. Sharpening and noise reduction go hand in hand, so if we push one too far it can have an adverse effect on the other.
Color Noise
This targets blotchy spots of colour that can appear in our photos, especially in darker areas. By default it’s set to 25, which is usually enough. The Color Noise slider below this lets you set a threshold – high values protect the colour edges, while low values remove speckles of colour.