All camera manufacturers provide software with their cameras, and for those photographers who eschew third-party software such as Adobe Lightroom or DXO PhotoLab, or don’t have the latest versions, it’s essential for processing the raw files and getting images just as you want them.
What does Canon Digital Photo Professional do?
Canon supplies a collection of software packages with its EOS and PowerShot cameras but Digital Photo Professional 4 (DPP4) is the image editor and this gives you lots of control over images, even enabling customised black & white conversions. Here’s a taste of how it works.
How to use Canon Digital Photo Professional
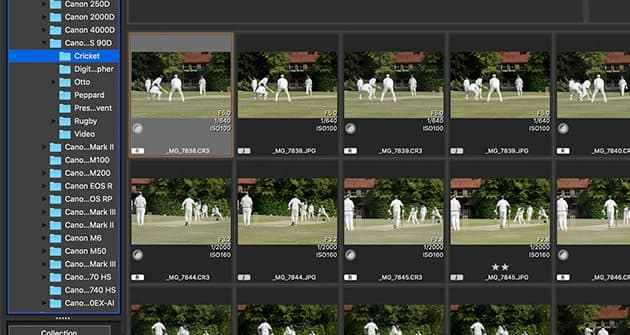
Highlighting an image also reveals basic exposure information
The first time that you open DPP, you won’t see any images, you need to select a folder of images first. To do this, simply click on the arrows next to the storage drives and folders shown in the right column near the top of the screen to reveal their contents and find the folders that contain your images. As soon as you click on a folder of images, thumbnails appear in the middle of the screen – unlike with Lightroom, there’s no need to import anything.
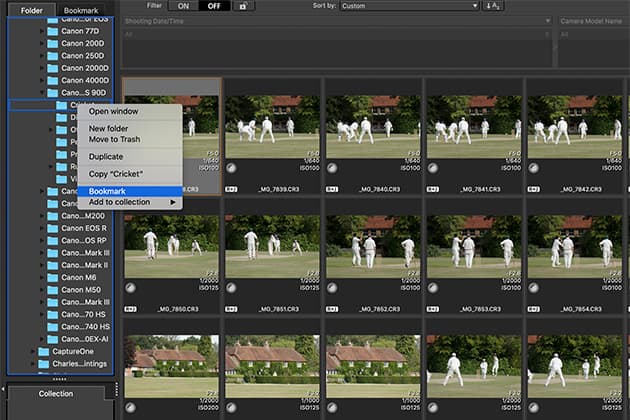
The Bookmark feature is handy if you have lots of stored images
Bookmarking a folder adds it to the Bookmark tab, making it easier to find in the future. Right click on the folder concerned and select ‘Bookmark’ in the box that appears.
Canon Digital Photo Professional’s refined image selection
Controls at the bottom of the screen let you adjust the size of the image thumbnails and reveal more or less information about them. You can also rate your images with numbers and/or stars just by selecting one or more shots and then either clicking on the rating bar at the bottom or tapping 1-5 on the keyboard.
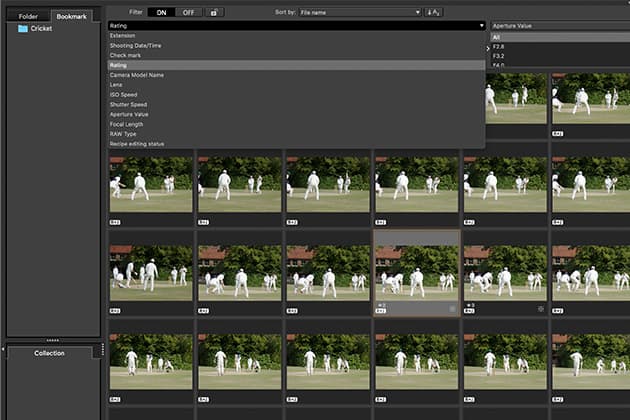
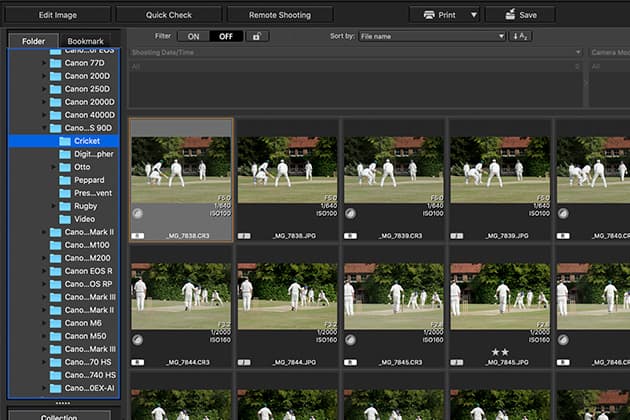
Filter controls make it even easier to track down images
The filter control at the top of the screen allows you to narrow your image selection by applying up to three filters. Set the filter to ‘On’ then click on the down arrow next to one or all of the filter types to select the parameter (rating, aperture, ISO etc). Next, select the filter you want to use in the box below.
Advanced exposure and contrast adjustments
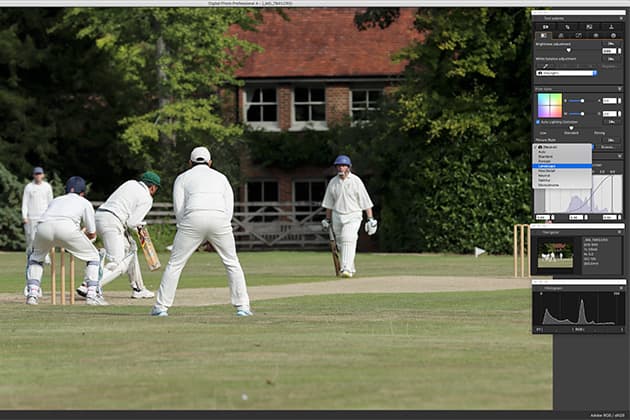
Opening an image reveals a fuller range of tools and options in Digital Photo Professional
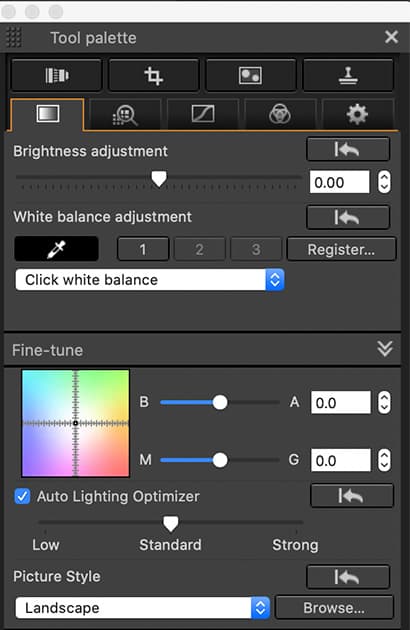
Double-click on an image to open it and see the adjustment panel which opens on the Brightness Adjustment tab at first. If you’re adjusting a raw file you can change the Picture Style to adjust the colour, contrast and sharpening in one go.
Whle it’s no alternative to Adobe CC, there are basic exposure adjustment tools
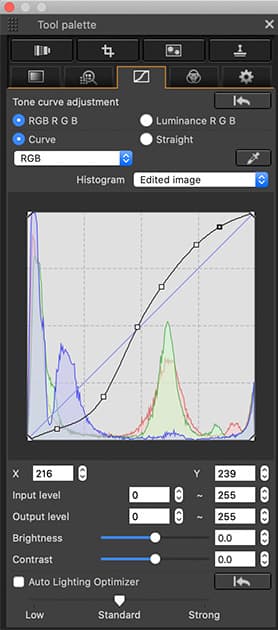
The histogram at the bottom of the panel gives you some control over the brightness of the shadows, mid-tones and highlights, but for greater freedom, click on the Tone Curve tab. This shows a histogram with a tone curve that you can click on to add points and change the curves shape to manipulate the brightness and contrast. Pushing a point up brightens pixels in that area of the curve while pulling it down darkens them. For a quick exposure adjustment, this works well.
How to adjust the white balance in Canon Digital Photo Professional
Digital Photo Professional enables you to fine-tune white balance for the colour temperature you need
The white balance drop-down box of presets in the Brightness Adjustment panel is the easiest way to change an image’s white balance and there are fine-tuning sliding controls. However, the Dropper tool is very useful if there’s something that should be neutral in your scene. Just select the Dropper and click on the neutral target to apply the adjustment. If you have several images taken in the same light, tap ‘Register’ and save the adjustment to the custom values (1,2 or 3). Be sure to click on the Dropper tool to deselect it when you’re finished. Then, when you open an image from the same shoot, click on the custom preset to get the white balance just right.
Canon Digital Photo Professional’s Color Adjustment panel
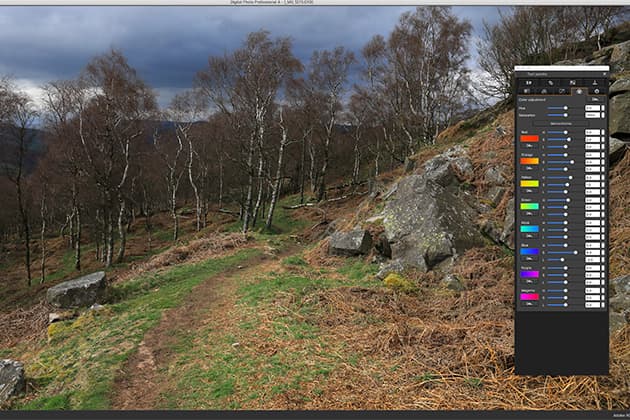
The Color Adjustment panel gives control over the hue (H), saturation (S) and lightness (L) of the eight colour channels. You can make the yellows a bit greener, for example, and boost their saturation or brightness without changing the blues or reds.
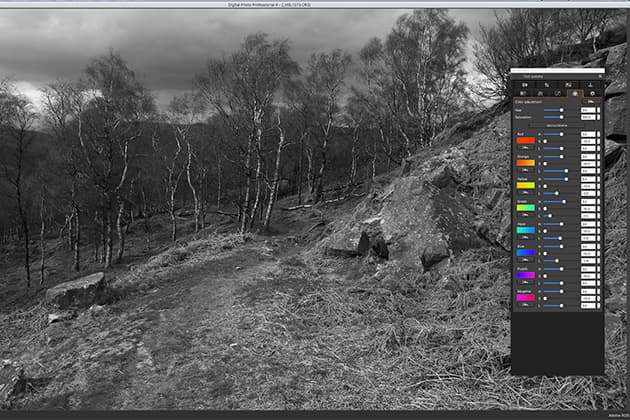
Use the Color Adjustment panel for basic but effective mono conversions
This panel is also perfect for making black & white conversions. Clicking on the ‘Monochrome’ button makes a basic black & white conversion by reducing the all the colours’ saturation to zero. Then you can use the L (lightness) sliders of each colour to adjust the brightness of the corresponding areas in the original image. Sliding the L control of the green channel to the left, for example, darkens green areas in the image while sliding it to the right brightens them. It is not as sopshisticated as Photoshop or Lightroom but it does the job.
How to create and use recipes in Canon Digital Photo Professional
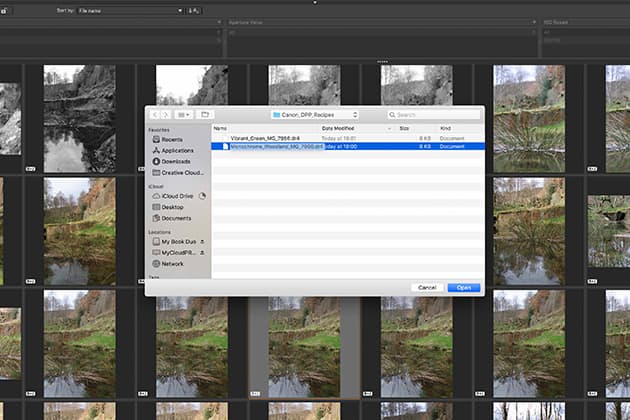
Recipes are stored in a dedicated folder for easy retrieval
DDP allows you to save many of the key adjustments as a ‘Recipe’ that you can apply to other images to get the same look. The next step is to copy the adjustment settings and the best way to do this is via Edit>Save Recipe in File. This allows you to save everything with a memorable file name in a folder of your choosing so you can recall it at a later date.
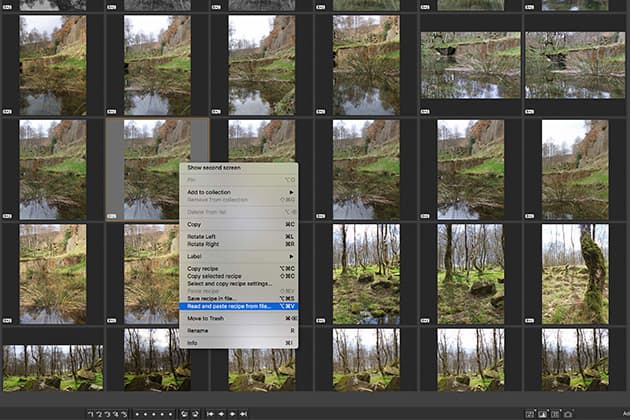
Recipes enable you to quickly access adjustments for a consistent look
When you want to apply a Recipe to another image, just select it in the browser and click on Edit>Read and Paste Recipe from File. Then find the file you want to use in the box that appears and click on ‘Open’ to apply the edits.
Photographer and journalist, Angela Nicholson started reviewing cameras for Amateur Photographer in 2004 and was our Technical Editor before leaving for new pastures in 2010. Last year she founded SheClicks, a community for female photographers.