There are times when video may be a better choice than a still photo, and many cameras have a video mode for these occasions
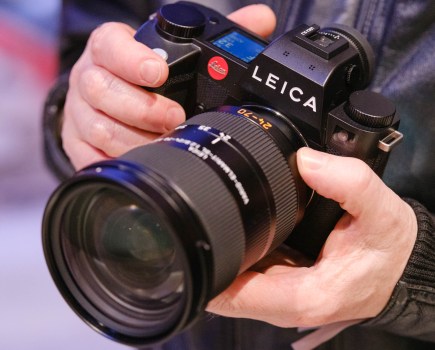
 Almost all compact cameras, and an increasing number of digital SLRs, offer the ability to shoot movie clips.
While suffering some limitations compared with a dedicated camcorder, it’s possible to get some great results if you know these limitations and follow a few simple guidelines.
Limitations to your camera’s video mode
Before you start shooting movies on your still camera it’s important to know what your camera cannot do.
First, with most still cameras the length of clip you can shoot in one continuous take is limited to anywhere between five minutes and 30 minutes, depending on the camera and selected resolution. So shooting the whole of the school nativity play in one take is out.
In practice this isn’t a big issue because most films are composed of a series of shorter clips edited together. A single 30-minute clip would be tedious to watch.
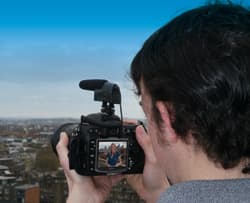
Second, many cameras have only a built-in microphone with no means to add an external one.
Built-in mics are omni-directional and pick up the sounds you want as well as those you don’t – such as the sound of your lens’s AF motor focusing. If you’re videoing someone talking, set the lens to wideangle and get as close as possible so the mic picks up as much of their voice as possible.
If your DSLR does offer auto focusing in video mode (not all do), switch to manual focus to eliminate the motor noise.
If your camera does have the ability to add an external mic, you’ll find you get significantly better audio quality from one.
Most cameras offer no control over aperture and exposure settings during recording – you’ll have to set the aperture before you start and let the camera adjust exposure itself, by varying the ISO. Many compacts will not let you zoom during recording.
Five tips for shooting video on a DSLR
1. Shooting DSLR Video – Use fast, high-capacity memory cards
 A 4GB media card will only give you about 12mins of HDR video, and that’s excluding any stills you may also want to take – an 8GB card is therefore the minimum that you should consider for HD-video-enabled DSLRs, and 16GB is better still.
It isn’t just the capacity you need to look at, though – if you use a cheap card with a slow write speed, you may find the buffer fills up faster than the card can save your footage. Faster cards will ensure that you can keep filming for longer.
2. Shooting DSLR Video – Focus manually
 Even if your DSLR offers autofocus (AF) during video recording, its best to switch to manual focus when shooting video. The AF is not only slow to adjust, but if your subject or the camera is moving, the focus is likely to hunt or – almost as bad – pop suddenly from one plane of focus to another. Both look pretty amateurish.
It can be difficult to fine-focus using the LCD screen, especially in bright light, which is why we recommend using a focusing loupe. Not only will this cut out extraneous light, it will magnify the screen to make fine adjustments easier to see. Try the LCDVF – it clips onto the camera magnetically and has a good-quality lens.
3. Shooting DSLR Video – Use external mics for better audio
 The camera’s built-in mic is better than nothing, but the sound quality it produces leaves a lot to be desired. Aside from its habit of picking up the sounds of the camera itself, it is omnidirectional and uncontrollable.
If your camera has a port for an external mic, then using one is the single biggest thing you can do to boost the professionalism of your video.
Not matter how good the pictures, weak audio will make your efforts seem amateurish. In fact, great audio can disguise poor visuals better than the other way around.
4. Shooting DSLR Video – Keep the camera steady and avoid excessive zooming
 A wobbly camera is annoying to watch, so keep the camera steady while filming. Use a tripod or monopod, rest on a stable surface or shorten the camera strap and pull it taut against the back of your neck.
Also avoid unnecessary zooming or panning – its generally better to cut away to a more telephoto shot that to record the zoom, and if you’re going to pan, plan your start and end points before you begin.
5. Shooting DSLR Video – Edit your video clips
 Unedited video clips can be painful to watch. At the very least, the beginning and end bits will probably need chopping off, and most clips would probably benefit from being shortened too.
You don’t need a pro editing package, as there are lots of inexpensive and even free ones available.
One of the best examples is Apple iMovie, which in incredibly powerful – a simplified version is even available for the iPhone.
Editing enables a series of related clips to be joined together, the boring bits cut out, and transitions, titles, music and narration added.