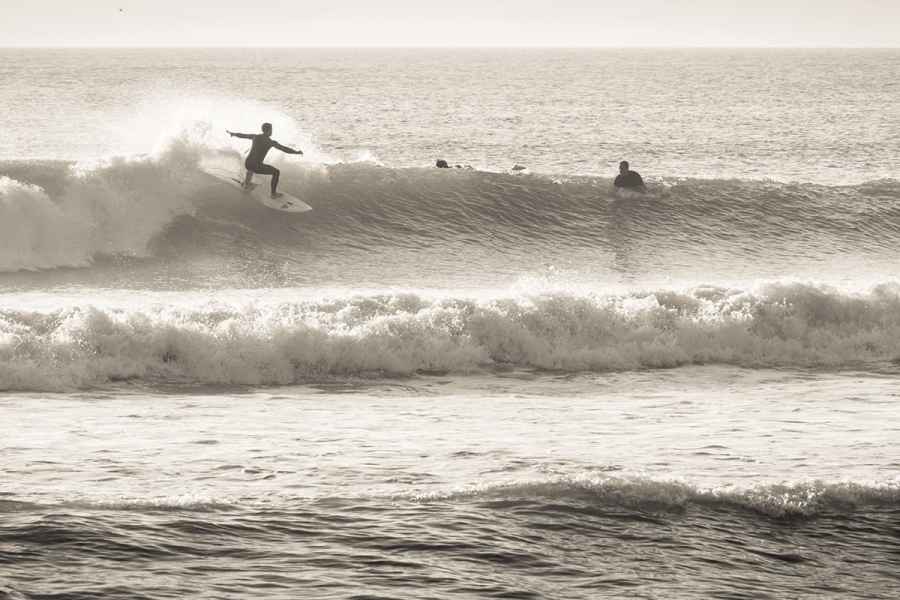

As the surfer was quite small in the frame, I used Single-point AF mode with the point held over him as he moved along the wave and towards the camera. Shooting continuously in AI Servo mode ensured he was sharp throughout the sequence of images
Canon’s first 35mm SLR with autofocusing, the T80, was introduced back in 1985. At that time there was some scepticism about autofocusing, with many photographers questioning the need for it and doubting its accuracy. Leap forward over 30 years to the modern day and there are many photographers who have never used a manual focus camera, and even more who would question not using autofocusing. In fact, these days we almost take autofocusing for granted, but it’s worth spending some time understanding the options that are available in order to get the best from it.
One-shot AF
Of the three AF modes offered on Canon DSLRs, One-shot AF mode is the most commonly used and many people regard it as the ‘standard’ autofocus option. When this mode is selected, the camera focuses the lens when the shutter release is pressed halfway down. Once focus is achieved, if the button is kept held down the lens will not adjust the focus even if the subject or the camera moves. If you want to refocus the lens you have to lift your finger from the shutter release and half-press again.
This is a useful autofocus mode for a wide range of photography including portrait, still-life, macro and landscape photography – anything with a motionless subject. It’s not usually a good choice, though, for sport and action when the subject is moving.
When you’re shooting in One-shot AF mode, the active AF point needs to overlie the subject in the frame in order for the camera to get it sharp. Canon DSLRs can select the correct point to use automatically or you can do the job yourself (see Focus Points for more on this). However, in some instances there may not be an autofocus point exactly where you need it and that’s where the ‘focus-and-recompose’ technique can come into play.
In some very low-light or low-contrast conditions, you may find that the camera is unable to focus on the subject and therefore the focus confirmation flashes in the viewfinder. If this happens, you should try to position the AF point over part of the subject that has greater contrast and give it another go using the focus-and-recompose technique if necessary.
AI Servo AF
This is the focus mode of choice for sports and action photographers because it sets the camera to continually check and adjust the focus while the shutter release button is pressed. It’s often used with Continuous shooting mode in order to take a sequence of images with the focus adjusting between shots as the subject moves towards or away from the camera.
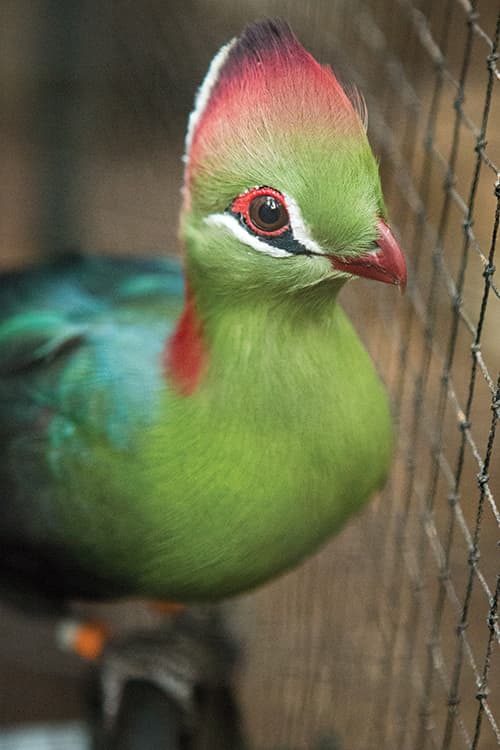
The bird was walking along a branch towards me which meant I was able to keep a single focus point more-or-less over his eye while I shot AI Servo AF to adjust the focus as he got closer to the camera
It is used in the same way as One-shot AF mode with the active AF point or area being positioned over the subject and the shutter being half-pressed to achieve focus. Because the camera is anticipating that the subject will move, it constantly checks focus and as result if this mode is used with a stationary subject the image in the viewfinder can seem jittery with focus shifting backwards and forwards very slightly.
Unlike with One-shot AF mode, even if it’s activated the beep will not sound nor will the focus confirmation light illuminate when focus is achieved.
AI Servo AF mode should not be used when employing the focus-and-recompose technique because the camera will refocus on the point under the active AF point when the image is recomposed.
AI Focus AF
In this mode the camera switches automatically between One-shot AF and AI Servo AF mode as it deems appropriate. If it detects that the subject is stationary it will use One-shot mode, but if it perceives movement it changes to AI Servo AF mode and tracks the target.
In this mode, when the Servo system is active the focus beep will sound softly but the focus confirmation light will not illuminate.
On paper, AI Focus AF mode seems like a convenient option, but it’s something of a compromise between One-shot AF and AI Servo AF mode. With moving subjects, for example, there can be a slight delay between the movement taking place, the camera recognising it and AI Servo mode kicking in. This can mean missed shots. It can also misinterpret camera movements (for example when using the focus-and-recompose technique) for subject movement and thus activate AI Servo AF mode when One-shot AF would be a better choice. Consequently, although this mode is intended as a multi-purpose option, in most situations it is best to set your camera to One-shot AF or AI Servo AF mode depending upon whether your subject is moving or not.

Using One-shot AF mode ensured this motionless subject was sharp
Focus and recompose
This is a technique that dates back to when cameras only offered one focusing area at the centre of the frame and it provides an easy means of getting the subject in focus while creating the composition that you want. Even today some people like to use it to save time changing AF point.
To use the technique, first ensure that the camera is set to One-shot AF mode then look through the viewfinder and position the active autofocus point over the subject. Next press the shutter release button down halfway to focus on the subject. Once focus is confirmed, keep your finger on the shutter release and reposition the camera (keeping subject distance the same) to create the composition that you want. Then press the shutter release home fully to take the shot.
It’s not essential, but it’s often a good idea to use the centre AF point because this is the most sensitive and gives your camera the best chance of getting the subject sharp in low-light conditions.
Focus points
Canon DSLRs offer a collection of autofocus points, varying in number from nine in the EOS 1300D and EOS 100D to 65 in the EOS 7D Mark II. The centre point is the most sensitive point, being cross type and is therefore able to detect contrast horizontally or vertically. There’s also double-cross type for even greater sensitivity.
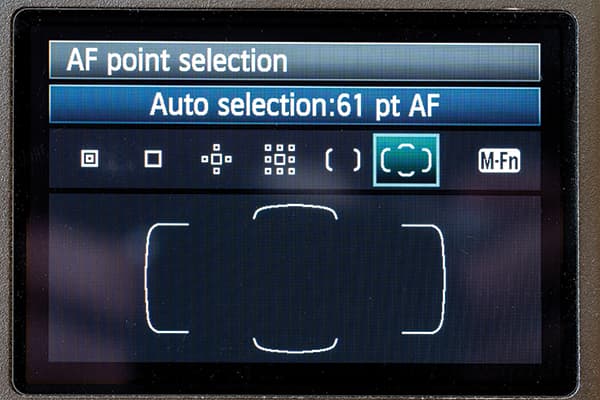
There are several options available for setting the active AF point. In X-Point Automatic Selection AF mode (for example, 61-Point Automatic Selection AF mode with the Canon 5D Mark III) the camera uses all the available points to determine where the subject is and to focus on it with no intervention by the photographer.
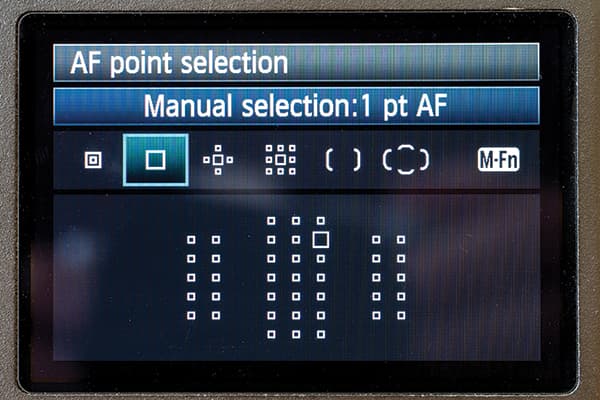
At the other extreme there’s Single-point AF mode in which you select one point to use for focusing. This is a great option with stationary subjects and when you are confident that you can keep the active point over the subject.
There are also Zone AF point options that group the AF points together into zones that can be selected. The camera then looks for the subject within the selected zone and focuses accordingly. This narrows down the target area in comparison with Automatic Selection mode and helps the camera determine where the subject is faster and more accurately. It’s a good choice with a moving subject when you’re shooting continuously because it’s easier to keep a zone over the subject than it is a single point.
Some of Canon’s more advanced DSLRs offer additional options such as Single-point Spot AF mode, which is a little more precise than the standard Single-point AF mode and AF-point expansion options that are essentially smaller zone focusing options.
Step by step: How to set the AF and AF point selection modes on the Canon EOS 5D Mark III
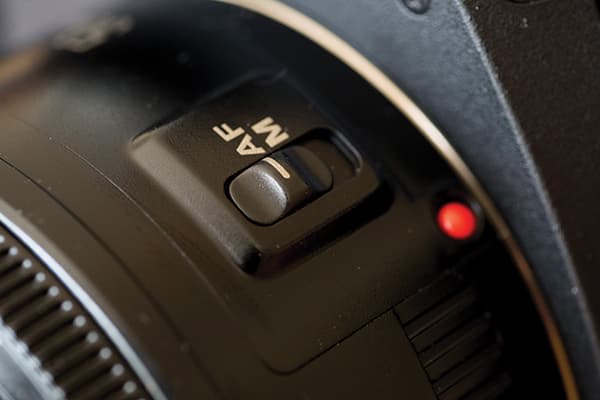
1. Canon EF and EF-S lenses have a switch to set them to manual or autofocus mode so the first step is to ensure that this is set to the correct position, and if not give it a flick.
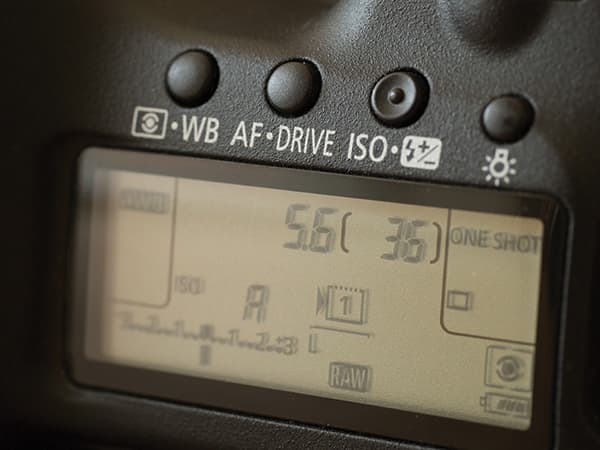
2. Now press the AF/Drive button on the top-plate of the camera and look at the top LCD screen. Rotate the front dial near the shutter release button until the desired AF mode is displayed.
3. Now to set the AF point selection mode. First press the AF point button on the back of the camera then look through the viewfinder while pressing the M-Fn button to toggle through the options.

4. In 61-point Automatic selection AF mode the camera will select the AF point automatically, so if you’ve selected this mode you’re all set to start shooting.
5. In any of the other modes, look through the viewfinder and press the AF point button to display the available points/zones. Now use the mini joystick control or the dials to select the point you want to use.
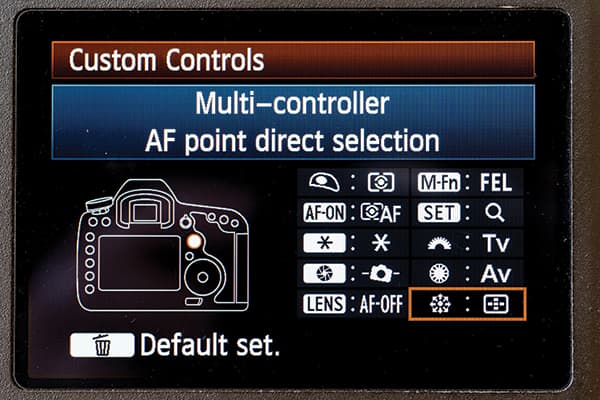
6. To speed up AF point selection, use the Custom Controls in Custom Function menu 2 to enable you to set the AF point directly with the joystick without pressing the AF point button.