
Our lens is the eye to your camera, and is used to focus light. Every surface and object reflects light and it’s the lens’s job to pass it through to your camera’s sensor to record the image. If you have a scientific mind and understanding you probably already have a good idea of how your lens is constructed and works, however most photographers may not even give it a second thought. Although you certainly don’t need a PhD in physics to take a great shot, it can help you get better results if you have some understanding about how your lens is constructed and what you need to be aware of when it comes to sharpness.

Keeping your image pinpoint sharp for many is crucial. By understanding your lens you can know where it performs at its best and where you might need to correct the issue
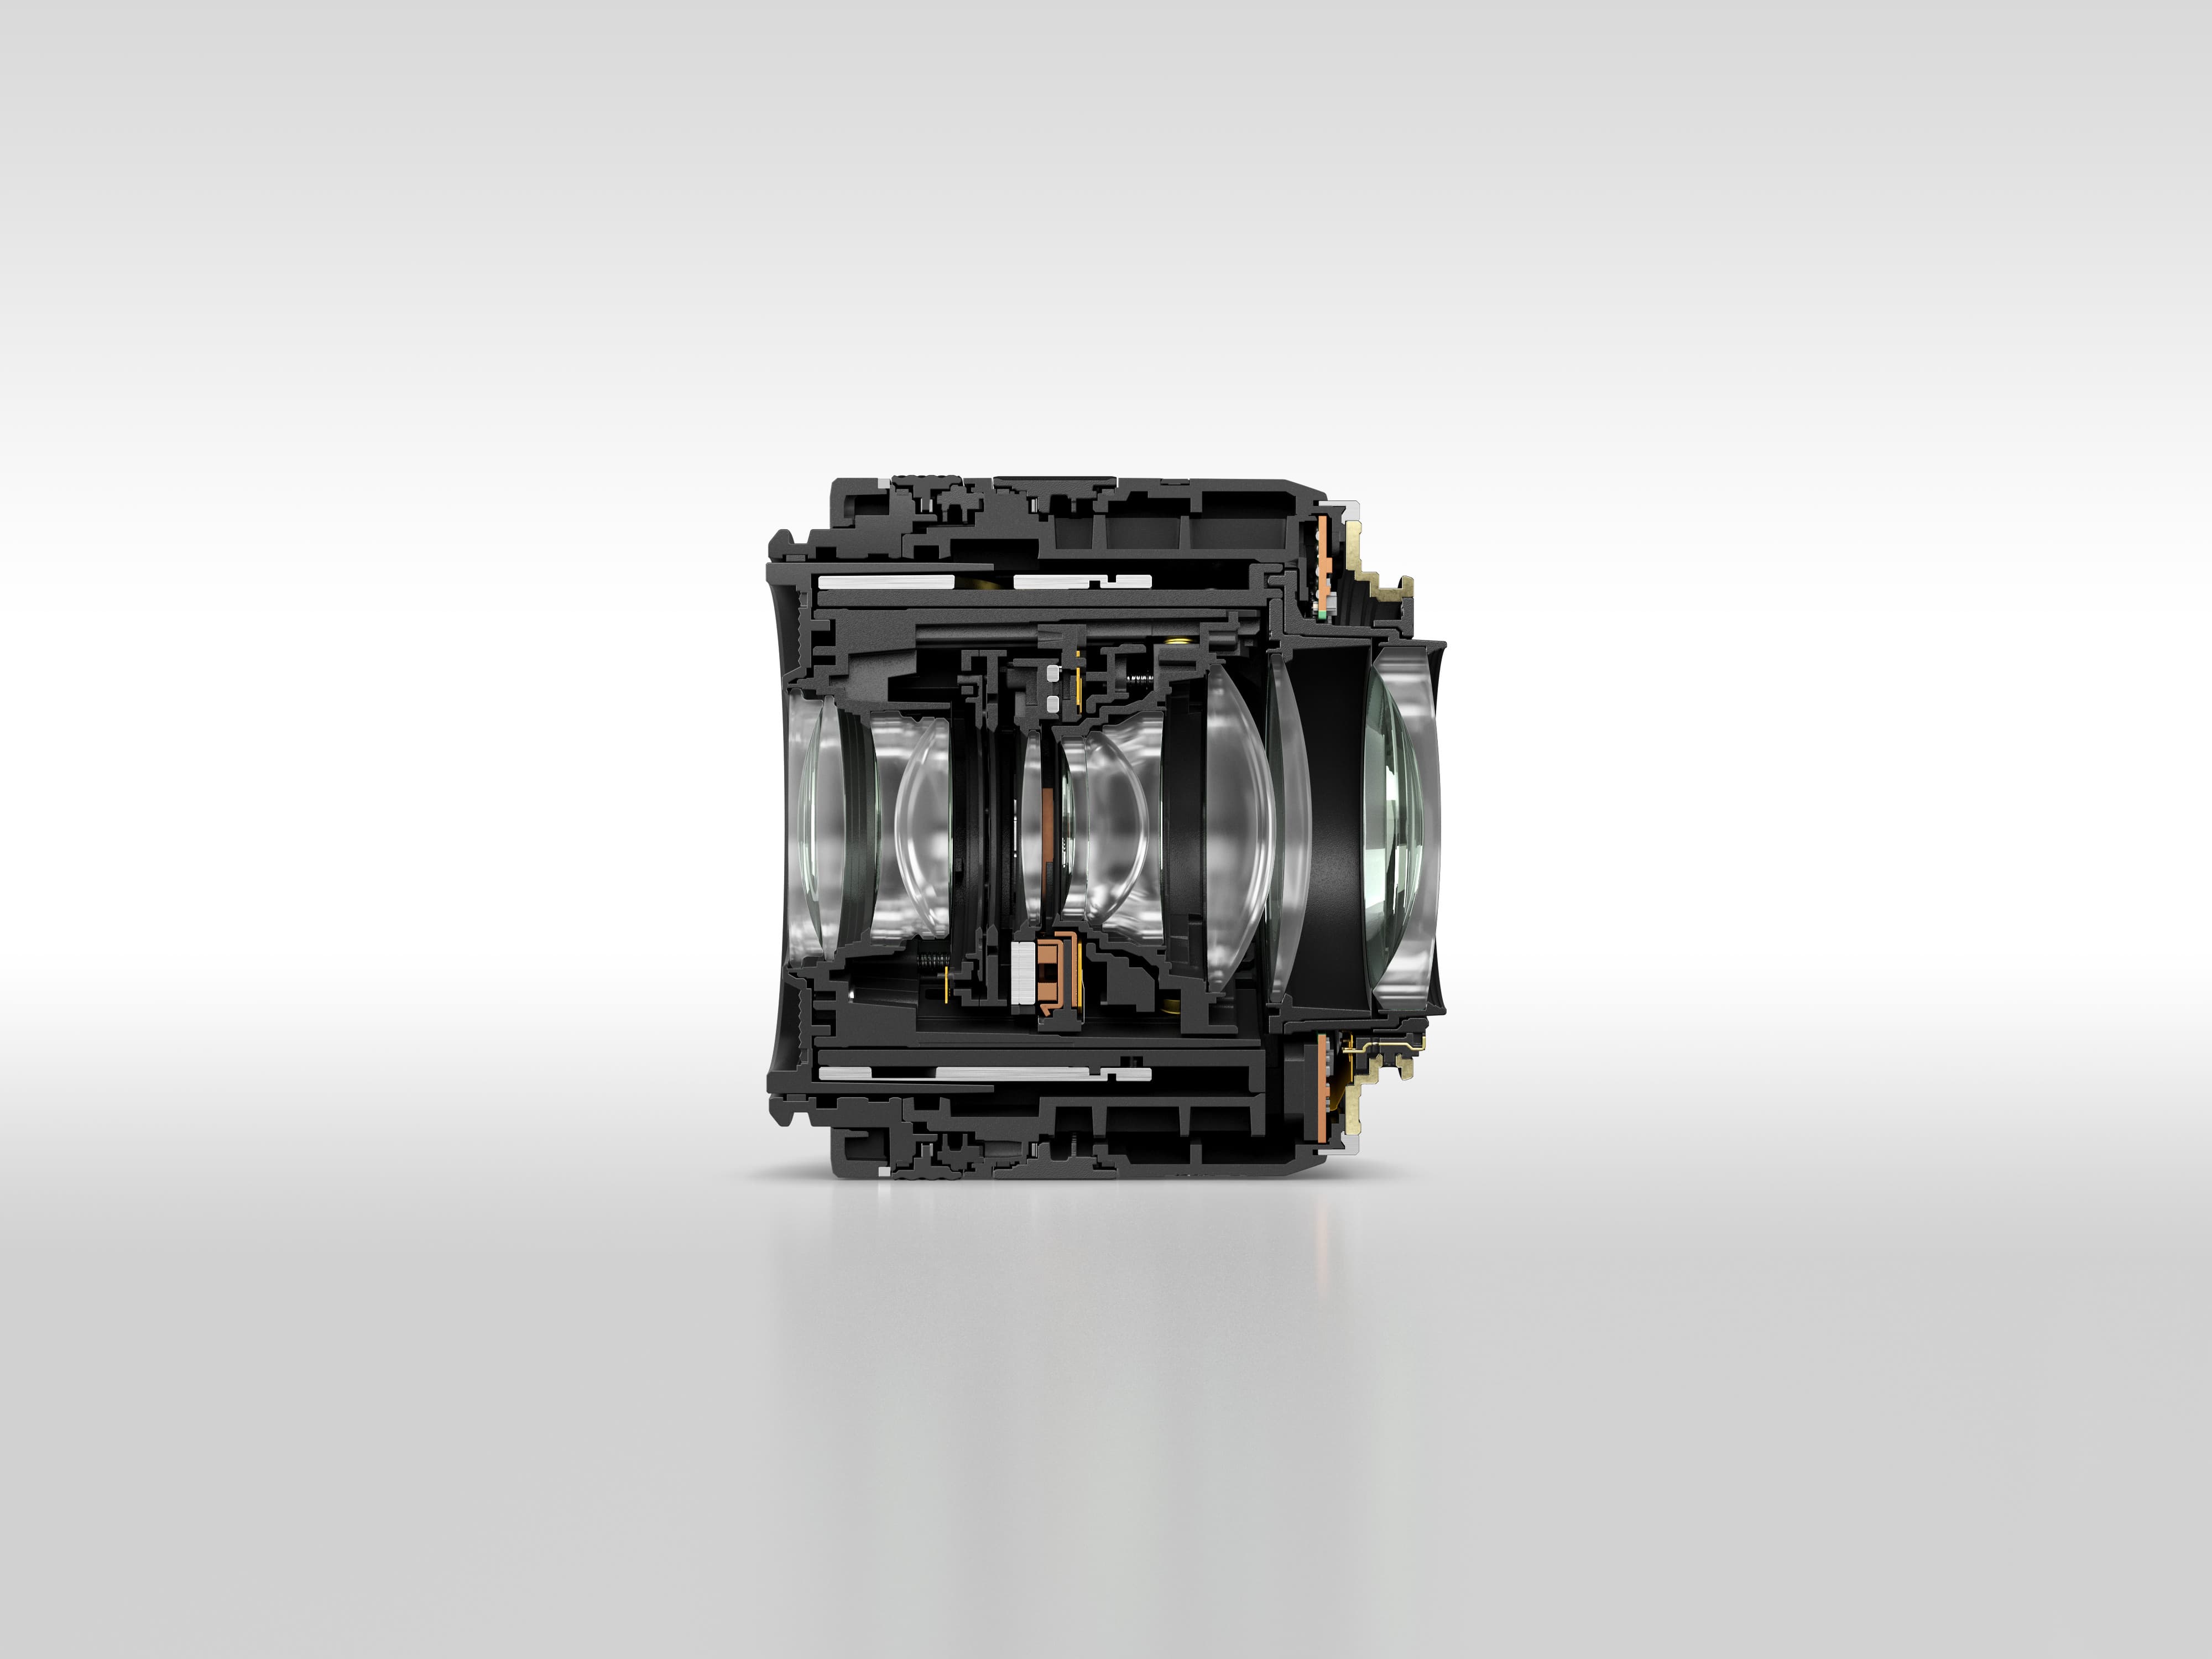
The basics
A lens consists of curved material, normally glass, that forms an image on your camera’s sensor. But even a pinhole camera can produce a recognisable image, so what does a lens add? Essentially it can gather much more light, and focus it more sharply. However lenses inevitably include optical flaws such as distortion and chromatic aberration, which are addressed by using multiple lens elements (see tip 2), and increasingly by computational rectification. However nothing is perfect and these optical flaws are never completely eliminated, especially in cheaper lenses. As a result, we might get a result that we are not entirely happy with.
Lens elements
The elements inside your lens are described by their shape. For example a plano-convex element is flat on one side and curves outwards on the other, and a plano-concave element curves inwards on one side and flat on the other. Lens elements are used either individually or in groups, so a lens specification might read six elements in five groups, meaning two of the elements are cemented together. Zooms are usually more complex than primes, for example the Canon EF 70-200mm f/4L IS II USM has 20 elements in 15 groups, while Sigma’s 50mm F1.4 DG HSM has 13 elements in eight groups. The art of lens design is to combine all these elements to give a sharp image with minimal aberrations. However the number of elements and groups doesn’t define the quality, as other factors are also at play, such as the glass types used.
Focal length sharpness test
Not sure of the sharpest focal length of your zoom lens? Place your camera on a tripod, point it square-on to an evenly lit brick wall, switch off any image stabilisation and zoom the lens to its widest focal length. Now open up the lens to its largest aperture and take a shot. Repeat at each marked focal length setting on your lens. Once done, review each image file at 100% for sharpness. Check the middle and edges of the frame; you will probably see some softening in the corners, and the wider your lens, the more obvious this is likely to be. You can also check for barrel distortion, which you can expect to see at the wider focal lengths, along with pincushion distortion at the other end of the zoom. No two lenses are the same, so it’s a useful exercise to test all your lenses and compare them to each other. As well as testing your lens with the aperture wide open, it’s also very useful to check how it performs as you stop down, to understand how to obtain the sharpest pictures (see tip 4).

This image has been shot at f/8 which on this lens is the sweet spot
Aperture and the sweet spot
Every lens has a ‘sweet spot’ aperture setting where it will produce the sharpest results. Closing down the aperture will initially increase sharpness by reducing aberrations, but at some point the image will start to soften again due to diffraction (see tip 5). To find your lens’s sweet spot take a test shot of the same subject under a consistent light source across all the aperture settings and compare the results. Usually the sharpest images will be obtained when you close the aperture down by one or two stops.
At f/22 diffraction is noticeable and the image looks soft when zoomed in
Diffraction
Diffraction occurs when the light rays are spread out slightly when passing by the aperture blades, which results in softening of the overall image. This effect is most visible at smaller settings because a larger proportion of the light travels close to the aperture blades. However, it’s often an acceptable trade-off to gain increased depth of field. On cameras with smaller sensors, diffraction becomes visible at larger apertures, so it’s important to avoid stopping down so far.
Is it the lens or the autofocus?
If you shoot with a DSLR using the viewfinder, then the autofocus uses a separate, dedicated sensor. By and large this will do a good job, but sometimes it may focus slightly in front of, or behind the subject. Either will result in soft images when shooting with a fast lens at large apertures. If you suspect this is happening, compare the image sharpness using autofocus with live view manual focus. You may need to fine-fune your AF settings (see tip 11).
What are diffractive optics?
Some lenses use diffractive optics, in which an optical element employs a stepped surface rather than a smooth one to alter the path of the light rays. This technology brings several benefits. It’s effective at suppressing multiple lens defects at once, including both spherical and chromatic aberration, which cause image softening and colour fringing around the edges of subjects. As a result, lenses can be made significantly shorter and lighter. On the other hand, the cost of this technology can be higher as it’s more challenging to manufacture, and some have argued that the results are not as good as traditional lenses.
Why invest in glass?
There is a big difference between lower- and higher-end lenses, but why is that? Obvious reasons include the durability of the material used for the outer casing, and the complexity of the aperture construction. But the glass components also vary greatly in quality. High-end professional lenses are more likely to use complex optical formulae that make extensive use of exotic glass types to minimise aberrations. They may also use higher-quality ground-glass, rather than glass-molded or hybrid aspherical elements. These are hand-pressed, shaped and handled by expert engineers, who also test for potential problems. If you want guaranteed sharpness, you have to pay!

Keeping your main subject sharp in the frame is vital for shots like this
Fluorine and Fluorite
These two words are similar and can cause confusion when talking about modern lenses. Fluorine refers to a special coating that’s applied to the outermost glass surfaces to repel things like dust and dirt. Keeping your lens clean is crucial, as marks on the front element can result in image-degrading flare. Fluorite, on the other hand, is a mineral that can be used to create optical elements inside a lens and is sought after for capturing high-quality images. It’s a monocrystalline substance that reduces chromatic aberration, resulting in sharper-looking images. It’s also lighter than glass, which has the added benefit of reducing the lens’s weight.

Focus fall-off
If you are shooting a group of people, focus fall-off can be especially annoying. The edges of the frame are often softer at the wider aperture settings, so if you are shooting a group of people this will be problematic. We recommend you shoot around f/8 to keep sufficient sharpness across all of your subjects. It may also help to arrange your group in an arc so they are all at a similar distance from the camera.
Fine-tuning your lens
When you purchase a lens you may need to calibrate it to match your camera. As explained in tip 6, this is because DSLRs use a separate autofocus sensor, unlike mirrorless cameras that use the main image sensor for AF, which is inherently more accurate. It’s easy to assume that you’ll instantly get great results as soon as you attach your lens onto your camera, however remember that lenses and cameras are made in different factories, and there are margins of error during the construction period that the manufacturers deem acceptable. Calibrating each lens to each camera body you use will give best results.

Both images were shot at f/1.8. The first was shot with the AF microadjustment set to its default value of 0…
You can calibrate your lens at home with the help of a special chart (or if you don’t have one of these, simply use a test object and apply the same method). Start by putting your camera into aperture priority and opening the aperture to the widest setting. Mount onto a tripod and place your chart or object around 6ft away from your camera. Go to your camera’s lens calibration feature (on Nikon it’s Autofocus Fine Tune, Canon – Autofocus AF Microadjustment, and Sony – Auto Focus (AF) Micro Adjustment) and take a shot with the value set at 0. Then shoot in intervals of 5 from -20 to +20, and review the results on a computer screen to compare the sharpness of your main focal point. You then can tune finer once you know roughly what your setting needs to be. For example if +5 is the sharpest setting, take another series of shots from 0 to +10, and use whichever value gives best results.

…and the second at +6. This image at +6 is much crisper and in focus
Filters and lens sharpness
There is much debate about whether filters affect lens sharpness. For example a UV filter is an easy way to protect the front of your lens from scratches and glare, but is it worth it if you are compromising on image quality? If you are worried, shoot a comparison test with and without a filter and weigh up your options. How annoyed would you be if your lens got scratched in comparison to losing a touch of image sharpness? One thing is for sure, using a lower or cheaper grade filter is more likely to harm your images compared to one of a higher quality. Again it pays to invest but you may
need to compromise somewhere.
Field curvature
This is a common lens flaw that causes a flat object to appear sharp in only certain parts of the frame. It occurs when the lens focuses light at slightly different distances between the centre and the edges of the (flat) image sensor. If you spot this issue we advise that you stop down the aperture, although this may risk diffraction. If that is the case then another option is to attach your camera to a tripod and focus stack to ensure you have complete sharpness. Generally telephoto lenses (100mm and upwards) don’t display this issue as much as wideangle lenses.
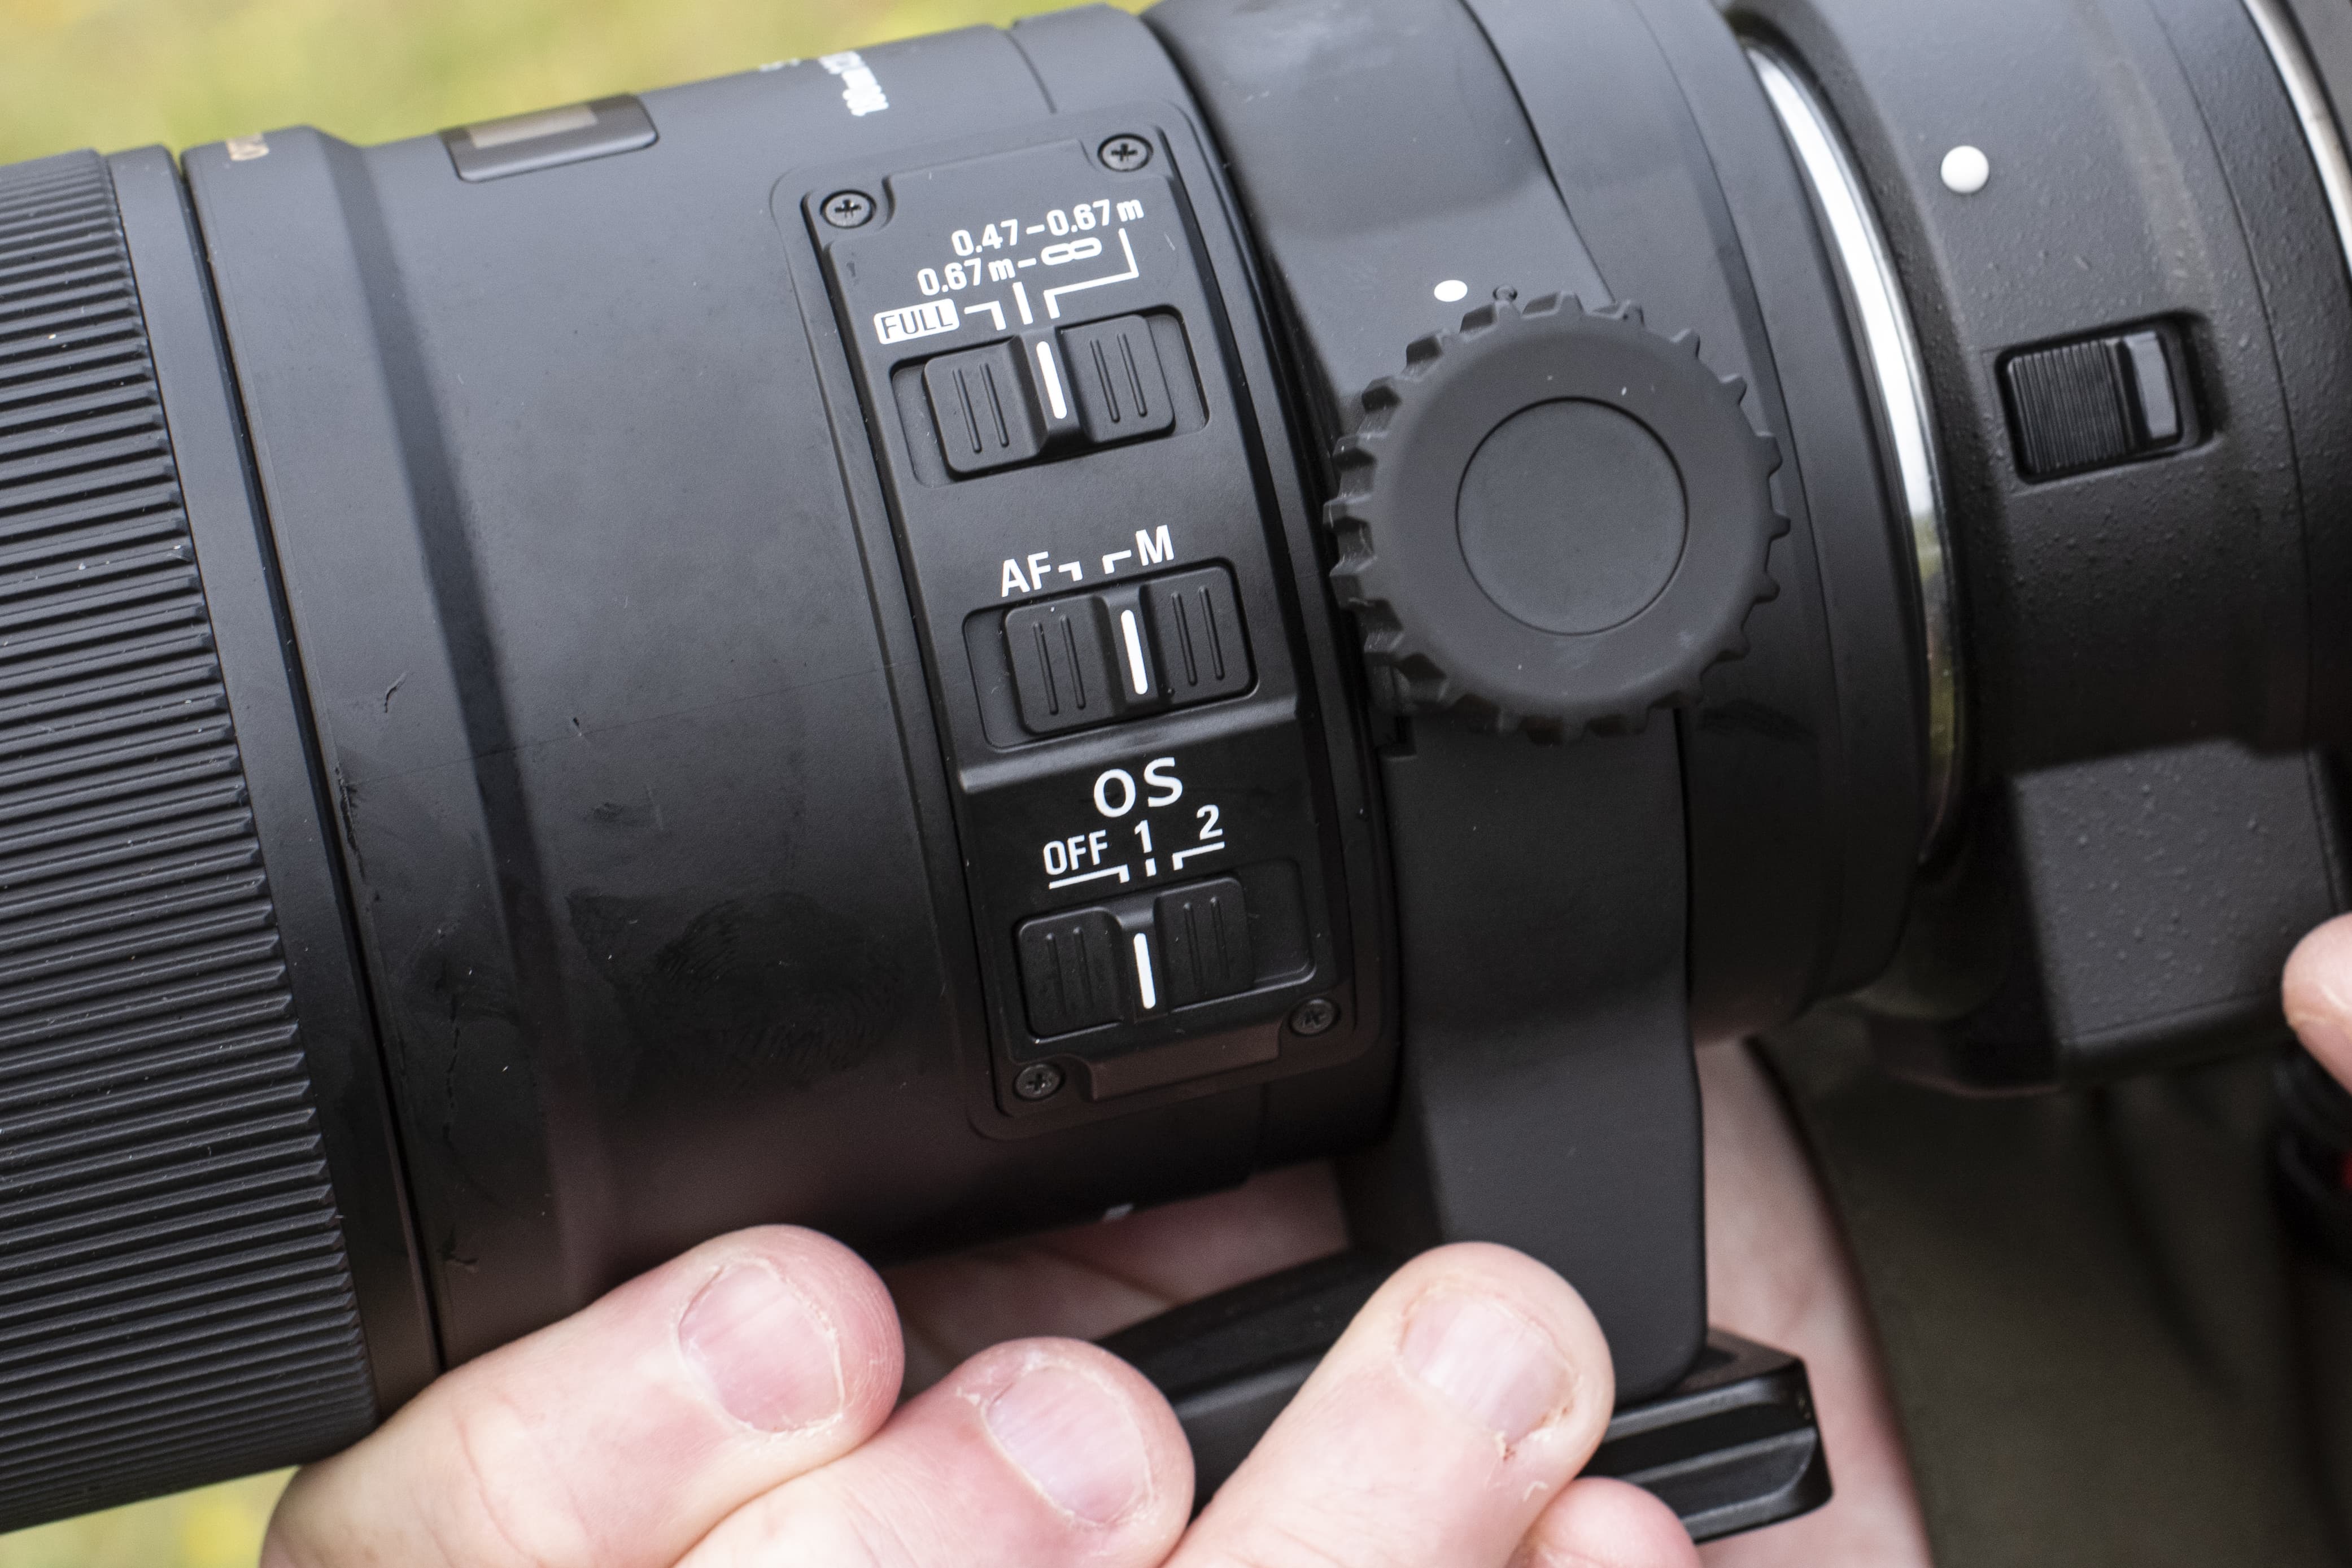
For the best results, switch your image-stabilisation feature on when shooting handheld, but off if using a tripod
When do you need stability?
Lenses now routinely include optical stabilisation systems, denoted using names such as Vibration Reduction (VR) by Nikon, Image Stabilisation (IS) by Canon and Optical Stabilizer (OS) by Sigma. Although this is great when shooting handheld, if you leave them enabled when your camera is on a tripod they can sometimes soften your image. As a guideline, switch them on when shooting by hand, but to be safe turn them off if using the tripod.

Adding too much sharpening creates an unappealing look
Can I fix sharpness?
Yes you can (to a small degree). Many small lens sharpness issues can easily be resolved in an image-editing program such as Photoshop. Take for example the Unsharp mask tool where you can tweak the sharpness in the image to enhance the focused areas. Note the Unsharp Mask isn’t magic and sharpening will only be applied to the areas in the image that are in focus. The trick with any type of sharpening is knowing where to stop! If you go too far your image will look oversharpened which isn’t appealing.

This image was shot with an old wideangle Sigma lens and although there are many technical flaws such as softening at the edges, the overall effect is still appealing
Does a lens lose sharpness over time?
In short, no! It might be that the parts of the lens such as the focusing ring and mount have perished over time, however if the lens has been kept in good condition and not knocked about it should be as good as the day it was made. If you have an old lens in good condition you might notice that its sharpness is not as good in comparison to a more recent purchase. Modern lenses are much more advanced compared to lenses made decades ago (and zooms in particular) so there will be corresponding differences in sharpness. However old lenses shouldn’t be discounted, as while they are not always sharp and accurate, they have character and flaws that can appear charming and retro if used in a sympathetic manner for an appropriate subject.
Lens firmware
Just as your camera has firmware updates, from time to time it’s worth checking to see if your lens does as well, to keep it up to date. There are several ways to update the firmware on your lens, usually either via the camera body, or using the manufacturer’s docking system to update the lens directly. Some lenses even have built-in USB ports! Refer to your lens manufacturer for advice on this aspect and for the availability of firmware updates.
Decentered lens
Even if you buy a new lens there is a small chance that the elements may have become decentered and this can potentially lead to blurring and softening in the image due to the divergence of light rays. It could be that the delivery guy dropped the box onto your doorstep, or the lens got knocked somewhere along the way in construction. Whenever you get a new lens, run the sharpness check immediately. That way if you are not happy with the results you can send it back to the manufacturer. If you are buying a second-hand lens we recommend you do so only from a trusted dealer or where you can check the lens quality before purchase. Also note that if one element in your lens is only slightly decentered, sometimes by simply stopping down to a smaller aperture this will fix the issue.
Watch how lenses are made
We found a fascinating video from 2013 on YouTube made for the 80th anniversary of Nikkor lenses. It reveals a behind-the-scenes look at the firm’s lens factory in Japan. Go to https://www.youtube.com/watch?v=Abybv2LrmK8 to watch the video and enjoy!