
Your guide: Kingsley Singleton
Kingsley is an experienced photographer, tutor, and writer with decades of experience in shooting technique and image editing. Specialising in landscapes, nature and travel subjects, he lives in Lincolnshire but likes to travel to hillier places. @kingsley.photo.
There is still time to enter the Black and White round of our Amateur Photographer of the Year competition, so we’ve got some great tips to raise your chance of success. While much success comes in how you process black & white images, you can certainly give yourself a helping hand from a shooting perspective, too. For starters, while black & white has gone from a restriction to a creative choice, like any choice, it should be made carefully.
Picking the right moments to use it should be key. It’s a treatment that should emphasise what you want to show in the subject, never disguise the shortcomings of a scene. Simplicity should be a driving force, too. Without colour to distract attention, the viewer’s focus will immediately be concentrated on the shape and contrast in an image, so in many ways composition becomes even more demanding.

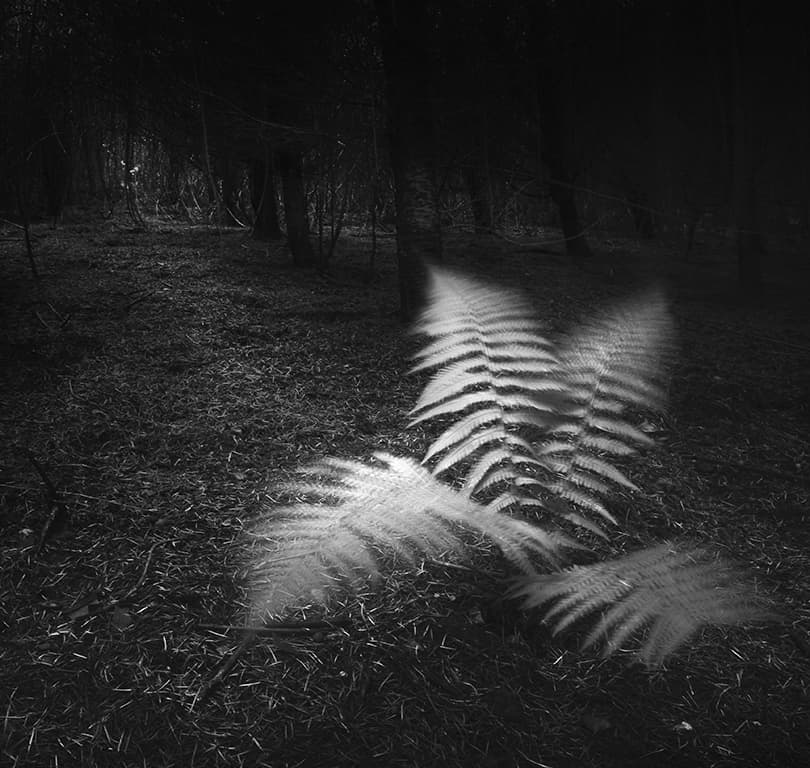
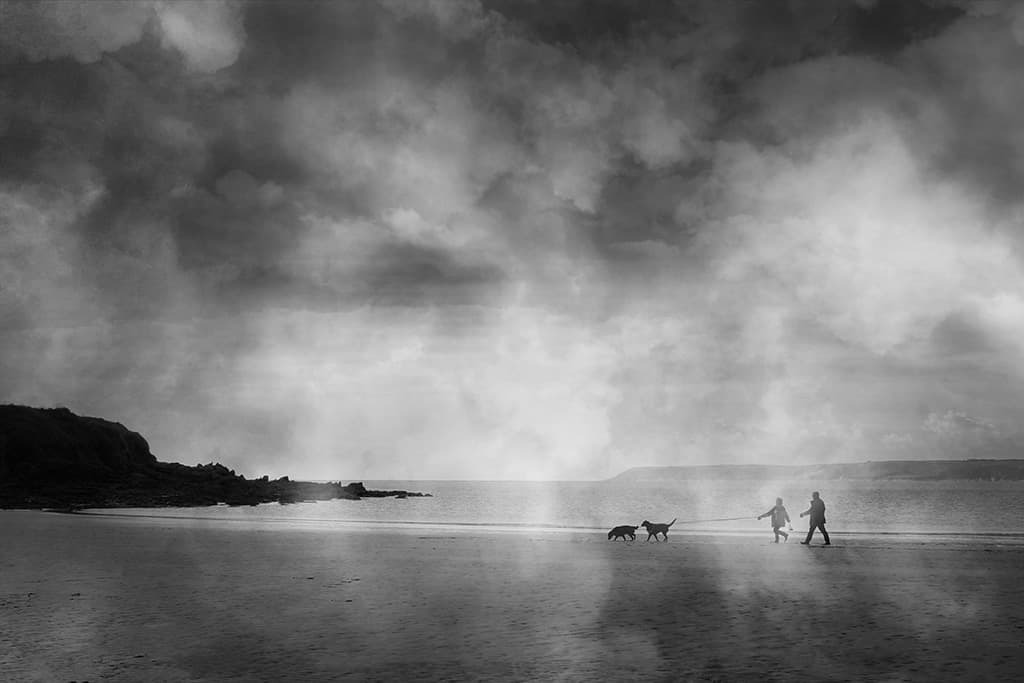
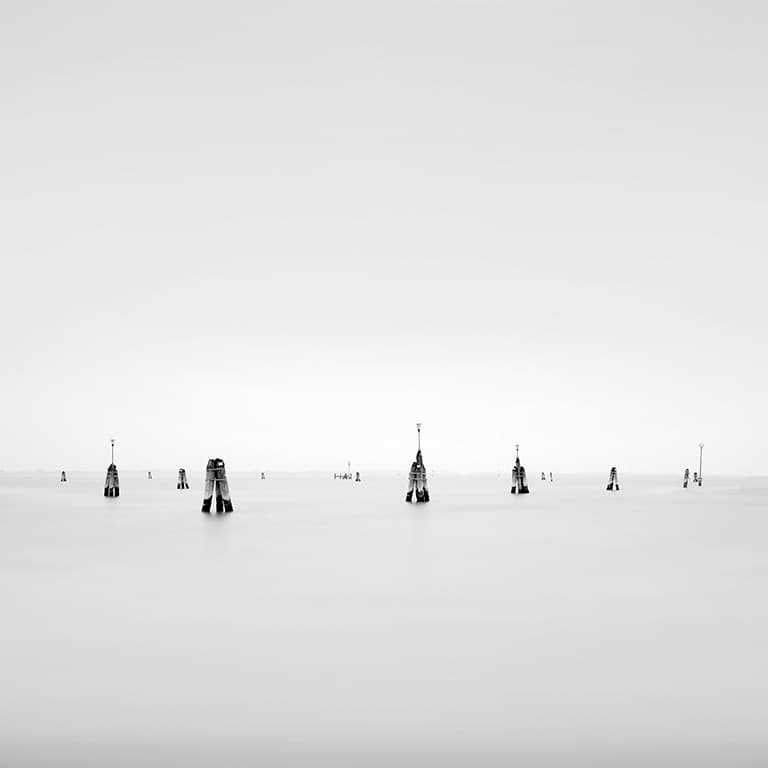
This simple long exposure becomes an effective image due to the natural contrast in the scene. Pentax K-5, 16-50mm, 10sec at f/16, ISO 20
Like any technique or subject, experience will help you ‘see’ subjects that’ll work in black & white more quickly – the more you do it, the better you’ll get. So, from that point of view, if you want to get better at it, it’s a good idea to really immerse yourself in black & white imagery. Look at the work of other photographers or go outside the realm of stills into illustration and black & white movies or TV.
See how it’s used as a style, what effects you like and what inspires you to create something yourself. Once you’re inspired, there are plenty of simple things you can do to improve your black & white images while shooting, so take a look at these tips to help get you started.
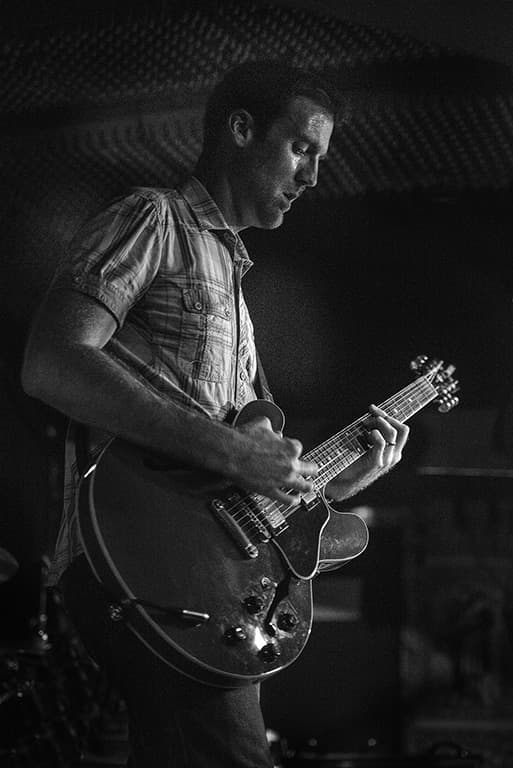
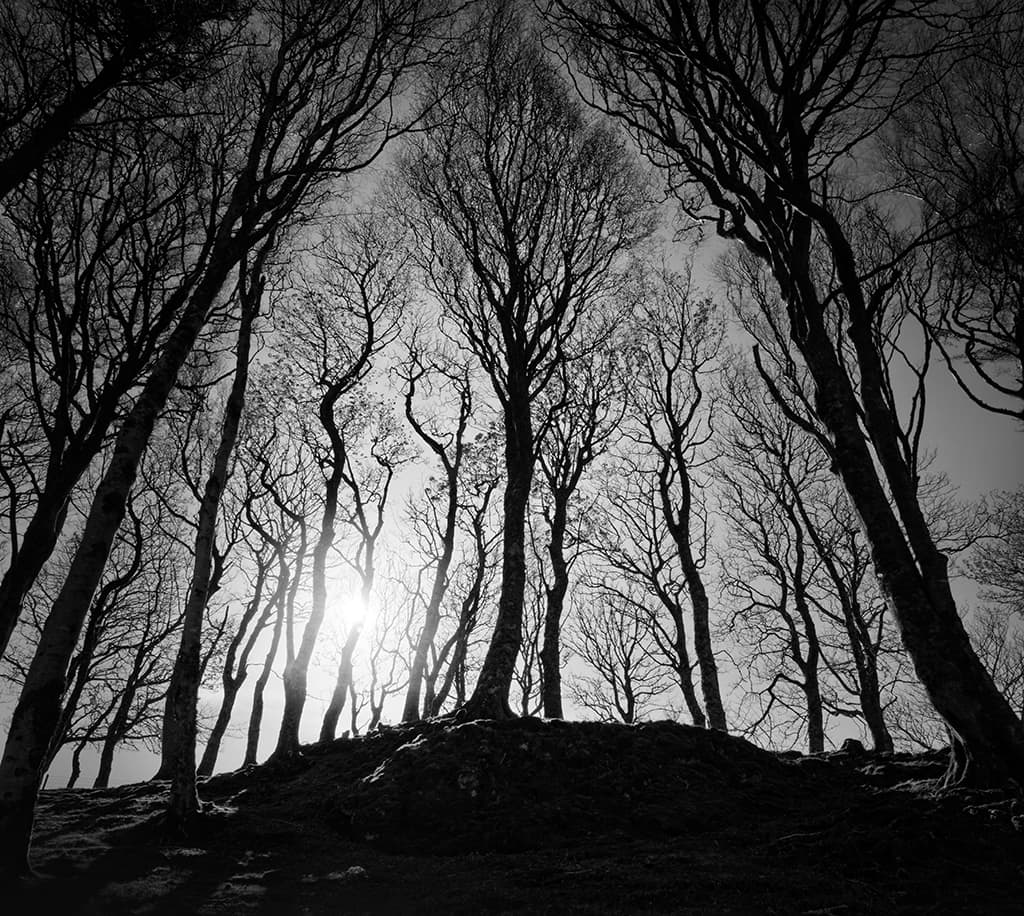
Seek out contrast for monochrome subjects
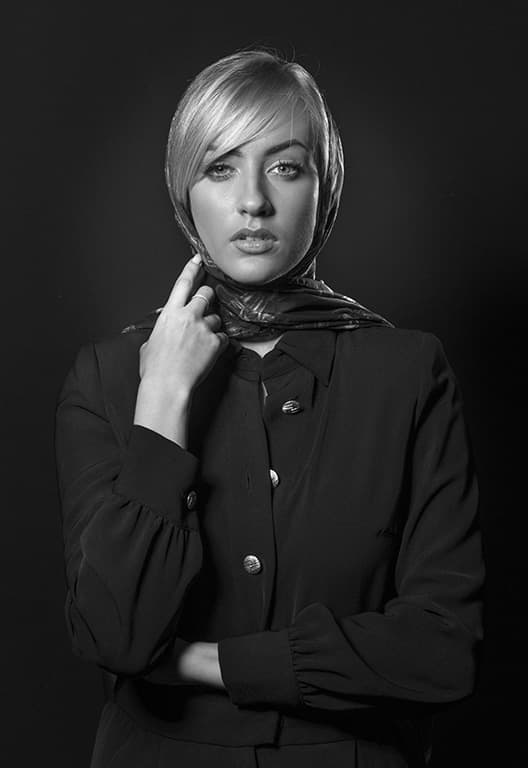
Whether you find it out in the wilderness, in nature, in the man-made world, or you create it yourself in the studio with portraits or still-life compositions, heavy contrast is a natural fit for monochrome. But rather than a sort of textured contrast with disparate tones spread across the frame, which can be confusing and challenging for the viewer, it can be far more successful to concentrate on a simple juxtaposition of tones.
A light subject against a dominant dark background, or a dark subject against a broadly light backdrop gives lots of impact but retains a simplicity that can be more aesthetically pleasing.
This simple long exposure becomes an effective image due to the natural contrast in the scene. Pentax K-5, 16-50mm, 10sec at f/16, ISO 20
Work the contrast with the right exposure
Even if you find subjects with an attractive contrast, without the right approach in camera they might not look as you’d imagine. Why? Well, set to its most general metering mode, your camera will try to make the best balance it can between highlights and shadows, which can result in quite a bland-looking scene.
To fix this, try under or overexposing the metered settings using either a manual adjustment to the shutter speed or your camera’s exposure compensation setting. If you’re using a camera with an EVF or live view you can assess this on screen or using an exposure histogram to check that the shadows and highlights are strong enough.
See better in black & white
For generations, photographers have known the need to ‘see in black & white’, essentially being able to tell which sorts of compositions and subjects work without colour and which don’t. This instinct is especially useful when using film. After all, you can only fully grasp whether a monochrome composition is successful after it’s been processed.
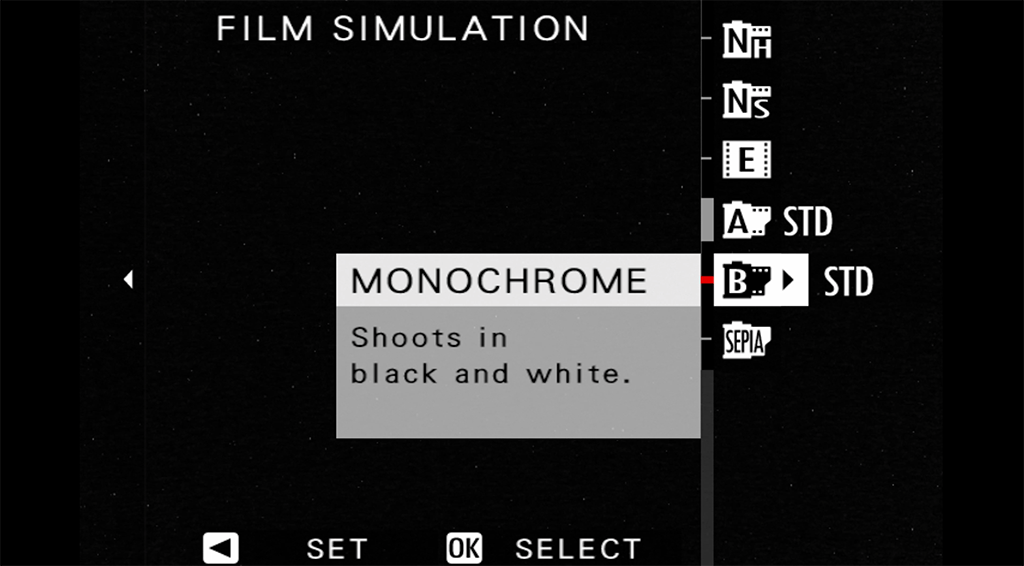
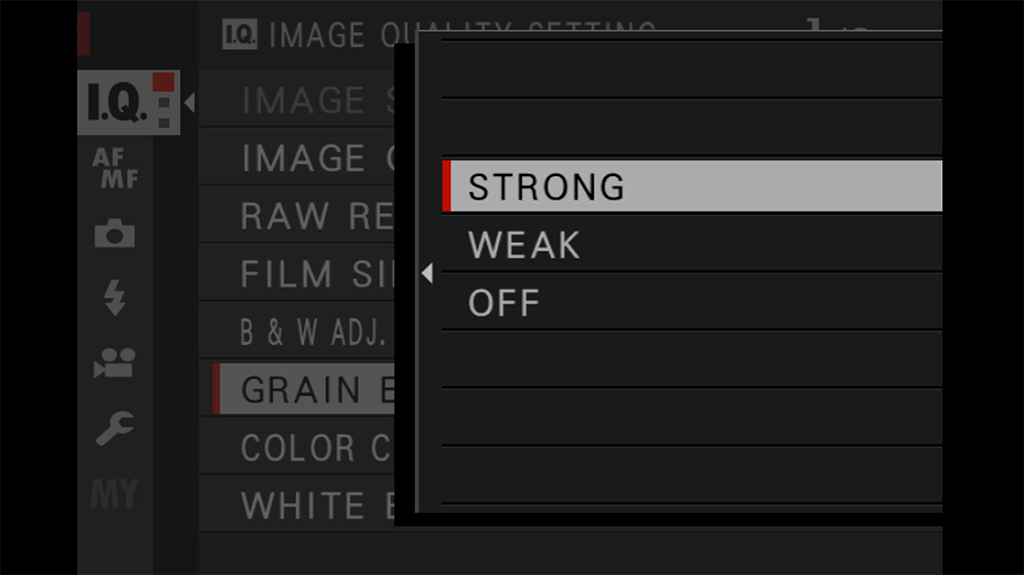
But as with so many other things, digital cameras make it easier. If your camera has a monochrome mode, which the lion’s share do, you can see in real time what works and what doesn’t. Find the camera’s picture mode and you’ll be able to switch to monochrome and literally see what you’re about to get through the viewfinder – or on the screen if you’re using a DSLR. Many cameras will also let you use different monochrome looks, like setting higher or lower contrast settings.
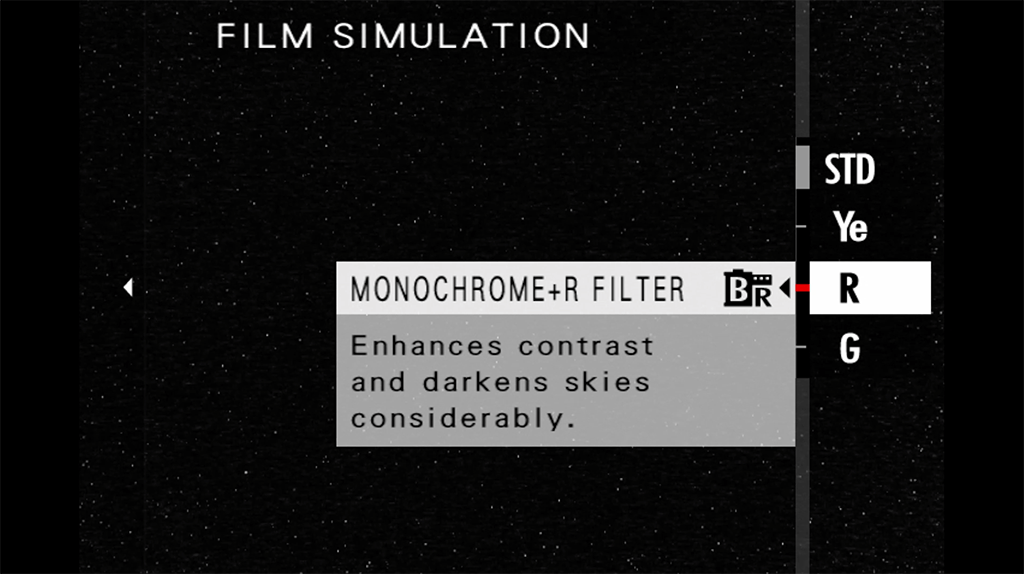
For instance, Fujifilm’s X-series cameras have black & white Film Simulation modes including Monochrome and ACROS that can also replicate the use of red, yellow or green filters, as well as applying warm or cool toning effects. Set to a picture mode like this, any JPEG will be monochrome, but if you shoot raw, you’ll still get full-colour files. Therefore, it’s best to set image quality to Raw+JPEG if you want the best of both worlds.
Start a black & white project
Here’s the thing: black & white photography is best mastered like anything else, with practice and repeated attention to the subject. Dipping in and out with fleeting forays into monochrome when you feel like it, won’t get you creating great images anywhere near as fast. That’s why devoting yourself to a black & white project is a really good idea.
So, why not kick off the year by starting a monochrome series? Of course, this doesn’t mean you should just pile together a random selection of photos… instead pick a theme that you think will work in mono. Sequences of images can work more effectively when toned in a particular way, so all manner of projects you pair with a black & white approach can look tighter and more coherent in this way.
Make multiple exposures
Another in-camera effect that works beautifully with a monochrome treatment is a multiple exposure. Bringing a strong subject together with textures and framing elements can be a tricky balancing act, but it’s made much simpler without colour to get in the way.
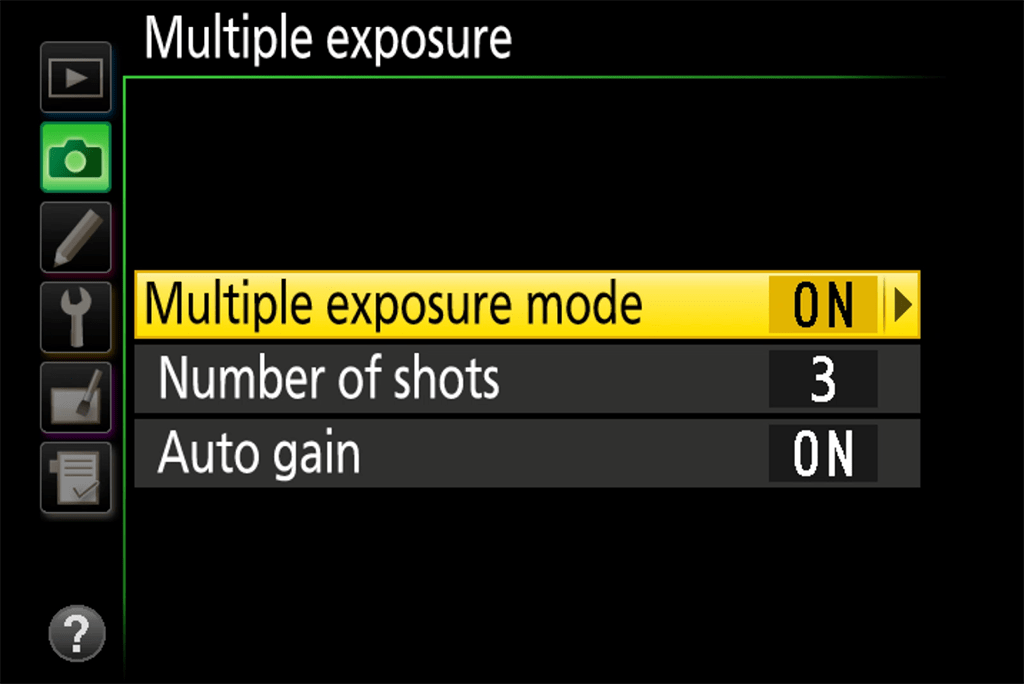
In a monochrome approach, you can keep attention on the subject, because there’ll be no clash between coloured elements to throw off the viewer’s eye, so you can look to exploit textures and shapes with greater freedom. Most modern cameras have a multiple exposure mode, and some helpfully let you preview the results ‘live’ as you’re framing to aid composition.
Mix mono with ultra-long exposures
A black & white approach is a natural fit with long-exposure photography for several reasons. For starters, if you’re making your long exposure using a very strong ND filter, it’ll likely come with a colour cast, often shifting towards magenta or green and looking unnatural.
Sure, this can be corrected in post, but it’s not always successful and the simplest and easiest option is to bin the colour entirely and enjoy the image in monochrome. Which brings us to the second and main reason to approach your long exposures in black & white: simplicity. Long-exposure images, especially those which include the blurred motion of clouds, water, or people, have an intrinsic calm to them, and removing colour is allied to this.
Shoot in poor light and bad weather
You’ll find that lighting conditions and weather which wouldn’t be great for colour can work much more effectively in black & white. Naturally monochrome scenes like those in mist and fog are a great fit, and can produce beautifully subtle images, but so are rainy days, where you can make the most of leaden skies.
But high-contrast, sunny conditions like those around midday can also work wonders, especially if you get a bold mixture of sunlight and shade creating a balance in the frame. In these conditions you can look for shadows making interesting shapes, or striking silhouettes, while heavy shadow also adds definition to architectural subjects, making towns and cities a good option to shoot in.
Embrace the grain
We all know that shooting at very high ISOs causes noise in a digital image. But this has always been part of photography, we just used to call it film grain. Shooting at high ISOs in colour can look quite unsightly. In monochrome on the other hand, it has a whole different appeal. Grainy black & white images remind us of classic fast film stocks like Kodak Tri-X 400 or Ilford HP5 Plus used for low-light, street and documentary work.

OLYMPUS DIGITAL CAMERA
And that’s a clue to how you might like to use it, letting the grain combine with a monotone setting and strong vignettes to give a classic look to those subjects. You’ll find that many cameras now offer a grain setting in their picture controls, which allows you to add grain, change the size or intensity. If you can, save these settings as a preset, so that you can apply them consistently across a series of shots.
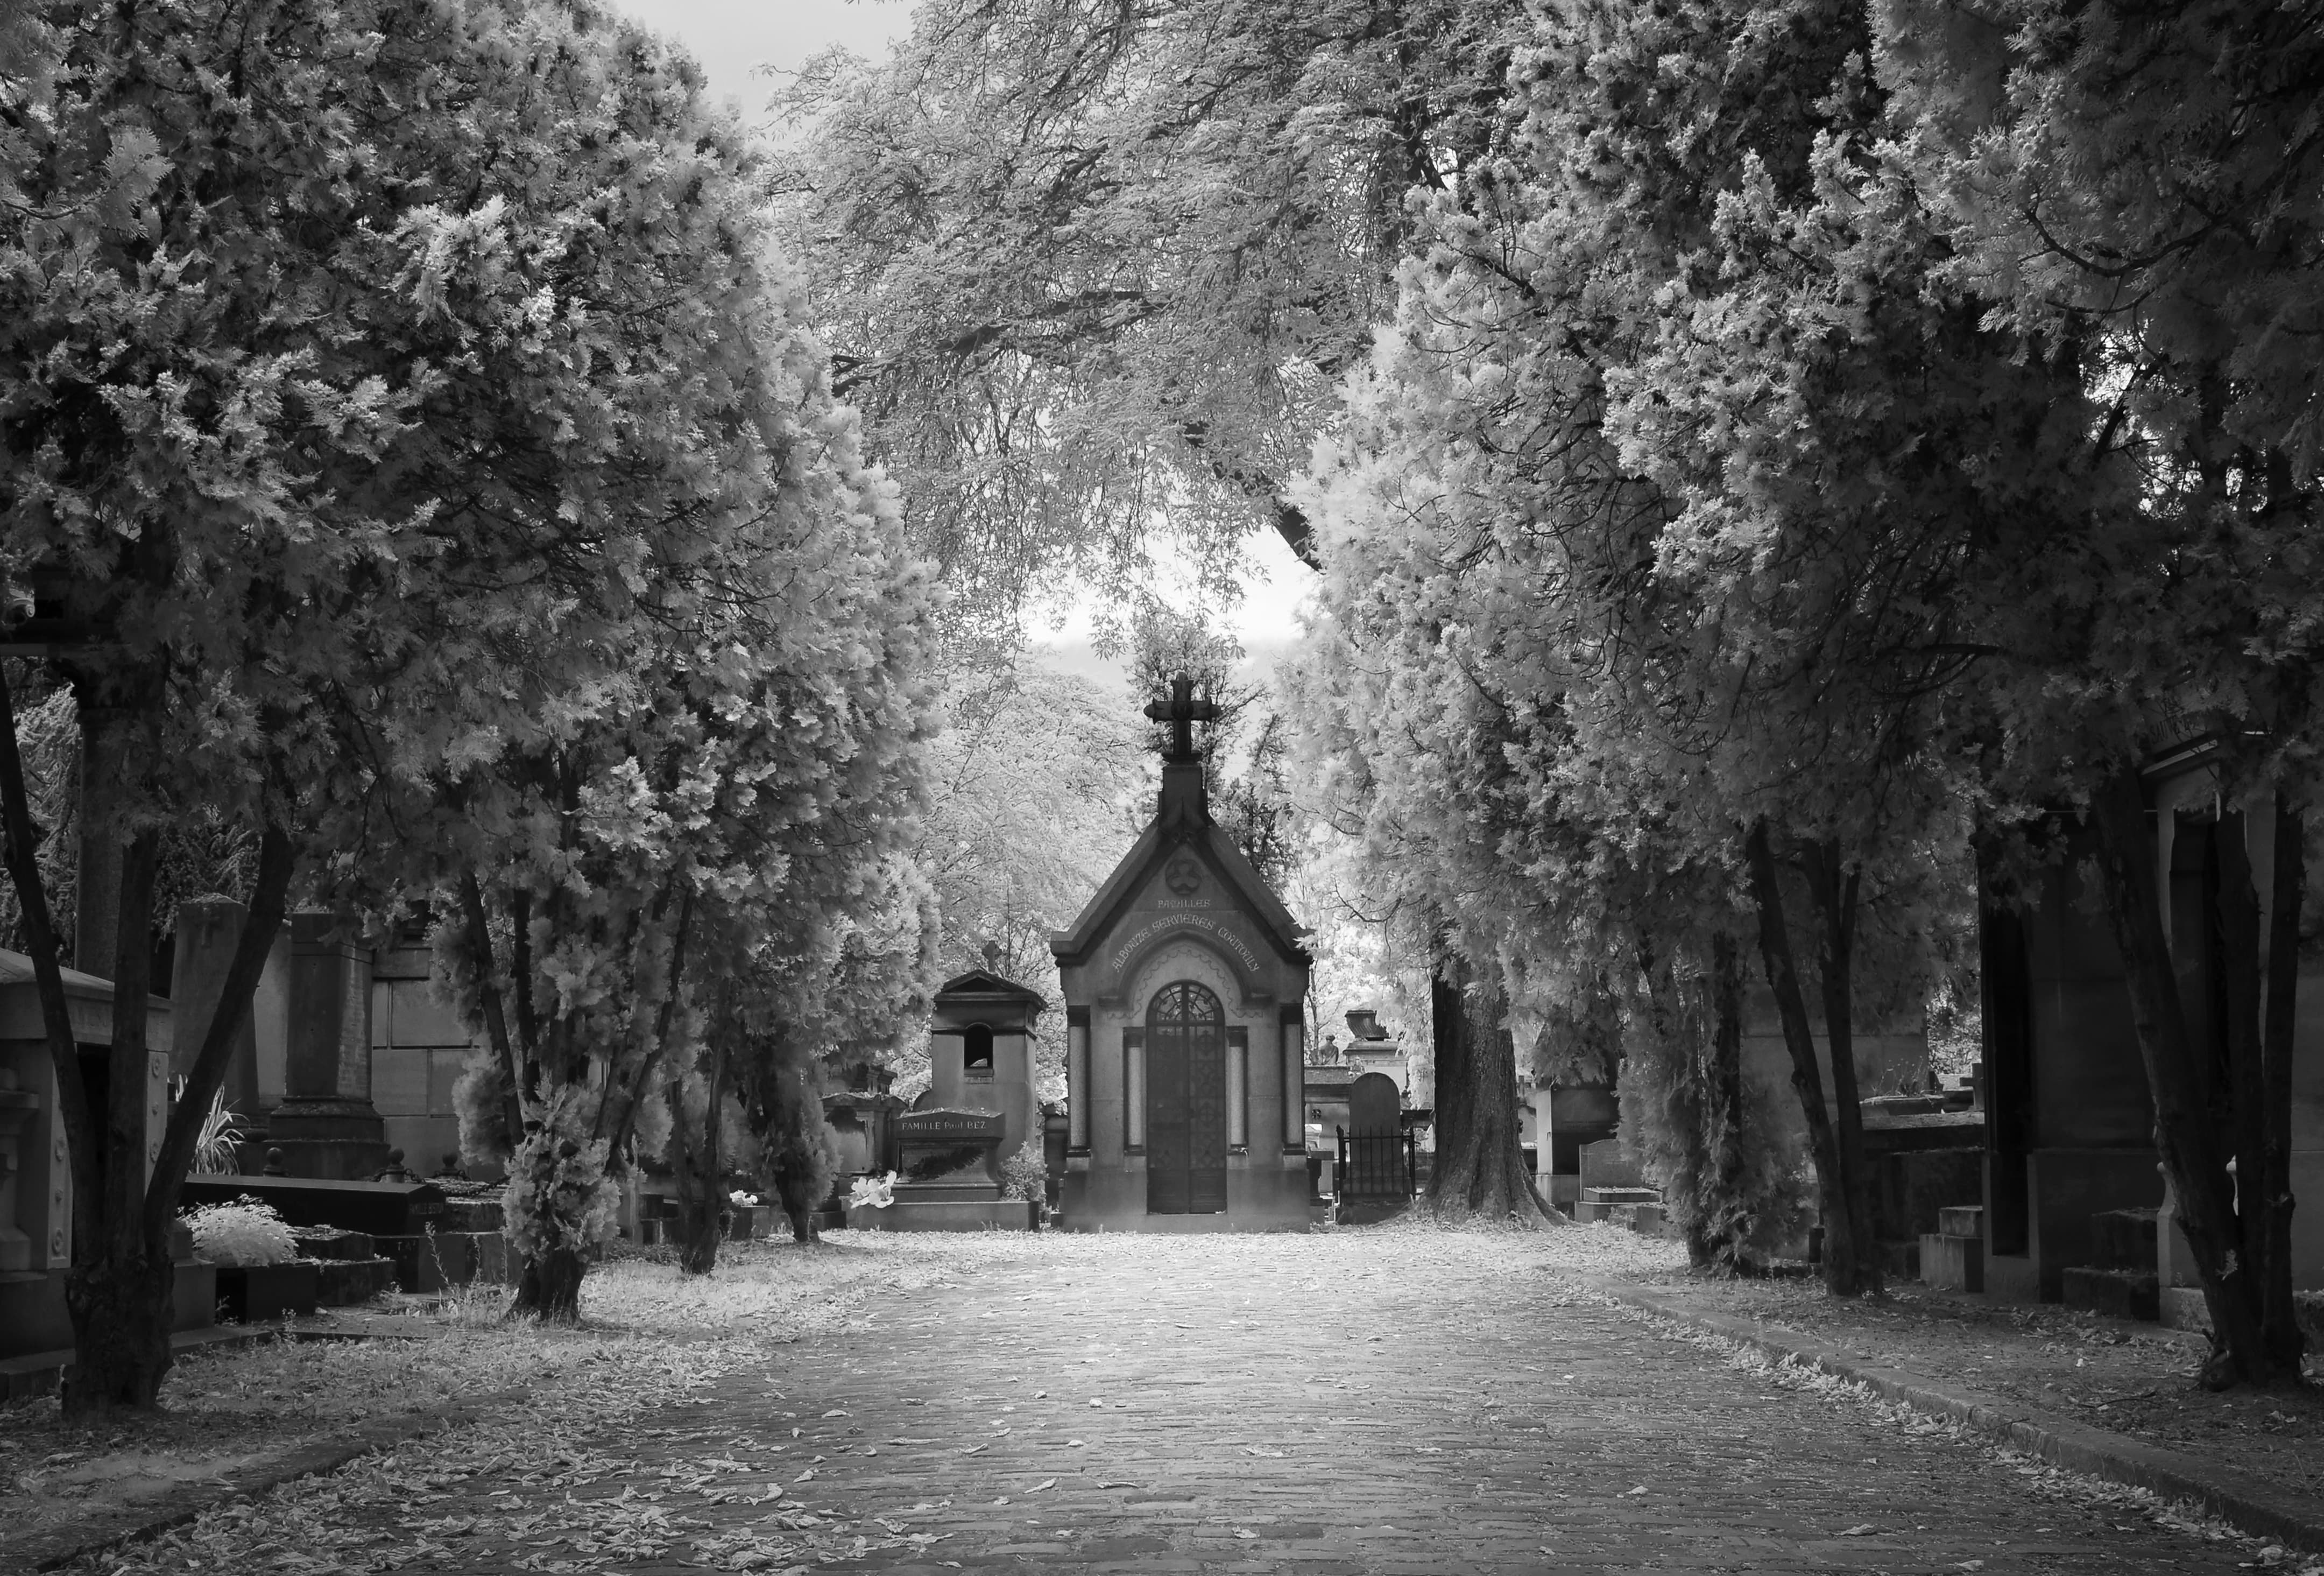
Make striking infrared mono
Some of the most striking monochrome shots you’ll see are infrared exposures. In these images, only infrared light is captured, which works a bit like a traditional colour filter you’d use when shooting with black & white film. Tones are shifted to look unnatural, for instance producing darker blue skies and brighter foliage.
You can use an infrared filter on your lens, which blocks natural light, but this will mean using a long exposure. If you’re into the subject, it’s much better to take the plunge on an infrared-converted camera. A quick look on websites such as eBay, or MPB, should turn up plenty of affordable converted DSLRs or mirrorless bodies, and the latter are most useful, as you can see the effect in action.
Alternatively, for a few hundred pounds you can get one of your old bodies converted, which is a great application for unused kit.
Further reading
Get dramatic black and white effects
To read more articles like this one subscribe to our print magazine today. You’ll save money every week and enjoy having each issue delivered to your door! Click here.