In the pre-digital days, shooting multiple exposures was an advanced technique. In order to obtain the correct exposure for the composite photographers had
to adjust the exposure of individual frames and hope that their sums were right. Nowadays, the technique requires little more than a tripod, a DSLR with Multiple Exposure mode and plenty of imagination.
Many photographers dismiss the technique as a bit of fun, but with trial and error you can obtain some seriously good results. Multiple exposures can bring a sense of movement to your stills, which is why so many sports and dance photographers are fans. During the 2012 Olympics, for example, photographer Julie Jacobson created a striking composite of American gymnast Kyla Ross performing a routine on the balance beam. Looking at the picture you can see the exact path her body takes from the start of one manoeuvre to the beginning of the next.
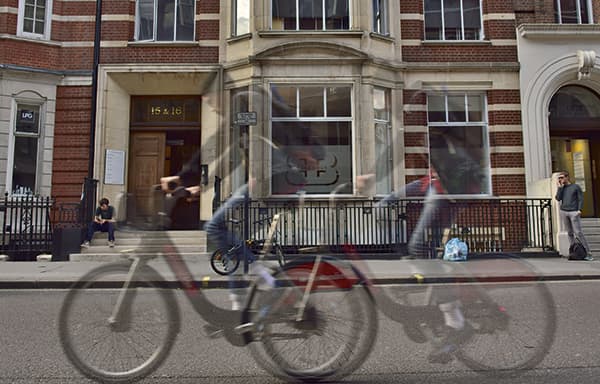
Aside from sports and dance photography, multiple exposures are also popular with street photographers, who use them to convey movement and energy: a shot of commuters rushing home could be combined with images of fast-moving traffic, for example. Multiple exposures are also great for shooting fireworks, as numerous explosions can be recorded in a single frame. Astrophotographers are also quite partial to the technique, combining star trails with static objects such as trees, castles and rocks.
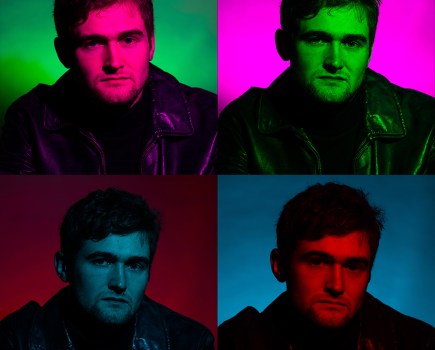
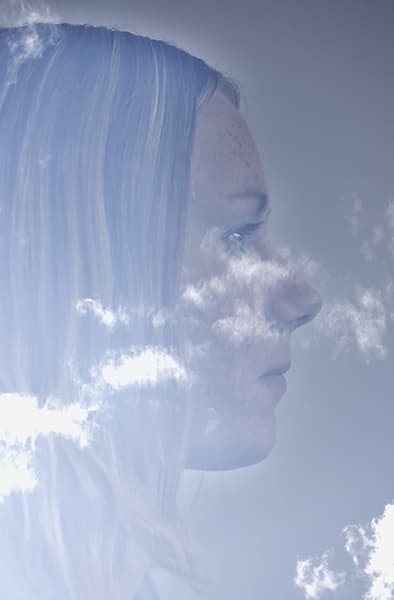
Some artists use multiple exposures to produce textured silhouettes. Portland-based photographer Sara K Byrne, for example, has truly mastered the technique, filling human outlines with images of blossom, petals and even electricity pylons! And then there’s the novelty of ‘cloning’ yourself (or a friend) to give the impression of being in two, three or even 10 places at once. In short, multiple exposures can be fun, but the results can also be seriously good.
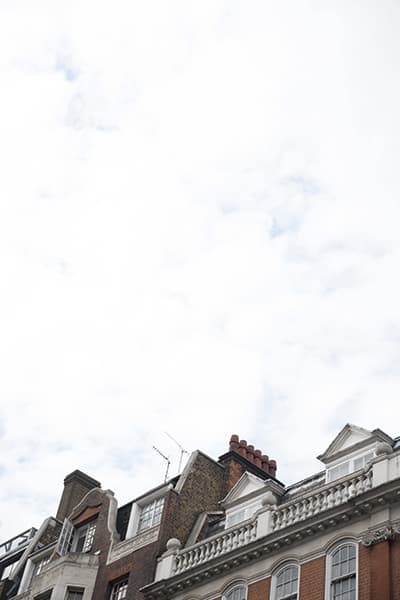
Below: Two simple images that, alone, don’t amount to much.

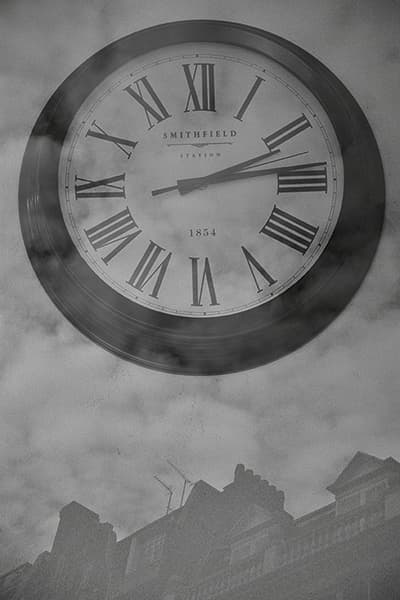
Below: The composite tells a story about time passing.
Backgrounds and exposure
Before you start combining frames, however, there are a few things that you need to be aware of. Firstly, if your subject has a busy background you need to either move it, or move yourself, until this area is clean and uncluttered. It might sound drastic, but if your background contains faces, trees, buildings etc and the camera moves even slightly during the exposures, you will see parts of these objects repeated in the final composite. Overcast skies, black curtains and painted walls all make great backdrops, so crouch down, change lenses, move your feet – do whatever it takes to make sure that people concentrate on your subject, not a distracting mess behind it. To reduce any camera movement, a tripod is essential.
Secondly, when you combine two or more shots, there is a strong chance that the composite will appear underexposed, because it has increased in density. Generally speaking, the more frames you add, the denser the result. To avoid an underexposed composite, you need to adjust the exposure of individual frames, making sure that they amount to the ‘correct’ exposure for the final composite. If this all sounds too complicated, fear not, many DSLRs can carry out the calculations for you.
Finally, while multiple exposures can now be created in-camera (see below) most composites will still benefit from a little post-production work, so be prepared to spend some time in front of the computer.
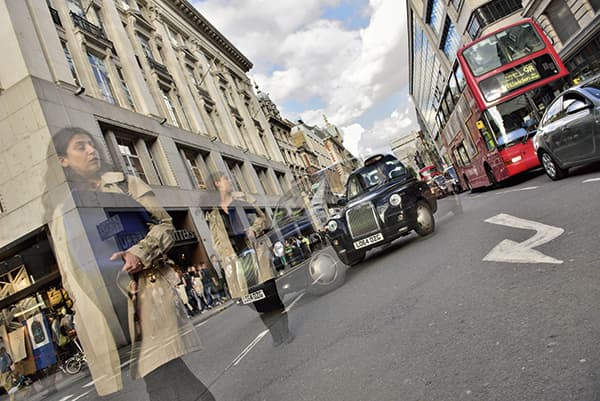
This example demonstrates why a busy background doesn’t work, as the result is confusing.
In-camera options
Nikon DSLRs (from the D7000 onwards) offer two ways of combining exposures: Multiple Exposure mode (found in the Shooting menu) and Image Overlay (found in the Retouch menu). The main difference between these two settings is that the first creates composites from images taken in a single session (action as it unfolds, if you like) and the second combines two pictures from the same memory card – regardless of whether they were taken seconds, months or even years apart. At present, the most popular way to merge frames is via the Multiple Exposure mode.
It might be close to the bottom of the Shooting menu, but Multiple exposure mode has some features that deserve top billing. Having attached your camera to a tripod, and composed and exposed as normal, you can choose between shooting a series of images or capturing individual frames (the number of pictures you decide to include in your composite is up to you – pro-spec models such as the D810 can shoot up to 10 frames before pausing to merge them). To begin with, it’s a good idea to stick to shooting single frames and limit the composite to maybe two or three exposures.
Once you’ve selected Multiple Exposure mode, you will be offered the choice of turning Auto gain on or off. Making the right decision here can be the difference between a stunning composite and an unusable file. If you leave Auto gain on, the camera will carry out the exposure calculations for you; if you turn it off, you’re on your own.
Let’s say you want to create a composite from two pictures, for example. With Auto gain on, the camera will adjust the exposure for each image, ensuring that the frames add up to the ‘correct’ exposure for the final composite. If you decide to switch Auto gain off, you’ll have to adjust the exposures yourself using the aperture, shutter speed or ISO controls. There are benefits to tweaking the exposures manually, but to start with it’s best to leave Auto gain switched on.
The second method, Image Overlay, works by combining two existing Raw (NEF) files from the same memory card, and saving the result as a new Raw file – leaving the ‘source’ images untouched. This has the advantage of allowing colour, contrast, tone, sharpness etc to be adjusted in post-production without losing any detail. Image Overlay allows you to see a preview of the composite before you commit yourself, with adjustments displayed in real time.
Even with the assistance of instant previews and automatic exposure adjustments, creating multiple exposures still requires trial and error. But if you start by merging two files, then move on to three, four etc, you will soon find your technical ability, and your confidence, growing.
Step by step – How to set up your Nikon DSLR to take multiple exposures
ONE
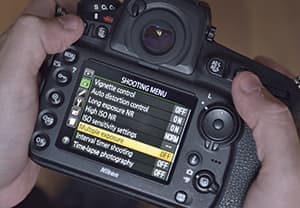
Mount the camera on a tripod. Compose and expose the shot as usual. Make sure Live View is switched off. Locate the Multiple Exposure mode in the Shooting menu and press the Multi selector right to open the submenu. (Menu>Multiple exposure>Multi selector right).
TWO
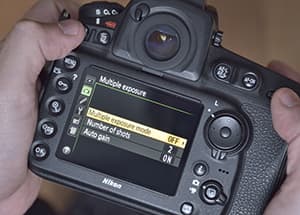
Once the submenu opens, make sure that Multiple exposure mode is highlighted. Press the Multi selector right to turn the feature on.
THREE
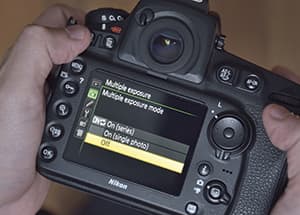
When the submenu opens you have two options: On (series) and On (single photo). If you select On (series) the camera will shoot up to 10 frames and merge them into one. If you select On (single photo), normal shooting will resume after you have created a single multiple exposure. Highlight an option and press OK.
FOUR
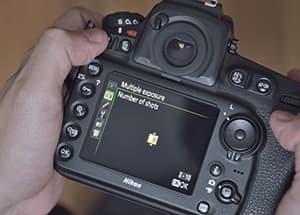
Now you can choose the number of frames you would like to include in your final composite. Highlight Number of shots and press the Multi selector right to open up the next screen. Press the Multi selector up or down to alter the number of frames. Press OK.
FIVE
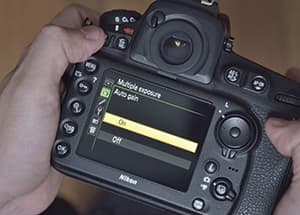
The final screen gives you two options: Auto gain On or Auto gain Off. To begin with, it’s best to leave this feature switched On (Highlight On and press OK), because it instructs the camera to carry out the exposure calculations for you.
Creating multiple exposures using Photoshop
Subtlety and simplicity is key to success when combining images.
If your camera lacks a multiple exposure mode, or you would like to combine files that aren’t saved on a memory card – pictures originally shot on film, for instance – you can achieve the same effect using Photoshop. To keep things simple, start by merging just two images. Having launched Photoshop, open your images: File>Open>Open. Remove any dust or blemishes using the clone/patch tools. If your files have different dimensions, re-size them so that they match.
Choose one of the images to use as your ‘base’ exposure. Select your second picture: Select>All. Click on the Move tool in the tools palette and drag and drop the second picture over the first. Line them up carefully.
To reveal the base layer, head to the Layers palette and locate the Opacity slider. Move the arrow left or right until you have a blend you’re happy with.
Still in the Layers palette, click on the drop-down menu next to the Opacity slider. Here you will find a list of blending options. You can leave this set to Normal, or experiment with the others.
When you’re happy with the effect you’ve achieved, flatten the layers: Layer>Flatten image. Save the file.
Tripods
Repeating on tripod.
With multiple exposures, you need to keep the camera in the same position, and avoid vibration, until the final exposure for your composite has been taken. Using a tripod and remote release will allow you to hold everything still, while concentrating on the action. When choosing a tripod for this technique, the usual advice applies: ensure it can bear the weight of your heaviest body and lens, remember that carbon fibre is lighter than aluminium (but ask yourself how important this is) and make sure the height when fully extended reaches at least eye-level.