Close-up and macro photography opens up access to a fascinating and interesting world not easily seen with the naked eye. By getting in close to our chosen subject, patterns, colours, textures and details can be revealed for the first time. And interesting subject matter can be found pretty much anywhere – items around the house or garden can be transformed into works of art once we move in close with our camera, add a measure of creativity and a sprinkling of imagination.
But this is also a challenging area of photography to tackle – any deficiencies in composition, exposure or focus (particularly depth of field) will be immediately apparent. Potentially it is not only the subject that becomes magnified but also all the flaws in our technique as well! Shooting only close up and macro photographs for six months is a great way to improve our technical skills.
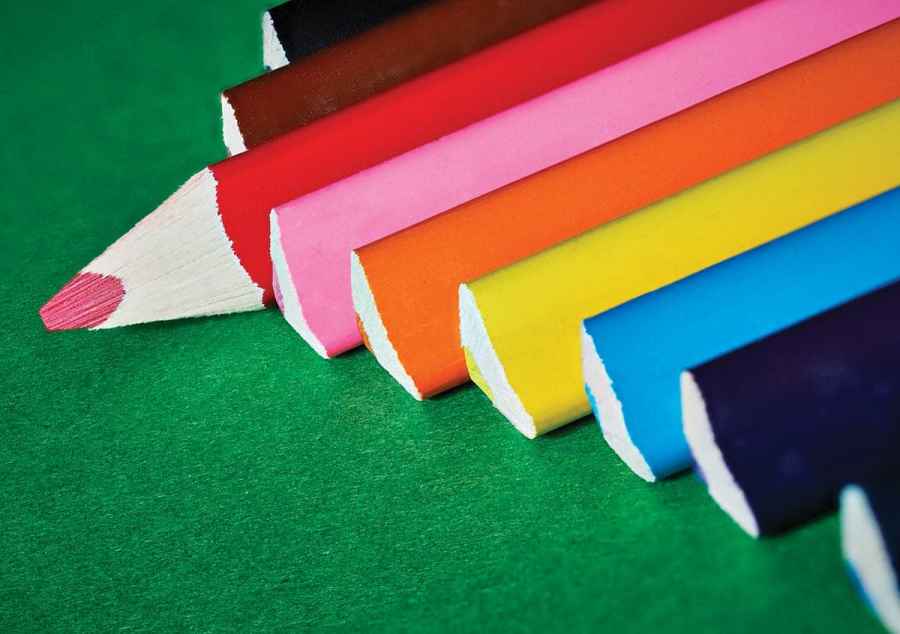
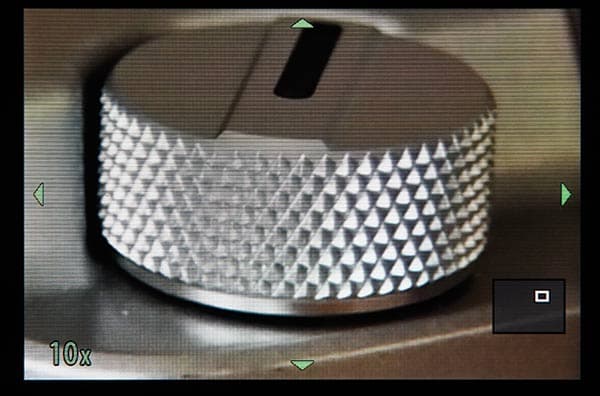
When working up close there’s plenty to photograph without straying far from home, as household items can become works of art. This has been Focus Stacked to ensure precise focus
Managing the inter-relationship between all the variables involved requires a good understanding of the relationship between aperture selection (and its impact on depth of field), shutter speed and ISO and their contribution to the look of the final image. For example, when working close with a macro lens, often a small aperture is required to maximise depth of field (assuming that the end result requires front to back sharpness as against a limited plane of focus where only one small part of the subject is sharp). A consequence of a small aperture is of course a slower shutter speed, to allow enough light to reach the sensor for an adequate exposure.
This in turn can lead to camera shake or blur from subject movement during the exposure. In the digital era an increase in ISO can help to negate these problems – a higher ISO allowing for a faster shutter speed (and thankfully the days of moderately high ISOs having a detrimental effect on image quality are behind us). The blurring induced by camera shake can also be countered by using a tripod or relying on the camera/lenses image stabilisation function. But all of these factors need to be considered before firing the shutter.
And furthermore when working in close to the subject even a relatively small aperture will require accurate focusing and an understanding of depth of field and hyperfocal distances to maximise sharpness.
So yet something else to take into account. It’s little wonder that many photographers have been deterred from undertaking close-up and macro work.
Those photographers who were not put off developed techniques to get around some of these problems. One of the solutions was focus bracketing, i.e. taking several exposures of the same subject at different points of focus and then blending these together in the computer using suitable software programmes (e.g. Adobe’s Photoshop, Zerene Stacker and Helicon Focus). But taking the shots at different focus points can be time consuming (and not possible with subjects that might move or fly off during the process) and requires some expertise in judging just where to focus and how many shots to take. Still not a simple solution.
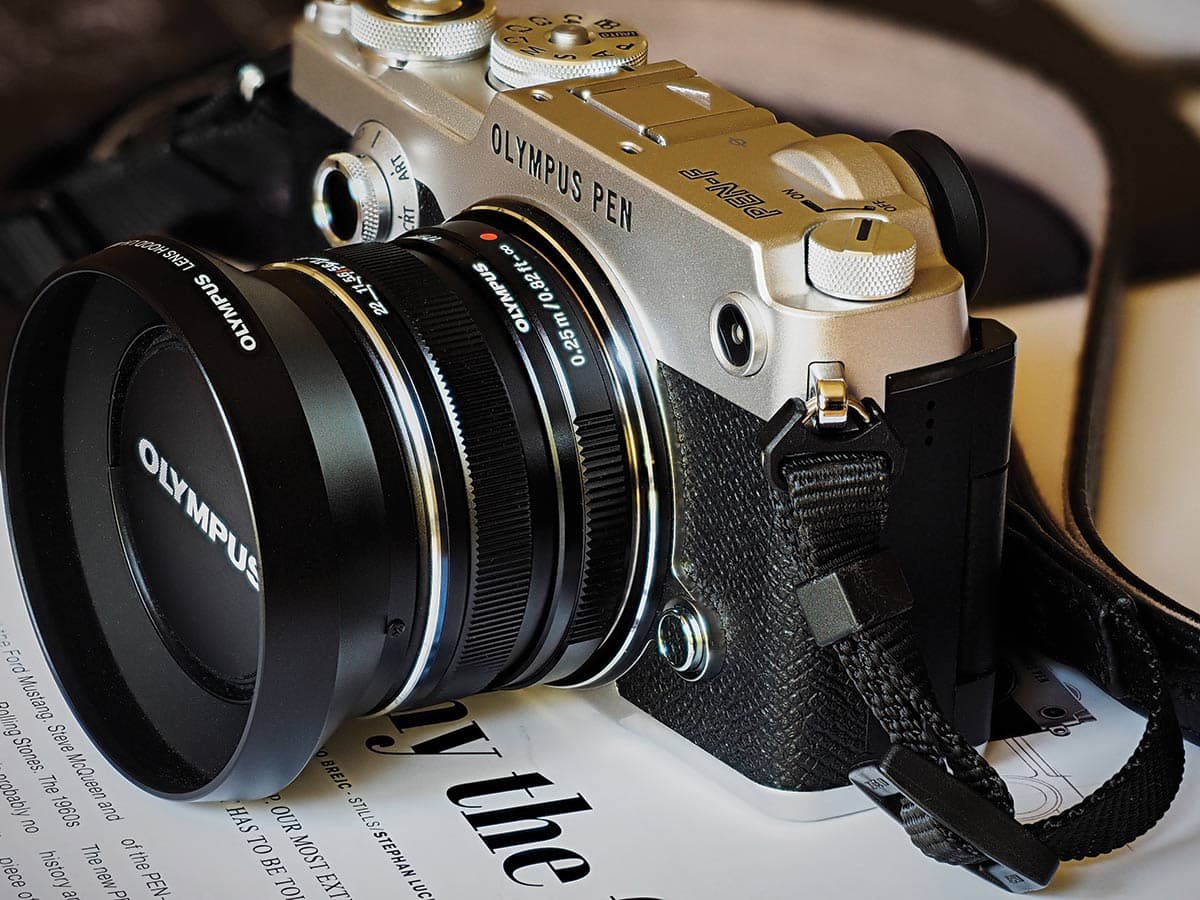
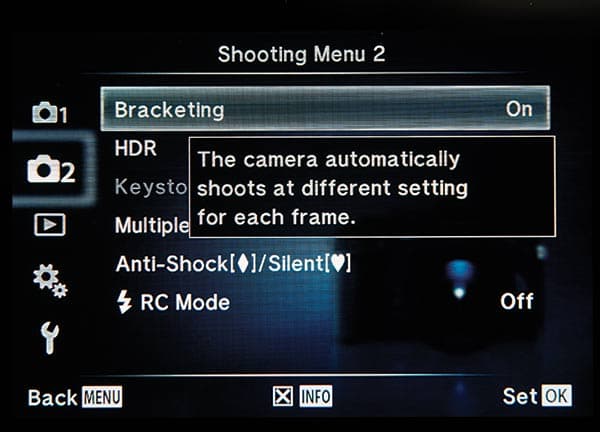
But then Olympus came along and introduced Focus Bracketing and Focus Stacking Modes to its OM-D cameras.
Focus bracketing
Focus Bracketing was first introduced to the OM-D range when the E-M10 II camera was launched, and was subsequently added to the E-M1 and E-M5 II by way of a firmware upgrade.
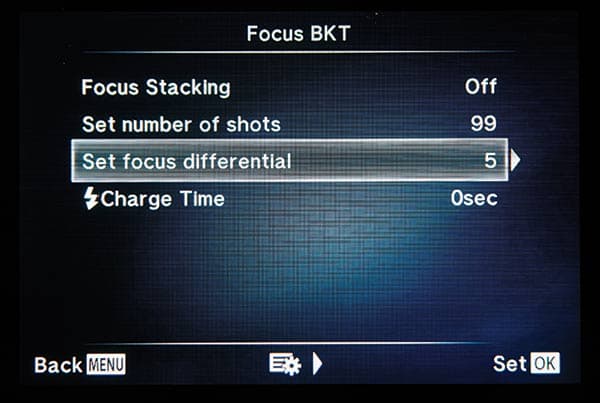
The Olympus Focus Bracketing mode allows the photographer to take up to 999 consecutive shots at focus differentials between 1 and 10 in a fast burst. The images still have to be merged in the computer using software but the mode does remove the time-consuming manual, multiple-shot approach that was previously required.
The Focus Bracketing mode does require some skill and experience, however (gained through experimentation), to determine the number of shots required and which focus differential to choose.
The focus differential is the distance between in-focus areas in the shot. If you choose too low a number, the result will be a large number of images with little difference between them; choose too high a number and there may be gaps of blurred areas between the in-focus bands.
The decisions about these settings will be determined by the number of subjects in the shot, your distance from the subject, how much of the subject you want to capture, and your chosen f-stop. Generally more shots will be required if:
- There are many subjects in the composition at varying distances from the lens
- You are very close to your subject
- You are using a longer focal length lens
- You want to cover a wide depth of field
- You are using a fast aperture.
But trial and error is the key to success initially.
This mode speeds up the process considerably, increases the chances of success (it’s less likely to miss areas of focus than the manual approach) and does enable handheld close-up photography to be done (great when photographing insects, for example). However for more critical work or macro (i.e. life size) photography I would advise using a tripod.
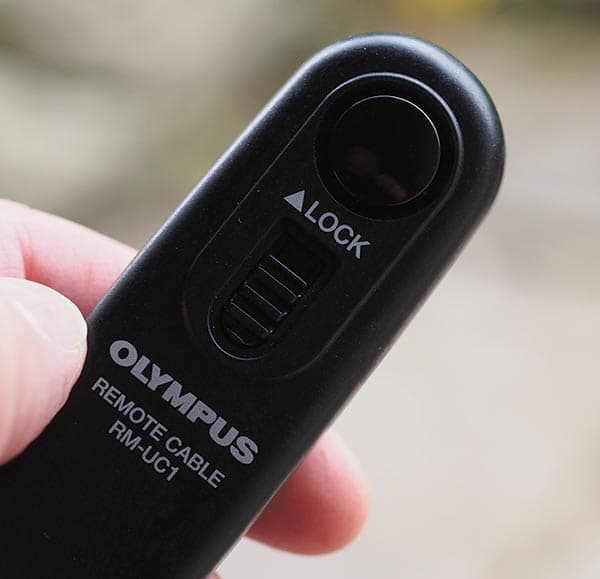
Flash can be used but with two limitations: The flash must be attached to the camera’s hotshoe and the maximum shutter speed is limited to 1/20sec.
Step by step: Focus Bracketing
1. Access Shooting Menu 2 and turn on Bracketing. Note that this will automatically change the shooting mode to High Burst/Silent; this will be cancelled again when you turn Bracketing off.
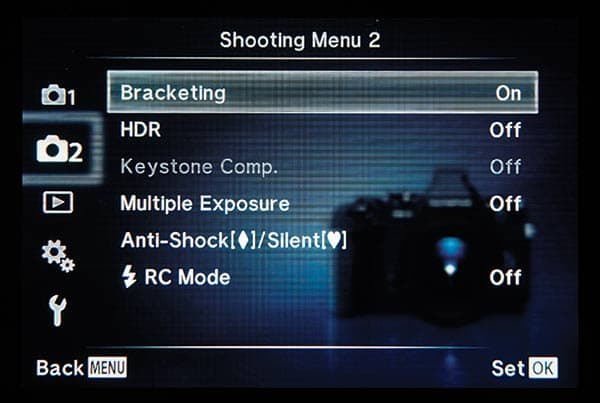
2. Select Focus Bracketing Mode from the options on screen – Focus BKT.
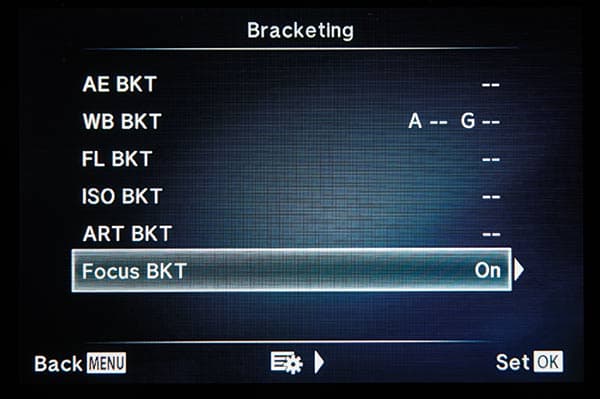
3. Then you simply need to set the number of shots and focus steps required.
4. Focus on the part of your subject nearest the camera (either by selecting the appropriate AF point or switching to Manual Focus).
5. Fire the shutter to take your shot (if you are using a tripod this is best done by using a cable release to minimise camera vibration).
Focus stacking
With the firmware upgrade to the EM1, Olympus went one step further and added Focus Stacking – with this mode the separate images are blended together in camera. Unlike the Focus Bracketing mode the photographer cannot choose the number of consecutive shots (the camera automatically fires eight frames) but can select the required focus differential.
There are some limitations with this mode: At the present time Focus Bracketing is limited to the 60mm macro lens plus the 12-40mm and 14-150mm Pro zooms l Whilst separate Raw files can be shot and saved the merged photograph is a combination of JPEG images. The slowest shutter speed available is 1/8sec and the maximum ISO 3200l The merged image crops off the edges of the composition so an allowance for this must be made in the framing of the shot.
However, in spite of any limitations, these modes are undoubtedly a boon to photographers wanting to try their hand at close-up and macro photography but who have previously been deterred by the technical complexities. By opening up the world of close-up photography, encouraging experimentation and being fun and easy to use into the bargain, these modes can provide a great stimulus to our creativity.
Step by step: Focus stacking
1. Access Shooting Menu 2 on the camera and then turn on Bracketing.
2. Now, select the Focus Bracket option and turn it on.
3. Press > and turn on Focus Stacking.
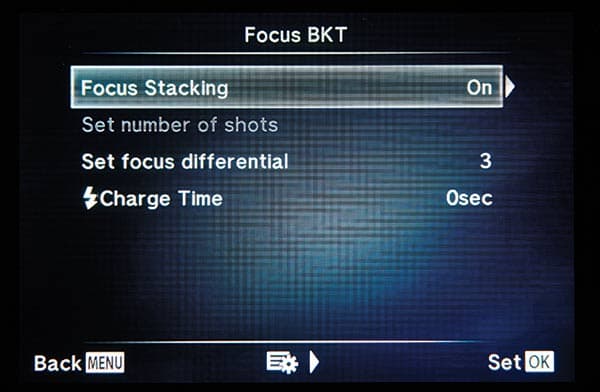
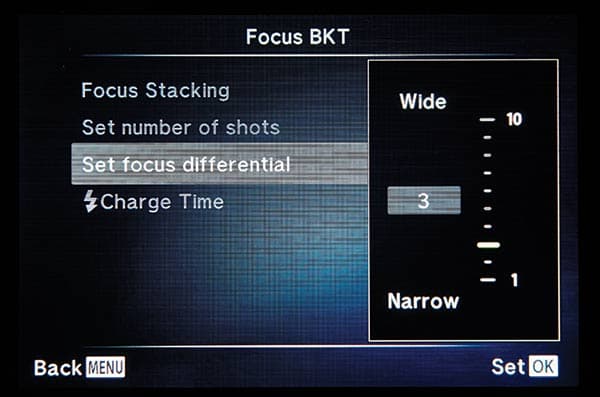
4. Now you need to set the Focus Differential (in this example 3 has been set).
5. Take the shot (preferably with the camera mounted on a tripod and by using a cable release) and then review the merged image on the LCD to check that the subject is sharp and in focus.