
Underexposed images can often be rescued in post-production, but blurred or out-of-focus shots are not so easy to save. Of course, there are ways to increase the clarity of a slightly soft shot, but in reality all you’re doing is increasing the contrast along edges detected by the post-processing software. The best way to ensure pin-sharp pictures is to do as much as you can to keep yourself and your equipment steady prior to releasing the shutter. This can be achieved in various ways, but one of the most obvious is to mount your camera to a stable support, or holding it in such a way that movement is kept to a minimum. Once you are sure that everything is super steady, you can employ the services of in-built camera stabilisation or experiment with focus settings and other camera-based variables.
Keep it steady
The basics
Most blurred pictures are caused by camera shake. Even when a picture looks sharp to the naked eye, when magnified on an LCD (or computer) screen you will often find that the edges are not clearly defined or that key areas lack fine detail. In truth, there is little point in investing hundreds, if not thousands, of pounds on high-resolution cameras and pin-sharp lenses, and then throwing away all this technology by failing to keep the camera steady at the point of capture. to make the most of this hi-tech wizardry, you need to support it properly. If you don’t have a tripod or other firm support, use the following tips to increase your chances of a steady shot.
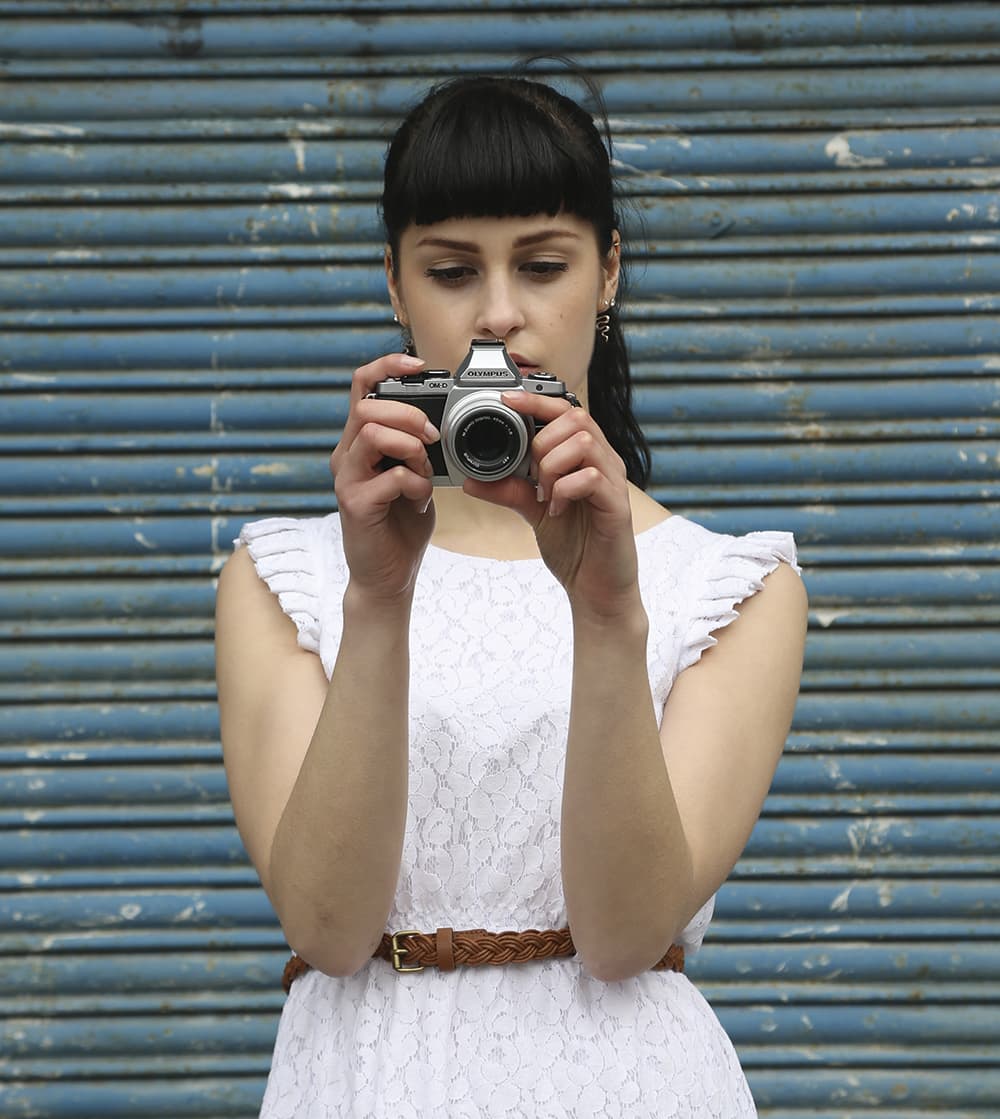
Elbows in, with a firm but relaxed grip
Stand properly
It may sound obvious, but make sure that you have both feet on the ground with your weight evenly distributed. Tuck your elbows into your sides for extra stability, and hold the camera firmly with both hands.
Lean against something
Find something rigid to lean against, as it will help to counteract the natural movement of your body. Resting against a lamppost, a tree or a wall will provide extra stability.
Place your tripod on a solid surface
If you haven’t got a tripod with you, try improvising. If there’s a table, the top of a wall, or some other flat surface at the right height for the shot, place your camera on it.
Raising the camera to your eye can aid stability
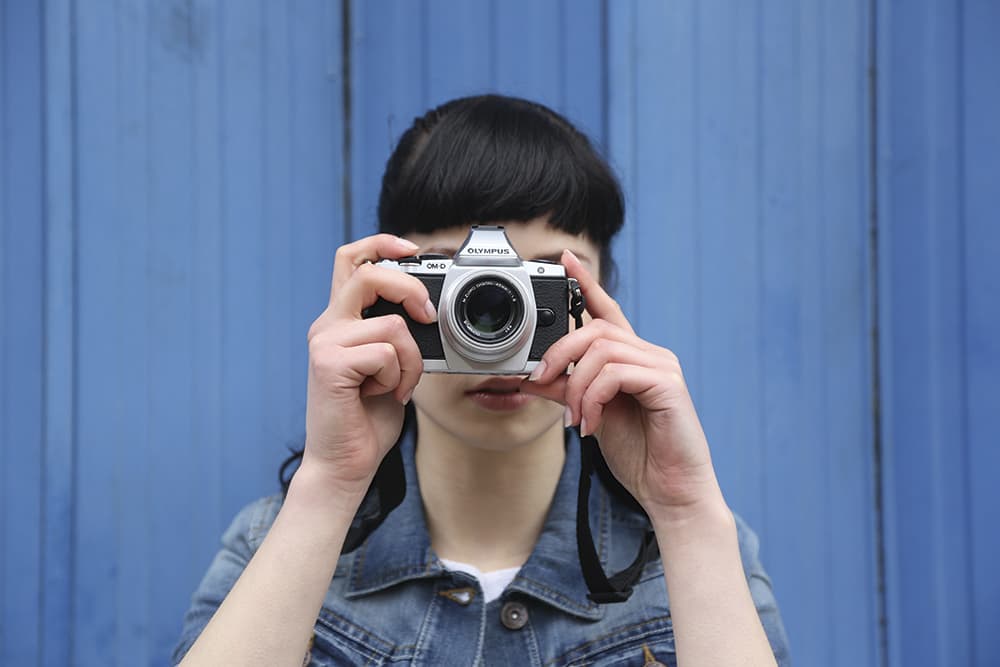
Use a viewfinder
When you use a viewfinder, the act of pressing the camera against your head to look through the eyepiece can significantly improve stability.
Don’t jab at the shutter
It can be tempting to jab at the shutter- release button, which can lead to blur- inducing movement. Squeeze the shutter slowly to avoid any jarring of the camera.
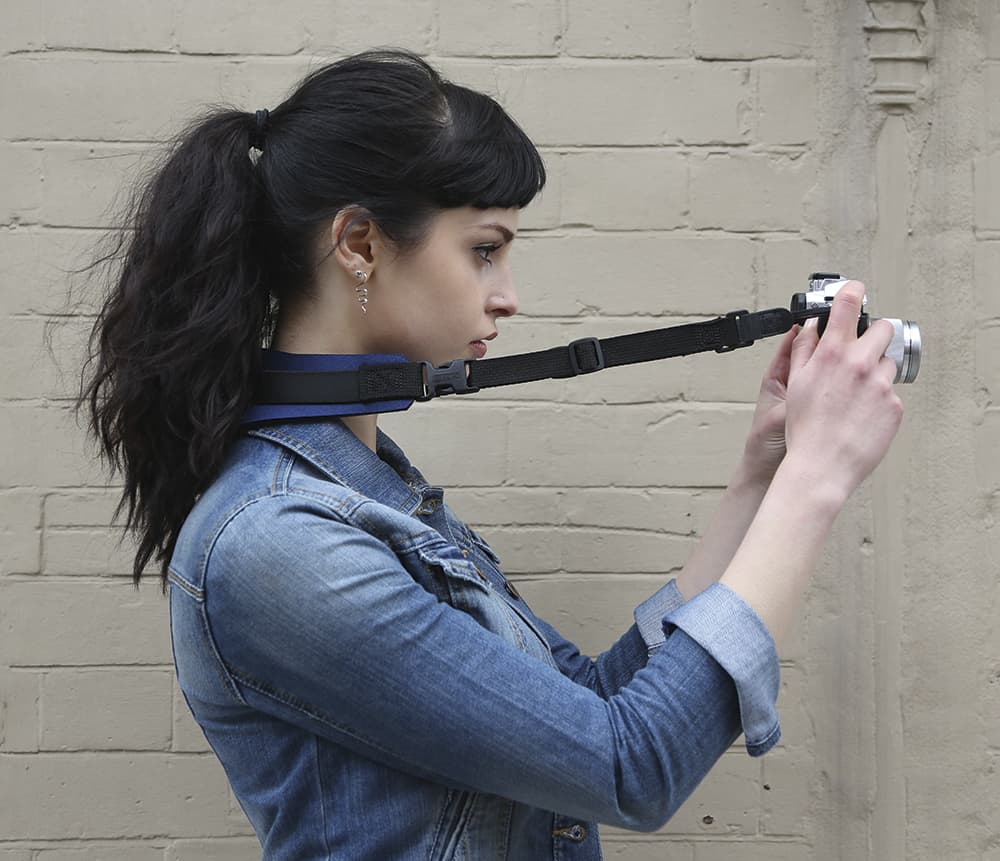
Pull out the strap to help support your camera
Make the most of the strap
If your camera doesn’t have a viewfinder, simply put your camera strap around your neck and pull the camera away from you until the strap is taut.
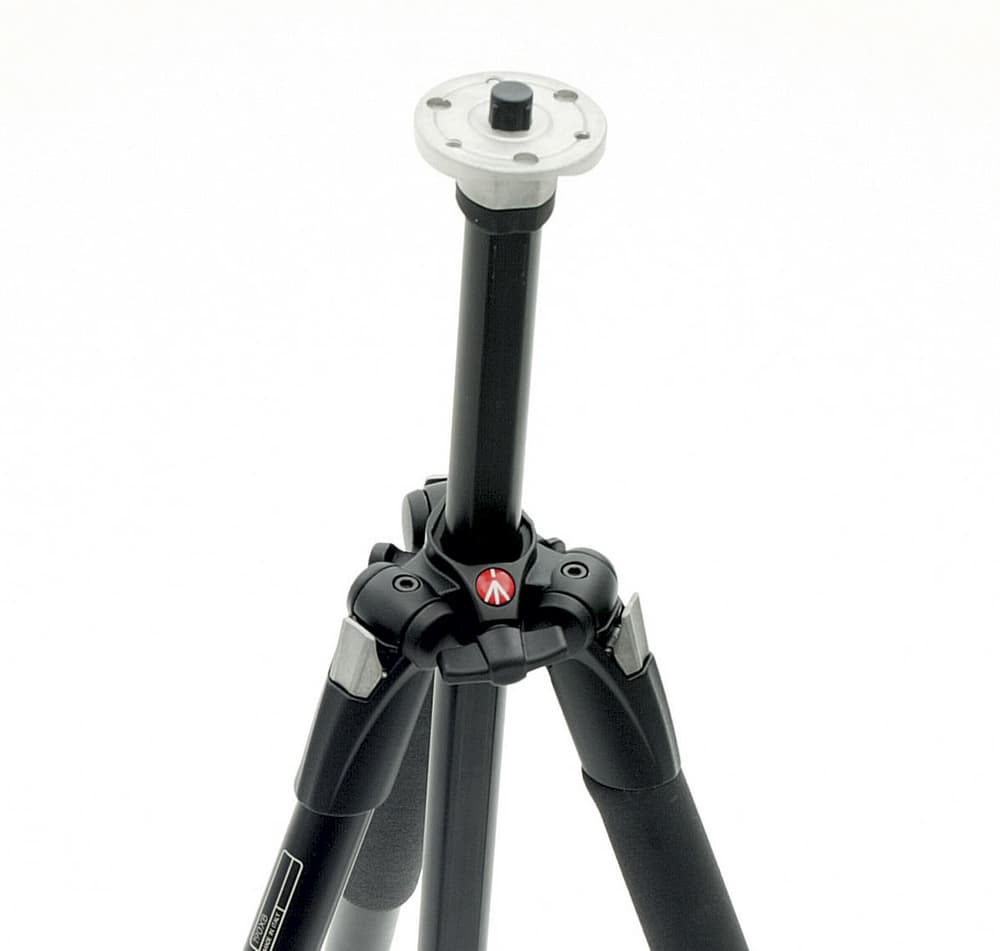
Choosing a tripod
We all know that the main purpose of a tripod is to keep your equipment still, but there are other, less obvious, benefits to using a three-legged support. First, it tends to slow you down: when you have to release leg locks, extend poles, and make sure that the camera is level, you often take more time over your compositions. Second, with the help of an additional arm or clamp, you can use the tripod as an assistant, holding a reflector or diffuser in place. There are hundreds of tripods on the market each differing in weight, construction, height, folded length and weight-bearing capacity. Before you decide what to buy you need to bear a few things in mind.
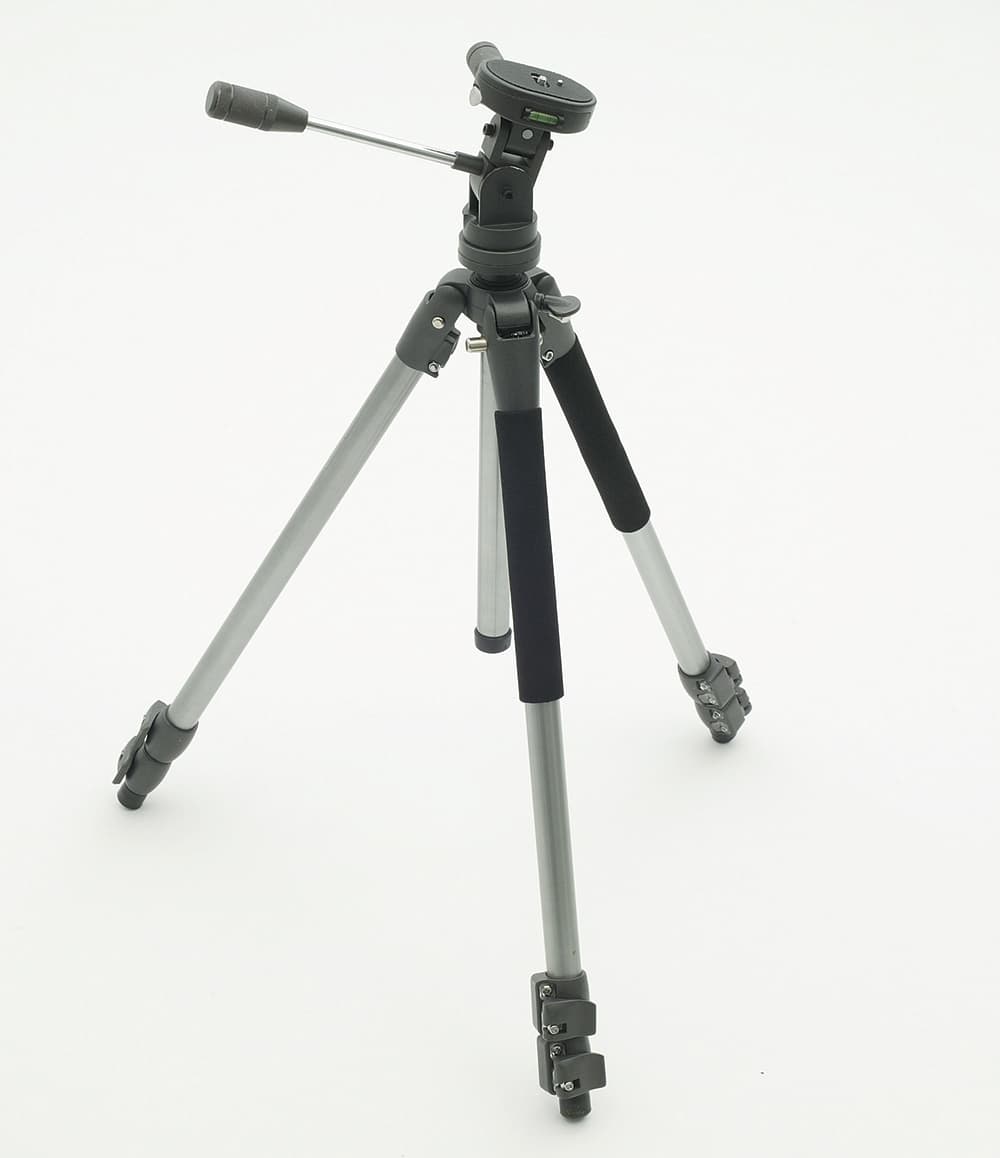
A sturdy, well-made tripod will last you for years
Check the weight-bearing capacity
The tripod needs to be strong enough to carry the weight of your heaviest camera and lens combination.
Consider the raw materials
If you’re planning to use the tripod away from home, you will probably want to consider its overall weight: carbon fibre is significantly lighter than aluminium, without compromising on strength or rigidity, but it’s also much more expensive.
Extending the centre column reduces stability
See how high you can go
It’s important to check the maximum height the tripod can reach without the centre column being extended. Some models have an impressively compact folded length, but do not extend as high as a result.
Decide between twist or lever-lock legs
Tripod legs are released and secured via twist-locks or lever-locks. Twist-lock legs can occasionally slip, but manufacturers have been working to alleviate this problem, with impressive results.
Choose a suitable head
Whether you choose a pan-and-tilt head or a ball head is down to the type of photography you do, as well as personal preference. Ball heads allow greater freedom of movement, but pan-and-tilt heads can sometimes be more accurate because you are adjusting one plane at a time. There are other specialist heads – panoramic versions spring to mind – but these tend to be less useful for general photography.
Using a tripod
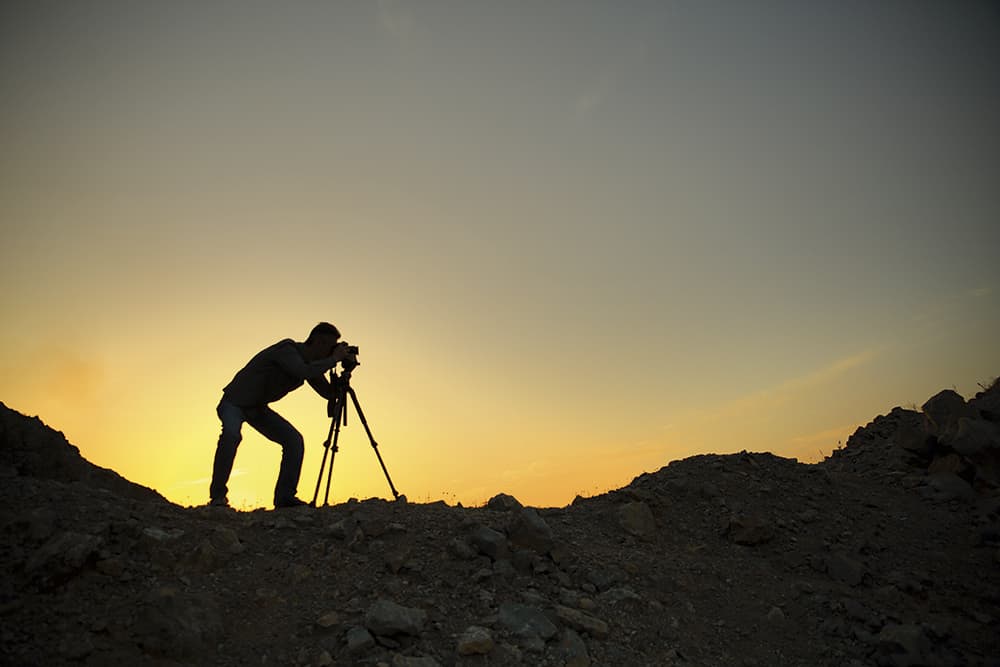
Photo ISTOCKPHOTO.COM/AYDINMUTLU
Once you’ve chosen a suitable leg-and-head combination, you need to make sure you know how to use it properly. It might sound obvious, but when you’re in a rush it can be tempting to raise the centre column before the legs, or fail to add some extra ballast in windy conditions. The following tips will help you to keep everything nice and steady.
Where possible, place the tripod on firm ground
If you need to set up on an unstable surface, such as sand or gravel, push the legs in slightly to avoid slippage. If you have ground spikes, make sure you use them.
Point one leg in the direction of your subject
It’s not always possible, but you’ll gain extra stability if you have a little room to stand between the two back legs.
Use the thicker upper-leg sections first
These are the strongest poles on the tripod; only use the thinner lower-leg sections as and when you need to.
Avoid raising the centre column
This part of the tripod is less stable than the legs; so only raise the centre column when the legs are already fully extended.
Add weight to increase stability
Some tripods have a hook at the bottom of the centre column that allows you to hang a weight from it, such as your camera bag. It’s particularly important to add extra ballast when you’re shooting in high winds.
Adjusting camera settings
Careful camera set-up can help to keep shots sharp
Holding the camera steady is the first step to achieving pin-sharp pictures, but there are many more precautions you can take to win the battle against blur. In fact, your camera already has a variety of in-built features to help you overcome vibration and shake, which include depth-of-field preview, self-timer, live view and mirror lock-up.
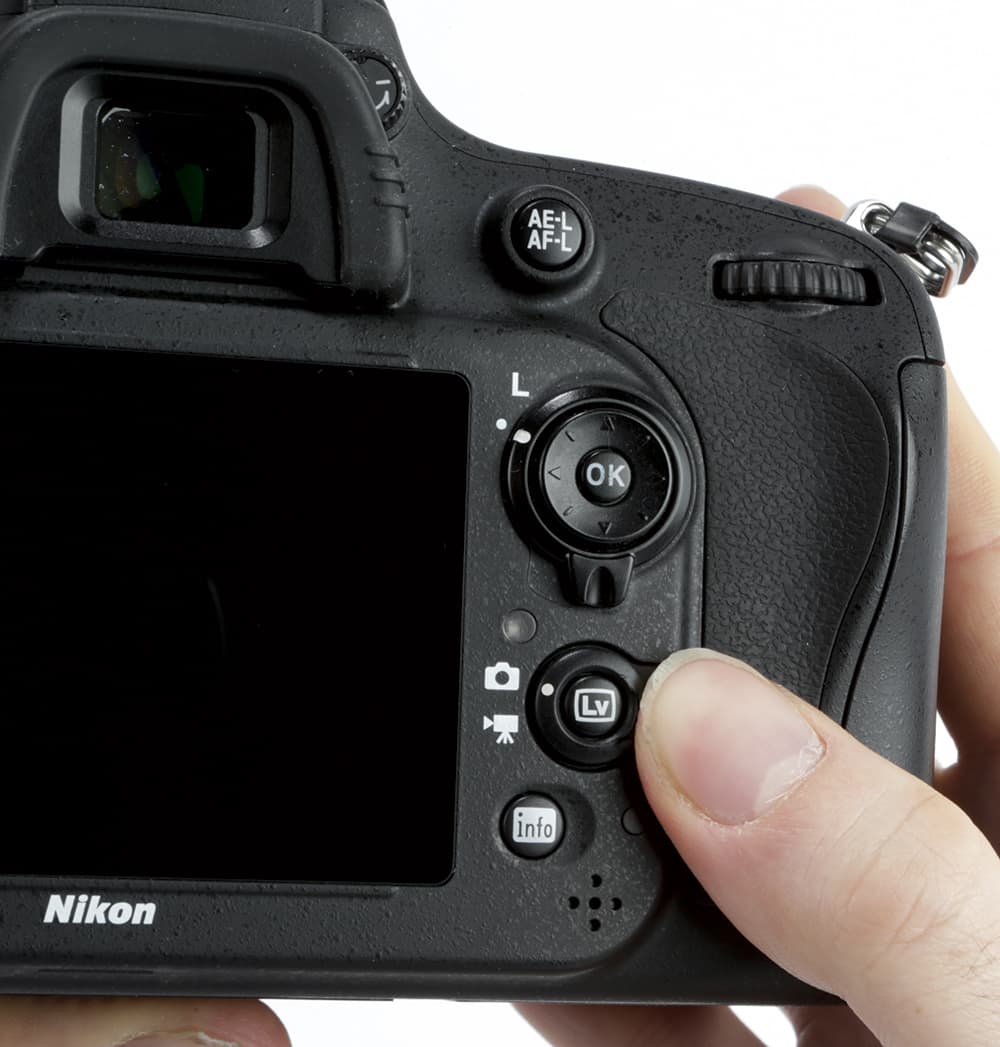
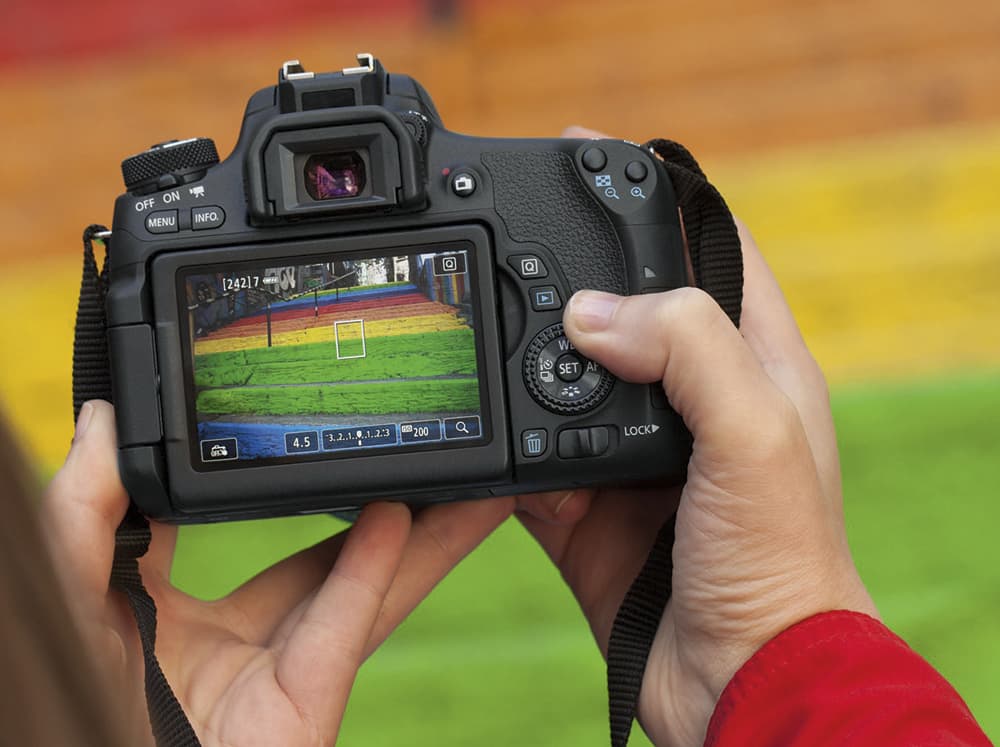
Switch to Live View to check your focusing
Focus and depth of field
Taking control of autofocus is essential for consistently sharp shots. For portraits, or situations with a static subject, choose single-point AF and carefully set the AF point over the eyes, for example. To track moving subjects, switch to continuous AF (AI Servo on Canon SLRs). In situations where your AF might get confused, for example, when shooting close ups, be prepared to focus manually, using Live View zoom to help you check everything is sharp before you shoot. The depth of field (DoF) preview button is also handy for checking the zone of acceptable sharpness in a shot.
Live View zoom helps with manual focus
Checking sharpness in live view
Whether you compose your pictures via the viewfinder or using an LCD screen is a matter of personal preference, but using an electronic screen has one major advantage: it lets you see exactly what the sensor sees. What’s more, this screen allows you to magnify the image to check key areas are sharp, which is especially handy if you have chosen to focus manually. When live view is activated the mirror in your DSLR flips up to allow a clear, unobstructed view through the lens to the sensor. This prevents mirror slap from affecting the sharpness of an image.
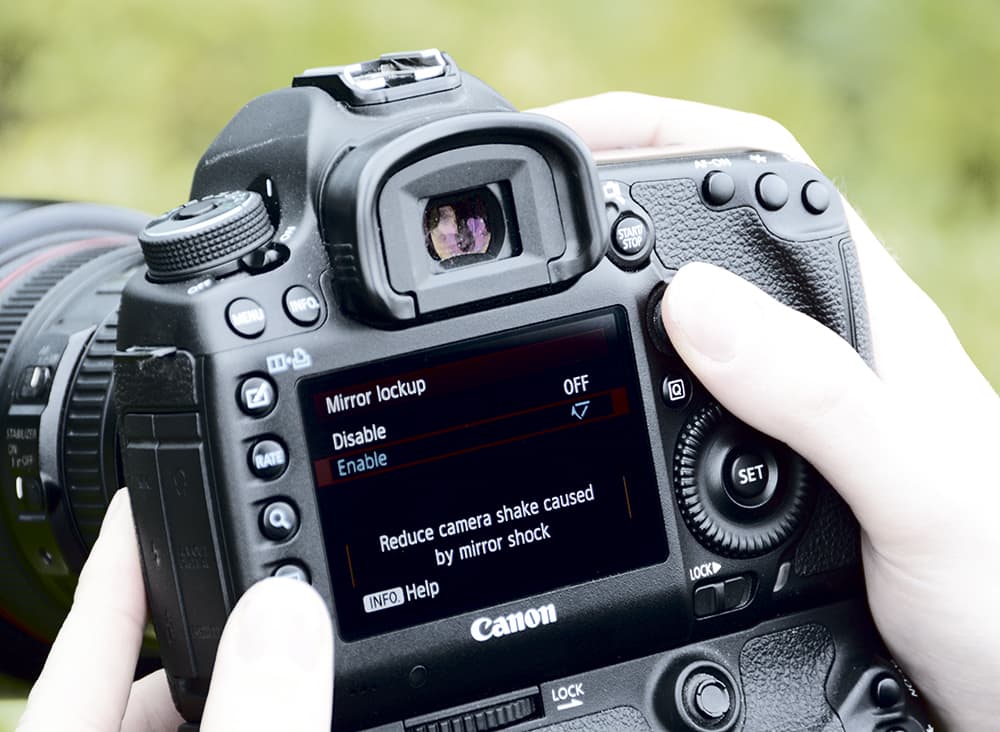
Lock up those flapping mirrors, too
Using mirror lock-up
To allow light to pass through the lens to the sensor, all DSLRs have a hinged mirror that bounces light up towards the optical viewfinder. When this mirror moves it can cause small vibrations, which can affect image sharpness. With modern DSLRs it’s less of an issue, but if you want to eliminate it altogether you can either use Live View or activate the mirror lock-up feature on your camera. When you use mirror-lock up, the camera flips the mirror out of the way long before the shutter is fired, which allows any vibration to die down. This is great for close-up photography, where every movement appears magnified.
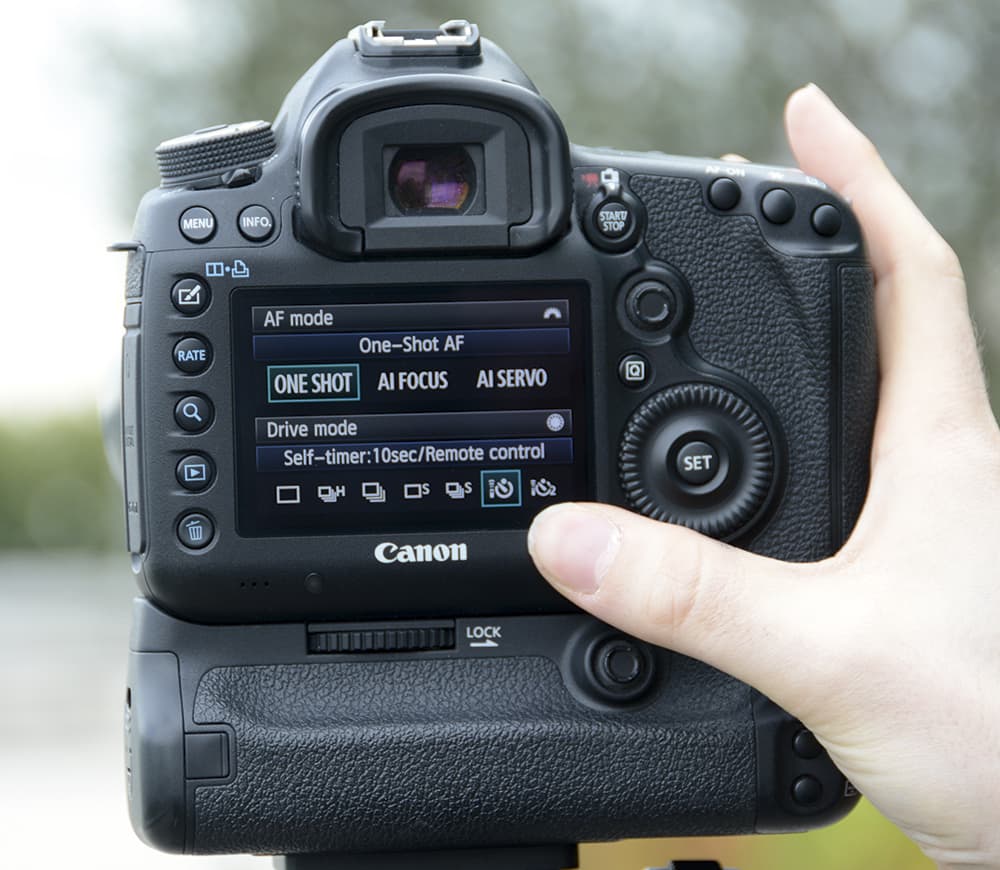
No release cable? Use the self-timer
Setting the self-timer
It’s a common assumption that if your camera is mounted on a tripod it is rock steady, but that’s simply not the case. Some movements and vibrations are so small that they go unnoticed until you view the resulting out-of-focus pictures on screen. To avoid moving the camera when you depress the shutter-release button, fire it with the self-timer feature or a remote release.
Finding your lens’s sweet spot
Every lens has a ‘sweet spot’ – the aperture at which it performs best – and it’s usually a few stops down from the widest aperture. Here’s how to hit the sweet spot every time.
Smaller isn’t better
Don’t assume that stopping the lens down will produce the sharpest image. Diffraction can be a problem at small apertures, where light rays get slightly bent as they pass through, slightly softening the image. The narrower the aperture, the more pronounced diffraction becomes.
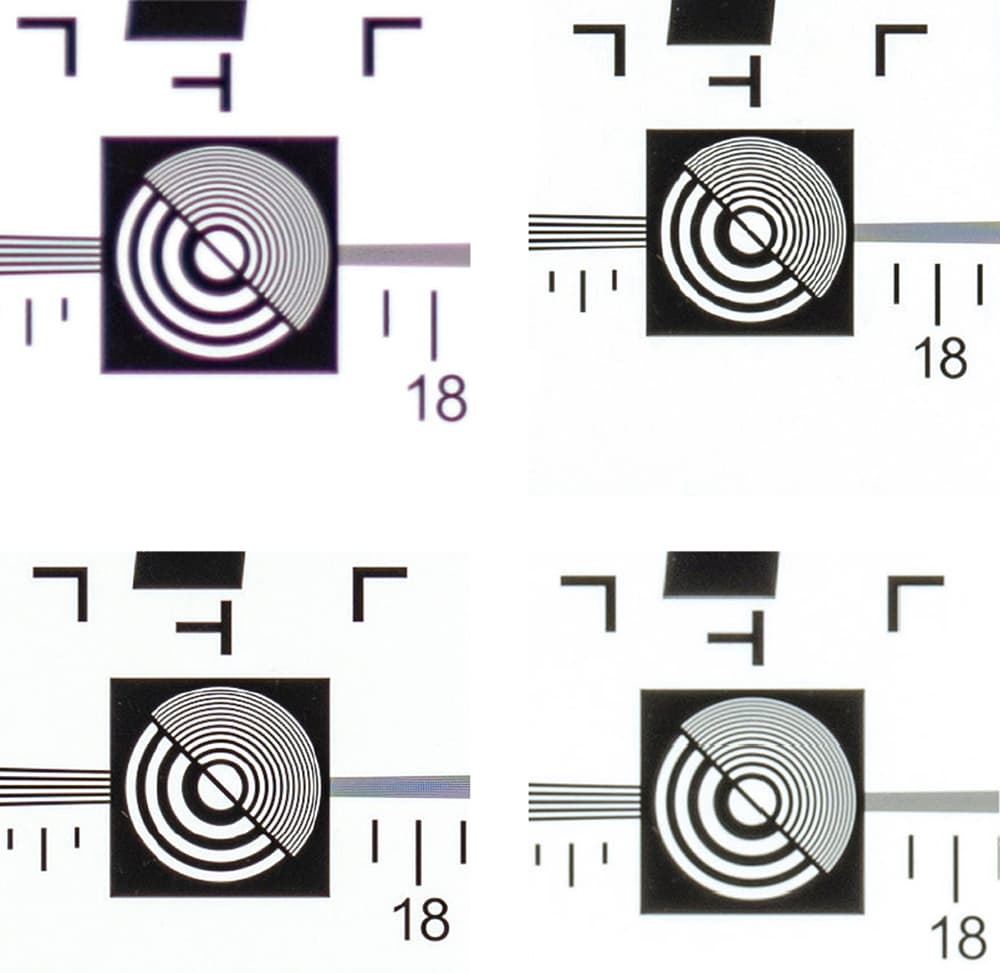
Lens test charts help you find the sweet spot
How to test for it
To find the sweet spot on a lens, attach your camera to a tripod, switch it to aperture priority, compose your image and take a picture at the widest aperture. Now reduce the aperture by one stop and repeat the exercise. Keep going until you reach the minimum aperture. Then upload your images to a computer, magnify the same area by 100% and check the EXIF data for each file. You’ll soon see which aperture provides the sharpest results.
Don’t get obsessed
While knowing about the sweet spot is helpful, don’t get hung up on it. Different scenes and subjects call for different aperture and shutter speed combinations, so don’t let an obsession with sharpness override your creative intentions.
Calculating the hyperfocal distance
One way to maximise DoF (and increase the zone of acceptable sharpness) is to calculate the hyperfocal distance. Don’t worry, it’s not as scary as it sounds.

Photo ISTOCKPHOTO.COM/KANONSKY
Use a smartphone app
Use online calculators and apps to do the maths for you. We like the free DOFMaster (www.dofmaster.com).
It couldn’t be easier
Simply enter the make and model of your camera, input the focal length of the lens, fill in the chosen aperture and enter the camera-to-subject distance. Press ‘calculate’ and the program comes back with all the information you need to guarantee front-to- back sharpness in your shot.
Focus peaking
Most cameras now offer both manual and automatic focusing. There will always be times when manual focus is preferable – when faced with a low-contrast scene or when shooting in low light, for example – but it can often be difficult to tell when key areas are entirely sharp. This is why some cameras offer focus peaking.
Contrast detection
When you focus the lens manually, the camera measures subject contrast. It lets you know which areas are showing the greatest contrast (appear the sharpest) by marking them with a highlight or colour.
Increase in highlights
This highlight or colour increases as the subject is brought into focus, until typically the subject is covered in the markings. At this point the subject is deemed to be in focus. Easy!
Selecting an appropriate shutter speed
Modern image stabilisation (IS) systems make it easier to achieve sharper shots when handholding, but you still need to know which shutter speeds will be fast enough to avoid blur when there’s no stable support. Here are some helpful tips.
 Speed and length
A good rule of thumb is to match the shutter speed to the equivalent focal length of the lens you’re using. So if you’re shooting with a 50mm lens on an APS-C DSLR (which results in a 35mm/full-frame focal length equivalent to 75mm), you will need to use a shutter speed of 1/75sec or more to safely handhold the camera.
Magnified movement
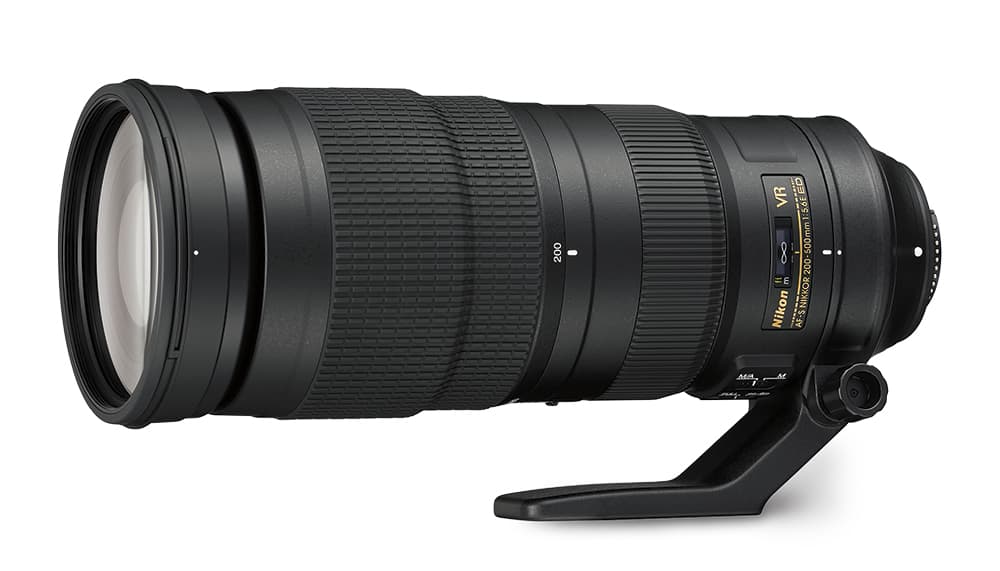
Remember that longer lenses will require faster shutter speeds because at longer focal lengths, any movement will appear magnified.
Don’t forget IS
If you have IS built into your camera or lens, turn it on as it gives you more leeway when shooting handheld, particularly in low-light conditions.


