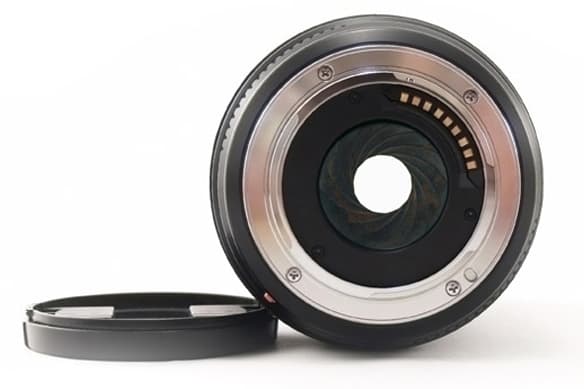

In a DSLR, the aperture is situated in the lens between the front and rear elements. A series of usually 8 or 9 metal blades, in a circular array called the diaphragm, actually make the aperture, which is the adjustable hole in the middle of the diaphragm.
The size of the aperture is controlled by a command dial on the camera body, or automatically in programmed modes. The aperture selected is then shown in the camera viewfinder and typically on an LCD screen on the camera’s body. Older lenses have an aperture ring on the lens barrel with a series of engravings showing the aperture value, known as an f-stop, which is turned to the achieve the desired setting.
The two main camera settings that allow you to control the size of the aperture are the Manual and Aperture Priority modes, the latter indicated as A or Av on your mode dial. For the most part, the Aperture Priority mode is the best to use as it allows you concentrate on the aperture, while the camera automatically sets the shutter speed.
So what does the aperture actually do? The primary function is to work with the shutter speed to provide the optimum exposure for your image. This was explained in more detail in last month’s issue, but it is important to remember that the two work reciprocally – that is, adjusting the shutter speed or aperture by a stop will either halve or double the amount of light reaching the sensor, depending on the direction of adjustment.
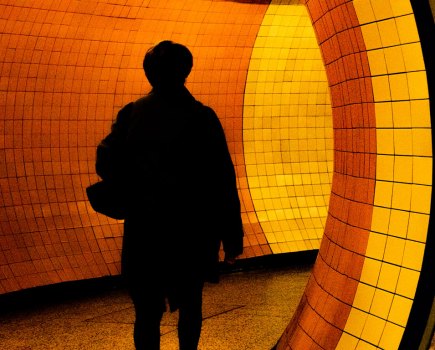
The second, and probably the most important creative use of the aperture, is to adjust the depth of field. Depth of field determines the amount of sharpness there is in an image, or how much of the image is in focus. It’s depth of field control that allows us to make landscapes that are pin-sharp from the front to the back of the subject, or to take a focused portrait with an out of focus background. In other words, the aperture is a key part of determining how the final image will look, offering an endless means of creatively enhancing your images.
How Aperture Works

Manual Mode
This allows you to set both the aperture and shutter speed and is useful in tricky light situations, or if you use some older lenses.
Aperture Priority AE
The most useful mode for aperture control. You choose the aperture and the camera automatically sets the shutter speed.
Shutter Speed Readout
Displays the shutter speed selected
Aperture Readout
Displays the aperture selected. This information is also viewable in the camera’s viewfinder.
The diaphragm is a set of interlocked blades that open and close to increase or reduce the size of the aperture. We choose this size by a system known as ‘f-numbers’ or ‘f-stops’, a value set by a mathematical formula dividing the lens’ focal length by the diameter of the aperture.
The f-stop system can be confusing to beginners, as the higher the number, the smaller the aperture – so f/2.8 is a large aperture, while f/16 is a small one. Each full aperture measurement doubles or halves the exposure. So, for example, moving from f/8 to f/5.6 (small to larger) doubles the amount of light reaching the sensor, while f/8 to f/11 (small to smaller) halves it. Modern lenses offer half-stop or even third-stop increments for more precision.
The aperture works with the lens optics to focus and direct the light waves from the subject to the sensor. A smaller aperture concentrates these light waves to a series of small points of light, while a wide aperture produces disks of unfocused light on the sensor. In this way, the choice of a large aperture produces a fuzzier image around the edges (narrow depth of field) while a small aperture produces a sharper overall image (deeper depth of field).
 Fast or Slow Lenses
You may often hear the terms ‘fast’ or ‘slow’ to describe a lens or aperture. This has nothing to do with the speed of operation, but to the size of the maximum aperture possible (usually quoted as a suffix to the name of a lens). A lens with a maximum aperture of f/1.4, for example, is ‘faster’ than a similar lens with f/2.8. Because the aperture is larger, faster shutter speeds can be used, which is especially useful in low-light conditions.
Another practical benefit of a larger aperture is that the extra light that enters the lens leads to brighter viewing on the camera’s viewfinder – again, useful in low-light conditions.
 Zoom lenses will often quote two maximum apertures, for example 18-70mm f/2.8-4. This means that the maximum aperture at the 18mm end is f/2.8, while the maximum aperture at 70mm is f/4. In reality, the actual hole is the same size but the added focal length (and the maths) changes the f-number. There are several lenses available now with a fixed maximum aperture that doesn’t change throughout the focal range, such as Sigma’s 70-200mm f/2.8 lens. These lenses are usually expensive though, and because of the large optics needed to perform the trick, quite heavy as well.
Canon produces the excellent 85mm f/1.2 while Sigma’s 70-200mm f/2.8 lens has a continuous maximum aperture of f/2.8
How to Use Aperture – Aperture Sizes
Reducing the aperture size is often called ‘stopping-down’, while increasing the size is referred to as ‘opening-up’.

Read our complete guide to exposure (aperture, shutter, ISO, etc)
How to use aperture in video