How to get started with light painting: Introduction
Known by many names, light painting (or light graffiti, light art, painting with light) is a well-established photographic process with roots that can be traced back to the early days of photography.
The practice of using light to trace a path into an image began with time-in-motion studies and subsequently evolved creatively in the hands of artists like Man Ray, Picasso, and photographer Eric Staller.
Pre-digital, the technique was hugely experimental, given both the characteristics of film during long exposures and the fact that you had to wait for visual feedback on your results.
But as camera technology has improved, along with that of small, battery-powered lights (and the batteries themselves), light painting has become infinitely more accessible, and is commonly seen as a photographic rite of passage – with good reason.
The processes of light painting encourages experimentation and rewards creativity, not to mention demanding that practitioners break out of their comfort zones into the world of full manual camera operation.
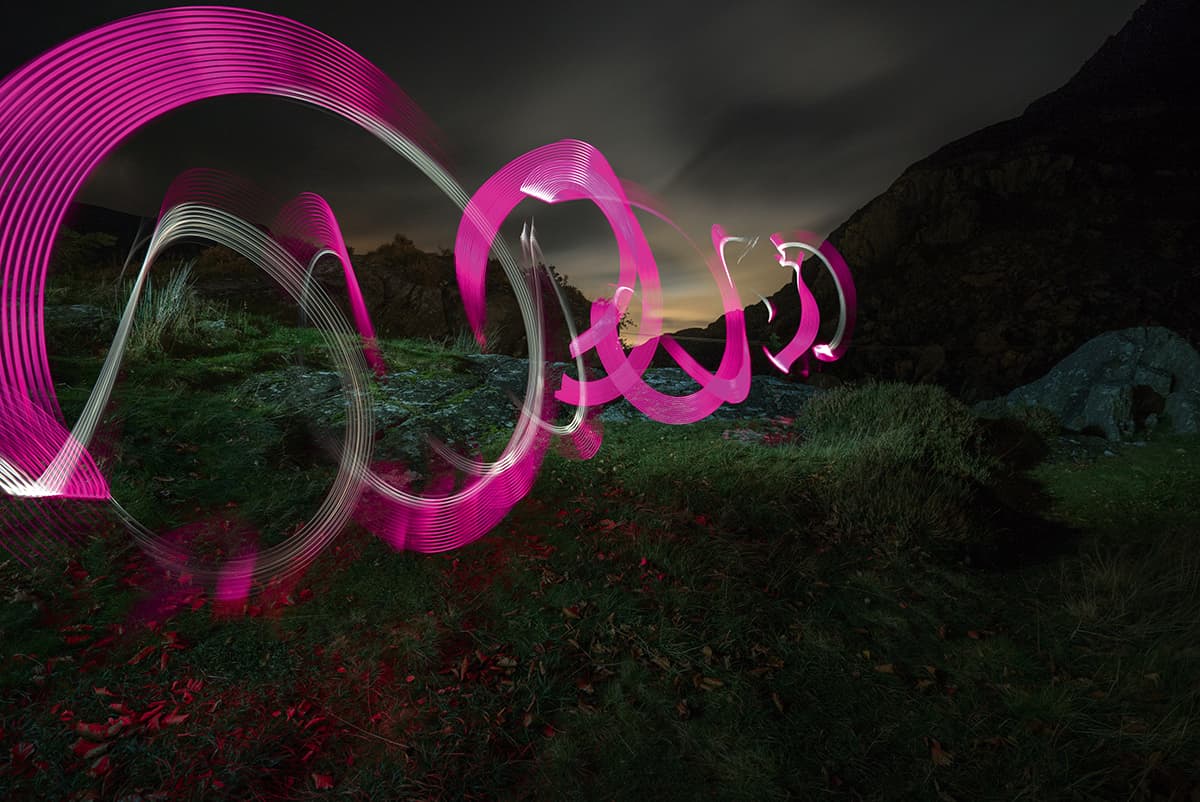
Look to the landscape and sky to inspire your choice of palette – either complementary or contrasting
Why? Simply put, using Shutter Priority or Aperture Priority means that you are asking the camera to make decisions on your behalf. Any stray light or shadow detected by the camera while it’s metering will affect the settings used.
Oncoming headlights, for instance, may trick the camera into thinking that the scene is brighter than it is, leading to underexposure. While you may end up with a great shot, relying on the camera’s choices means that you are removing the guarantee of consistency.
Far better to take control, let your light painting tools determine the aperture you set, and adjust the shutter speed to influence the amount of ambient light gathered by the camera. Use the slower pace of night to reflect on results and changes to settings to get the image you’re after.
Styles
There is no shortage of styles to pursue. From abstract frames of light movement against a black backdrop to geometric patterns that brighten architectural spaces, or moonlit landscapes with added flourishes of light, there’s no strict rules about right and wrong.
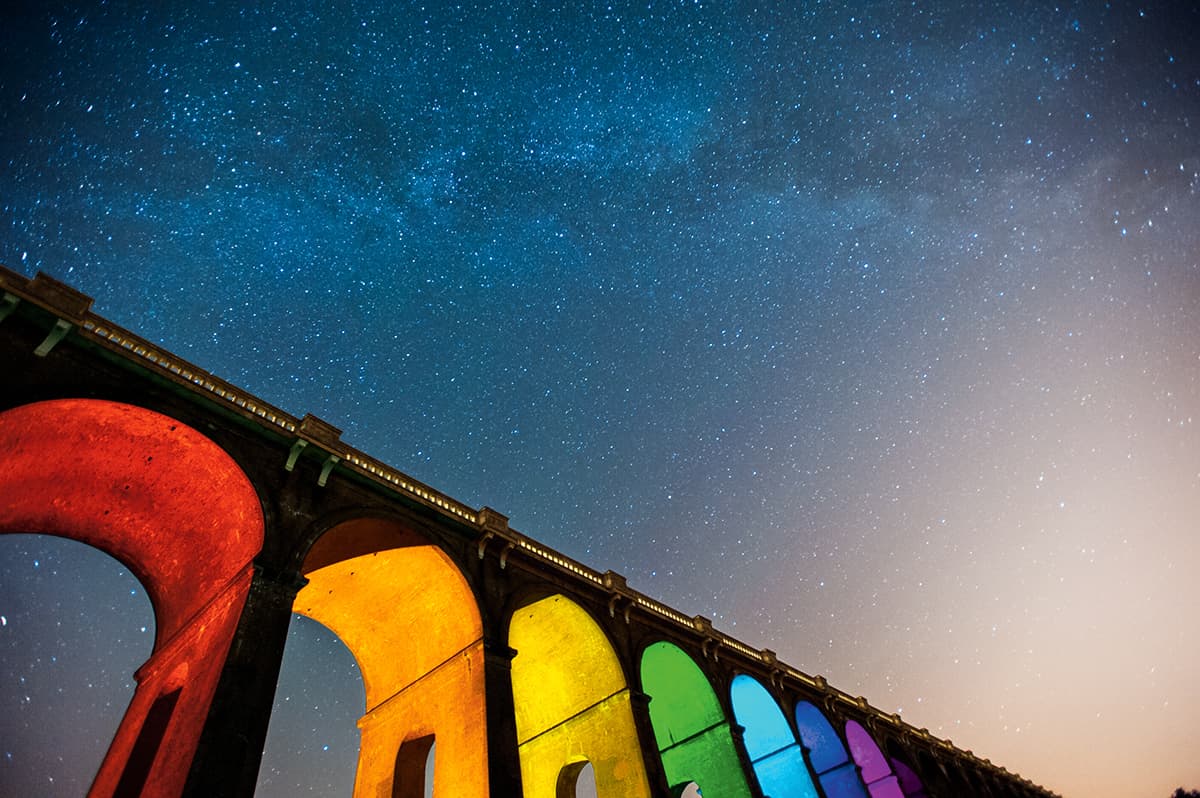
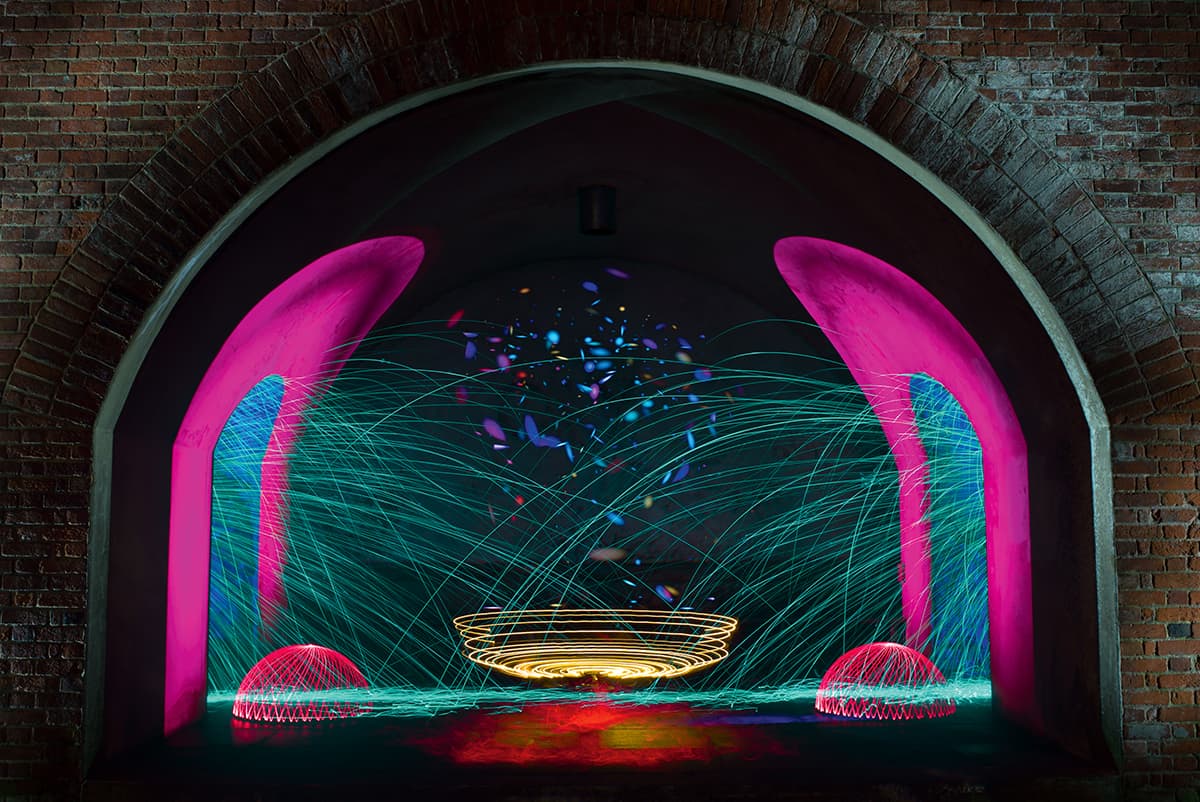
Having selected settings to capture the Milky Way, I needed only a relatively small torch to illuminate the elevated expanse of each archway
Arguably it’s least complicated to shoot light painting on a black background, particularly as it’s likely you’ll be able to create something within the confines of your home, garage or garden.
But that’s not to say it’s easy; in fact, with nothing else in the frame, you’ll be opening up the aesthetic of your light painting to the most scrutiny. Nonetheless, it’s a great starting point, and in a technical sense it acts as a gateway to more adventurous concepts
On the other hand, if you’re prepared to take on the further challenges of light painting on location, doing so opens up a whole world of storytelling opportunities as you integrate dynamic trails of light into the landscape.
There’s even a further, less-discussed, variant of light painting where you add illumination to a subject or scene but keep the light source out of frame.
It’s a technique with a range of uses: automotive photographers will use top-end LED arrays to meticulously highlight the gleaming form of prestige cars while, at the other end of the scale, urban explorers commonly showcase the textures of decay using nothing more than a torch.
How to get started with light painting: Equipment
Choose your equipment
Whichever style you opt for, your approach is likely to be very similar. A camera and tripod are obvious requirements while a cable release is strongly recommended, even if you don’t plan to shoot beyond the 30 seconds that most cameras can manage without one.
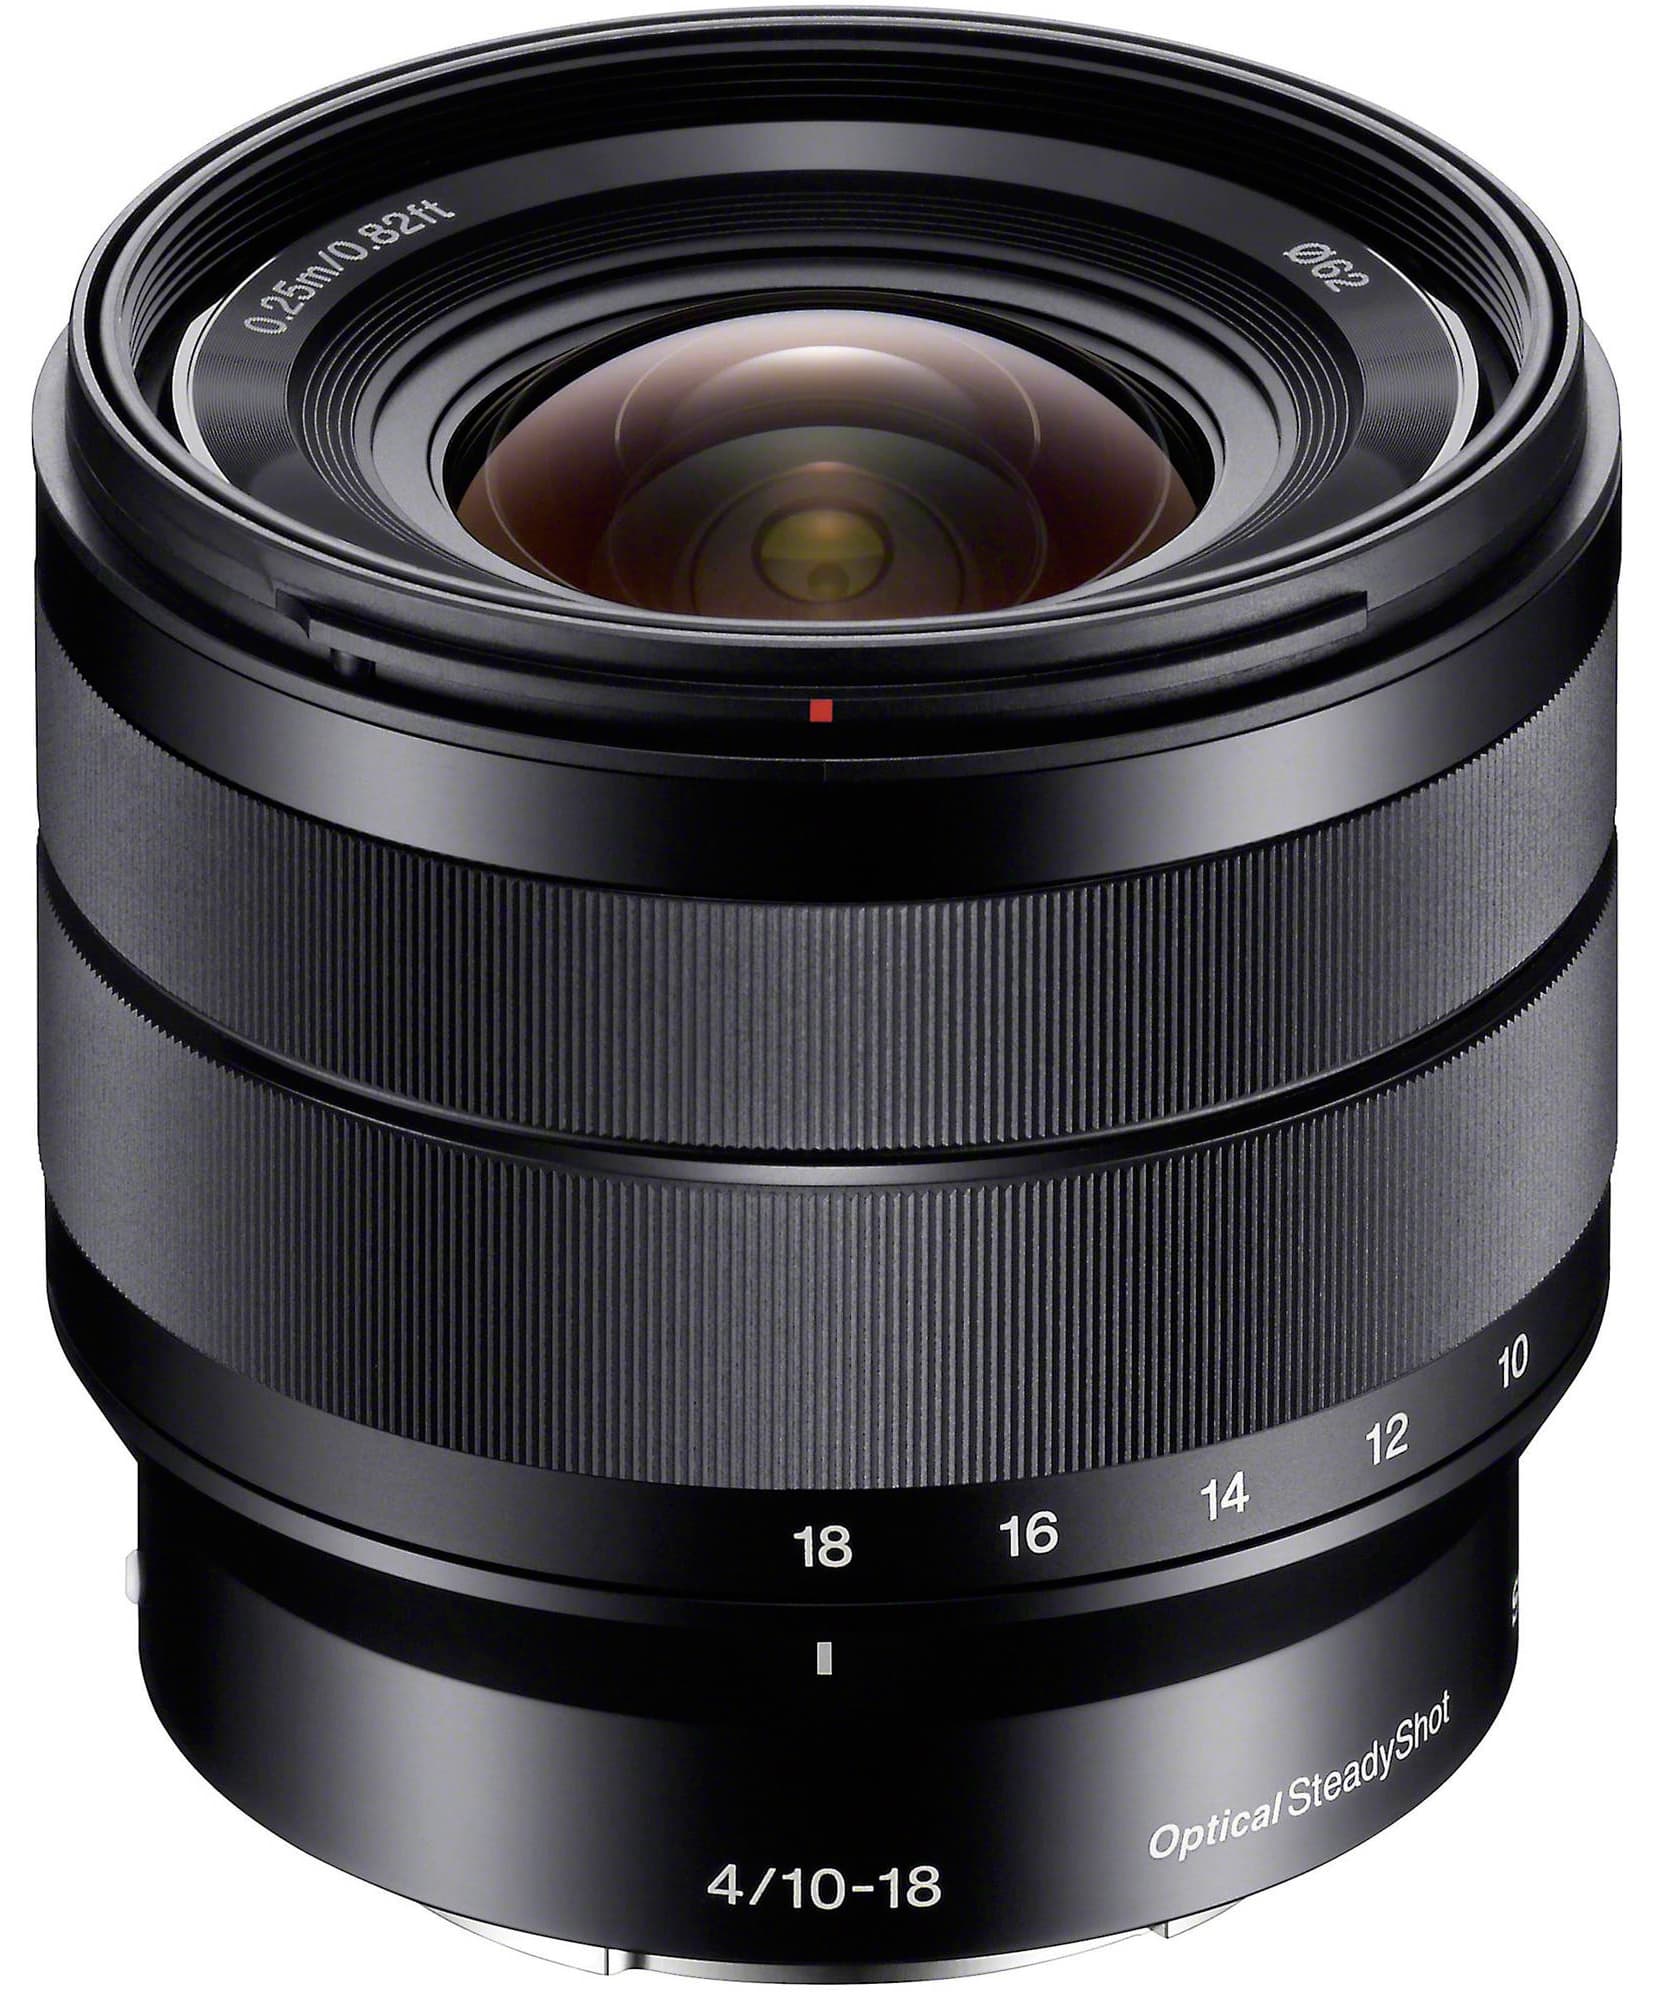
Ultra-wideangle lenses are the most popular choice among light-painting photographers, with their wide field of view and minimal issues with depth of field. More on how to actually focus in a moment.
In theory, you can create a light tool from almost anything that illuminates or glows: fairy lights are versatile and even if you can only find white lights, their colour can be changed with lighting gels or tinted cellophane.
Light sabers dug out from a child’s bedroom can be pretty handy, along with finger lights and glowsticks (at the cheaper end of the scale). If you feel like busting the budget, try specialist tools like the Pixelstick, Light Painting Brushes or the Ball of Light tool. Click here to check out our three top products for light painting.
In reality, practical considerations will lead you to match your light source to the local conditions – bright LEDs in urban areas versus dimmer lights out of town (or, at least, weaker batteries).
It’s best to use tools of similar intensity within the same exposure otherwise you’ll run the risk of overwhelming your camera’s dynamic range and end up with either blown highlights from the brighter light or no visual impact from the dimmer light.
Experience helps, but judging the suitability of a light tool in any scenario is often a matter of trial and error.
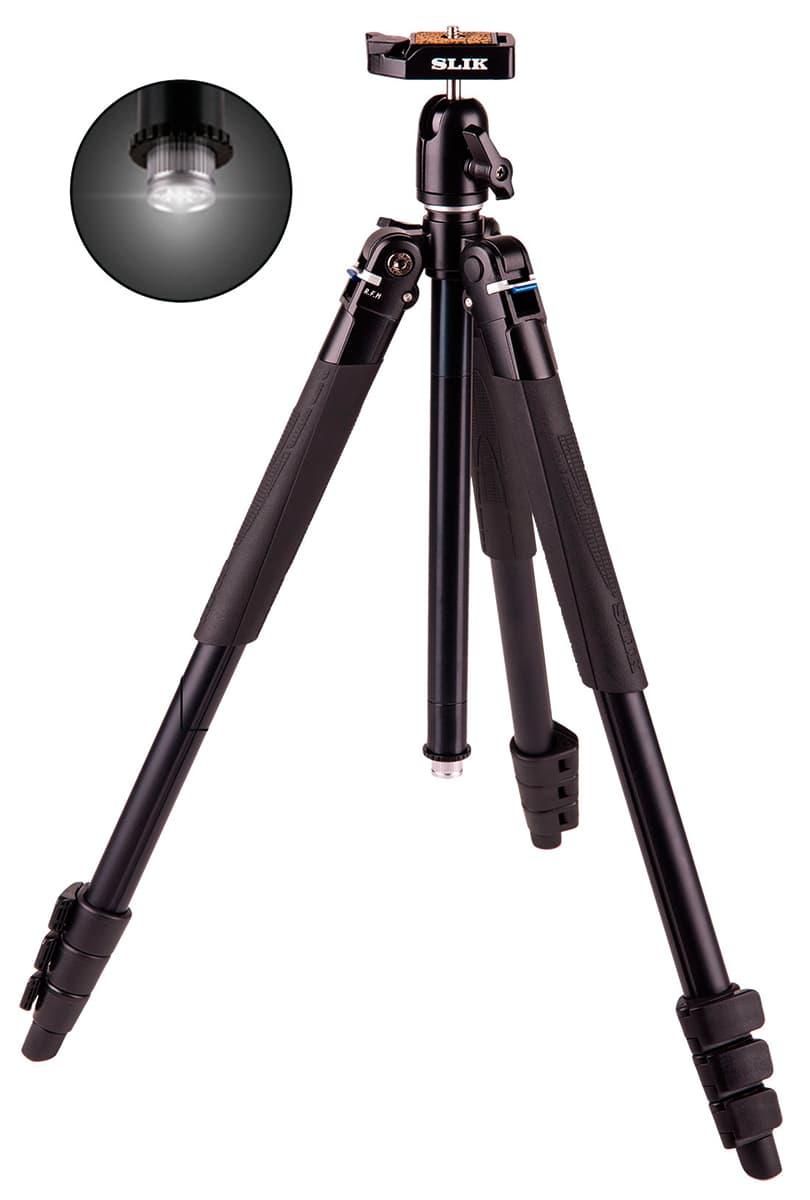
Tripod
A robust tripod provides a stable platform for long exposures. Attach a small LED or glowstick so that you can locate your camera in the dark. Alternatively buy a model with a built-in light.
Ultra-wideangle lenses
Ultra-wide lenses bring the frame to life. They also help minimise depth-of-field worries, making them ideal for those times you require super-sharp results.
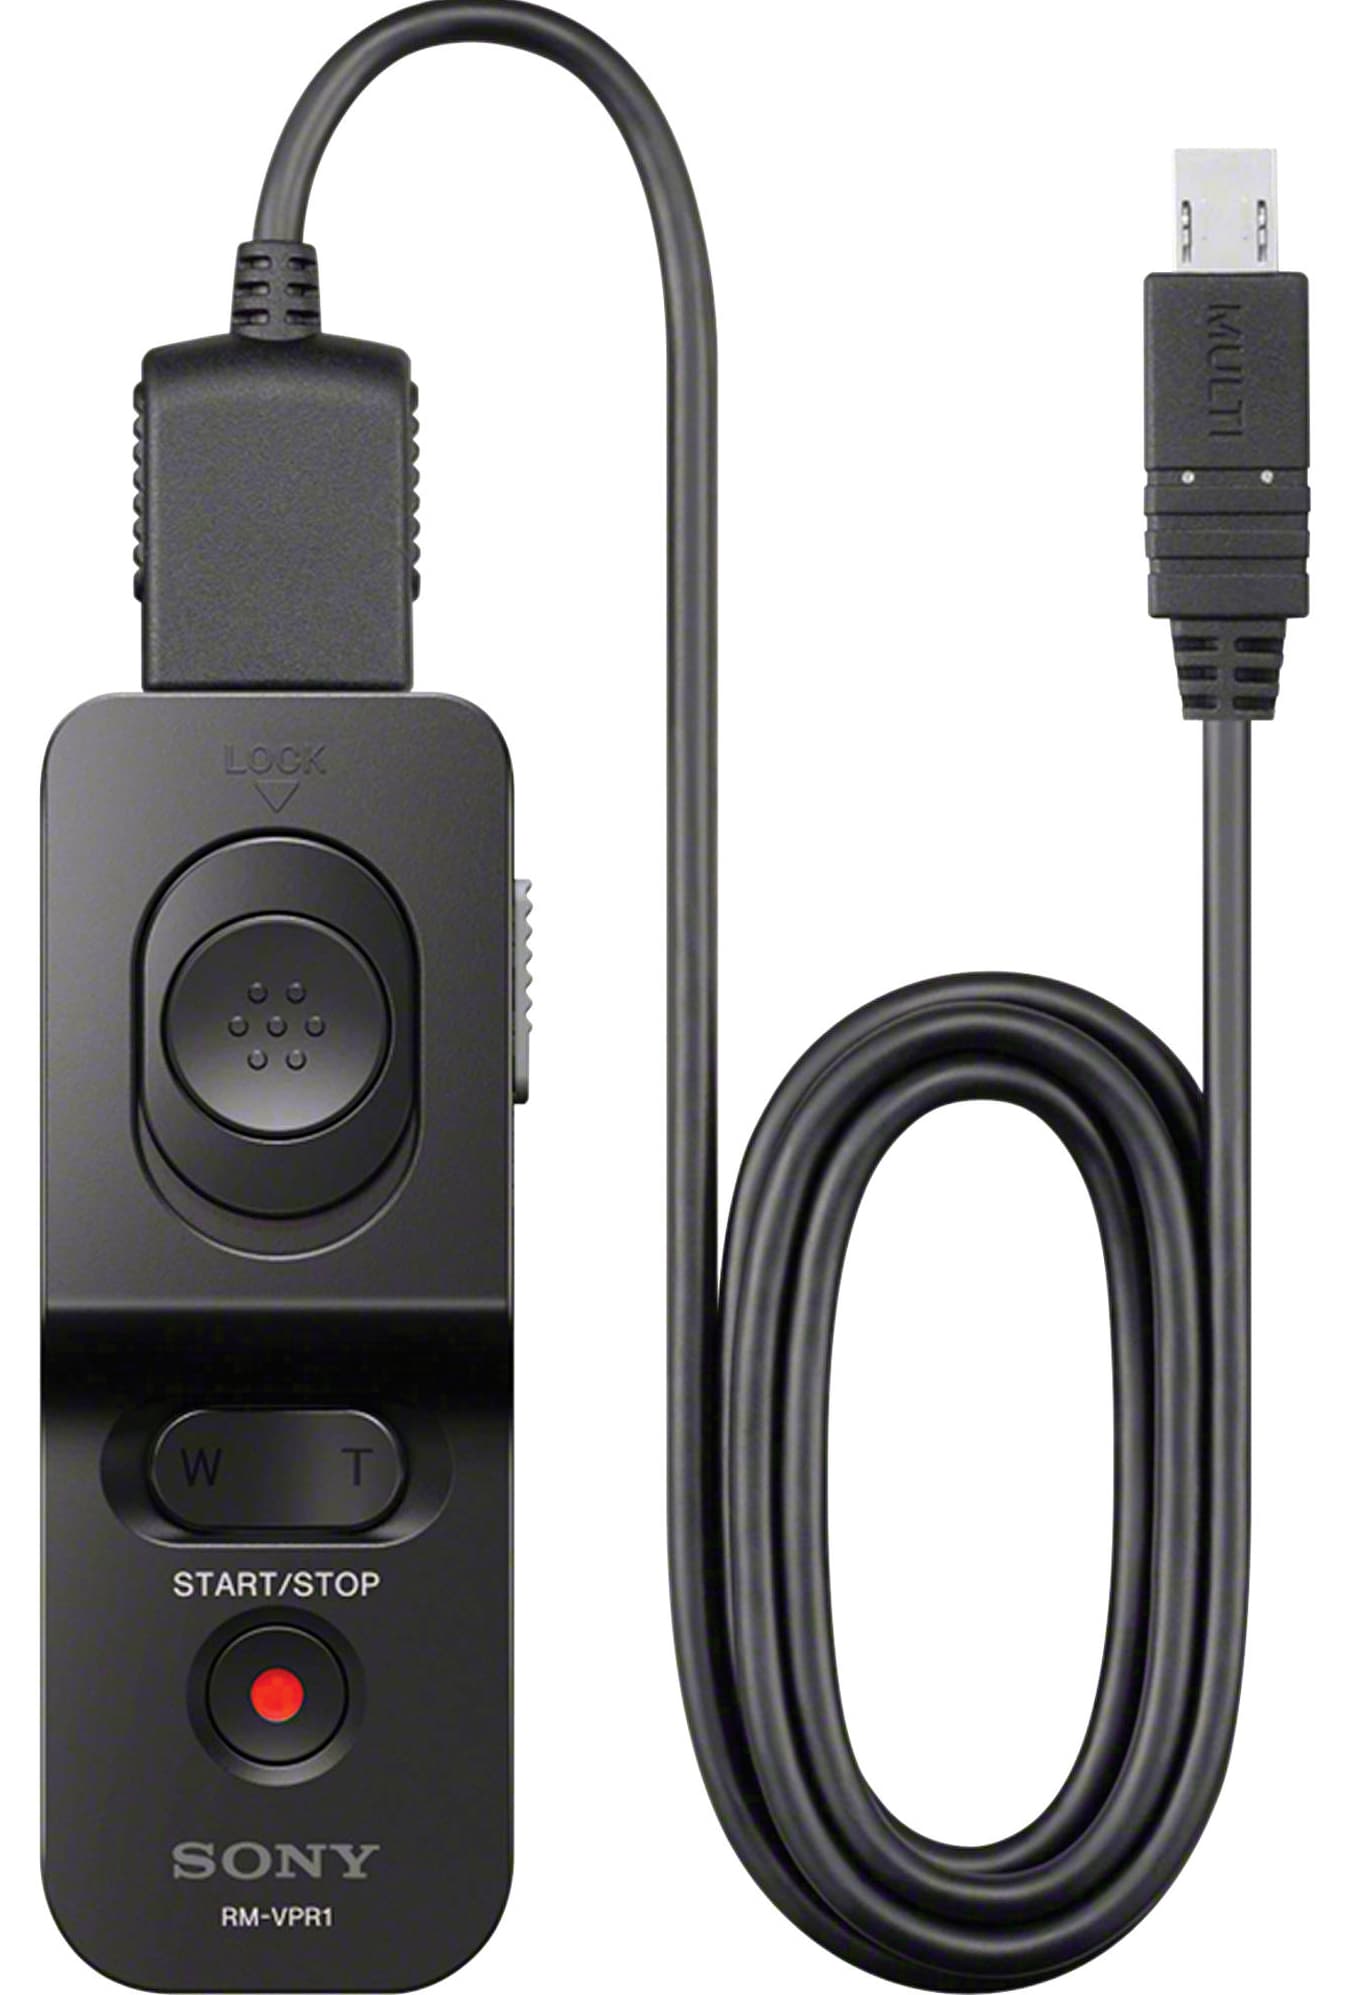
Remote release
A remote release is essential for preventing camera shake when you’re starting/ending your exposures, or executing bulb-time exposures. There are plenty of models available.
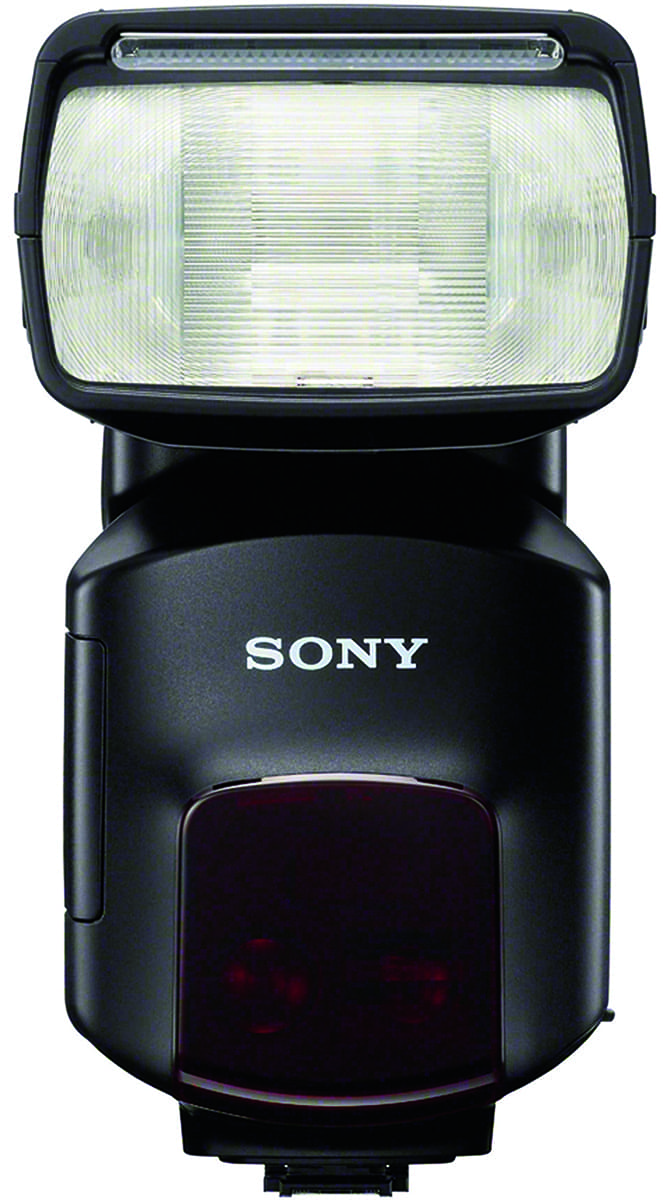
Torch/flash
Torchlight is live and therefore easy to see and control where your light is falling. However, flash is quicker and more powerful, and freezes people if you want crisp silhouettes. Where possible, try to keep both in your kit bag.
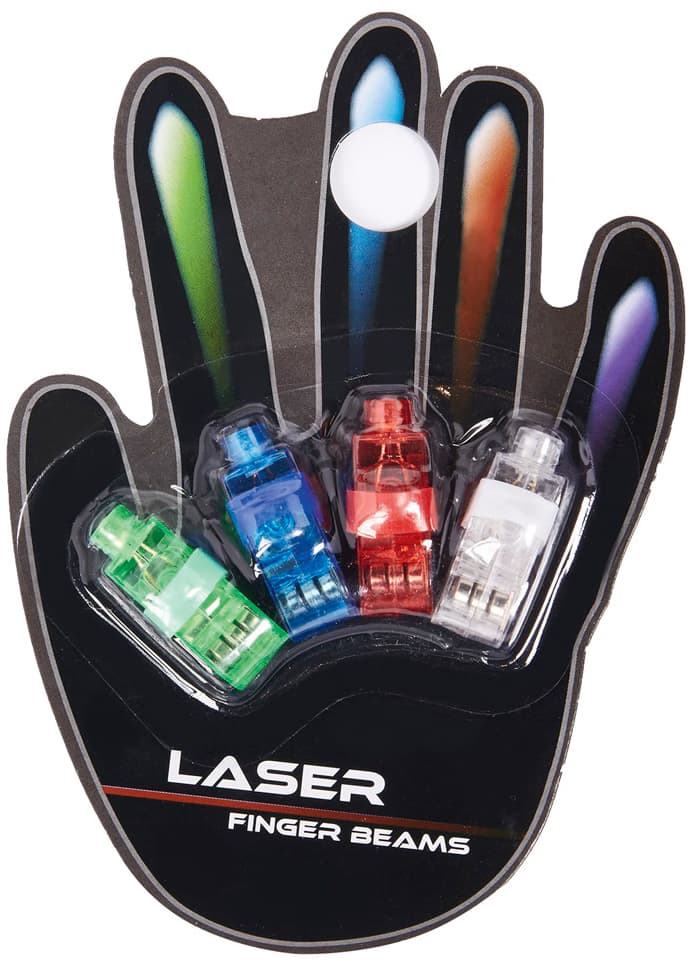
Lights, gels etc
Fairy lights are cheap and versatile: they can be strung out, bunched up or swung in either state – with effective results. Look for light-up toys, finger lights and anything else that illuminates, and don’t forget the batteries.
Hat/boots, socks, tea/cake
Avoid an early bath by preparing well for late nights and cold weather. Dress to keep your extremities warm and take some feel-good sustenance with you.

How to get started with light painting: Technique
Perfect your focusing
Once you’ve gathered light tools and other camera essentials it’s time to set up.
If your location is dark enough for a multi-second exposure, it may be too dark to compose your shot easily or permit autofocus. This is where a decent torch comes into its own, enabling you to illuminate within your frame for composition and focus purposes.
Light painting can be child’s play. Here, my daughter’s movement through the scene created this organic flow of light
In a scene illuminated by torchlight, autofocus should work effectively. Try it by focusing your camera at the area in which you’ll be light painting.
However, I find myself increasingly focusing manually using the excellent focus magnifier and focus peaking of my Sony Alpha 7s’ bodies – these features offer a zoomed live view of the scene and, within that preview, show small coloured highlights around elements that are in focus.
In most cases you’ll need to switch off the camera’s AF to prevent the camera from trying to refocus when you next press the shutter button.
Get into position
To aid moving in the dark it can help to mark the boundaries of your working area with glowsticks or tape on the ground just outside of the frame, and use more tape (or sticks/pebbles) to identify positions from where you’re going to light paint.
A 30-second test shot will help you to confirm your composition and give you an idea of the ambient light levels, photographically. You can shoot this at a higher ISO to speed up the test shot process, then drop the ISO back down to 200 and extrapolate the other settings for your final shot.
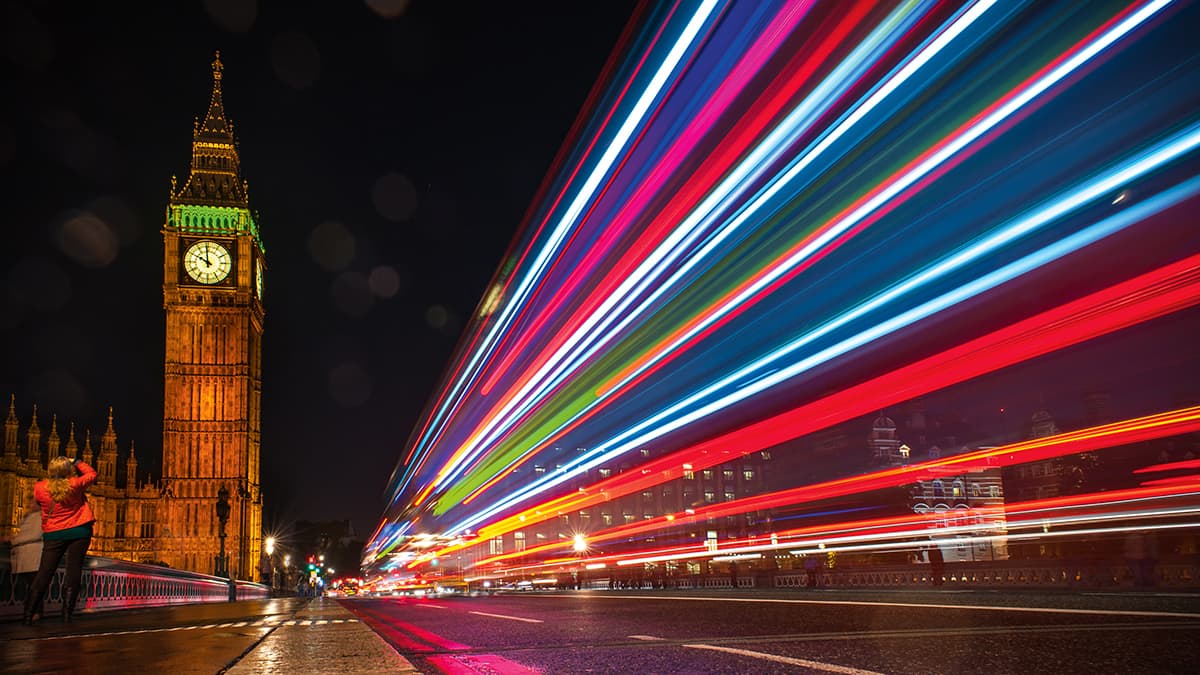
In brightly lit urban environments you may only have a few seconds to capture traffic trails before other parts of the image overexpose
Note, however, that while the exposure triangle relationship is linear, all settings are not created equal when light painting.
On paper, settings of ISO 200, f/4 and 2 minutes would give the same ambient brightness as ISO 200, f/8 and 8 minutes. But unlike aperture and ISO, shutter speed has no impact on how much light from a moving source reaches the sensor – it only affects how long the trail might be.
An aperture of f/8 is a typical starting point to capture the likes of fairy lights or light sabers, so calculate your exposure length from there, making reciprocal changes where required.
In all but the brightest environments a short exposure duration – 10 seconds or less – will result in a dark background, but the trade-off is a lack of time for light painting. Nonetheless there’s time to take a few steps across the frame or just motion your light past the camera.
If you aspire to create grander patterns, consider shooting several frames consecutively and layering them in post production. Your cable release will be invaluable for this, acting like a finger on the shutter button to trigger images at your desired frequency.
Move through the scene
Meanwhile, longer exposure times gather more ambient light and can help convey an ethereal feeling, particularly if you’re in the landscape with clouds drifting by or trees swaying in the breeze.
Remember to separate the time it takes to complete your light painting versus the time needed to gather sufficient ambient light.
Throughout your exposure you have the opportunity to move through the scene, introducing light as you go.
Handheld light, swung with fluid arm movements, introduces an organic sense of movement whereas light trails anchored at a fixed point – rotated around a light stand, for example – bring geometric precision.
Experiment with a physical subject
Waving lights around for minutes at a time is not for everyone. It demands a significant amount of creative vision, not to mention endurance.
Instead it can be gentler on the mind and body to start your light-painting journey with a physical subject, and build a shot around it.
Much of the approach is the same. Focusing on something – a car, for example – is always easier than focusing on nothing!
With the right combination of technique, location and tools it’s possible to light a car in a single frame, although this approach will lead to compromises.
The key to a strong final image is accepting that it’s going to take several lighting frames, often with different exposure values.
Shooting separate frames for each ‘plane’ of the car, as you walk parallel with each side, front and rear, is a good target to ensure that you have captured light in and from enough angles.
Further exposure-adjusted frames for head- or tail-lights and, of course, a base foreground frame, should give you all the files you need to complete your layering, without overwhelming yourself with too many frames to then have to work through in post production.
Creating Light Trails
In many ways light painting can be likened to an extension of shooting traffic trails, with the head- and tail-lights of traffic replacing handheld lamps as the source of illumination.
In fact, so similar are the approaches that I often recommend traffic trails as the best starting point for newcomers to nighttime long exposures: again, use the aperture setting to control the brightness of vehicle lights and dial in a shutter speed that gives you the ambient lighting you’re looking for.
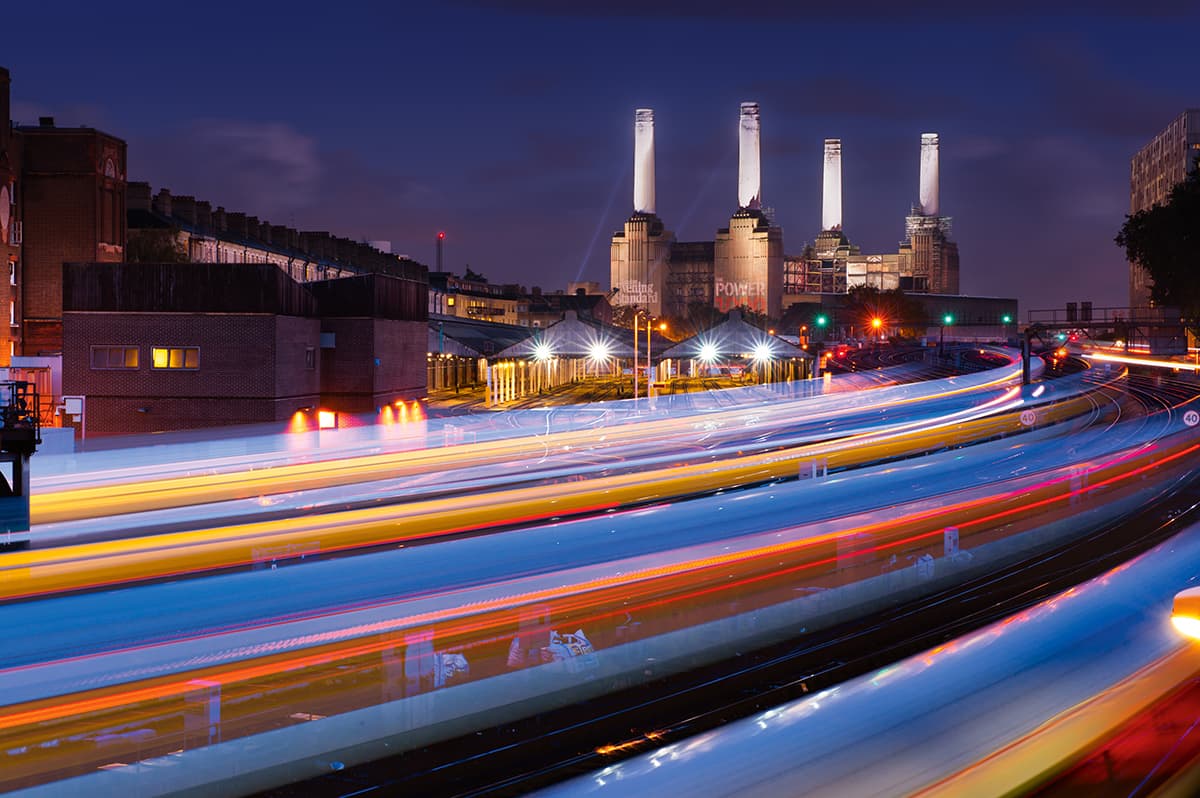
As complex as this shot appears, it actually came down to timing. Having reached the vantage point a few minutes before sunset, I waited for those perfect few moments when ambient light levels dropped enough to balance the glow of fixed and moving lamps across the scene.
I knew I’d need exposures of 20 seconds or more – the average time it was taking for trains to pass through. Fortunately the variables converged to the same point in time – a fading sky and 20 seconds at f/11 – the aperture best suited to capturing these lights from my raised viewpoint.
I kept shooting long enough for a train to pass on each set of tracks, then I layered my favourite frames in Photoshop.
Try continuous lighting
Continuous lighting offers an advantage over flash in that you can observe the effect of the light ‘live’ and make adjustments accordingly.
As you might expect, a weak light held close to a car will create a very different result than a strong light held further away.
Similarly, different aesthetics can be achieved by holding your light higher or lower. Cars usually look better lit from above but it can be a matter of individual taste.
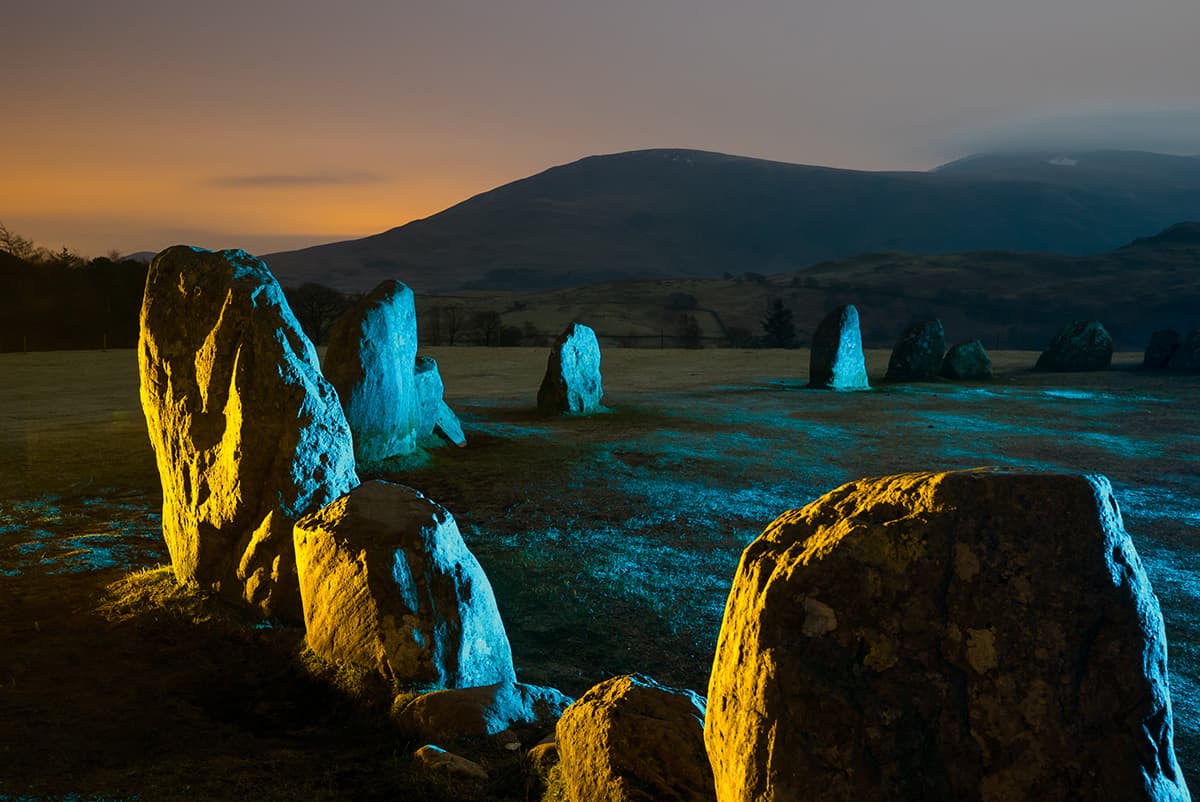
In most cases, a similar approach can be applied to other subjects, from simple studies in the comfort of a home studio to dynamic interpretations of monoliths amidst the landscape.
You can, of course, apply illumination to the landscape itself. In this case, as before, experimentation around the relationship between camera, light and subject can yield dramatically different results with nothing more than a few footsteps one way or the other.

Light painting over water can transform negative space with fascinating rippled reflections
Colouring your light(s) with gels is a good way to differentiate illumination from different positions. Expect 1-2 stops of light loss from your torch when using gels, however, which can be offset by any combination of moving closer to the subject; moving the light more slowly over the subject area; or adjusting the camera settings.
Get it right in-camera
The unwritten rules of light painting suggest that images should undergo no editing once the shutter closes.
Following such an ethos can be frustrating, especially if you make a mistake towards the end of a 15-minute frenzy of lighting. However, shooting to create a usable JPEG straight out of the camera is undoubtedly rewarding and may serve to motivate you towards constant improvement.

It’s a good idea to get your white balance right at the time of shooting
How far you’re prepared to go in your editing software is a matter of personal preference, but as ever shooting raw will give you the greatest latitude to recover highlights and lift areas of dense shadow. Take time to nail white balance in camera, though, as having the ‘wrong’ white balance selected on location appears to have a significant tonal impact.
How to get started with light painting: Editing
If you do decide to embrace post-processing it opens up options to create your final image in simple stages, varying the settings to accommodate a wider range of light sources.
For example, capture a base exposure with no light painting, then shoot separate frames for EL wire, orbs, domes, light sabers and wire wool, changing the aperture setting from f/4 to f/11 to reflect whichever light you’re using.
The exposure time can vary in response to the time you need for each light painting function.
Free software from StarStaX (designed for star trails but equally applicable to light painting) can quickly stack your JPEGs into a single image, or you can use Photoshop Layer blending mode > Lighten for complex layering with the freedom to mask areas of each frame.
Step-by-step processing
1. Import and tonal adjustments
I use Lightroom for developing single images and cataloguing Raw files, but I dip into Photoshop when I’m layering two or more frames. You need to develop a workflow that works for you. When it comes to settings, the highlight and shadow sliders are my most frequently used adjustments.

2. Select the frames
In Lightroom select all the frames that you want to consider for layering. This might include a clean, base exposure without light painting or even light-painting frames from other sessions.
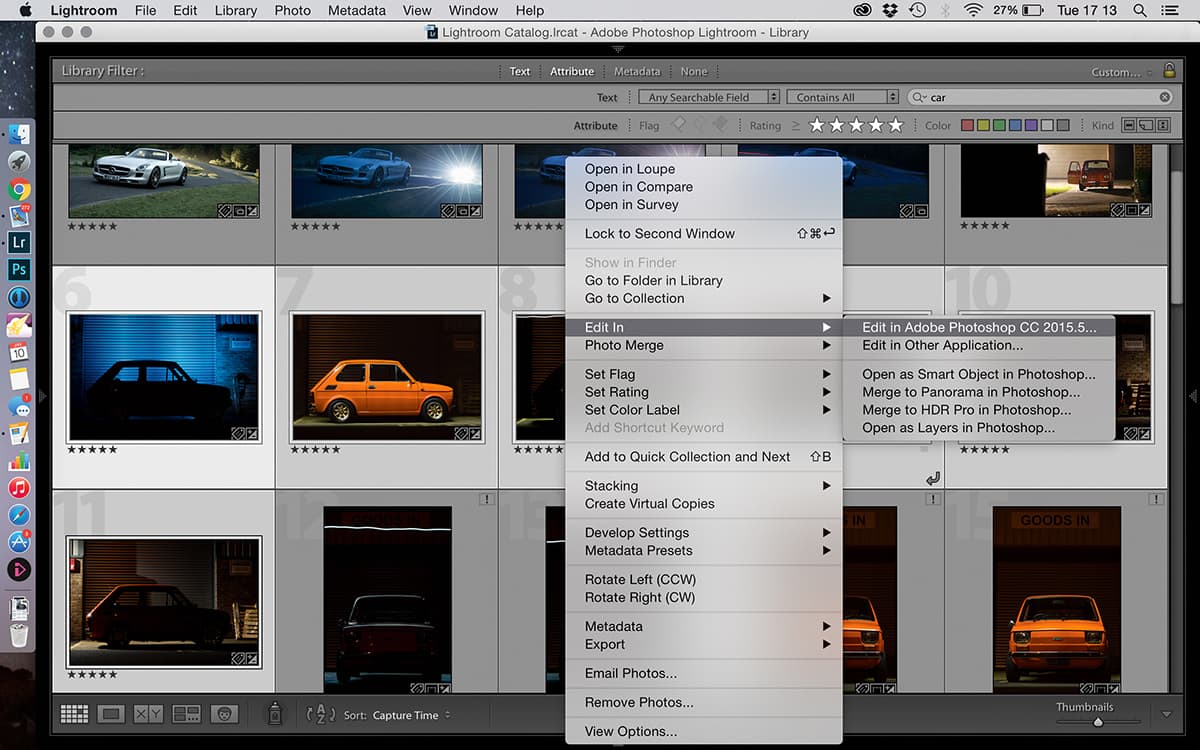
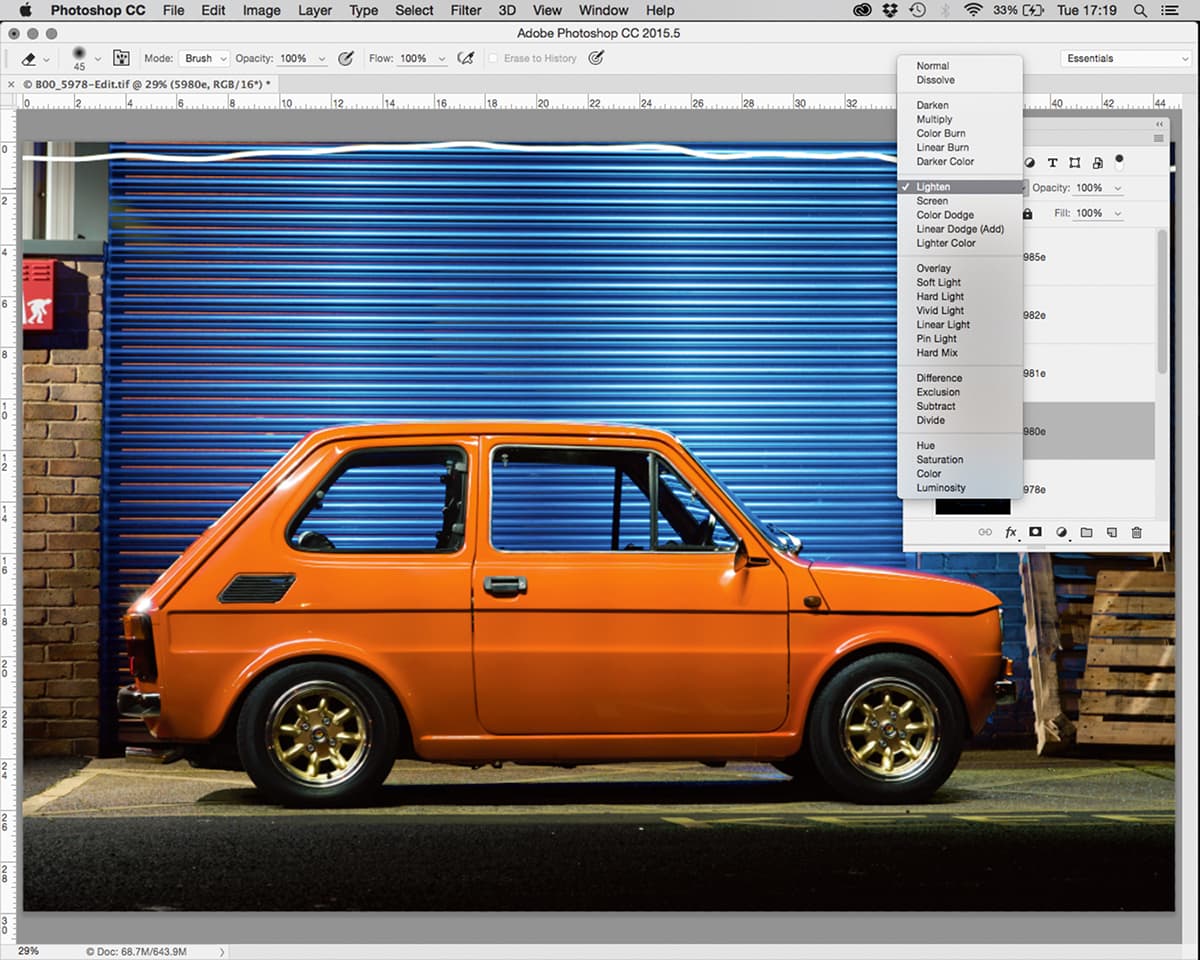
3. Blend the layers
In Photoshop, copy each frame to a new layer in the same file and blend with ‘Lighten’ layer blend mode. Adjusting the opacity can bring a more cohesive feel across the whole image but straying too far from 100% opacity on lighting frames can look muddy.
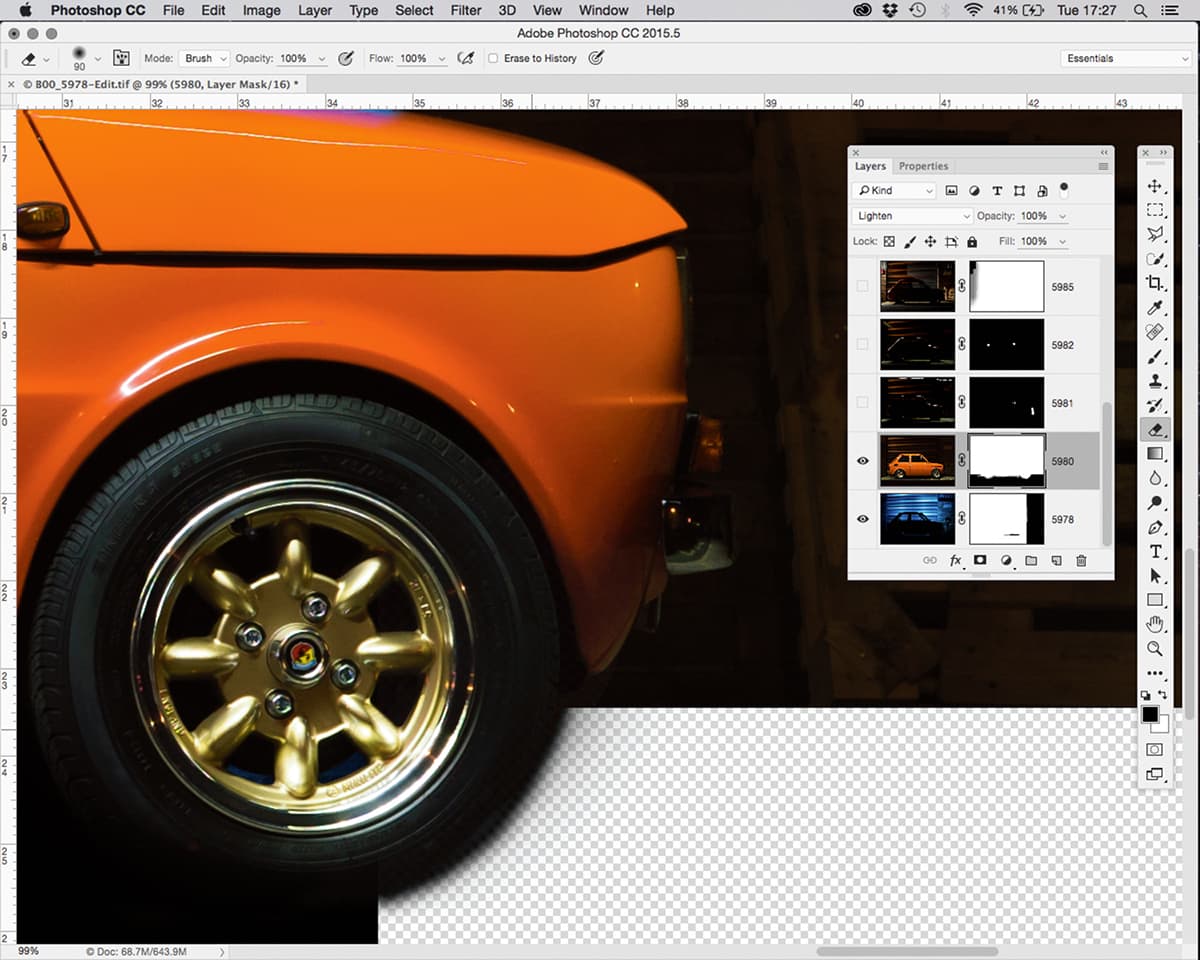
4. Clean up the image
Any areas with stray light, or where you’ve ghosted into individual frames, can now be masked off to clean up the image. I usually place my base exposure as the bottom layer to preserve its EXIF data when it’s saved back to Lightroom.
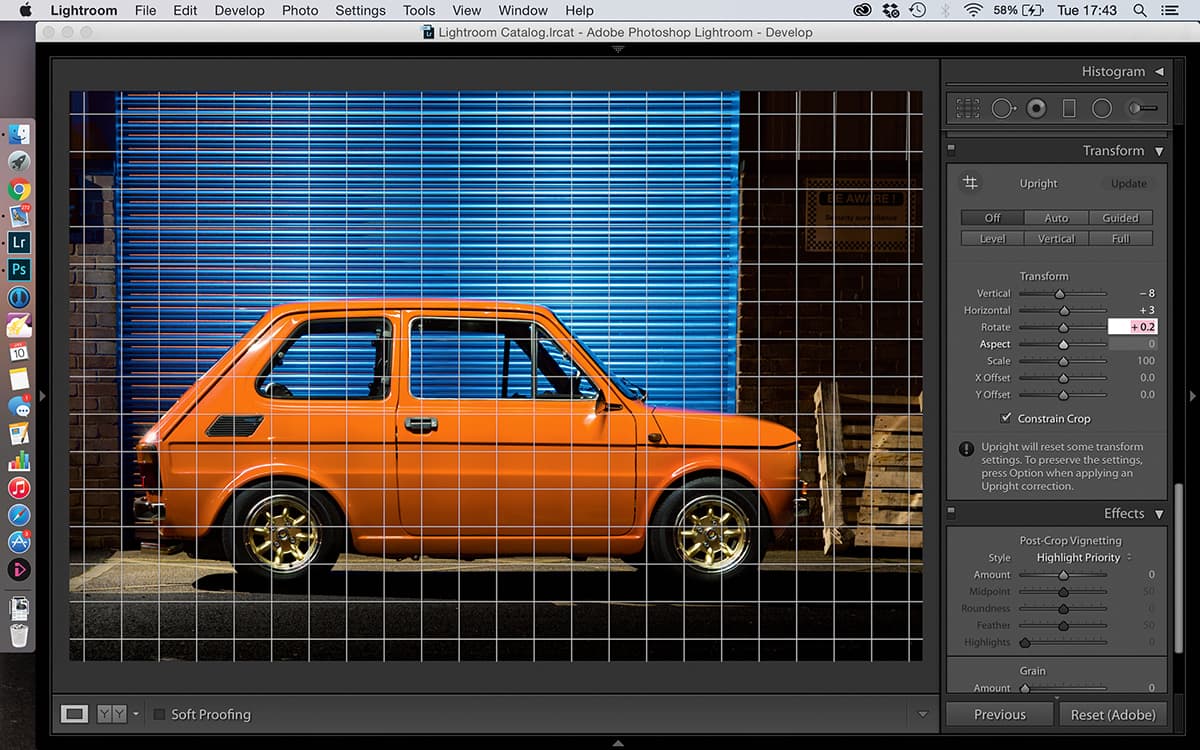
5. Make final adjustments
When you save and return, it preserves the layers and returns you to Lightroom for any final adjustments, and the chance to export. It’s here that I do any Transform adjustments to minimise the potential of small frame-to-frame misalignments.