
It’s never been possible to do what Anders Andersson can do with a camera. Not because the camera technology was not up to it, and not because the things he photographs did not exist, but because you simply could not get a camera in the positions you can now. What’s changed is the emergence of affordable, highly advanced consumer drones set up for photography – and Swedish photographer Anders is somewhat of an expert in the art of using them.
‘Around four or five years ago someone showed me a clip on YouTube taken by some Finnish guys using a drone,’ he says of his first experience of the new technology. ‘They had the drone circling around a moose in a forest clearing. I had never seen anything like that before and it simply blew me away. The clip wasn’t very smooth or well executed, but just being able to hover and move slowly in the air, in first-person view, was extremely cool. I realised pretty soon that this had the potential to be the next big thing in photography, which proved to be a correct assumption.’
Five years later and Anders would seem to have well and truly mastered the art of ‘drone photography’ – although interestingly, he believes such an assumption would be misleading. He thinks we are still very much at the early stages of where such a discipline may take photography.
‘It’s still something that is under development,’ he says. ‘In “normal” photography, it is quite hard to come up with something unique that hasn’t been done or seen before. In drone photography, there is still a universe waiting to be discovered, both for composition and technique.’
Sony Alpha 7, 35mm, 1/1250sec at f/5, ISO 250
Tool kit for brilliant drone images
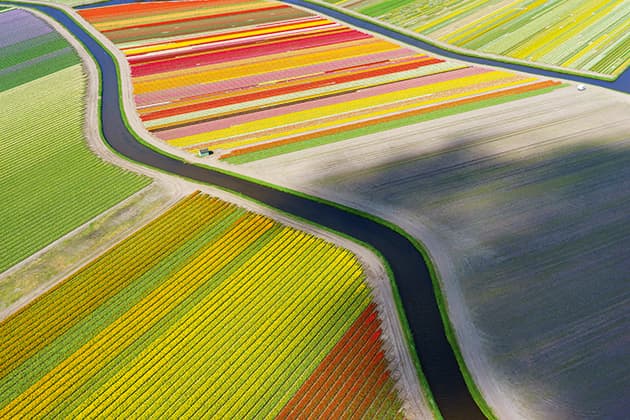
Currently, Anders is attracted to photographing anything with a strong geometric pattern, from man-made constructions to Dutch tulip fields with their vast rows of multi- coloured bulbs. He takes these images with an expensive and varied collection of kit.
‘I have a large, lethal-looking HAB Paparazzo V2 drone for aerial stills, and a DJI Phantom 3 Professional for film work,’ he says. ‘I also have two ProDrone Byrds, which I won in China’s first drone photography contest last year – called China’s UAV Photography Contest.’
Anders’ preference is to use the HAB machine. ‘It is a Y6 configuration (it looks like a Y), with two propellers on each arm,’ he explains. ‘This set-up makes it safer, because if you lose one or two propellers the machine won’t fall out of the sky. It’s also very resistant to wind – I’ve flown in 20m/s [metres per second] winds without any problems.’
The Phantom has a default 4K, 12-million-pixel camera on a three-axis gimbal. Anders says it’s fine, but the images tend to be only suitable for web publishing. The quality is much better on the HAB, apparently.
‘On that, I have the original Sony Alpha 7 camera, which is a full-frame unit in a very compact shell,’ says Anders. ‘And I usually have a Sony Zeiss Sonnar T* FE 35mm f/2.8 ZA lens mounted on it, which is extremely sharp and lightweight.’
Sony Alpha 7, 35mm, 1/200sec at f/8, ISO 250
The camera is attached to the drone on a two-axis gimbal. ‘Since it only stabilises in two ways, it’s not perfect for filming, as any movement from side to side is visible, which occurs if it’s windy when flying,’ he adds. ‘In the future, I might upgrade to the new Sony Alpha 7R II, as it has a higher resolution and five-axis stabilisation for longer shutter speeds.’
As this last point demonstrates, taking photos using a drone – or unmanned aerial vehicle (UAV) – can be very complicated. What could add to the complexity is that Anders has to decide how to set up his camera before it gets airborne.
Any decisions are final until the drone comes back down again, with battery capacity allowing flight times of up to 25 minutes. That said, Anders says he also shoots on land in a way that lends itself to these constraints.
‘As I don’t have any controls for things like exposure when airborne, I set the camera to aperture priority and fire away,’ he says. ‘That’s the way I shoot anyway. Since I also shoot raw, there’s room for improvement in post-processing if anything is under or overexposed.
‘I also use centreweighted autofocus, just as on my regular cameras. I usually shoot at f/6.3-f/8 to get maximum sharpness, and since most of the subjects I shoot have the same focal distance, without much depth of field needed, that works fine.’
Sony Alpha 7, 70mm, 1/500sec at f/8, ISO 800
He adds that there is more intricacy in deciding what to shoot. ‘It’s pretty hard to figure out what looks good from above until you actually see it from above!’ he says. ‘I have a monitor on my transmitter with live view, so whatever the camera sees, I can see as well. As most drones have GPS, they will stay in the air if you let go of the controls, which makes aiming and framing pretty easy.
‘Someone once said it’s like operating a crane, which is an accurate description. But although I compose the same way as when shooting on the ground, I place more emphasis on capturing patterns and geometry from the air, since the subject matter is pretty much two dimensional when looking straight down on it.’
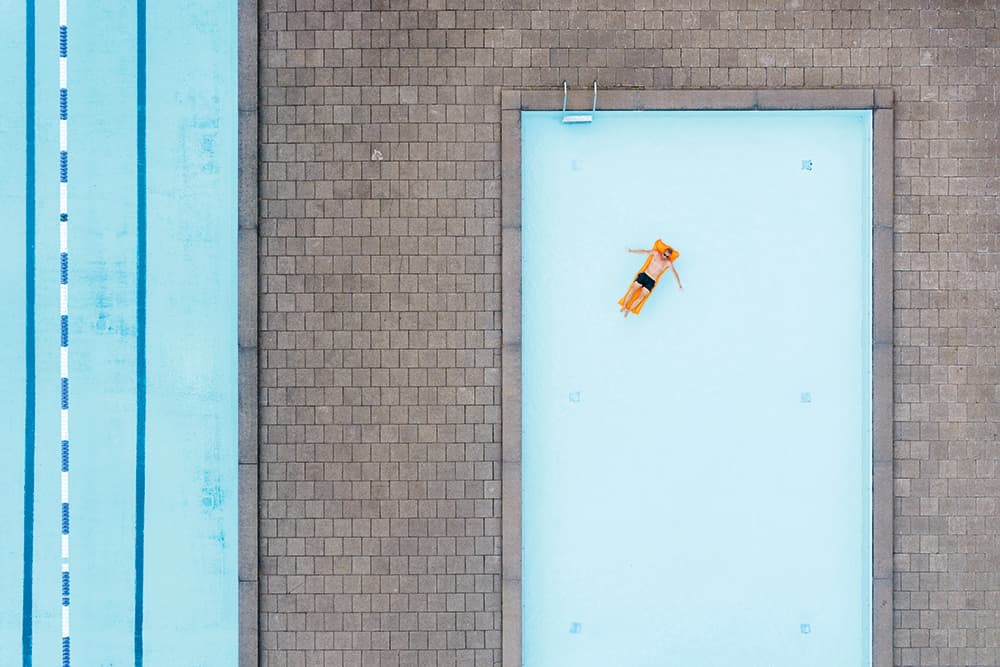
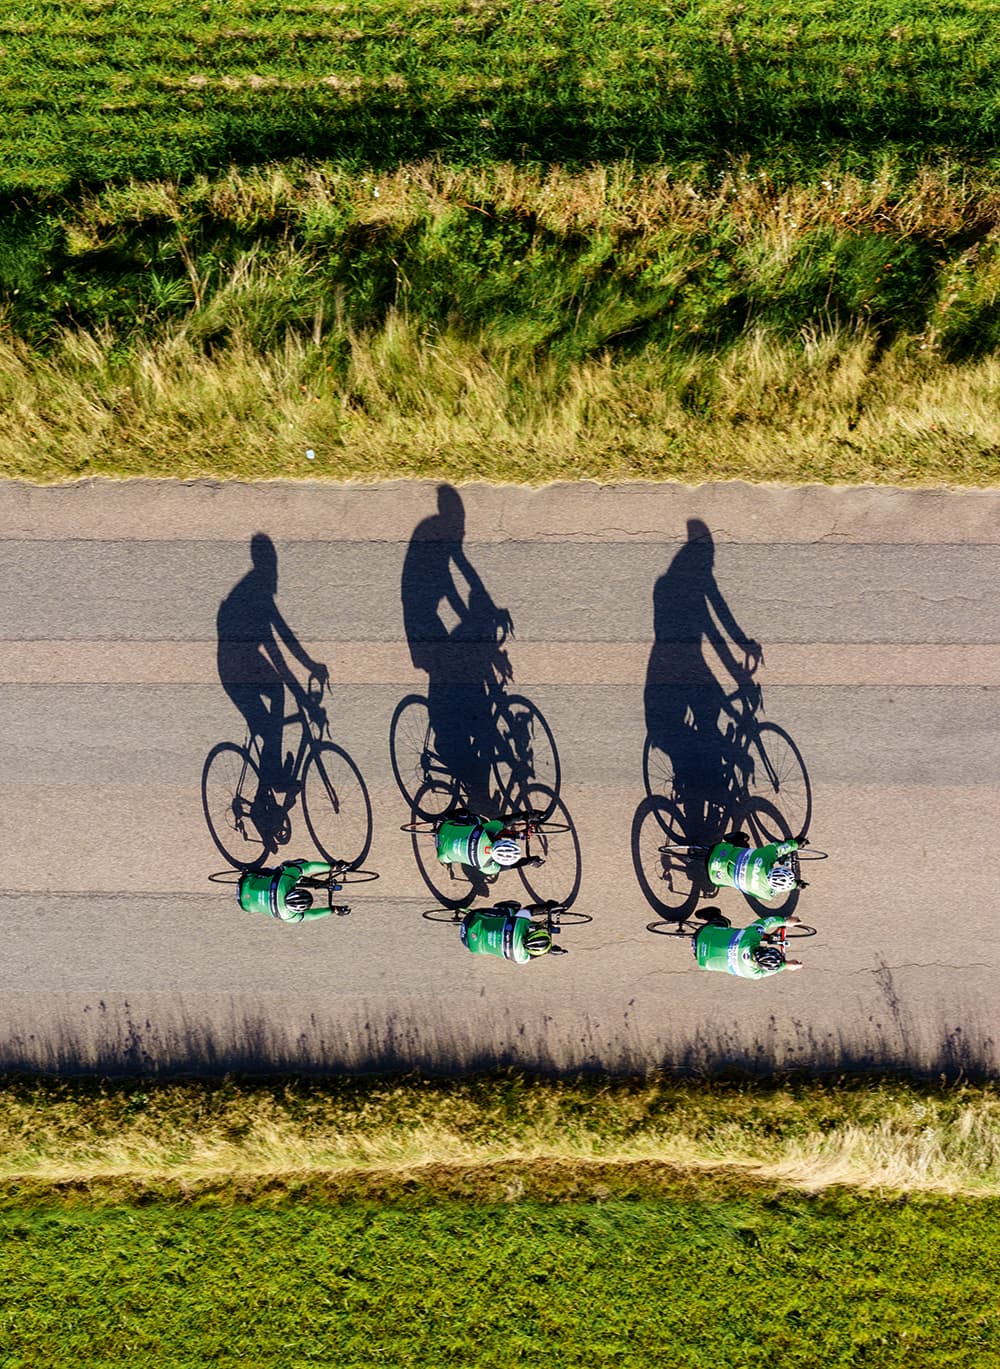
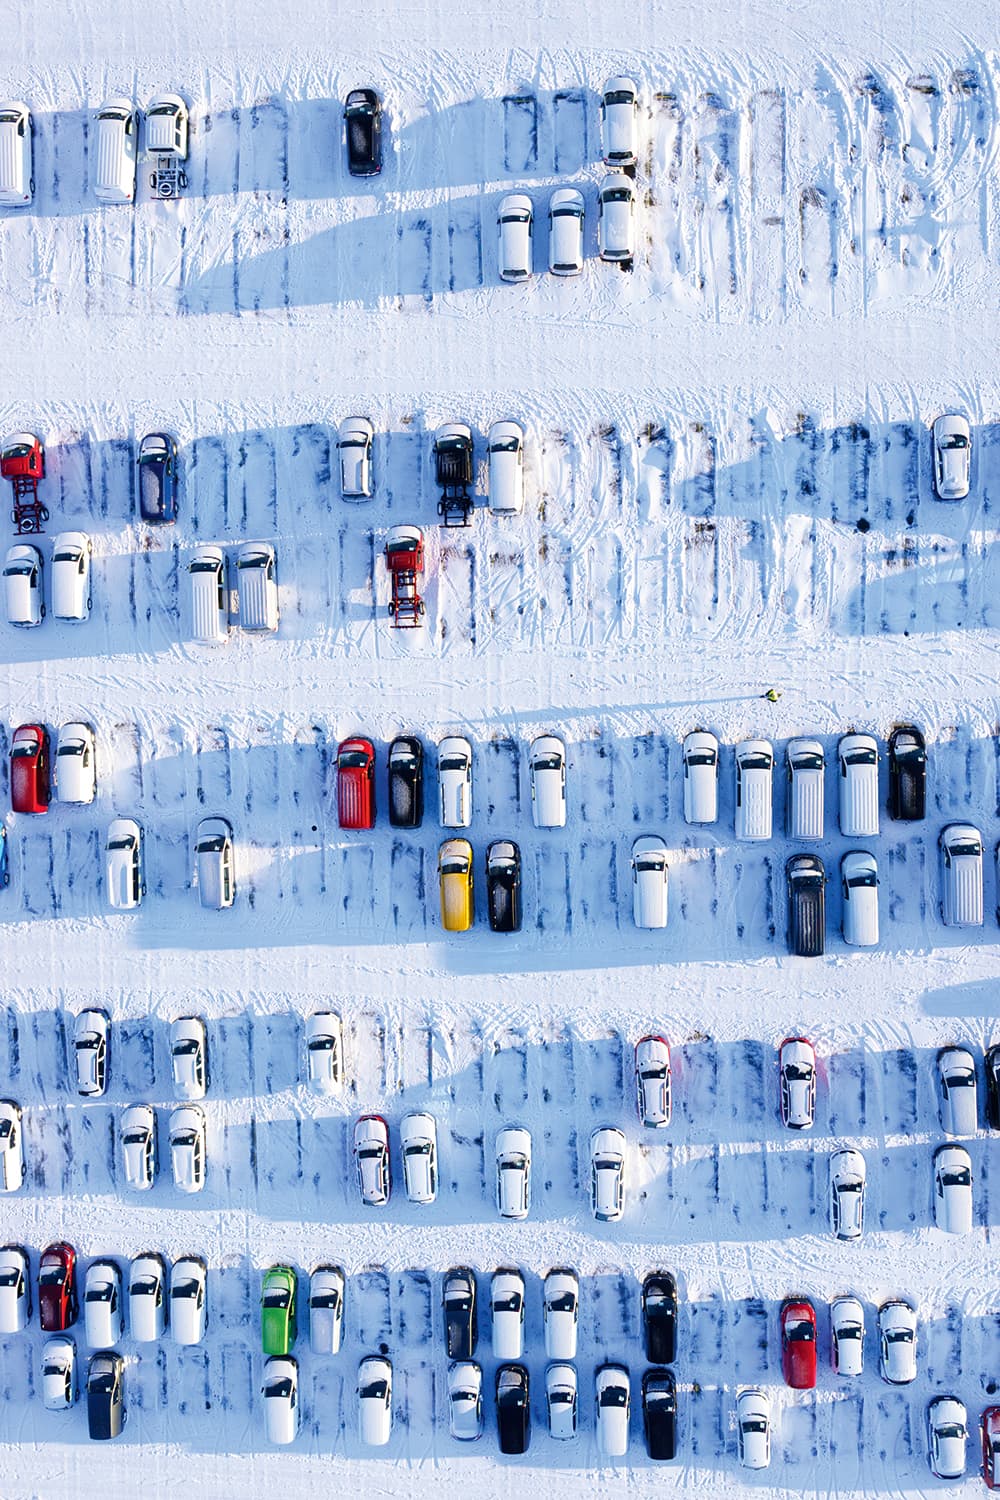
For Anders, as well as geometric patterns, the use of colour plays an important role in creating interesting aerial images. ‘Contrasting colours work well, like a red car on a road in a green landscape,’ he says. ‘I also like working with shadows of people and objects, as you get a rendering of their form, lying on the ground. I would love to photograph a beach full of people from a pretty low altitude, but due to safety reasons and current regulations it’s not possible unless you ask each and every one of the individuals being depicted.’
Indeed, when photographing in this way there are a lot of regulations governing what you can and can’t do. ‘You need to investigate what the rules, laws and regulations in your country have to say about droning,’ adds Anders. ‘They aren’t the same everywhere, and I think current laws in many places aren’t really made for drones, which sometimes makes it frustrating and confusing.’
Anders recently encountered this frustration first hand on a visit to Egypt, which highlights the grey areas surrounding this rapidly evolving type of photography. ‘I was on my way to Gebel el-Silsila to help a team of archaeologists map and 3D-render a vast dig there,’ explains Anders. ‘However, both my drones were confiscated by customs at the airport. I had, or so I thought, all my papers and permits in order, but apparently this was not the case. It looked like I was going to be taken into custody, but luckily this was avoided when my contact there managed to get me out of the situation. I had to spend a week at the site doing nothing!’

Sony Alpha 7, 50mm, 1/320sec at f/9, ISO 200
The rules of the air
Current UK law permits anyone to fly a drone, so long as it weighs less than 20kg and it’s for personal use only. However, it cannot be flown within 150 metres of a built-up area, and must be flown at least 50 metres away from any a person, vessel, vehicle or structure.
If you can get your head around these rules, you can then get started with drone photography yourself. Or rather, you can begin to train yourself to fly a drone so you can eventually use it for photography.
‘I started out with a very simple octocopter, maybe 6in [15cm] across, just to learn how to control it,’ explains Anders. ‘You don’t want to start learning on a £5,000 machine, as you will crash at the beginning. The DJI Phantom 3 has a built-in simulator, meaning you can plug the transmitter into a computer and learn how the controls work without any risks at all. Also, if you’ve played a lot of Nintendo or PlayStation, you’re on top of things already!’
Once you’ve mastered how to fly the drone, Anders says there are several factors to watch out for that may hinder you along the way. ‘It’s incredibly hard to judge distances: when the drone is more than 20 feet [6 metres] away from you it’s impossible to see how close you are to an obstacle,’ he said. ‘Be aware also of flying inverted: when the front of the drone is pointing away from you, it will react the way you want. Pull right and it flies right. But if you turn 180° in the air and have the nose pointing towards you, pull right and it will fly left! This is one of the most common reasons for crashing and it takes a lot of training to figure it out.’
Adverse weather conditions are also a problem for drone photographers, with wind and rain being the ones you particularly want to avoid. ‘Electronics don’t like to get wet,’ explains Anders, ‘so it’s best to avoid the rain. Although my HAB Paparazzo drone can take some rain, if the camera lens gets wet it will impinge your view and you might end up with more arty photos than you would like. It’s also worth noting that winds are always stronger the higher up you are.
Sony Alpha 7, 35mm, 1/400sec at f/8, ISO 250
‘Also, don’t fly in fog, especially if it’s cold outside, as the aerodynamics might cause ice to build up on the propellers. Icy propellers might cause your flying apparatus to stop flying and come down for a hard landing in a hurry!’
Anders has had his fair share of crashes and accidents. ‘I once slipped while carrying my drone and my body slammed right onto it, which neither drone nor handler enjoyed very much,’ he says. ‘And the wind kidnapped my Phantom once, but a broken propeller was the only result from that.’
So, any final wise words for budding drone photographers out there? ‘The perspective is still fresh and there are still a lot of things out there to be discovered from the air,’ says Anders. ‘But most important of all, don’t be an idiot. Fly safe and don’t put other people at risk. Killing or injuring someone with an out-of-control drone is not worth any shot, I promise.’
Sony Alpha 7, 35mm, 1/800sec at f/6, ISO 400
Anders Andersson is a trained journalist, but has been working as a freelance photographer since 2001. He mainly covers southern Sweden, from his home base just outside Halmstad on the west coast. To find out more, visit www.fotografhalmstad.se


