https://link.brightcove.com/services/player/?bctid=5343230039001
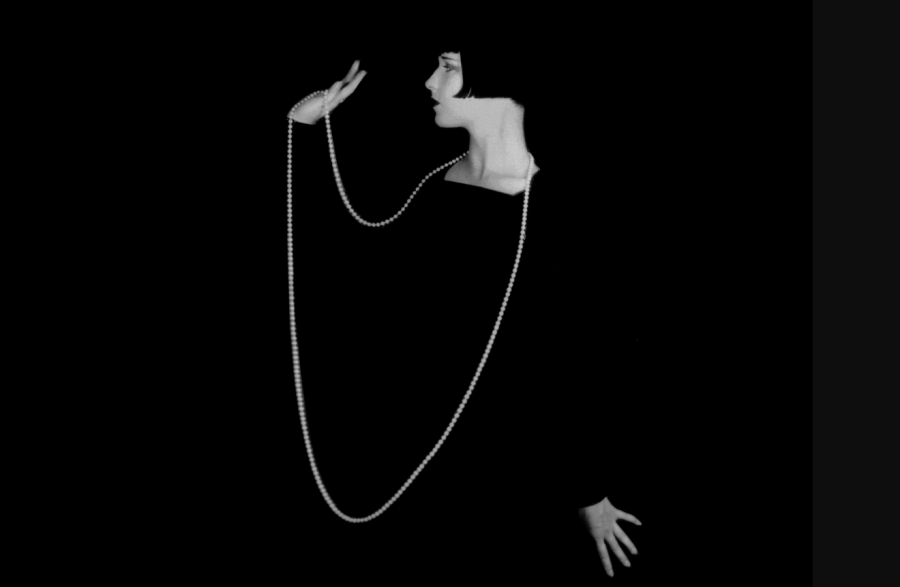
Known for her distinctive bob as much as for her acting ability, intelligence and fiery nature, actress Louise Brooks had starred in 12 films by the time she posed for Eugene Robert Richee in 1929. Richee had been working for Paramount Pictures for seven years, and during his career photographed some of Hollywood’s most dazzling stars including Fay Wray (the star of King Kong) and Clara Bow (the original ‘It Girl’.) He photographed Brooks on a number of occasions, but the pictures from this photo session capture the spirit and fashion of the late 1920s perfectly.
1929: American actress Louise Brooks (1906 – 1985) wearing a long necklace which stands out starkly against a black background. (Photo by Eugene Robert Richee/John Kobal Foundation/Getty Images)
Actress and dancer Louise Brooks was a force to be reckoned with – she left her Kansas home at the age of 15 and headed to New York to study at the Denishawn School of Dancing. Just three years later she appeared in her first film The Street of Forgotten Men, which was filmed at Paramount’s Astoria Studios on Long Island. By the late 1920s Brooks was rubbing shoulders with screen legends such as Humphrey Bogart and Charlie Chaplin (who later denied having an affair with her).
This was the start of Hollywood’s Golden Age – a period that spanned four decades and saw most people attending at least one film every week. Brooks was in the right place at the right time, and her film credits soon began to pile up. Around the same time the studios began to recognise the pulling power of celebrities, and the importance of controlling the public image of their stars. As a result many of them set up dedicated photography departments, and employed staff to create portraits purely for promotional purposes. Many photographers made an excellent living creating work of this kind. One such character was Eugene Robert Richee, who worked for Paramount Pictures.
Richee worked at the studio for two decades, and throughout his career captured striking images of Gloria Swanson, Marlene Dietrich and, of course, Brooks, with a 10x8in studio camera. His attention to detail, use of light-reflective props (plastic, glass, mirrors etc) to imply opulence, and his skill as a craftsman are evident in all of his imagery. Despite his technical proficiency he obviously did not feel the need to sweet-talk his subjects. ‘He used to take 60 shots in two hours,’ declared Brooks. ‘We never said a word to each other. Perfect relationship.’
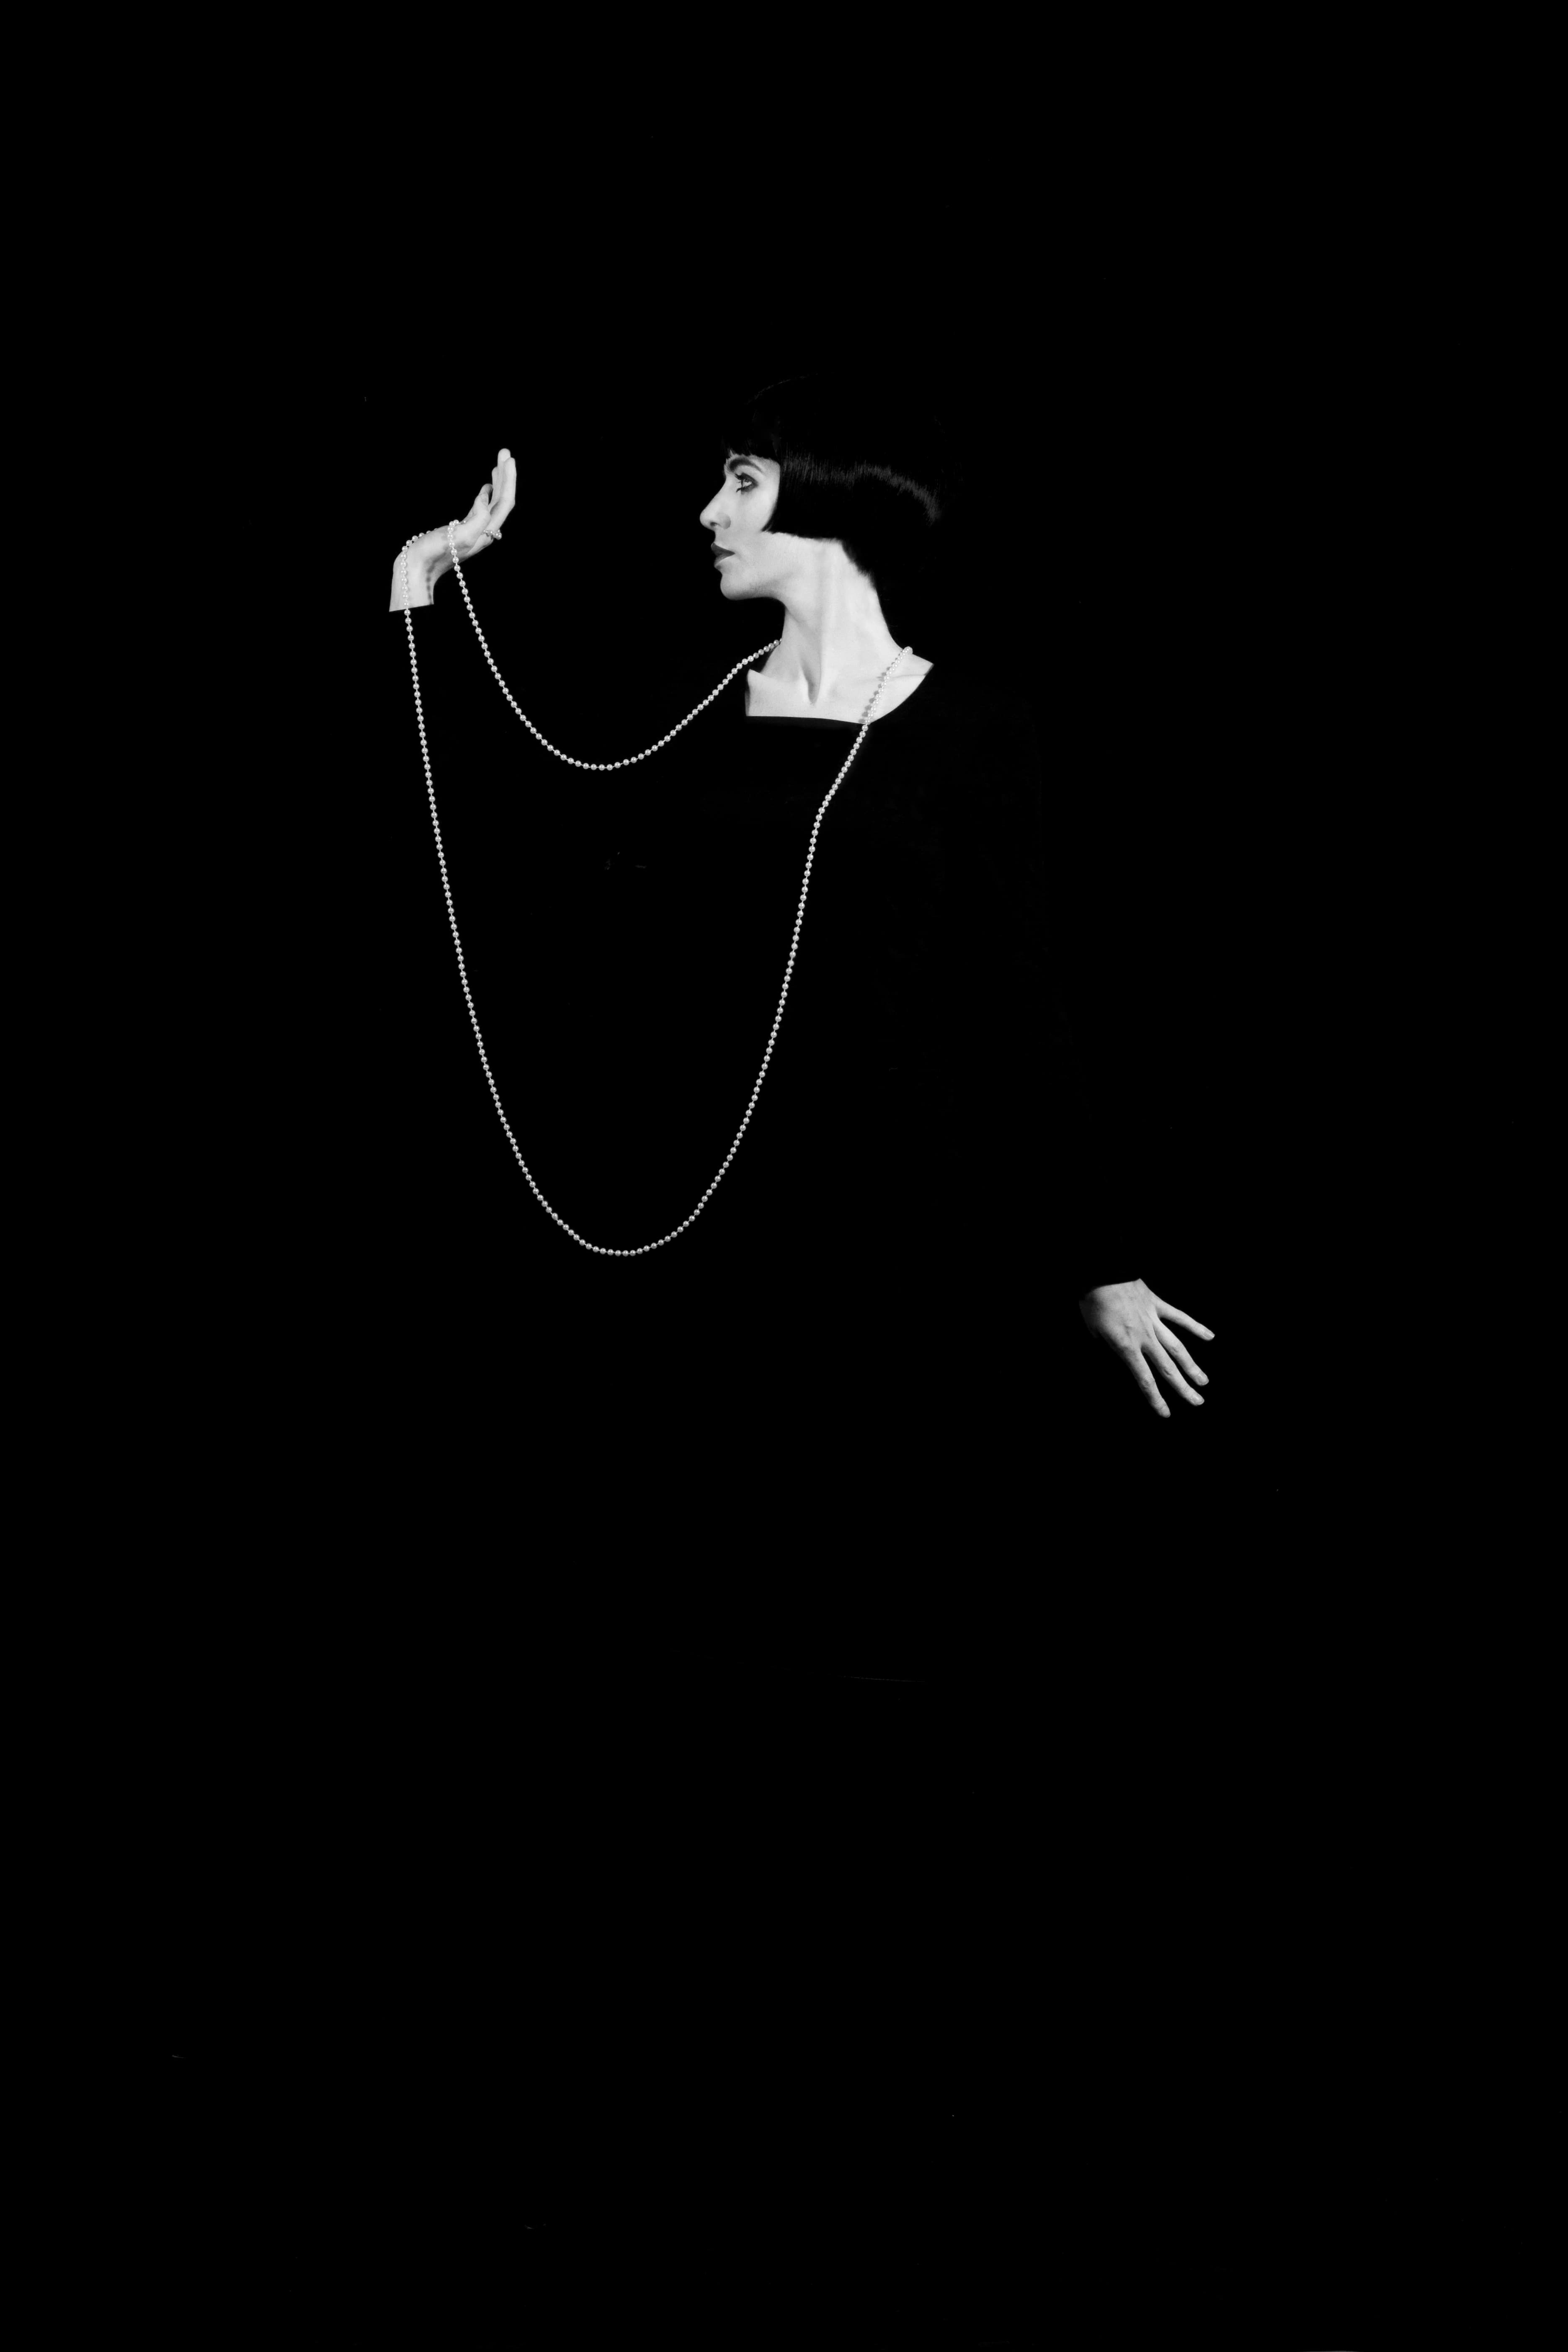
2017: AP’s version taken by Andrew Sydenham. Model – Lottie from Gingersnap
How we recreated this classic image
1. Outfits and props
Brooks was known for her razor-sharp bob, which we recreated using a wig from Party Pieces. A three-yard length of artificial pearls was sourced from Rose and Bows, and the dress was an eBay find (originally from Benetton). The total cost was just £11.
2. Styling
The neckline on the dress wasn’t quite right, but this was soon remedied with a wide strip of gaffer tape folded over to create a bold, straight edge. We hired a make-up artist to recreate Brooks’ smoky eyes and perfect bow-shaped lips.
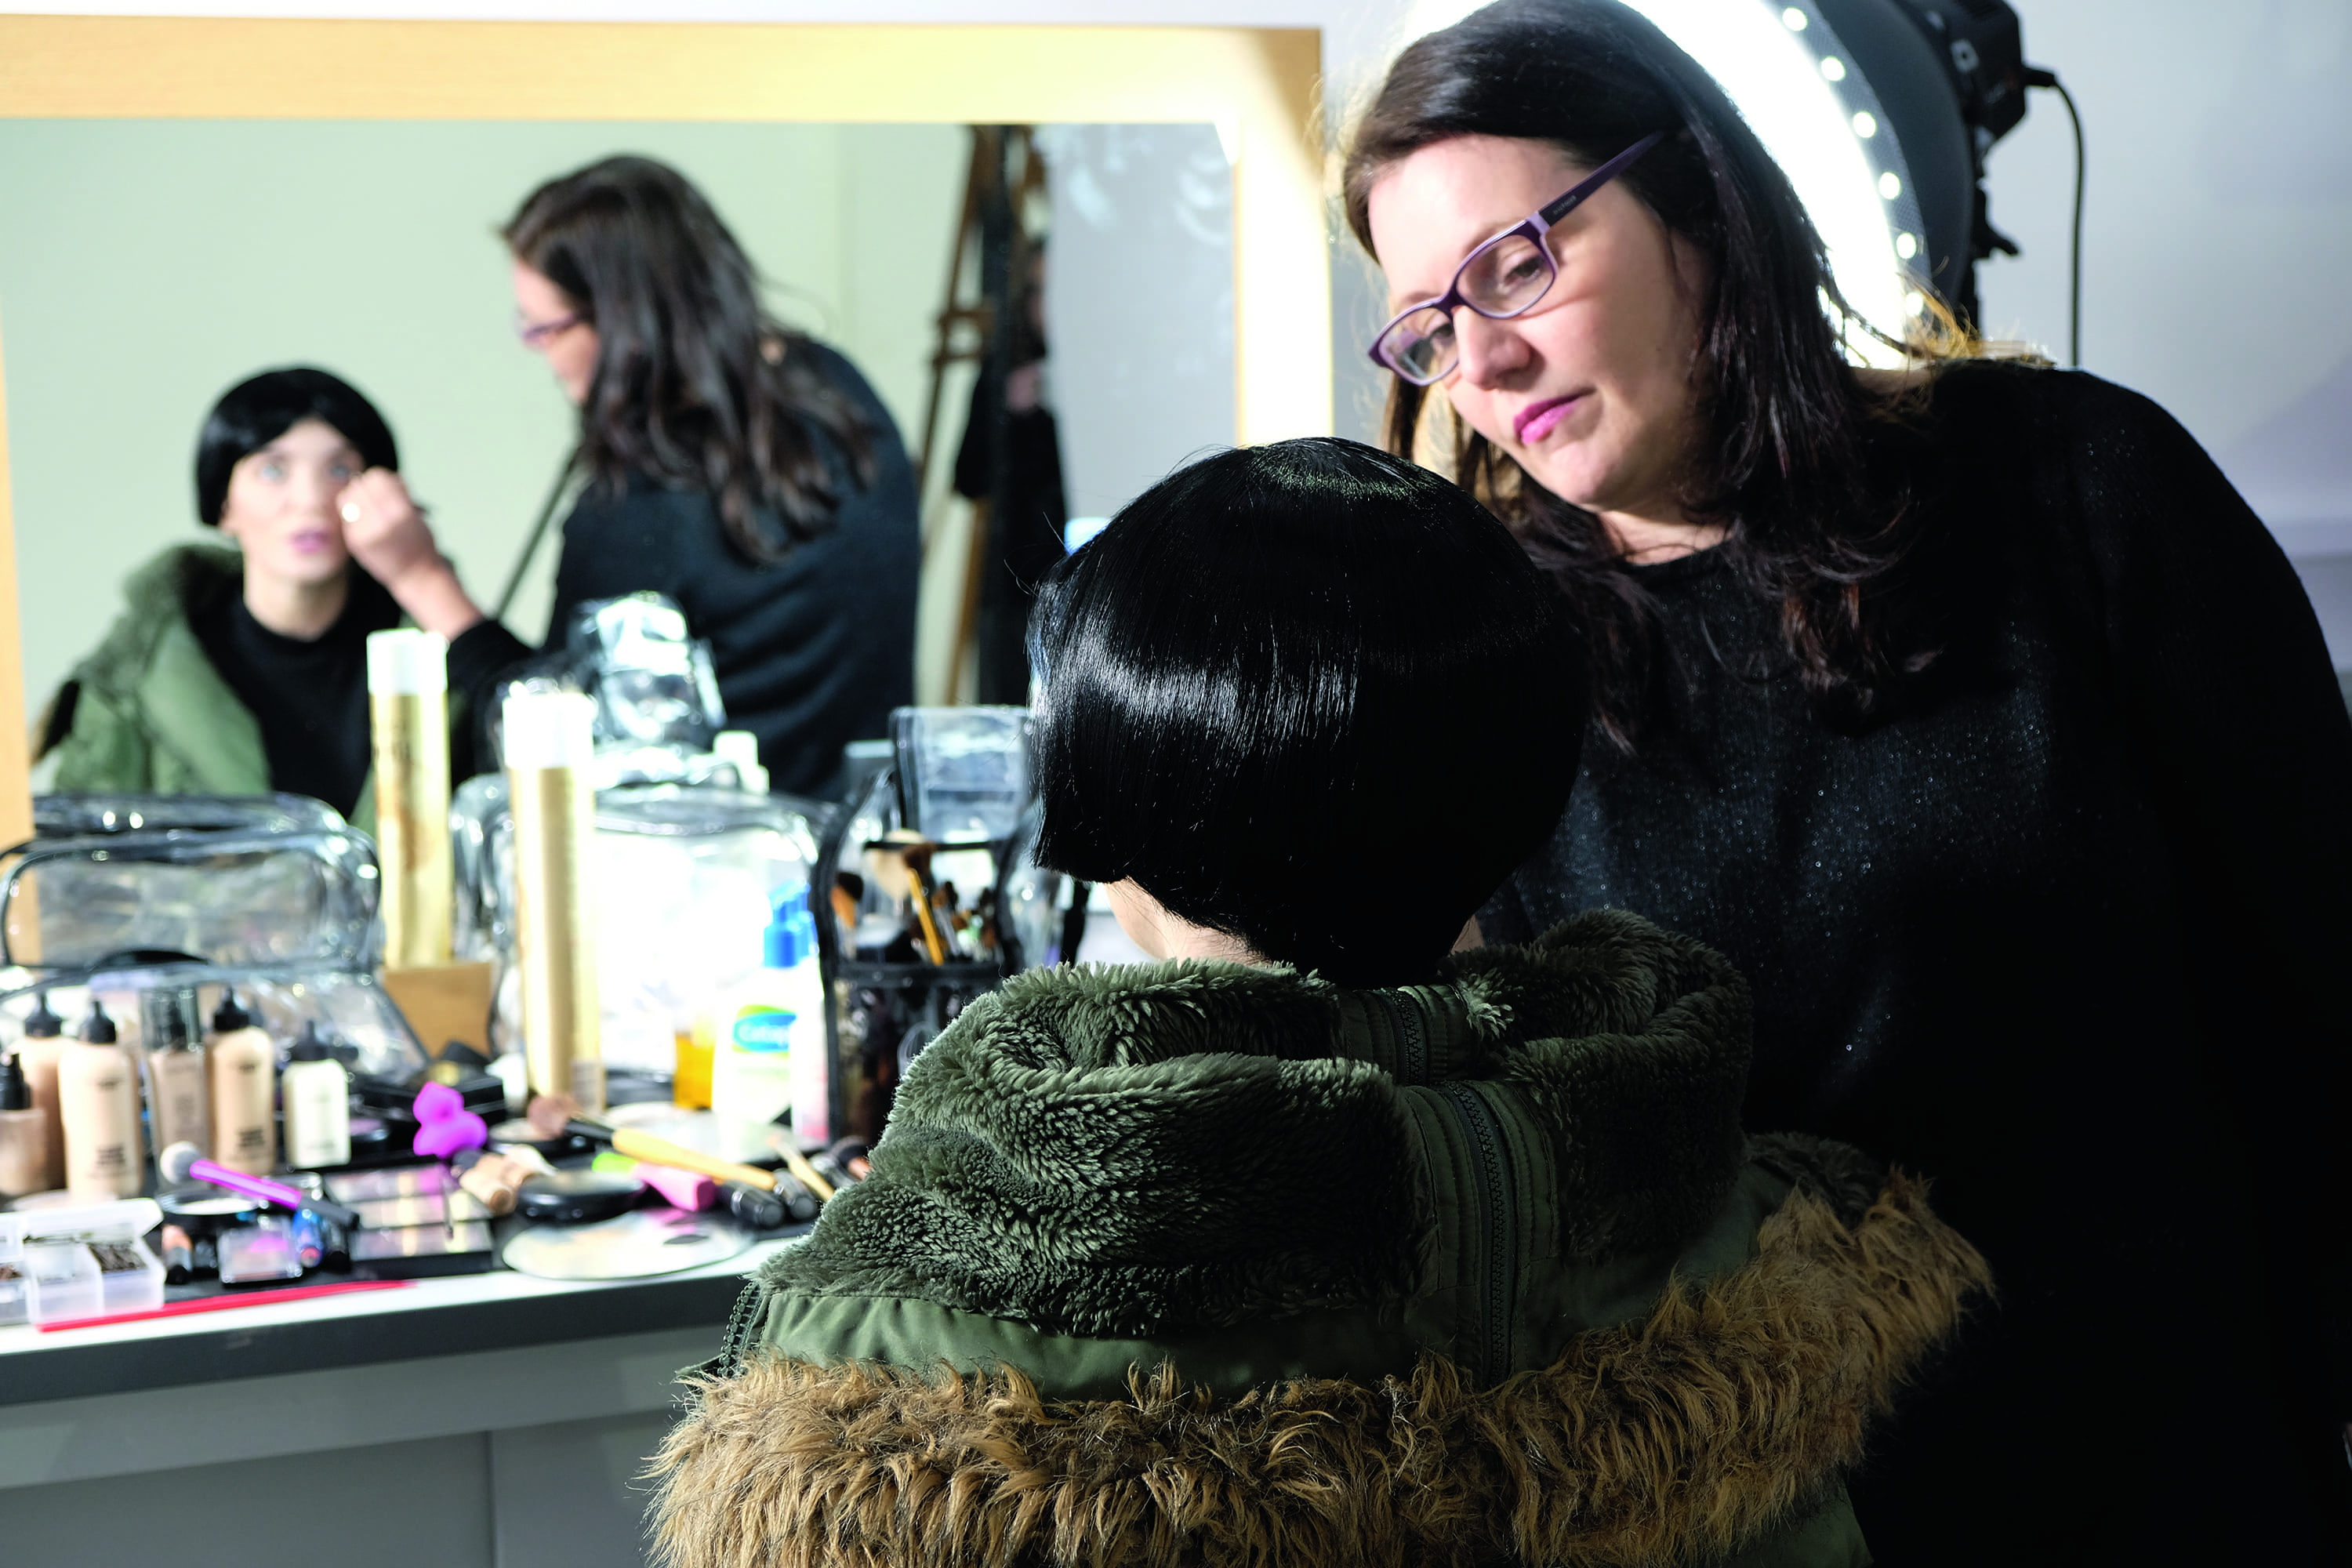
Hair and make-up – Portia from Gingersnap
3. The shoot
We used a black backdrop and positioned large pieces of black board on either side to control the light (which was provided by flash moonlights). We used two lights and controlled the beam using barn doors and black card.
Adding the finishing touches in Photoshop
https://link.brightcove.com/services/player/?bctid=5343173072001
4. Raw adjustments
The camera was set to record Raw and JPEG files but we’re going to process the Raw file to achieve the maximum amount of quality and detail. We begin by opening it into ACR to reduce the Blacks, which will remove the visible edge details of the dress.
5. Mono conversion
Once in Photoshop we can do a mono conversion. We add a Black and White adjustment layer and experiment with the filters in the Preset dropdown box. The Yellow Filter gives a glowing skin tone and a good amount of contrast. We also dragged the Red slider further to the left.
6. Levels adjustment
With the mono conversion complete more edge detail has become noticeable. We add a Levels adjustment layer and set the Shadows slider to 11 to darken them. Some tidying up is required, so we create a merged layer of our adjustments to work on so we can edit non-destructively.
7. Clone Stamp tool
We rename the merged layer ‘tidy’ for reference. Using the Clone Stamp tool at 100% opacity we can remove the black tape from the top of the dress and replace some of the missing pearls. Reduce opacity to 20% to soften shadows on the face and neck.
8. Spot Healing Brush tool
The Spot Healing Brush tool will also come in handy to tidy up stray strands of hair. The hairline and neckline in the original was very clean-cut so we’ve duplicated small sections that are clean and tidy, added a layer mask and used the Brush tool to blend.
9. Dodge and Burn tools
For the finishing touches we’ve used the Dodge tool set to Midtones with opacity of 50% to lighten the shadows on the model’s face and neck. Then we’ve used the Burn tool to reduce the highlights in the hair. Finally we add a Curves adjustment layer and drew gentle ‘S’ shaped curve.
With thanks to
Model – Lottie G from Gingersnap
MUA – Portia C from Gingersnap


